I made these Candy Corn Rice Krispie Treats three times before I realized I was melting the marshmallows wrong. Not the marshmallows themselves—those were fine. It was the butter. I was rushing, cranking the heat, and the butter would separate before the marshmallows even had a chance to melt evenly. The first batch turned into a greasy, sticky mess that wouldn’t hold its shape. The second batch was better, but the texture was off—too dense, almost chewy in a bad way. The third time, I finally let the butter melt slowly over low heat, stirred the marshmallows in gently, and everything clicked. The treats came out light, perfectly chewy, and they actually looked like little candy corn triangles instead of sad, blobby squares.
Honestly, I didn’t even plan on making these. I was staring at a bag of candy corn I bought on impulse (you know, the one you grab at the checkout aisle in October because it just feels wrong not to), and I thought, why not? Rice Krispie treats are already the easiest dessert on the planet. Adding candy corn felt like a no-brainer. And it is—once you get the butter situation right.
These are the kind of treats you bring to a Halloween party and watch disappear in ten minutes. They’re sweet, crunchy, and have that nostalgic flavor that reminds you of fall. No oven required, no complicated steps, and you probably have most of the ingredients in your pantry right now. That’s the kind of recipe I actually want to make.
Why You’ll Love This Recipe
Let me tell you why these Candy Corn Rice Krispie Treats are about to become your new favorite fall dessert. I’ve tested this recipe more times than I care to admit, and I can say with confidence that this version works every single time.
- No Oven Required : It’s a no-bake recipe. You just need a stovetop or a microwave. Perfect for those days when you want dessert but don’t want to heat up the whole kitchen.
- Simple Ingredients : You only need five basic ingredients—Rice Krispies cereal, marshmallows, butter, candy corn, and a pinch of salt. That’s it. No fancy grocery store trips required.
- Perfect for Fall Gatherings : Whether it’s a Halloween party, a Thanksgiving dessert table, or just a cozy movie night at home, these treats fit right in. They’re also great for classroom parties or potlucks.
- Crowd-Pleaser : I brought a batch to my neighbor’s Halloween get-together, and they were gone before the pizza arrived. Kids love them, adults love them, and people who swear they don’t like candy corn somehow end up eating three pieces.
- Unbelievably Delicious : The combination of gooey marshmallow, crunchy cereal, and sweet candy corn is honestly addictive. The texture is light and chewy, not hard or dense like some homemade treats can be.
What makes this recipe different from the dozens of other versions out there? It’s the method. I spent time figuring out the exact butter-to-marshmallow ratio and the right melting technique so your treats come out perfectly every time. No greasy mess, no rock-hard squares, just soft, chewy, deliciousness. Plus, I added a small pinch of salt to balance the sweetness—trust me on that one.
These treats are the kind of dessert that makes you close your eyes after the first bite. They’re nostalgic, fun, and surprisingly satisfying. And honestly, they’re so easy to make that you’ll find yourself whipping up a batch just because it’s Tuesday.
What Ingredients You Will Need
This recipe uses simple, pantry-friendly ingredients to deliver that classic Rice Krispie treat texture with a festive fall twist. Here’s everything you need:
- 6 cups Rice Krispies cereal (or any crispy rice cereal—store brands work fine too)
- 4 tablespoons unsalted butter (salted butter works if you skip the added salt later)
- 1 package (10 oz) marshmallows (regular size, not mini—though mini works in a pinch)
- 1 cup candy corn (plus extra for topping, about ¼ cup more)
- ¼ teaspoon salt (skip if using salted butter)
- Optional: ½ teaspoon vanilla extract (adds a lovely warmth that complements the candy corn)
Ingredient Tips & Substitutions:
- For the cereal, I recommend using fresh Rice Krispies. If your box has been open for months, the cereal might be stale and won’t give you that satisfying crunch. Store brands like Malt-O-Meal work great and are usually cheaper.
- Unsalted butter gives you more control over the salt level. I prefer Land O’Lakes, but any brand works. If you only have salted butter, just skip the added salt in the recipe.
- Marshmallows are the backbone of this recipe. I’ve tried both Jet-Puffed and store brands, and they both work. The key is to use fresh marshmallows—old, hard marshmallows don’t melt as smoothly. If your marshmallows feel dry, they’re probably past their prime.
- Candy corn is obviously essential here. I’ve used Brach’s and store brands, and honestly, they all taste pretty similar. If you want to get fancy, you can use the autumn mix with the little pumpkins and leaves. Just make sure the candy corn is fresh—stale candy corn gets hard and crunchy in a bad way.
- For a dairy-free version, use vegan butter and vegan marshmallows. Dandies brand makes excellent vegan marshmallows that melt beautifully. The texture will be slightly different, but still delicious.
- If you want a gluten-free option, check your cereal label. Most Rice Krispies are gluten-free, but some store brands may not be. The recipe itself is naturally gluten-free as long as you use certified gluten-free cereal.
Equipment Needed
You don’t need any fancy equipment for this recipe. Here’s what you’ll need:
- Large pot or saucepan : You need a pot big enough to hold all the cereal and marshmallow mixture. A 5-6 quart pot works perfectly. I use my trusty old Dutch oven, but any large pot will do.
- 9×13 inch baking dish : This is the standard size for Rice Krispie treats. If you don’t have one, you can use a 9×9 inch dish for thicker treats (just adjust the cooking time slightly) or even a rimmed baking sheet for thinner, crunchier treats.
- Parchment paper or wax paper : Line your baking dish with parchment paper, leaving some overhang on the sides. This makes it so much easier to lift the treats out later. Trust me, you don’t want to scrape them out of the pan.
- Rubber spatula or wooden spoon : You need something sturdy to stir the marshmallow mixture and fold in the cereal. A silicone spatula works great and won’t scratch your pot.
- Measuring cups and spoons : Standard set for measuring cereal, butter, and salt.
- Sharp knife : For cutting the treats into squares or triangles. A chef’s knife works better than a butter knife—it cuts cleanly without squishing the treats.
Budget-Friendly Alternatives: If you don’t have a 9×13 pan, you can use a disposable aluminum baking pan from the grocery store. They’re cheap and work just as well. No parchment paper? Grease your pan generously with butter or cooking spray. It won’t be as easy to remove, but it’ll work.
Preparation Method
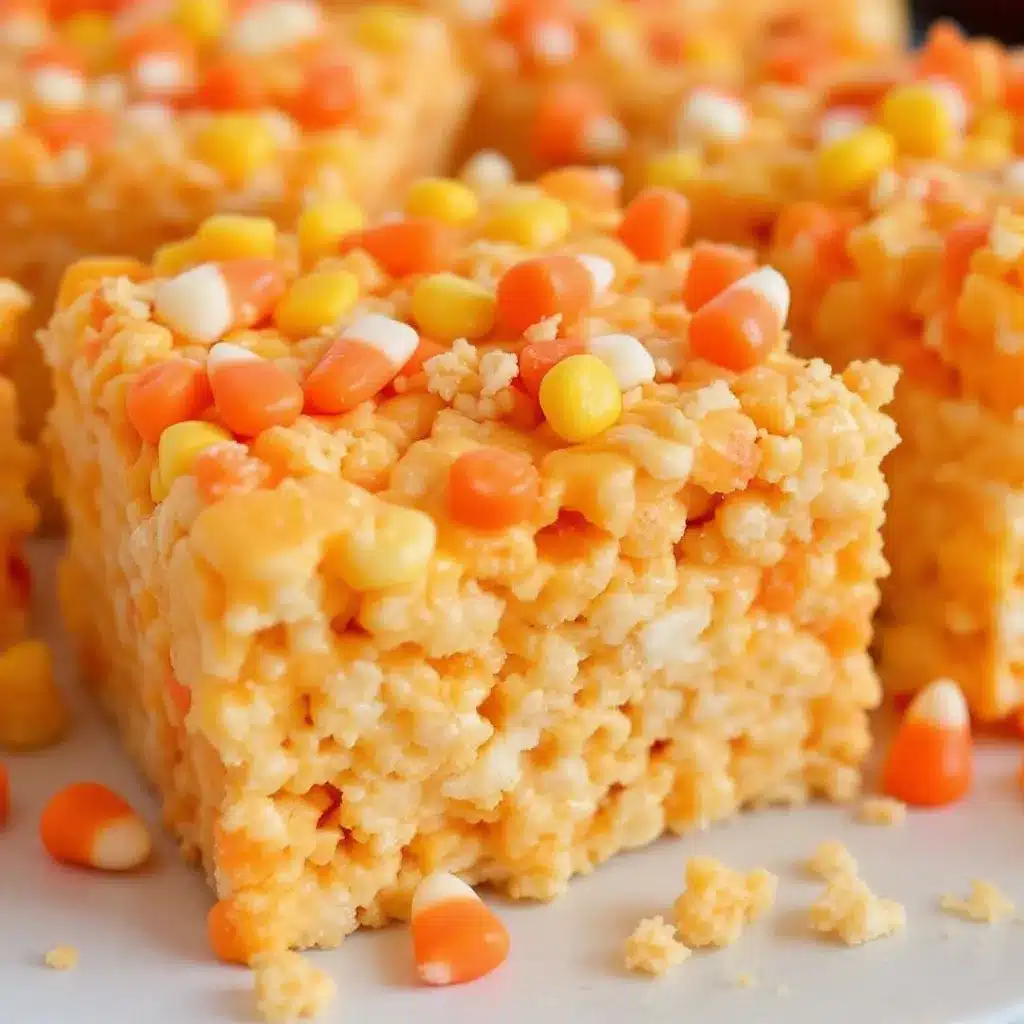
Making these Candy Corn Rice Krispie Treats is straightforward, but there are a few key moments where things can go wrong. Follow these steps carefully, and you’ll have perfect treats every time.
- Prepare your pan. Line a 9×13 inch baking dish with parchment paper, leaving about 2 inches of overhang on the long sides. This creates handles that make lifting the treats out super easy. Lightly spray the parchment with non-stick cooking spray so nothing sticks.
- Measure your cereal. Pour 6 cups of Rice Krispies cereal into a large bowl and set aside. Having it ready to go is important because once the marshmallow mixture is done, you need to work fast.
- Melt the butter. Place your large pot over low heat. Add 4 tablespoons of unsalted butter and let it melt slowly. This is the step I messed up the first few times. Do not rush this. Low heat is crucial. If the butter starts sizzling or browning, your heat is too high. You want the butter to melt gently, not fry. This takes about 2-3 minutes.
- Add the marshmallows. Once the butter is fully melted, add the entire 10-ounce bag of marshmallows. Stir constantly with your rubber spatula or wooden spoon. The marshmallows will start to soften and then melt. Keep stirring—don’t walk away. This takes about 4-5 minutes on low heat. You’ll know it’s ready when the mixture is completely smooth and glossy, with no lumps of unmelted marshmallow.
- Add salt and vanilla. Remove the pot from the heat. Stir in ¼ teaspoon of salt (if using unsalted butter) and ½ teaspoon of vanilla extract if you’re using it. The salt balances the sweetness beautifully—don’t skip it.
- Fold in the cereal. Pour the Rice Krispies into the pot with the marshmallow mixture. Use a folding motion—scrape down the sides and lift the cereal from the bottom. Fold gently but thoroughly until all the cereal is coated. Don’t overmix or you’ll crush the cereal and end up with dense treats. You want it evenly coated but still light and airy.
- Add the candy corn. Gently fold in 1 cup of candy corn. Try to distribute it evenly, but don’t worry if some clumps together—that’s part of the charm. The candy corn will soften slightly from the heat, which is exactly what you want.
- Press into the pan. Transfer the mixture to your prepared baking dish. Here’s the trick: don’t press too hard. If you compact the mixture, the treats will be hard and dense. Instead, use a piece of parchment paper or wax paper to gently press the mixture into an even layer. I like to use my hands (lightly greased with butter or cooking spray) to pat it down gently. Aim for an even thickness across the whole pan.
- Add topping. While the mixture is still warm, sprinkle the remaining ¼ cup of candy corn on top. Press them in gently so they stick. This gives the treats a pretty, festive look.
- Cool completely. Let the treats cool at room temperature for at least 1-2 hours. Don’t rush this. If you try to cut them while they’re still warm, they’ll fall apart. The marshmallow needs time to set and firm up. I usually let mine sit for a full 2 hours to be safe.
- Cut and serve. Once completely cool, lift the treats out of the pan using the parchment paper handles. Place them on a cutting board. Use a sharp knife to cut them into squares or triangles. For the candy corn look, cut them into triangles by slicing the pan into rows and then cutting each row diagonally. A clean cut is easier if you wipe the knife between slices.
Sensory Cues: At step 4, the marshmallow mixture should look like thick, glossy glue. It should stretch slightly when you lift the spatula. At step 6, the cereal should be evenly coated but still crunchy—if you hear a wet, soggy sound, you’ve overmixed. At step 8, the mixture should feel warm and pliable but not hot. If it’s too hot to touch, let it cool for a minute before pressing.
Cooking Tips & Techniques
I’ve made enough batches of Rice Krispie treats to know exactly where things can go wrong. Here are my best tips for perfect results every time.
Low and slow is the rule. I cannot stress this enough. Melting butter and marshmallows over low heat prevents the butter from separating and the marshmallows from scorching. High heat creates a greasy, grainy texture that no amount of stirring can fix. If you’re impatient (I get it), use the microwave instead—30-second intervals at 50% power, stirring between each.
Use fresh marshmallows. Old marshmallows get hard and crusty on the outside. They don’t melt smoothly and leave lumps in your mixture. If your marshmallows feel stiff or have a powdery surface, buy a new bag. It makes a real difference.
Don’t overmix the cereal. Once you add the cereal, fold gently. If you stir aggressively, you’ll crush the cereal and end up with dense, heavy treats. You want the cereal to stay intact so each bite has that satisfying crunch.
Grease your hands. When pressing the mixture into the pan, lightly grease your hands with butter or cooking spray. The mixture is sticky, and this prevents it from clinging to your fingers. Alternatively, use a piece of parchment paper to press it down.
Let them cool completely. This is the hardest part because the kitchen smells amazing and you want to dig in. But warm treats fall apart. Give them at least 1-2 hours at room temperature. If you’re in a hurry, you can pop them in the fridge for 30 minutes, but room temperature cooling gives the best texture.
Use a sharp knife to cut. A dull knife squishes the treats instead of cutting them. Run the knife under hot water, wipe it dry, then cut. The heat helps the knife glide through cleanly. Wipe the blade between cuts for neat edges.
Common Mistake to Avoid: Adding the candy corn too early. If you add it while the marshmallow mixture is still on the heat, the candy corn will melt completely and you’ll lose the distinct pieces. Always remove the pot from the heat before folding in the candy corn.
Variations & Adaptations
One of the best things about this recipe is how easy it is to customize. Here are some variations I’ve tried and loved:
Chocolate Drizzle: Melt ½ cup of chocolate chips with 1 tablespoon of coconut oil in the microwave (30-second intervals, stirring between). Drizzle the melted chocolate over the cooled treats. The chocolate pairs beautifully with the sweet candy corn and adds a nice visual touch. I did this for a Halloween party and they looked almost fancy.
Peanut Butter Twist: Add ¼ cup of creamy peanut butter to the marshmallow mixture right after you remove it from the heat. Stir until smooth before adding the cereal. The peanut butter adds richness and a savory note that balances the sweetness. If you’re a fan of peanut butter and candy corn (which is an underrated combo, honestly), this is for you.
Spiced Autumn Version: Add ½ teaspoon of pumpkin pie spice or cinnamon to the marshmallow mixture along with the salt. This gives the treats a warm, cozy fall flavor. I made this version for Thanksgiving and it was a hit. The spice isn’t overpowering—it just adds a little something extra.
Vegan Option: Use vegan butter (like Earth Balance) and vegan marshmallows (Dandies brand works great). The process is exactly the same. The texture is slightly different—a bit softer—but still delicious. I’ve made this for a friend who’s vegan, and she said it was better than the original.
Gluten-Free Option: Most Rice Krispies are gluten-free, but double-check the label. Some store brands may not be. If you need certified gluten-free, look for the specific gluten-free Rice Krispies box or use a certified gluten-free crispy rice cereal.
Different Candy: Not a fan of candy corn? Use chopped candy bars, M&Ms, or even crushed pretzels for a salty-sweet version. I’ve made a version with chopped Reese’s cups and it was absolutely incredible.
Serving & Storage Suggestions
These treats are best served at room temperature. The texture is perfect—chewy but firm, with a satisfying crunch from the cereal. If they’ve been in the fridge, let them sit out for 10-15 minutes before serving so they soften slightly.
Presentation Ideas: For Halloween parties, cut the treats into triangles to mimic the shape of candy corn. Arrange them on a platter in a pattern or stack them in a jar for a cute, rustic look. You can also stick a lollipop stick into each treat for easy grabbing—perfect for kids’ parties.
What to Serve With Them: These treats are sweet and rich, so they pair well with something light. A glass of cold milk is the classic choice. For a grown-up version, try them with a cup of hot apple cider or a pumpkin spice latte. If you’re serving them at a party, they go great alongside other no-bake desserts like our creamy vegan chocolate avocado pudding for a fun dessert spread.
Storage Instructions: Store the treats in an airtight container at room temperature. They’ll stay fresh for 3-4 days. Do not refrigerate them—the fridge makes them hard and dry. If you live in a humid climate, add a piece of bread to the container to absorb excess moisture and keep the treats chewy. Replace the bread every day.
Freezing Instructions: These treats freeze surprisingly well. Wrap each piece individually in plastic wrap, then place them in a freezer-safe bag or container. They’ll keep for up to 3 months. To thaw, let them sit at room temperature for about 30 minutes. The texture will be slightly softer than fresh, but still delicious.
Flavor Development: Honestly, these treats taste best on the second day. The flavors meld together, and the marshmallow sets perfectly. If you can resist eating them right away, make them a day ahead. They’ll be even better.
Nutritional Information & Benefits
Let’s be real—these are a treat, not a health food. But here’s the estimated nutritional information per serving (based on 12 servings):
| Nutrient | Amount Per Serving |
|---|---|
| Calories | 280 |
| Total Fat | 8g |
| Saturated Fat | 5g |
| Carbohydrates | 52g |
| Sugar | 32g |
| Protein | 2g |
| Sodium | 180mg |
Health Benefits (such as they are): Rice Krispies are fortified with iron and B vitamins, so there’s that. The butter contains vitamin A. And honestly, sometimes you need a dessert that’s just fun and nostalgic without pretending to be healthy. These treats are about joy, not nutrition. That said, if you’re looking for something lighter, check out our refreshing cucumber mint green tea cooler for a healthier option.
Dietary Considerations: This recipe contains dairy (butter) and gluten (cereal—though most are gluten-free). It’s nut-free if you use plain candy corn. For dairy-free and vegan options, see the variations section above.
FAQs
Can I use mini marshmallows instead of regular ones?
Yes, you can. Use about 4 cups of mini marshmallows (which equals one 10-ounce bag of regular marshmallows). Mini marshmallows melt slightly faster, so keep an eye on them and stir constantly.
Why did my Rice Krispie treats turn out hard?
This usually happens for one of two reasons: you pressed the mixture too firmly into the pan, or you overcooked the marshmallows. Press the mixture gently—just enough to create an even layer. And always melt the marshmallows over low heat, removing the pot from the stove as soon as they’re smooth.
Can I make these treats in the microwave?
Absolutely. Melt the butter in a large microwave-safe bowl for 30 seconds. Add the marshmallows and microwave in 30-second intervals, stirring between each, until fully melted. Then proceed with the recipe as written. Just be careful—microwaves vary, and marshmallows can bubble over if overheated.
How do I keep the treats from sticking to the knife when cutting?
Run your knife under hot water and wipe it dry before each cut. The heat helps the knife glide through the marshmallow without sticking. You can also lightly spray the knife with cooking spray.
Can I use a different cereal?
Yes, but the texture will change. Cocoa Krispies, Froot Loops, or even crushed graham crackers can work. Just keep in mind that different cereals absorb moisture differently, so you may need to adjust the marshmallow ratio slightly. Start with 5 cups instead of 6 and add more if needed.
Conclusion
These Easy No-Bake Candy Corn Rice Krispie Treats are the kind of recipe that makes you look like a hero with almost no effort. They’re fun, festive, and genuinely delicious—not just “good for a Halloween treat” good, but actually, legitimately good. The combination of crunchy cereal, gooey marshmallow, and sweet candy corn is hard to beat.
I love this recipe because it brings back that childhood feeling of making something special in the kitchen. No stress, no complicated techniques, just simple ingredients and a little bit of patience. Whether you’re making them for a party, a school event, or just because it’s October and you want something sweet, these treats deliver.
I’d love to hear how yours turn out! Did you try a variation? Add chocolate drizzle? Swap in peanut butter? Let me know in the comments below. And if you’re looking for more easy dessert ideas, check out our easy slow cooker honey garlic chicken meal prep bowls for a savory option, or browse through our full recipe collection for more inspiration. Happy fall, and happy snacking!
Pin This Recipe!
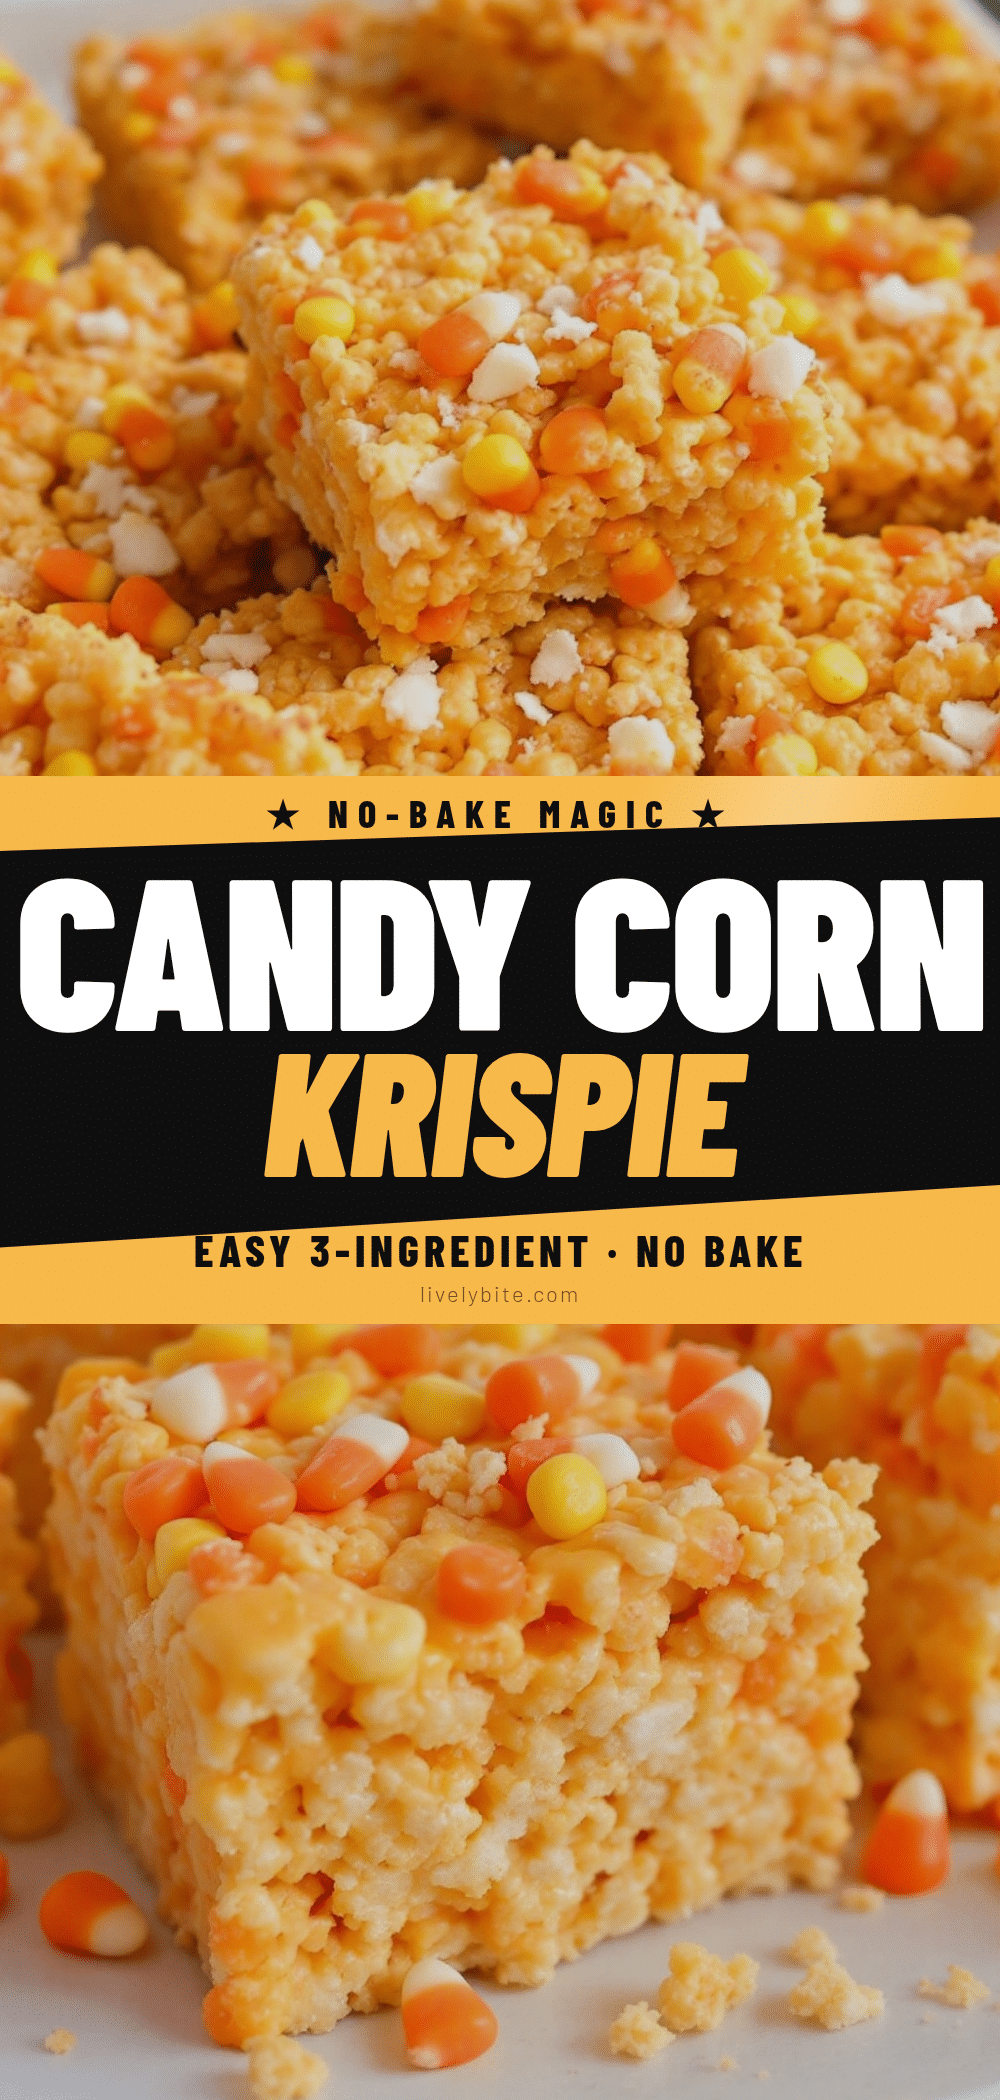
Easy No-Bake Candy Corn Rice Krispie Treats: Best Fall Dessert
These no-bake Candy Corn Rice Krispie Treats are the perfect fall dessert, combining crunchy cereal, gooey marshmallow, and sweet candy corn. Easy to make with simple ingredients, they’re a crowd-pleaser for Halloween parties and cozy gatherings.
- Prep Time: 15 minutes
- Cook Time: 10 minutes
- Total Time: 1 hour 25 minutes (including cooling)
- Yield: 12 servings 1x
- Category: Dessert
- Cuisine: American
Ingredients
- 6 cups Rice Krispies cereal
- 4 tablespoons unsalted butter
- 1 package (10 oz) marshmallows
- 1 cup candy corn (plus ¼ cup for topping)
- ¼ teaspoon salt (skip if using salted butter)
- ½ teaspoon vanilla extract (optional)
Instructions
- Line a 9×13 inch baking dish with parchment paper, leaving overhang on the long sides. Lightly spray with non-stick cooking spray.
- Measure 6 cups of Rice Krispies cereal into a large bowl and set aside.
- In a large pot over low heat, melt 4 tablespoons of unsalted butter slowly, about 2-3 minutes. Do not rush this step.
- Add the entire 10-ounce bag of marshmallows to the melted butter. Stir constantly over low heat until completely smooth and glossy, about 4-5 minutes.
- Remove the pot from heat. Stir in ¼ teaspoon salt (if using unsalted butter) and ½ teaspoon vanilla extract (if using).
- Pour the Rice Krispies cereal into the pot with the marshmallow mixture. Fold gently until all cereal is evenly coated. Do not overmix.
- Gently fold in 1 cup of candy corn until evenly distributed.
- Transfer the mixture to the prepared baking dish. Using lightly greased hands or a piece of parchment paper, gently press the mixture into an even layer. Do not press too hard.
- While still warm, sprinkle the remaining ¼ cup of candy corn on top and press gently to adhere.
- Let the treats cool completely at room temperature for at least 1-2 hours.
- Once cool, lift the treats out using the parchment paper handles. Place on a cutting board and cut into squares or triangles using a sharp knife. Wipe the knife between cuts for clean edges.
Notes
Melt butter over low heat to prevent separation. Use fresh marshmallows for smooth melting. Do not overmix the cereal to keep treats light. Let treats cool completely before cutting to avoid crumbling. For best texture, make a day ahead.
Nutrition
- Serving Size: 1 piece (based on 12
- Calories: 280
- Sugar: 32
- Sodium: 180
- Fat: 8
- Saturated Fat: 5
- Carbohydrates: 52
- Protein: 2
Keywords: candy corn rice krispie treats, no-bake dessert, fall dessert, Halloween treats, easy rice krispie treats


