It is 6:14 AM on a Tuesday in December, and the only thing I want is a quiet moment before the house wakes up.
The kitchen is still holding its breath. Outside, the world is wrapped in a thick, gray fog that makes the windowpanes fog up with every exhale. Inside, the air smells faintly of old books and the lingering trace of last night’s dinner. I am not cooking for an audience. There are no cameras pointed at my hands, no friends waiting for a photo-ready platter to arrive at the table.
This is just me, the stove, and a bowl of cake crumbs that have been sitting in the fridge since Christmas Eve. You know how it goes. The holiday rush leaves you with these little islands of leftover dessert. A few slices of gingerbread here, some red velvet there. It feels wasteful to throw them away, but it also feels like too much work to serve them as slices. So, I do what I do best when I’m tired and alone: I make them into something new.
These crispy Christmas cake pops with white chocolate are not just a snack. They are a way of honoring the leftovers without feeling guilty about the sugar. The process is slow. You have to mash the cake until it feels like wet sand. You have to roll each ball with a patience that feels almost meditative. And then, the coating. That moment when the cake ball hits the melted white chocolate is the only part that feels like magic.
I remember the first time I tried to make these. I used store-bought frosting and the cake fell apart in my hands. It was a sticky, white-chocolate-covered disaster that ended up on the floor. But then I figured it out. I learned that the ratio of cake to binder is everything. I learned that chilling the balls for too long makes them crack, but not chilling them enough makes them slide off the stick.
Now, standing here in my pajamas with a dusting of powdered sugar on my apron, I realize why I keep making them. It is not about the taste, though the crunch of the chocolate shell is incredible. It is about the control. In a month where everything feels chaotic and loud, rolling these small, perfect spheres gives me a tiny sense of order. It is a ritual. A quiet one.
And honestly, when the sun finally starts to creep over the rooftops and the kids come stumbling into the kitchen, rubbing their eyes, those first bite-sized treats disappear faster than anything else on the counter. They are the calm before the storm of the holiday day.
Why You’ll Love This Recipe
Let’s be honest for a second. Most cake pop recipes online are overly complicated. They ask you to make a cake from scratch, let it cool for hours, crumble it, mix it with a cup of frosting, chill it, dip it, and then hope it doesn’t fall off the stick. I have tested enough of these to know that life is too short for that much fuss. This recipe is different because it respects your time and your leftover ingredients.
I developed this method after years of trial and error in my own kitchen. I wanted a result that was foolproof but still looked professional. Here is why this version stands out from the rest:
- Zero Waste Hero: This recipe is designed specifically to use up holiday leftovers. If you have any cake scraps, gingerbread bits, or even dry sponge cake sitting in the fridge, this is the perfect solution. It transforms potential trash into a delightful treat.
- The Crispy Texture Contrast: Many cake pops are soft and doughy. By toasting the cake crumbs slightly before mixing (a trick I picked up from a pastry chef friend), and then coating them in a tempered white chocolate shell, you get a satisfying crunch that gives way to a soft, fudgy center.
- Simple Ingredients: You do not need fancy food coloring or expensive sprinkles. The beauty here is in the simplicity. White chocolate, a bit of vanilla, and maybe some crushed peppermint or red sprinkles if you want to lean into the holiday vibe. No one is going to judge you for keeping it classic.
- Make-Ahead Friendly: These are actually better the next day. The flavors meld together, and the chocolate shell hardens into a perfect snap. You can make them up to three days in advance, which is a lifesaver during the busy holiday season when you have guests arriving unexpectedly.
- Crowd-Pleaser Factor: Kids love them because they are sweet and bite-sized. Adults love them because they are not overwhelmingly sweet like some commercial versions. It is a balanced flavor profile that works for holiday parties, office potlucks, or just a quiet treat with your morning coffee.
There is something deeply satisfying about holding one of these in your hand. It is the kind of comfort food that feels special but doesn’t require a special occasion. It just requires a little bit of patience and a willingness to play with your food for ten minutes.
What Ingredients You Will Need
This recipe relies on the humble cake crumb as its foundation. The key to success here is not the type of cake, but how you prepare it. You want a cake that is moist but not soggy. Dry cake will make a dry pop, while overly moist cake will make a mushy mess. Here is what you need to get started.
- Leftover Cake (2 cups, crumbled): Any cake works, but dense cakes like gingerbread, spice cake, or red velvet hold together best. If your cake is very light and airy, like a sponge or angel food cake, you may need slightly less frosting. I prefer using the trimmings from the top of the cake or the bottom layers that didn’t look pretty when I frosted the main cake.
- Cream Cheese Frosting (1/2 cup): This acts as the binder. Do not use a runny glaze or a very stiff buttercream unless you adjust the ratios. Cream cheese frosting has the right amount of moisture and tang to balance the sweet cake. I recommend making your own if you have time, but a high-quality store-bought tub works fine in a pinch. Just make sure it is not separated or watery.
- White Chocolate Chips (12 oz): Quality matters here. Cheap chocolate chips often contain fillers that make them grainy when melted. I prefer brands like Ghirardelli or Callebaut for dipping because they melt smoothly. Avoid chips with added wax coatings, as they will not coat the cake pops evenly.
- Coconut Oil or Shortening (1 tablespoon): This is the secret ingredient for a glossy finish. Adding a small amount of fat to the melted chocolate thins it out slightly, making it easier to dip and helping it set with a professional shine. It also prevents the chocolate from becoming too thick and clumpy.
- Vanilla Extract (1 teaspoon): A little bit of vanilla enhances the sweetness of the white chocolate and ties the flavor profile together. It is subtle, but you will miss it if you leave it out.
- Holiday Sprinkles or Crushed Candy Canes (optional): For decoration. Red and green jimmies are classic, but crushed peppermint adds a nice crunch and a minty flavor contrast that is amazing with white chocolate. You can also use gold dust or edible glitter if you want something more elegant.
If you are allergic to dairy, you can substitute the cream cheese frosting with a dairy-free buttercream, though the texture may be slightly different. For the chocolate, there are excellent dairy-free white chocolate alternatives available now that melt just as well. The structure of the cake pop relies more on the cake-to-frosting ratio than the specific brand of chocolate, so feel free to adapt to your dietary needs.
Equipment Needed
You do not need a lot of fancy gadgets to make these, but having the right tools makes the process much less frustrating. Here is what you will need on your counter.
- Large Mixing Bowl: You need enough space to toss the cake crumbs with the frosting until it resembles wet sand. A wide bowl is better than a deep one for this step.
- Cookie Scoop or Ice Cream Scoop: This is the most important tool for consistency. If you try to eyeball the dough, your cake pops will be different sizes, which means they will dip unevenly. A #40 or #50 scoop is perfect for making uniform balls.
- Baking Sheet lined with Parchment Paper: You will need a flat surface to roll the balls and a place to set them while they chill. Parchment paper is essential because the sticky cake dough will stick to anything else.
- Microwave-Safe Bowl or Double Boiler: For melting the chocolate. A microwave-safe bowl is easier for most people, but a double boiler gives you more control if you are nervous about burning the chocolate.
- Cake Pop Sticks or Popsicle Sticks: Wooden sticks work best. Make sure they are clean and dry. If you do not want to use sticks, you can just roll them into truffles and skip this step entirely.
- Wax Paper or a Cardboard Sheet: Once dipped, you need somewhere to set the pops. Wax paper is great because you can poke the sticks into it to create a makeshift drying rack.
If you do not have a cookie scoop, you can use two teaspoons to form the balls, but it will take longer and the shapes will be less uniform. I highly recommend investing in a scoop if you plan to make desserts often. It is one of those cheap tools that pays for itself in saved time.
Preparation Method
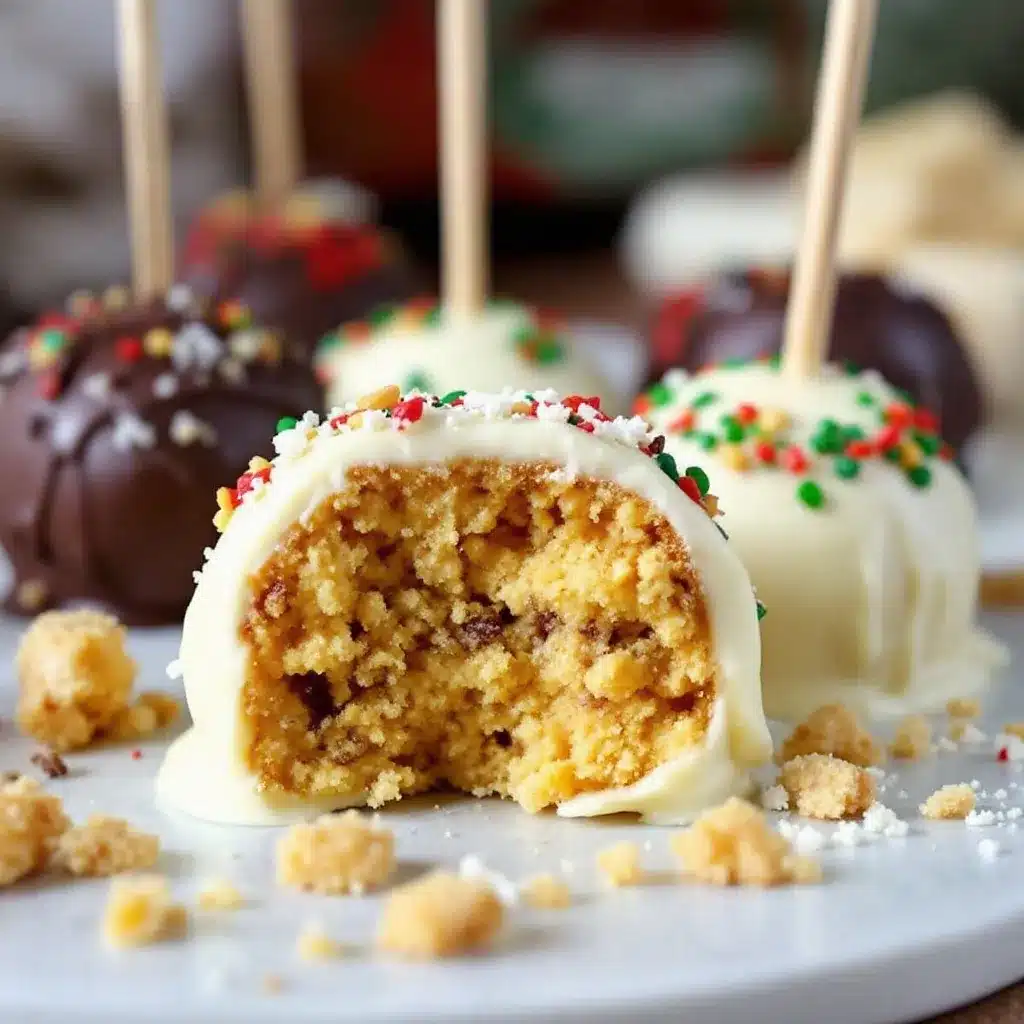
Follow these steps carefully. The order matters, especially when it comes to the chilling process. If you skip a chill step, your cake pops may fall off the sticks or the chocolate will crack.
- Crumble the Cake: Take your leftover cake and break it apart with your fingers or a fork until it is fine crumbs. You want no large chunks. If the cake is still slightly warm, let it cool completely first. Warm cake will melt the frosting and create a greasy mess. This should take about 5 minutes. (Time: 5 mins)
- Mix with Frosting: Add the cream cheese frosting to the crumbs. Start with 1/2 cup and mix well. The mixture should hold together when you press it between your fingers. If it is too dry, add more frosting a teaspoon at a time. If it is too wet, add more cake crumbs. You are looking for a texture similar to playdough or wet sand. (Time: 5 mins)
- Chill the Dough: Cover the bowl with plastic wrap and refrigerate for at least 30 minutes. This firms up the fat in the frosting, making it easier to roll. Do not skip this step. If the dough is too soft, it will stick to your hands and you will end up with a sticky ball of nothing. (Time: 30 mins)
- Roll the Balls: Take the dough out of the fridge. Use your cookie scoop to portion out the dough. Roll each portion between your palms to form a smooth ball. If the dough sticks to your hands, wet your hands slightly with water. This prevents sticking. Place the balls on the parchment-lined baking sheet. You should get about 24-30 balls depending on the size. (Time: 10 mins)
- Second Chill: Place the baking sheet with the rolled balls back into the freezer for 15 minutes. This is crucial. The balls need to be rock hard before they hit the warm chocolate. If they are soft, the chocolate coating will slide right off. (Time: 15 mins)
- Melt the Chocolate: Place the white chocolate chips in a microwave-safe bowl. Microwave in 30-second intervals, stirring well after each interval, until smooth. Do not overheat, or the chocolate will seize. Stir in the coconut oil or shortening until fully incorporated. The mixture should be fluid like honey. (Time: 3 mins)
- Prepare the Sticks: Dip the tip of each wooden stick into the melted chocolate. This acts as glue. (Time: 2 mins)
- Dip the Cake Pops: Take one cake pop out of the freezer. Dip the chocolate-coated stick end into the cake pop hole about 1/2 inch deep. Then, submerge the entire cake pop into the melted chocolate. Use a spoon to help cover any bare spots. Gently tap the spoon against the side of the bowl to let excess chocolate drip off. (Time: 15 mins)
- Decorate and Set: Immediately add your sprinkles or crushed candy canes while the chocolate is still wet. Place the cake pops upright into the wax paper or cardboard. If you are not using sticks, place them flat on the parchment paper. Let them set at room temperature for about 10 minutes, or in the fridge for 5 minutes to speed up the process. (Time: 10 mins)
If the chocolate thickens while you are dipping, you can gently reheat it in the microwave for 10 seconds at a time. But be careful not to make it too hot, or it will become oily.
Cooking Tips & Techniques
There are a few common pitfalls with cake pops that I have learned to avoid over the years. Here is how to keep your batch perfect.
First, do not overwork the dough. Once you add the frosting, mix it just until combined. If you mix it too much, you might break down the cake crumbs too finely, making the texture gummy rather than crumbly. You want some texture.
Second, temperature control is everything. If your kitchen is very warm, the chocolate might not set properly. If this happens, add a bit more coconut oil to thin it out, or chill the finished pops in the fridge for a few minutes. Conversely, if your cake balls are too cold, the hot chocolate might crack the shell as it hits the surface. This is why the second chill in the freezer is important—it ensures the interior is cold enough to handle the heat of the chocolate without cracking.
Third, if your chocolate is too thick, your cake pops will have a heavy, clunky coating. Thin it out with the fat until it flows easily off the spoon. A thin coating is more elegant and easier to bite through.
Finally, don’t be afraid to taste as you go. If your cake is very sweet, you might want to add a pinch of salt to the chocolate mixture. Salt enhances the flavor of white chocolate and makes it taste less cloying. It is a small detail that makes a big difference.
Variations & Adaptations
While the classic white chocolate version is delicious, this recipe is a blank canvas. Here are a few ways to change it up.
Mint Chocolate Chip: Swap the white chocolate for green-tinted white chocolate (or just add green food coloring). Add mini chocolate chips to the cake crumbs before rolling. This tastes like a mint chocolate chip cookie.
Peppermint Bark: Use dark chocolate for the coating instead of white. Crush candy canes finely and mix them into the dark chocolate before dipping. This is a more sophisticated, less sweet option for adults.
Gluten-Free: Simply use gluten-free cake for the base. Most store-bought gluten-free cakes work well, but check the texture. Some are very crumbly and may need a bit more frosting to bind.
Seasonal Fruit: In the summer, you can use leftover berry cake or lemon cake. The bright flavors pair surprisingly well with white chocolate. Just ensure the cake is not too moist, as berries can add extra liquid.
I once tried making these with pumpkin spice cake and maple frosting. It was a bit too heavy for my taste, but my family loved it. It’s all about personal preference. Feel free to experiment with flavors you enjoy.
Serving & Storage Suggestions
These cake pops are best served at room temperature. If they are too cold, the chocolate can feel waxy and the cake can be too dense. Take them out of the fridge about 10 minutes before serving.
For storage, keep them in an airtight container at room temperature for up to 3 days. Do not refrigerate them unless your kitchen is very hot, as condensation can ruin the chocolate coating. If you need to store them longer, you can freeze the un-dipped cake balls for up to a month. Thaw them in the fridge before rolling and dipping.
They pair well with a hot cup of coffee or tea. The bitterness of the coffee balances the sweetness of the white chocolate perfectly. I also like to serve them alongside a glass of milk for a nostalgic treat.
Nutritional Information & Benefits
These cake pops are a treat, so enjoy them in moderation. Each pop contains approximately 120-150 calories, depending on the size and the sweetness of the cake used. They are high in sugar and carbohydrates, so they are not suitable for low-carb or diabetic diets unless you use sugar-free alternatives.
However, they do provide a quick source of energy. The white chocolate contains calcium and some minerals, though the sugar content is the main component. If you are watching your sugar intake, you can reduce the amount of frosting used in the dough, though this may affect the texture.
From a wellness perspective, I view these as a mindful treat. It is better to enjoy a small, high-quality dessert than to overeat on something bland. This recipe allows you to savor the flavor without needing a huge portion.
Conclusion
Making crispy Christmas cake pops with white chocolate is a simple way to bring a little joy to the holiday season. It is a recipe that honors leftovers, reduces waste, and creates a beautiful treat that is easy to share. I hope you find as much peace in the process as I do.
I encourage you to try this recipe and see how it works with the leftovers in your fridge. Feel free to adjust the flavors to suit your taste. And if you do make them, I would love to hear how they turned out. Leave a comment below with your favorite flavor combination or any tips you have learned along the way.
Happy baking, and enjoy the quiet moments in the kitchen.
FAQs
Can I use box cake mix for this recipe?
Yes, absolutely. In fact, box cake mix often works well because it has a consistent texture. Just bake it according to the package directions and let it cool completely before crumbling.
Why did my cake pops fall off the sticks?
This usually happens if the cake balls are not cold enough when you dip the sticks, or if you do not dip the tip of the stick in chocolate before inserting it into the cake. The chocolate acts as glue, so make sure you have a good seal.
Can I make these without sticks?
Yes, you can skip the sticks and just roll the mixture into truffles. Dip them in the chocolate and roll them in sprinkles. They will be slightly harder to eat with one hand, but they taste exactly the same.
How long do cake pops last?
At room temperature, they last for about 3 days. In the freezer, the un-dipped balls can last up to a month. Once dipped, the chocolate coating protects them, but they may start to lose their crispness after a few days.
Can I use buttercream instead of cream cheese frosting?
You can, but buttercream is often sweeter and softer. You may need to use less of it to bind the cake. Cream cheese frosting has a firmer texture when chilled, which helps the cake pops hold their shape better.
Pin This Recipe!
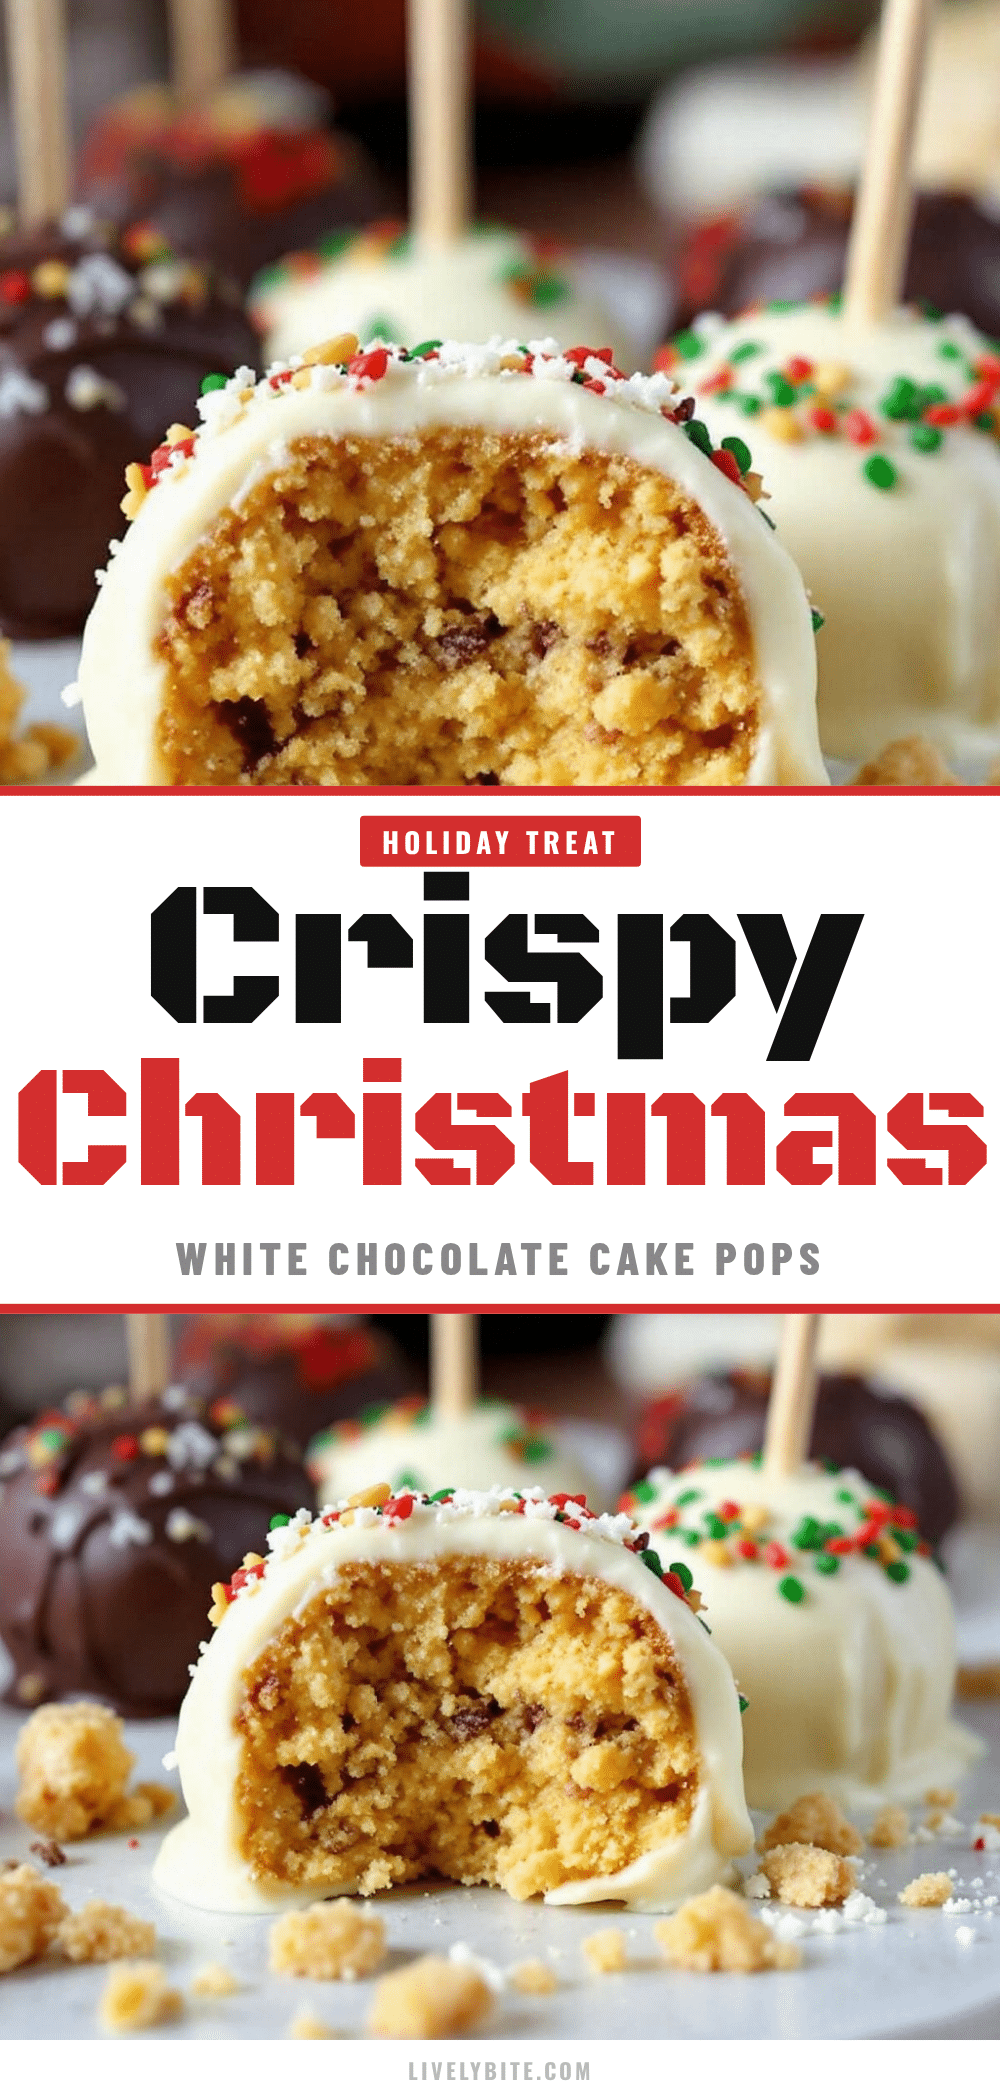
Crispy Christmas Cake Pops: Easy White Chocolate Recipe
Transform holiday cake leftovers into crispy, bite-sized treats with a smooth white chocolate coating. This foolproof recipe uses a simple cake-to-frosting ratio and a tempering trick for a professional snap.
- Prep Time: 20 minutes
- Cook Time: 3 minutes
- Total Time: 1 hour 18 minutes
- Yield: 24-30 servings 1x
- Category: Dessert
- Cuisine: American
Ingredients
- 2 cups leftover cake, crumbled (gingerbread, spice, or red velvet work best)
- 1/2 cup cream cheese frosting
- 12 oz white chocolate chips (high quality, e.g., Ghirardelli or Callebaut)
- 1 tablespoon coconut oil or shortening
- 1 teaspoon vanilla extract
- Holiday sprinkles or crushed candy canes (optional, for decoration)
Instructions
- Crumble the leftover cake into fine crumbs, ensuring no large chunks remain. Let cool completely if warm. (5 mins)
- Mix the cake crumbs with cream cheese frosting until the texture resembles wet sand or playdough. Adjust with more frosting or crumbs if needed. (5 mins)
- Cover the bowl and refrigerate the dough for at least 30 minutes to firm up. (30 mins)
- Portion the dough using a cookie scoop and roll into smooth balls. Place on a parchment-lined baking sheet. (10 mins)
- Freeze the cake balls for 15 minutes until rock hard. (15 mins)
- Melt white chocolate chips in 30-second intervals, stirring until smooth. Stir in coconut oil/shortening and vanilla. (3 mins)
- Dip the tip of wooden sticks into melted chocolate and insert 1/2 inch into each cake ball.
- Submerge each cake pop into the melted chocolate, tapping off excess. (15 mins)
- Immediately add sprinkles or candy canes. Place upright in wax paper or cardboard to set. (10 mins)
Notes
Ensure cake balls are rock hard before dipping to prevent the chocolate from sliding off. If chocolate thickens, reheat briefly in 10-second intervals. Store in an airtight container at room temperature for up to 3 days. Do not refrigerate unless the kitchen is very hot to avoid condensation.
Nutrition
- Serving Size: 1 cake pop
- Calories: 135
- Sugar: 12
- Sodium: 45
- Fat: 8
- Saturated Fat: 5
- Carbohydrates: 15
- Protein: 1
Keywords: cake pops, white chocolate, holiday dessert, leftover cake, Christmas treats, crispy cake pops, easy dessert, zero waste


