The oven timer was still counting down from the last batch, but the pantry was looking dangerously bare. It was 4:55 PM on a Tuesday, and the house was already smelling like burnt sugar and stress. I had promised the kids pumpkin treats for the afternoon trick-or-treaters who were due any second, but the only thing I had in the fridge was a lone tube of sugar cookie dough and a can of pumpkin puree that had been hiding since September.
Honestly, I nearly called takeout.
But then I remembered I had some canned pumpkin pie spice and a jar of orange cream cheese frosting. I didn’t have time to make dough from scratch. I didn’t have time to bake individual pies. I just needed something cute, fast, and definitely not store-bought. So I rolled the dough flat, cut it into circles, and added a dollop of pumpkin-spiced filling. The kids helped me cut out the jack-o’-lantern faces with small plastic knives while I tried not to burn the kitchen down.
They came out golden, soft, and smelling exactly like autumn. The best part? They looked like tiny, edible pumpkins.
I wasn’t planning on sharing this hack, but let’s face it, Halloween is stressful enough without worrying about whether your dessert will impress the neighbor’s kids. These cookies turned out to be the hero of the evening. They are soft, chewy, and taste like a cross between a sugar cookie and a slice of pumpkin pie. Plus, they are so easy that even a tired parent can pull them off without losing their mind.
If you are looking for a last-minute Halloween treat that feels homemade but takes zero effort, this is it. I’ve made them three times this month, and they are already a favorite. It’s comfort food for the holidays, minus the hassle.
Why You’ll Love This Recipe
Let’s be real for a second. Halloween baking usually involves a lot of red food coloring, a lot of mess, and a lot of regret. I used to think I needed to make everything from scratch to make it special. But after years of trial and error, I’ve learned that the best recipes are the ones that don’t require a degree in culinary arts or a three-day time commitment.
These Easy Jack-O-Lantern Pumpkin Pie Cookies hit that sweet spot. They are quick, simple, and incredibly delicious. Here is why they deserve a spot in your holiday rotation:
- Quick & Easy: You can have these in the oven in under 15 minutes. If you are using refrigerated dough, you don’t even need to mix batter. It’s perfect for busy weeknights or last-minute Halloween parties when you realize you forgot to buy decorations.
- Simple Ingredients: No fancy grocery trips needed. You likely already have pumpkin puree, spices, and cookie dough in your kitchen. This recipe relies on pantry staples that most people keep on hand, which means no running to the store at 6 PM.
- Perfect for Halloween: These are great for school parties, office potlucks, or cozy dinners. The jack-o’-lantern shape is festive without being childish, making them appealing to both kids and adults.
- Crowd-Pleaser: Always gets rave reviews. Kids love the fun shape, and adults love the pumpkin pie flavor. It’s a win-win situation that keeps the peace at gatherings.
- Unbelievably Delicious: The texture and flavor combo is next-level comfort food. The cookie is soft and chewy, while the filling tastes like actual pumpkin pie. It’s not just a cookie; it’s a dessert experience.
What makes these different from other Halloween cookies? Most pumpkin cookies are dense and cake-like. These are light and buttery. The trick is using the right ratio of pumpkin to spice, and adding a tiny bit of cream cheese to the filling for richness. It’s not just another version—it’s my best version.
This recipe isn’t just good; it’s the kind that makes you close your eyes after the first bite. It’s comfort food reimagined—faster, but with the same soul-soothing satisfaction. Perfect for impressing guests without stress, or turning a simple meal into something memorable.
What Ingredients You Will Need
This recipe uses simple, wholesome ingredients to deliver bold flavor and satisfying texture without the fuss. The beauty of these cookies lies in their simplicity. You don’t need specialty flours or exotic spices. Just a few key items that work together to create that classic pumpkin pie taste inside a soft cookie.
Here is what you need to gather:
- Sugar Cookie Dough: One 16-ounce tube of refrigerated sugar cookie dough. I recommend Pillsbury or a local bakery brand for the best texture. It saves so much time and provides a consistent base.
- Pumpkin Puree: One 15-ounce can of 100% pure pumpkin puree. Make sure it’s not pumpkin pie filling. Pie filling has added sugar and spices, which will throw off the balance. You want the plain stuff.
- Pumpkin Pie Spice: One to two teaspoons. If you don’t have a pre-mixed blend, you can make your own with cinnamon, ginger, nutmeg, and cloves. But honestly, the jar is easier.
- Brown Sugar: Half a cup of packed brown sugar. This adds moisture and a caramel-like depth that white sugar can’t match. It helps the filling stay soft.
- Unsalted Butter: Two tablespoons, softened. This gives the filling a rich, creamy mouthfeel. Don’t skip this step; melted butter makes the filling greasy.
- Vanilla Extract: One teaspoon. Just a splash to round out the flavors.
- Orange Cream Cheese Frosting: One cup. You can buy this pre-made in the Halloween aisle, or make your own by mixing cream cheese, powdered sugar, and orange zest. Store-bought is fine for speed, but homemade tastes fresher.
- Orange Food Coloring (Optional): A few drops if you want the frosting to look more vibrant. It’s not strictly necessary, but it helps with the jack-o’-lantern aesthetic.
For the best results, ensure your pumpkin puree is thick. If it looks watery, strain it through a coffee filter for 15 minutes to remove excess liquid. This prevents the cookies from becoming soggy. Also, look for firm, small-curd cream cheese for the frosting to ensure it holds its shape when piped.
Equipment Needed
You don’t need a lot of fancy gear for this recipe. In fact, keeping it simple is part of the charm. Here is what you’ll need to get the job done:
- Baking Sheets: Two standard half-sheet pans. Line them with parchment paper or silicone baking mats. Parchment paper is cheaper, but silicone mats are reusable and make cleanup a breeze. I prefer silicone mats because they distribute heat evenly.
- Parchment Paper: Essential for preventing sticking. It also makes cleaning the pans much easier. If you don’t have any, a light greasing of the pan works, but the cookies might spread more.
- Rolling Pin: If you are using refrigerated dough, you need to flatten it. A standard wooden rolling pin works fine. If you don’t have one, a clean wine bottle can work in a pinch, though it’s less precise.
- Small Round Cookie Cutters: You need a cutter that is about 2 to 3 inches in diameter. This will be the base of your pumpkin. A simple circle cutter is best.
- Small Triangle Cookie Cutters: For the eyes, nose, and mouth. If you don’t have a triangle cutter, you can use a small paring knife to cut the shapes by hand. It takes a bit more practice, but it works.
- Piping Bag or Ziploc Bag: To apply the frosting. A piping bag with a round tip gives the cleanest lines, but a Ziploc bag with the corner snipped off works perfectly well. It’s a budget-friendly option that is just as effective.
- Mixing Bowls: One medium bowl for the filling and one small bowl for the frosting. You don’t need stand mixer attachments for this. Hand mixing is sufficient.
Keep your tools simple. Overcomplicating the equipment list just adds stress. The goal is to have fun, not to feel like you’re in a cooking competition.
Preparation Method
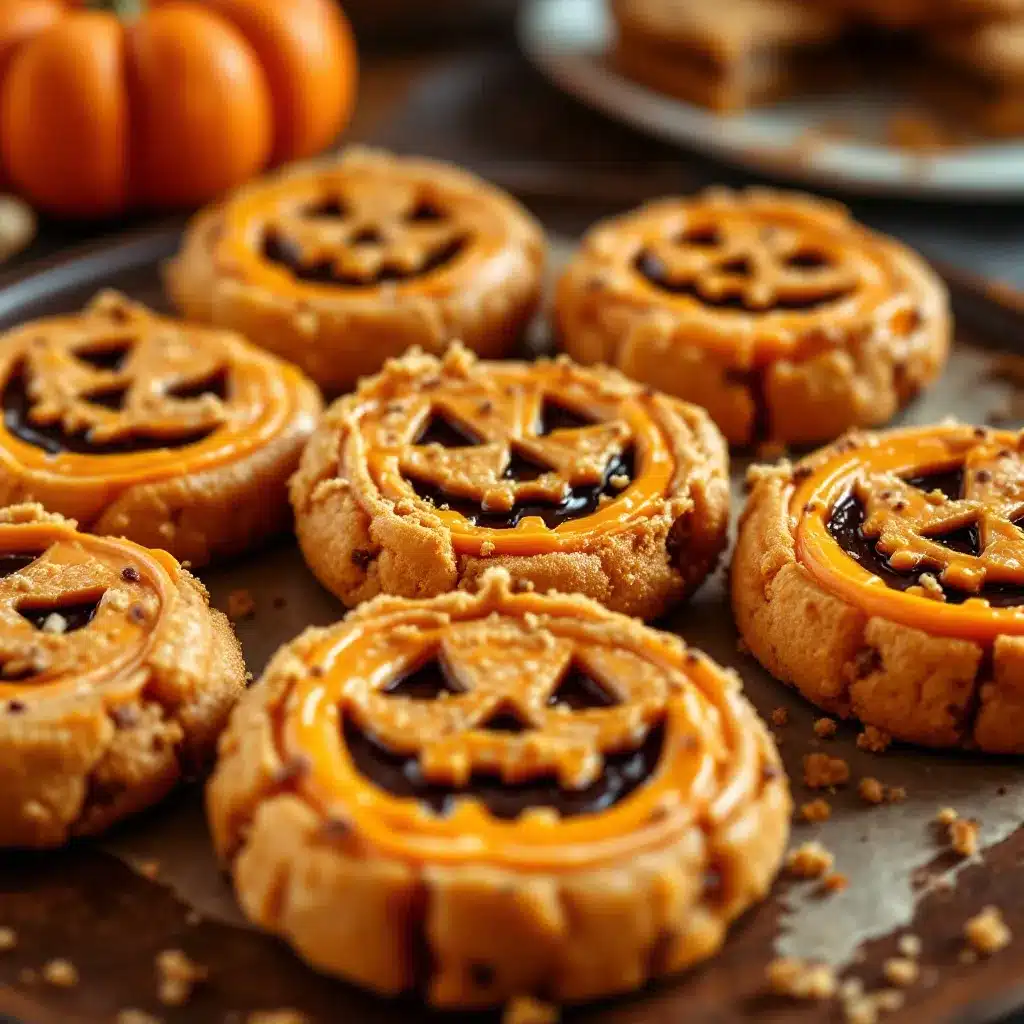
Getting these cookies ready is straightforward, but there are a few tricks to ensure they turn out perfectly. Follow these steps carefully, and you’ll have a batch of pumpkin pie cookies in no time.
- Preheat the Oven: Start by heating your oven to 350°F (175°C). This ensures the oven is at the right temperature when the cookies go in. Preheating takes about 10 minutes, so use this time to prep your baking sheets.
- Prepare the Baking Sheets: Line two baking sheets with parchment paper. This is crucial for easy cleanup and even baking. If you are short on paper, you can grease the sheets lightly with butter or cooking spray.
- Make the Pumpkin Filling: In a medium mixing bowl, combine the pumpkin puree, brown sugar, pumpkin pie spice, softened butter, and vanilla extract. Whisk these ingredients together until smooth. The mixture should be thick and spreadable. If it’s too runny, add a tablespoon of flour. If it’s too thick, add a teaspoon of milk. Taste it at this stage and adjust the spice if needed.
- Roll Out the Dough: Take the refrigerated cookie dough and unroll it onto a lightly floured surface. Roll it out until it is about 1/4 inch thick. You want it even so the cookies bake uniformly. Don’t roll it too thin, or they will become crisp instead of soft.
- Cut the Circles: Use your round cookie cutter to cut out circles from the dough. Place them on the prepared baking sheets, leaving about an inch of space between each one. They will spread slightly in the oven. You can re-roll the scraps to cut more cookies.
- Add the Filling: Spoon a small amount of the pumpkin mixture onto the center of each cookie dough circle. About one teaspoon per cookie is enough. Don’t overfill them, or the filling will spill out and burn.
- Fold the Edges: Gently fold the edges of the dough over the filling to create a half-moon shape. Press the edges firmly to seal them. You can use a fork to crimp the edges, or just pinch them with your fingers. This step is important to keep the filling inside.
- Bake the Cookies: Place the baking sheets in the preheated oven. Bake for 10 to 12 minutes, or until the edges are lightly golden. Do not overbake them. They should still look soft in the center. They will firm up as they cool.
- Cool the Cookies: Remove the sheets from the oven and let the cookies cool on the pan for 5 minutes. Then transfer them to a wire rack to cool completely. This step is critical because you cannot frost warm cookies, or the frosting will melt.
- Prepare the Frosting: While the cookies are cooling, mix the cream cheese frosting with a little orange food coloring if you want a brighter color. Place it in a piping bag or a Ziploc bag with the corner snipped off.
- Decorate the Jack-O-Lanterns: Once the cookies are completely cool, pipe three small dots for the eyes and nose, and a curved line for the mouth. You can use a toothpick to adjust the shapes if the frosting is too thick. Let the frosting set for 10 minutes before serving.
Take your time with the folding and sealing. This is where most people make mistakes. If the filling leaks, the cookies will spread and lose their shape. Be gentle but firm.
Cooking Tips & Techniques
Baking cookies might seem simple, but there are a few professional techniques that can make a big difference in the final result. I’ve learned these the hard way, through a few burnt batches and collapsed cookies.
First, temperature control is everything. Make sure your butter for the filling is softened, not melted. Melted butter changes the texture of the filling, making it greasy and hard to spread. Softened butter keeps it creamy.
Second, don’t overcrowd the baking sheet. Cookies need space to spread. If you pack them too close together, they will merge into one giant cookie. Leave at least an inch of space between each one.
Third, watch the oven like a hawk. Ovens vary in temperature. If your oven runs hot, check the cookies at 9 minutes. If they are browning too quickly, cover them loosely with foil. Golden edges are the goal, not dark brown crusts.
Another common mistake is using too much filling. A little goes a long way. If you overfill the cookies, the dough will burst open in the oven. Start with a small amount and add more if needed. It’s better to have a little extra filling than a mess in your oven.
Finally, let the cookies cool completely before frosting. Warm cookies will melt the frosting, and you’ll end up with a orange puddle instead of a jack-o’-lantern. Patience pays off here. If you can’t wait, put them in the fridge for 15 minutes to speed up the process.
Variations & Adaptations
While the classic jack-o’-lantern is the star, there are plenty of ways to twist this recipe to suit your tastes or dietary needs. Here are a few ideas:
- Gluten-Free Option: Use a gluten-free sugar cookie dough. Many brands make excellent refrigerated dough that works just as well as the regular version. Just check the label to ensure it’s certified gluten-free.
- Vegan Twist: Swap the dairy butter for vegan butter, and use a vegan cream cheese frosting. There are several good plant-based options available now. The pumpkin filling itself is naturally vegan if you use vegan butter.
- Spice It Up: Add a pinch of cayenne pepper to the pumpkin filling for a subtle kick. It pairs surprisingly well with the sweetness of the cookie. This is great for adults who like a bit of heat.
- Chocolate Chip Variation: Add a few chocolate chips to the pumpkin filling before folding the dough. The chocolate and pumpkin combination is rich and decadent. It’s a great twist for chocolate lovers.
- Mini Cupcakes: If you don’t want to fold the dough, you can use cupcake liners. Place a dollop of dough in the bottom, add the filling, and top with another small piece of dough. It creates a similar effect but is easier to handle.
I tried the chocolate chip version last year, and it was a huge hit. The melted chocolate chunks in the pumpkin filling were unexpected and delicious. It’s a great way to use up leftover chocolate chips.
Serving & Storage Suggestions
These cookies are best served at room temperature. They have a soft, chewy texture that is perfect for snacking. Pair them with a glass of cold milk or a cup of hot coffee for the ultimate afternoon treat. They also go well with pumpkin-spiced lattes, of course.
For storage, keep the cookies in an airtight container at room temperature for up to 3 days. If you live in a humid climate, add a piece of bread to the container to keep them soft. The bread will absorb the moisture and keep the cookies fresh.
You can also freeze the unfilled cookies. Roll out the dough, cut the circles, and freeze them on a baking sheet. Once frozen, transfer them to a freezer bag. When you’re ready to bake, just add the filling and bake as directed. This is a great way to prep ahead for busy weekends.
The frosting can be made up to 2 days in advance. Store it in the fridge in an airtight container. Let it come to room temperature before piping. If it’s too stiff, add a teaspoon of milk to loosen it up.
Nutritional Information & Benefits
These cookies are a treat, so they do contain sugar and carbohydrates. However, using pumpkin puree adds a bit of fiber and vitamin A to the mix. It’s not a health food, but it’s a better option than plain sugar cookies.
Each cookie contains approximately 150 calories, depending on the size and amount of frosting used. The pumpkin filling provides some natural sweetness, so you can use less frosting if you want to reduce the sugar content.
For those with dietary restrictions, the recipe can be easily adapted to be gluten-free or vegan. Just ensure you use certified alternatives for the dough and frosting. The pumpkin puree itself is naturally gluten-free and vegan.
From a wellness perspective, I love that these cookies use real pumpkin. It’s a whole food ingredient that adds nutritional value beyond just flavor. It’s a small step toward making holiday treats a bit more wholesome.
Conclusion
These Easy Jack-O-Lantern Pumpkin Pie Cookies are a game-changer for Halloween baking. They are quick, easy, and absolutely delicious. You don’t need to be a professional baker to make them, and you don’t need a lot of time. Just a few simple ingredients and a little creativity.
I hope you try this recipe and enjoy it as much as I do. It’s a fun way to get the kids involved in the kitchen, and the results are always impressive. Feel free to customize the filling and frosting to suit your tastes. The possibilities are endless.
If you make these cookies, I’d love to hear how they turn out. Leave a comment below with your thoughts, or share a photo on social media. Tag me so I can see your creations. And don’t forget to pin this recipe for later!
Happy baking, and happy Halloween!
Frequently Asked Questions
Can I use pumpkin pie filling instead of pumpkin puree?
No, it’s best to use 100% pure pumpkin puree. Pumpkin pie filling already has sugar and spices added, which will make the cookies too sweet and alter the texture. Puree gives you better control over the flavor.
How do I keep the cookies from spreading too much?
Make sure your dough is cold when you start. If it gets too warm, chill it in the fridge for 15 minutes before rolling. Also, don’t overcrowd the baking sheet. Give the cookies enough space to spread.
Can I freeze these cookies?
Yes, you can freeze the unfilled cookies. Bake them first, let them cool completely, and then store them in an airtight container in the freezer for up to 3 months. Thaw them at room temperature before frosting.
What if I don’t have a triangle cutter?
You can use a small paring knife to cut the shapes by hand. It takes a bit more practice, but it works perfectly fine. Just be careful not to cut through the bottom of the cookie.
Can I make these cookies ahead of time?
Yes, you can prepare the dough and filling up to 2 days in advance. Store them separately in the fridge. Assemble and bake the cookies on the day you plan to serve them for the best texture.
Pin This Recipe!
Easy Jack-O-Lantern Pumpkin Pie Cookies

A quick and festive Halloween treat made with refrigerated sugar cookie dough and a homemade pumpkin pie filling, decorated with orange cream cheese frosting to resemble jack-o’-lanterns.
- Prep Time: 15 minutes
- Cook Time: 12 minutes
- Total Time: 27 minutes
- Yield: Approximately 24 cookies 1x
- Category: Dessert
- Cuisine: American
Ingredients
- 1 tube (16 oz) refrigerated sugar cookie dough
- 1 can (15 oz) 100% pure pumpkin puree
- 1–2 teaspoons pumpkin pie spice
- 1/2 cup packed brown sugar
- 2 tablespoons unsalted butter, softened
- 1 teaspoon vanilla extract
- 1 cup orange cream cheese frosting
- Orange food coloring (optional)
Instructions
- Preheat oven to 350°F (175°C) and line two baking sheets with parchment paper.
- In a medium bowl, whisk together pumpkin puree, brown sugar, pumpkin pie spice, softened butter, and vanilla extract until smooth.
- Roll out the cookie dough on a lightly floured surface to about 1/4 inch thickness.
- Cut out circles using a 2-3 inch round cookie cutter and place on prepared baking sheets.
- Spoon about 1 teaspoon of pumpkin filling onto the center of each dough circle.
- Fold the edges of the dough over the filling to create a half-moon shape and press edges firmly to seal.
- Bake for 10-12 minutes until edges are lightly golden.
- Cool cookies on the pan for 5 minutes, then transfer to a wire rack to cool completely.
- Mix orange food coloring into the cream cheese frosting if desired.
- Pipe eyes, nose, and mouth onto the cooled cookies to create jack-o’-lantern faces.
- Let frosting set for 10 minutes before serving.
Notes
Ensure pumpkin puree is thick; strain if watery to prevent soggy cookies. Use softened butter, not melted, for the filling to maintain texture. Do not overcrowd baking sheets. Cool cookies completely before frosting to prevent melting.
Nutrition
- Serving Size: 1 cookie
- Calories: 150
- Sugar: 14
- Sodium: 120
- Fat: 6
- Saturated Fat: 3
- Carbohydrates: 22
- Fiber: 1
- Protein: 2
Keywords: Halloween cookies, pumpkin pie cookies, jack-o-lantern treats, easy Halloween dessert, sugar cookie hack, fall baking


