That was the moment I realized I wasn’t going to get those seeds into the oven in time. Honestly, they looked like slimy green jelly. I stared at them, fork in hand, wondering if I could just throw them in the air fryer wet. You know how it goes. You’re hungry, the TV is calling, and the cleanup is already piling up. But then I remembered that bag of store-bought seeds I used to love, and how much better they tasted when you make them yourself. So, I wiped them down, tossed them in oil, and hit the button.
The smell that came out of the air fryer was surprisingly nutty and warm. It filled the kitchen with that cozy, autumn vibe that usually takes hours to build. I cracked one open, salted it with my fingers, and took a bite. It was perfectly crunchy. Not burnt, not chewy, just crisp. That small victory turned a lazy Tuesday night into something special. Now, making crispy air fryer roasted pumpkin seeds with sea salt is my go-to trick for using up leftovers from any squash dish.
It’s funny how something so simple can feel like a win. I’ve made this recipe dozens of times since that night. It’s become a ritual. I keep a stash of them on the counter for when the kids need a snack, or when I need something healthy to nibble on while working. There’s a quiet satisfaction in turning what would usually be trash into a tasty treat. It’s not just about the seeds, really. It’s about the patience to clean them right and the reward of hearing that crunch.
Once you try them, you’ll never go back to the overpriced bags at the store. They cost pennies to make and taste infinitely better. Plus, you control the salt and spices. I’ve found that this method is foolproof, even if you’re rushing. The air fryer does all the heavy lifting, leaving you with a bowl of golden, savory goodness. It’s the kind of small joy that makes cooking at home worth it, even on the busiest nights.
Why You’ll Love This Recipe
Let’s be honest, most people throw pumpkin guts in the trash without a second thought. But after years of experimenting with different roasting methods, I’ve found that the air fryer is the absolute game-changer for texture. Traditional oven roasting often leaves seeds soggy in the middle or burnt on the edges because of uneven heat. The air fryer circulates hot air rapidly, creating that uniform crunch we all crave without the guesswork. This isn’t just another snack; it’s the result of testing dozens of batches to get the oil-to-seed ratio just right.
- Quick & Easy: These come together in under 15 minutes of prep, and the air fryer handles the rest in about 10 minutes. It’s perfect for busy weeknights or last-minute cravings when you need something fast.
- Simple Ingredients: No fancy grocery trips needed. You likely already have pumpkin seeds, olive oil, and sea salt in your kitchen. It’s pantry-friendly and reduces food waste.
- Perfect for Movie Nights: Great for cozy dinners, binge-watching sessions, or as a healthy alternative to chips. They are portable and easy to eat without making a mess.
- Crowd-Pleaser: Always gets rave reviews from kids and adults alike. The savory crunch is addictive, and you can easily adjust the salt level to suit different tastes.
- Unbelievably Delicious: The texture and flavor combo is next-level comfort food. There is nothing quite like the nutty, toasted flavor of a perfectly roasted seed.
What makes this recipe different is the emphasis on drying the seeds thoroughly before cooking. I learned this the hard way after a few soggy batches. By patting them dry and using a light coat of oil, you ensure that every single seed crisps up evenly. It’s a small step that makes a huge difference in the final result. Whether you are making this from a fresh pumpkin or using store-bought raw seeds, the technique remains the same for consistent success.
This recipe isn’t just good—it is the kind that makes you close your eyes after the first bite. It’s comfort food reimagined—healthier, faster, but with the same soul-soothing satisfaction. Perfect for impressing guests without stress, or turning a simple meal into something memorable. You can even add a little spice if you want a kick, but the classic sea salt version is timeless.
What Ingredients You Will Need
This recipe uses simple, wholesome ingredients to deliver bold flavor and satisfying texture without the fuss. The key to success lies in the quality of the seeds and the type of oil you use. Since the flavor profile is minimal, you want the pumpkin seeds to shine. I recommend using raw, hulled pumpkin seeds if you are short on time, but fresh seeds from a pumpkin are always best for that authentic taste. The oil helps conduct the heat and carry the salt, while the sea salt provides that essential savory pop.
- Pumpkin Seeds: 1 cup of raw, shelled pumpkin seeds. Look for bright green, flat seeds. If using fresh seeds, make sure to clean them well. (Adds protein and crunch)
- Olive Oil: 1 tablespoon of extra virgin olive oil. I recommend California Olive Ranch for its clean taste and high smoke point. It adds richness and helps the salt adhere. (Use avocado oil for a neutral flavor)
- Sea Salt: ½ teaspoon of flaky sea salt. Maldon sea salt is my go-to because the flakes stick better and provide bursts of flavor. (Use kosher salt if flaky isn’t available)
- Black Pepper: A pinch of freshly cracked black pepper. Optional, but it adds a subtle depth that complements the nuttiness. (Skip if you prefer a pure savory taste)
If you are starting with a whole pumpkin, you will need about half a medium-sized sugar pumpkin or pie pumpkin to get that one cup of seeds. When selecting a pumpkin, look for one that feels heavy for its size and has a firm stem. This ensures the seeds are fresh and the flesh is sweet. For seasonal variations, you can swap the olive oil for melted coconut oil for a slightly sweeter note, or use ghee for a richer, buttery flavor. In summer, you might even try adding a little chili powder and lime zest for a zesty twist.
Substitution guidance is easy here. If you are looking for a lower-fat option, you can reduce the oil to ½ tablespoon, though the crunch might be slightly less pronounced. For a gluten-free option, this recipe is naturally gluten-free, but always check your salt and oil labels to ensure no cross-contamination. You can also use pumpkin peels if you want zero waste, just make sure to remove all the stringy pulp for the best texture.
Equipment Needed
You don’t need a lot of fancy gear for this, which is the best part. The primary tool you’ll need is an air fryer. Any standard basket-style air fryer works perfectly. I’ve used everything from small 2-quart models to larger 5-quart ones, and the results are consistent across the board. Just make sure your seeds are in a single layer for the best airflow.
You will also need a large bowl for mixing and a few paper towels or a clean kitchen towel. The towel is crucial for drying the seeds. I usually use an old t-shirt or a dedicated kitchen rag that I don’t mind getting a bit dirty. If you don’t have a towel, a salad spinner can work in a pinch, but it takes more effort to dry them thoroughly.
For measuring, standard tablespoons and teaspoons are fine. I prefer using a small whisk to toss the seeds in the oil so they get coated evenly. If you don’t have a whisk, your hands work just as well, though you’ll need to wash them afterward! I also recommend having a baking sheet or a small plate ready to transfer the seeds to once they are done, so they don’t overcook in the hot basket.
If you don’t own an air fryer, you can absolutely use a conventional oven. You’ll just need a baking sheet and parchment paper. The cooking time will be slightly longer, around 15-20 minutes, and you’ll need to stir them halfway through. Budget-friendly options for oil include using any neutral vegetable oil you have on hand, as the flavor won’t be masked by spices. Regular salt works too, just use a slightly smaller amount since it’s denser than flaky sea salt.
How Do I Clean Pumpkin Seeds for Roasting?
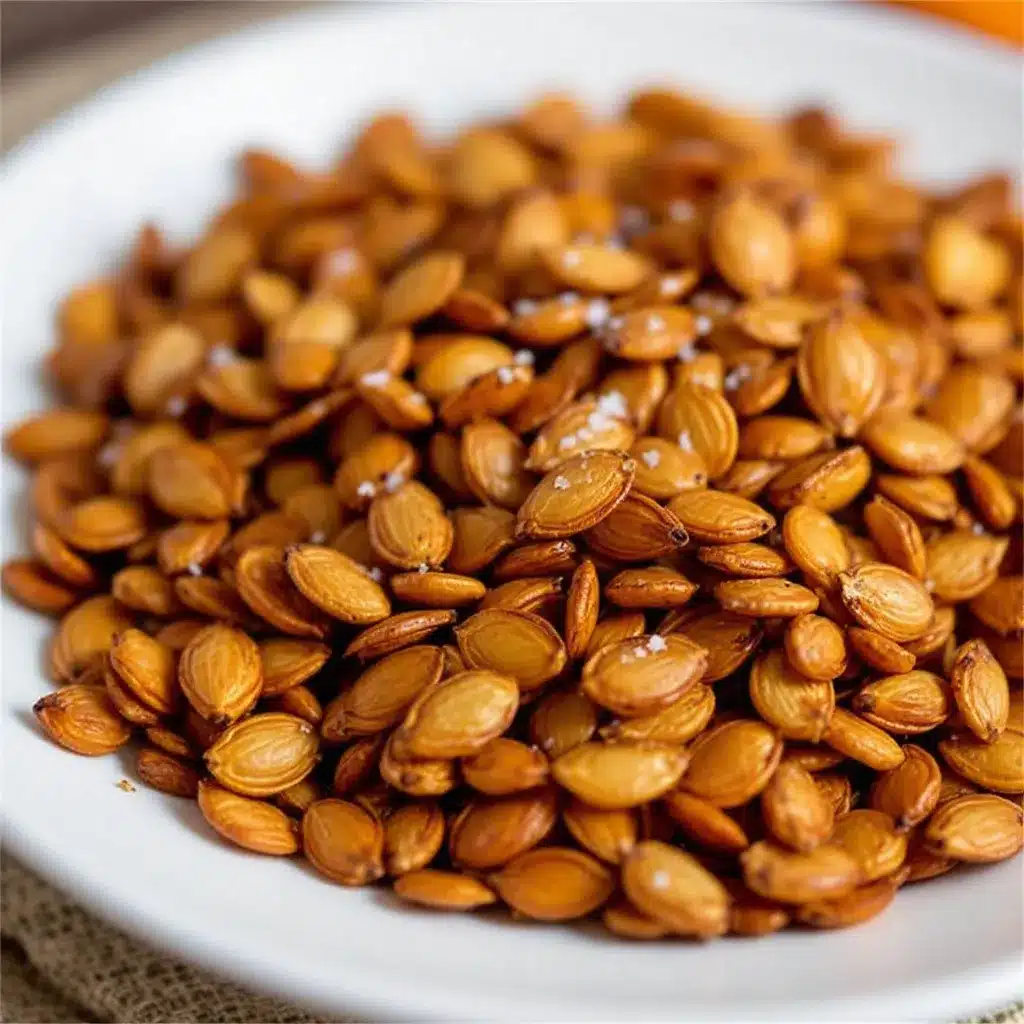
Start by scooping the seeds and pulp out of the pumpkin into a large bowl of warm water. The water helps separate the seeds from the stringy bits. Gently rub the seeds between your hands to loosen the pulp. Pour off the water and repeat until the seeds are mostly clean. Then, spread them out on paper towels and pat them dry. This step is critical for achieving that crispy texture.
Can I Use Store-Bought Raw Pumpkin Seeds?
Absolutely. This recipe works perfectly with raw, shelled pumpkin seeds bought from the bulk bin or grocery store. You save the time and mess of cleaning fresh seeds. Just make sure they are raw and unsalted. If they are already salted, reduce or omit the added salt in the recipe. They roast up just as crunchy and are a great time-saver for busy weeknights.
Why Are My Seeds Still Chewy After Cooking?
Chewy seeds usually mean they weren’t dried enough before roasting, or the air fryer basket was overcrowded. Moisture is the enemy of crunch. Make sure to pat the seeds very dry with paper towels before adding the oil. Also, avoid stacking them in the basket. If you have a lot of seeds, roast them in two batches. Overcrowding blocks airflow and leads to steaming instead of roasting.
What Temperature Should I Set My Air Fryer To?
Set your air fryer to 350°F (175°C). This temperature is high enough to crisp the seeds quickly without burning them. If you go too high, the outside will burn before the inside is cooked. If you go too low, they might dry out but not get that satisfying crunch. 350°F is the sweet spot for even roasting.
How Long Do These Seeds Last in Storage?
Once cooled completely, store them in an airtight container at room temperature. They will stay crispy for up to one week. If you live in a humid climate, they might lose some crunch after a few days. You can also freeze them for up to three months. Just let them come to room temperature before eating. They make great meal prep snacks for the week ahead.
Preparation Method
Getting these seeds ready is straightforward, but attention to detail makes all the difference. First, if you are using fresh seeds, scoop them out of the pumpkin and place them in a large bowl. Cover them with warm water and gently swirl them around. The water will help loosen the fibrous pulp. Let them sit for a minute, then pour off the water, catching the seeds in a colander. Pick out any remaining bits of pumpkin flesh. This cleaning process takes about five minutes.
Once cleaned, lay the seeds out on a clean kitchen towel or several layers of paper towels. Pat them dry thoroughly. You want them as dry as possible. This step is non-negotiable if you want crunch. If they are wet, they will steam in the air fryer. After drying, transfer the seeds to a dry mixing bowl. This preparation phase should take about ten minutes total, including cleaning and drying.
Next, add the olive oil to the bowl with the seeds. Use a whisk or your hands to toss the seeds until they are lightly coated. You don’t want them swimming in oil; just a thin, even sheen. If you are using fresh seeds, you might need a little extra oil since they absorb more. Add the black pepper and half the sea salt at this stage. Toss again to distribute the seasoning evenly. The oil and salt will help the seeds brown and flavor them.
Preheat your air fryer to 350°F (175°C) for about three minutes if your model recommends it. This isn’t strictly necessary for all models, but it helps start the cooking process immediately. Once preheated, pour the seeds into the air fryer basket. Spread them out in a single layer. Do not overcrowd the basket. If you have a small air fryer, you may need to cook them in two batches. This ensures hot air can circulate around every seed.
Set the timer for 10 minutes. At the 5-minute mark, pause the air fryer and shake the basket vigorously. This is crucial for even cooking. You want to move the seeds from the edges to the center. Listen to them. They should start to make a light rattling sound when shaken. If they sound dull, they need more time. After shaking, close the basket and let them finish cooking.
When the timer goes off, open the basket and check the seeds. They should be golden brown and crispy. If they are still pale, cook for another 2-3 minutes, checking every minute. Be careful not to burn them, as they can go from golden to burnt very quickly. Once they look perfect, remove the basket and pour the seeds onto a plate or baking sheet. They will continue to crisp up as they cool, so don’t worry if they seem slightly soft right out of the air fryer.
While they are still warm, sprinkle the remaining sea salt over them. The residual heat will help the salt stick. Toss them gently to distribute the salt evenly. Let them cool completely before storing or eating. This cooling process takes about 10 minutes. Once cool, they should be crunchy and delicious. Enjoy them immediately or save them for later.
Cooking Tips & Techniques
I’ve made my fair share of burnt seeds over the years. One time, I left them in for 15 minutes and ended up with charcoal. Here’s what I learned: trust your eyes, not just the timer. Air fryers vary in their actual temperature, so always check early. If your air fryer runs hot, start checking at 7 minutes. Another tip is to add the final salt after cooking. If you add all the salt before, it can draw out moisture and prevent crisping. Adding it at the end ensures maximum crunch.
Multitasking is key here. While the seeds are roasting, you can clean your mixing bowl or wipe down the counter. The whole process from start to finish takes less than 20 minutes, so it’s efficient. However, do not walk away from the air fryer during the last few minutes. They burn faster than you think. Keep an eye on them and shake the basket regularly to ensure even browning.
For consistency, always use the same brand of seeds if possible. Different brands have different moisture contents. If you switch brands, you might need to adjust the cooking time slightly. Also, make sure your oil is room temperature. Cold oil can sometimes clump up the seeds, leading to uneven coating. A quick whisk helps break up any clumps before they go into the basket.
If you are new to air frying, start with a smaller batch. This helps you gauge your specific machine’s performance. Once you know how long it takes for your model, you can scale up. Remember, the seeds will crisp up more as they cool. So, if they seem a little soft when they come out, give them a minute. They should snap when you break one in half. If they bend, they need more time.
Variations & Adaptations
While the classic sea salt version is my favorite, it’s fun to experiment. Try adding a teaspoon of smoked paprika and a pinch of cayenne for a spicy kick. The smoke flavor pairs beautifully with the nuttiness of the seeds. Another variation is to add a little garlic powder and onion powder for a savory, snack-chip vibe. Just make sure to use powdered spices, as fresh garlic can burn in the air fryer.
For a sweet twist, toss the seeds with a little maple syrup and cinnamon before roasting. These make a great dessert topping for yogurt or oatmeal. However, be careful with the sugar, as it can burn quickly. Cook them for a shorter time, around 6-8 minutes, and watch them closely. You can also try a lemon-pepper variation by adding fresh lemon zest and cracked black pepper. It’s bright and refreshing.
If you are looking for different cooking methods, you can roast these in the oven at 300°F (150°C) for 20-25 minutes. Stir them every 10 minutes for even browning. The air fryer is faster, but the oven is great if you are cooking something else at the same time. For a low-fat option, skip the oil and just toast the dry seeds in the air fryer at 325°F (160°C) for 8-10 minutes. They will be less rich but still crunchy.
Allergen-wise, this recipe is naturally free from major allergens like nuts, dairy, and gluten. It’s a safe snack for most people. If you are nut-free, these seeds are a great alternative to roasted nuts. They provide a similar crunch and protein boost. I’ve tried adding a little soy sauce for an umami flavor, but it can make them soggy if not used sparingly. A tiny drop of tamari works best.
Serving & Storage Suggestions
Serve these seeds warm or at room temperature. They are perfect for snacking straight from the bowl, or you can use them as a topping for salads, soups, and avocado toast. They add a nice textural contrast to creamy dishes. I love sprinkling them over my creamy vegan chocolate avocado pudding for a bit of crunch. They also pair well with a glass of refreshing cucumber mint green tea for a light afternoon snack.
For storage, let the seeds cool completely to room temperature. This prevents condensation from forming in the container, which would make them soggy. Once cool, transfer them to an airtight container. Glass jars with tight-fitting lids work well. Store them in a cool, dry place away from direct sunlight. They will stay crispy for up to one week. If you live in a humid area, consider adding a silica gel packet to the container to absorb excess moisture.
If you have leftovers, you can freeze them for up to three months. Place them in a freezer-safe bag or container. When you’re ready to eat them, let them thaw at room temperature for about 15 minutes. They should regain most of their crunch. If they seem slightly soft, you can re-crisp them in the air fryer at 300°F for 2-3 minutes.
Reheating is easy. If you want them extra hot, pop them back in the air fryer for 2 minutes. This restores their crispiness. Avoid microwaving, as it can make them chewy. For presentation, serve them in a small bowl with a pinch of extra sea salt on the side. Garnish with a few fresh herbs if you’re serving them as part of a charcuterie board. They are a versatile snack that fits many occasions.
Nutritional Information & Benefits
These seeds are not just tasty; they are nutritious. Pumpkin seeds are packed with magnesium, zinc, and protein. A one-ounce serving contains about 5 grams of protein and 2 grams of fiber. They are also a good source of healthy fats, including omega-3 and omega-6 fatty acids. These nutrients support heart health and immune function. I love having them as a post-workout snack because they help with muscle recovery.
Compared to store-bought snacks, these are much lower in sodium and free from preservatives. You control exactly what goes into them. For a low-carb diet, they are a great option as they are low in net carbs. They are also gluten-free and vegan, making them suitable for various dietary restrictions. Just be mindful of the oil and salt amounts if you are watching your calorie intake.
From a wellness perspective, I find that snacking on these seeds keeps me satisfied for longer than chips or crackers. The combination of protein and fat helps stabilize blood sugar levels. They are a wholesome choice for anyone looking to add more plant-based nutrients to their diet. Plus, they are a great way to reduce food waste by using every part of the pumpkin.
| Nutrient | Amount per 1 oz (28g) |
|---|---|
| Calories | 150 |
| Protein | 5g |
| Fat | 12g |
| Carbohydrates | 2g |
| Fiber | 2g |
| Sugar | 0g |
Conclusion
Making crispy air fryer roasted pumpkin seeds with sea salt is easier than you think, and the results are worth it. They are crunchy, savory, and perfect for any time of day. I hope you try this recipe and find it as useful as I do. Feel free to experiment with different spices and flavors to make them your own. The possibilities are endless.
If you make this recipe, I’d love to hear how it turned out. Leave a comment below with your thoughts or share your variations. Did you add any unique spices? Let me know! You can also tag me on social media if you post a photo. I always enjoy seeing what you create. Sharing your results helps inspire others to try simple, healthy snacks.
Thank you for reading and for supporting my blog. I hope these seeds become a staple in your kitchen. Happy cooking, and enjoy the crunch! If you liked this, you might also enjoy trying this easy Mediterranean stuffed mini peppers with feta for a savory appetizer.
FAQs
Can I use salted pumpkin seeds?
It’s best to use raw, unsalted seeds. If you use pre-salted seeds, you won’t be able to control the salt level, and they might end up too salty. Raw seeds also tend to roast more evenly.
Do I need to preheat the air fryer?
Preheating is optional but recommended. It helps the seeds start cooking immediately, leading to better crispiness. If your air fryer doesn’t have a preheat function, just add 1-2 minutes to the cooking time.
Can I make these in a conventional oven?
Yes, you can. Spread the seeds on a baking sheet and roast at 300°F (150°C) for 20-25 minutes. Stir them halfway through. They will take longer than in the air fryer but will still be delicious.
How do I know when they are done?
They are done when they are golden brown and make a rattling sound when shaken. They should snap when broken in half. Remember, they will crisp up more as they cool.
Can I add sugar for a sweet version?
Yes, you can toss them with maple syrup and cinnamon. However, sugar burns easily, so cook them for a shorter time (6-8 minutes) and watch them closely to prevent burning.
Pin This Recipe!
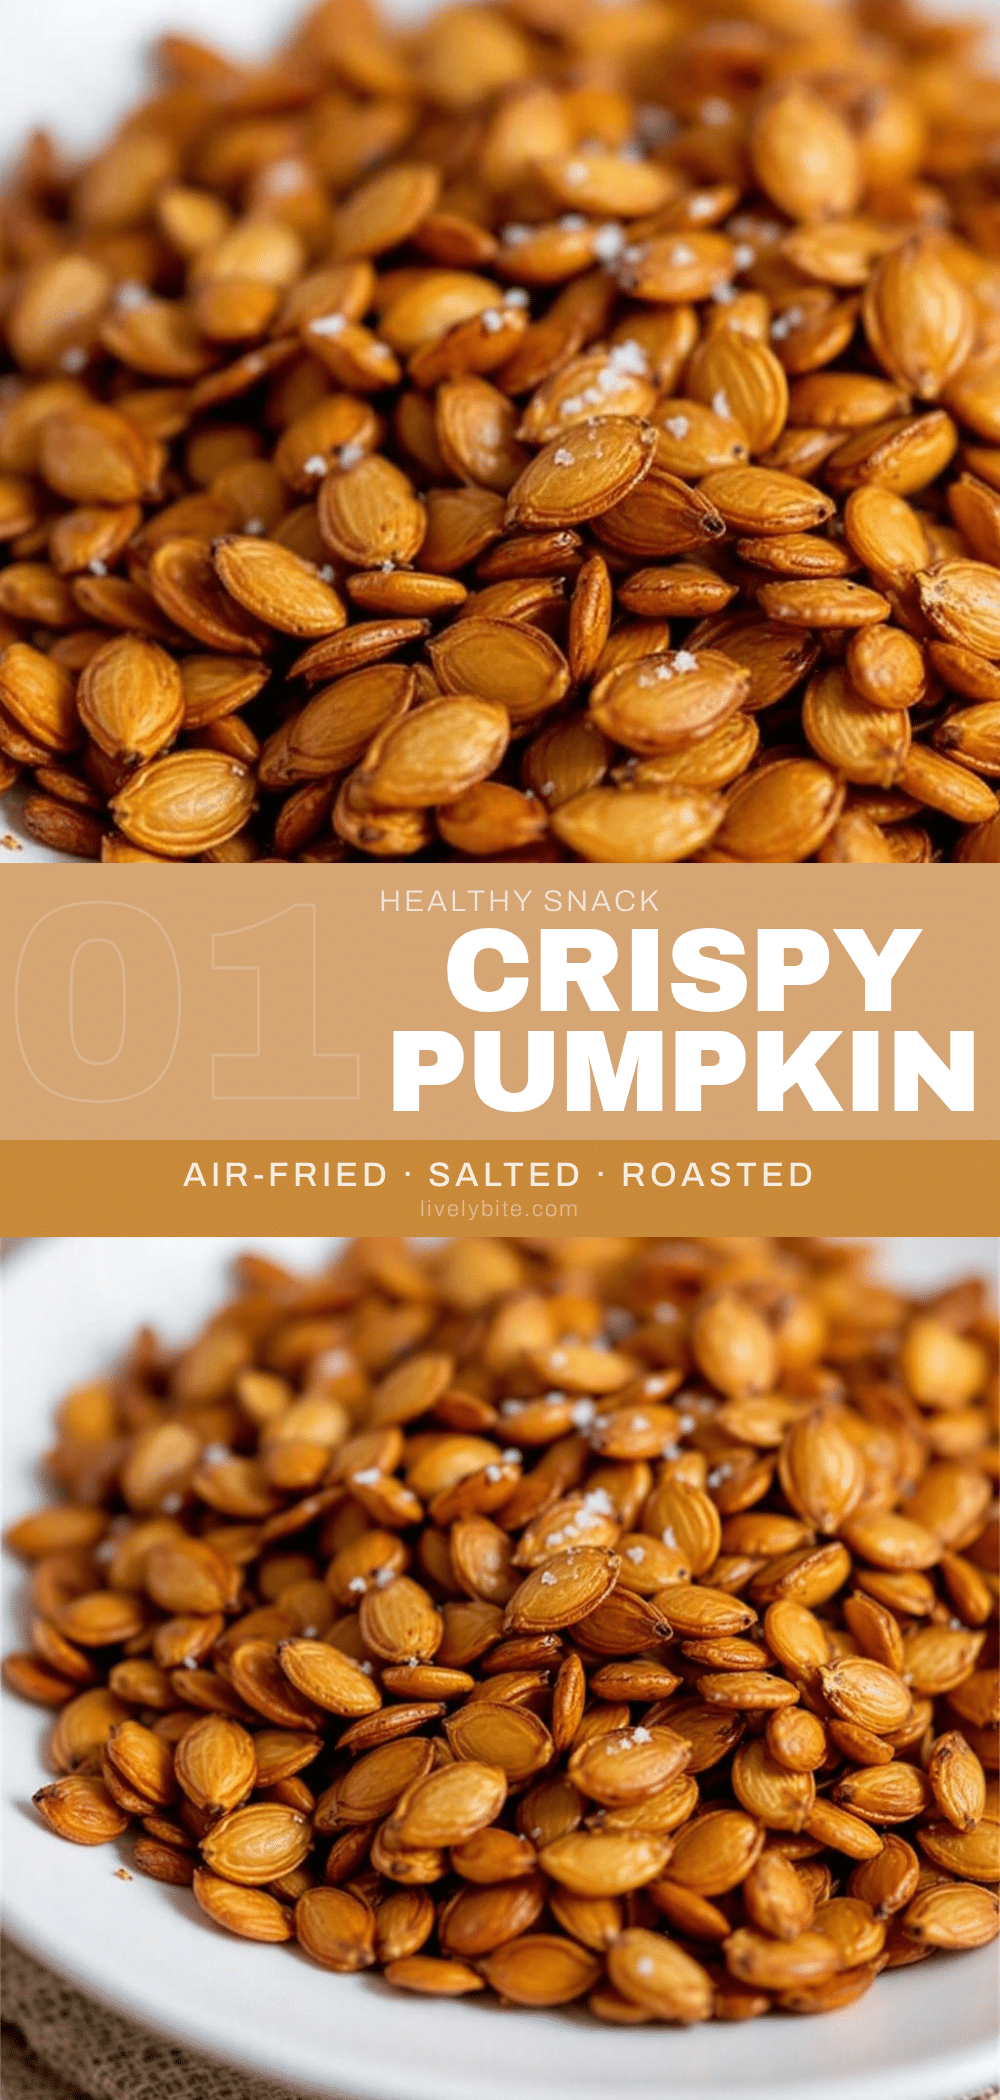
Crispy Air Fryer Roasted Pumpkin Seeds with Sea Salt
These crispy air fryer roasted pumpkin seeds are a quick, healthy, and savory snack made with simple ingredients. They offer a perfect crunch and nutty flavor, making them an ideal alternative to store-bought chips.
- Prep Time: 15 minutes
- Cook Time: 10 minutes
- Total Time: 25 minutes
- Yield: 1 serving 1x
- Category: Snack
- Cuisine: American
Ingredients
- 1 cup raw, shelled pumpkin seeds
- 1 tablespoon extra virgin olive oil
- ½ teaspoon flaky sea salt
- A pinch of freshly cracked black pepper
Instructions
- Clean fresh pumpkin seeds by soaking them in warm water to remove pulp, then pat them completely dry with paper towels or a clean kitchen towel.
- Place the dried seeds in a mixing bowl and toss with olive oil until lightly coated.
- Add black pepper and half of the sea salt to the bowl, tossing again to distribute seasoning evenly.
- Preheat air fryer to 350°F (175°C).
- Spread the seeds in a single layer in the air fryer basket, ensuring they are not overcrowded.
- Cook for 10 minutes, shaking the basket vigorously at the 5-minute mark to ensure even cooking.
- Check for doneness; seeds should be golden brown and crispy. If needed, cook for an additional 2-3 minutes.
- Remove from air fryer and immediately sprinkle with the remaining sea salt while warm.
- Let cool completely on a plate or baking sheet before storing or serving.
Notes
Ensure seeds are thoroughly dried before cooking to achieve maximum crunch. Do not overcrowd the air fryer basket; cook in batches if necessary. Add final salt after cooking to prevent moisture draw-out. Seeds will continue to crisp as they cool.
Nutrition
- Serving Size: 1 cup (approx. 1 oz)
- Calories: 150
- Sodium: 150
- Fat: 12
- Saturated Fat: 2
- Carbohydrates: 2
- Fiber: 2
- Protein: 5
Keywords: pumpkin seeds, air fryer recipes, healthy snacks, roasted pumpkin seeds, gluten-free snack, vegan snack, autumn recipes, zero waste cooking


