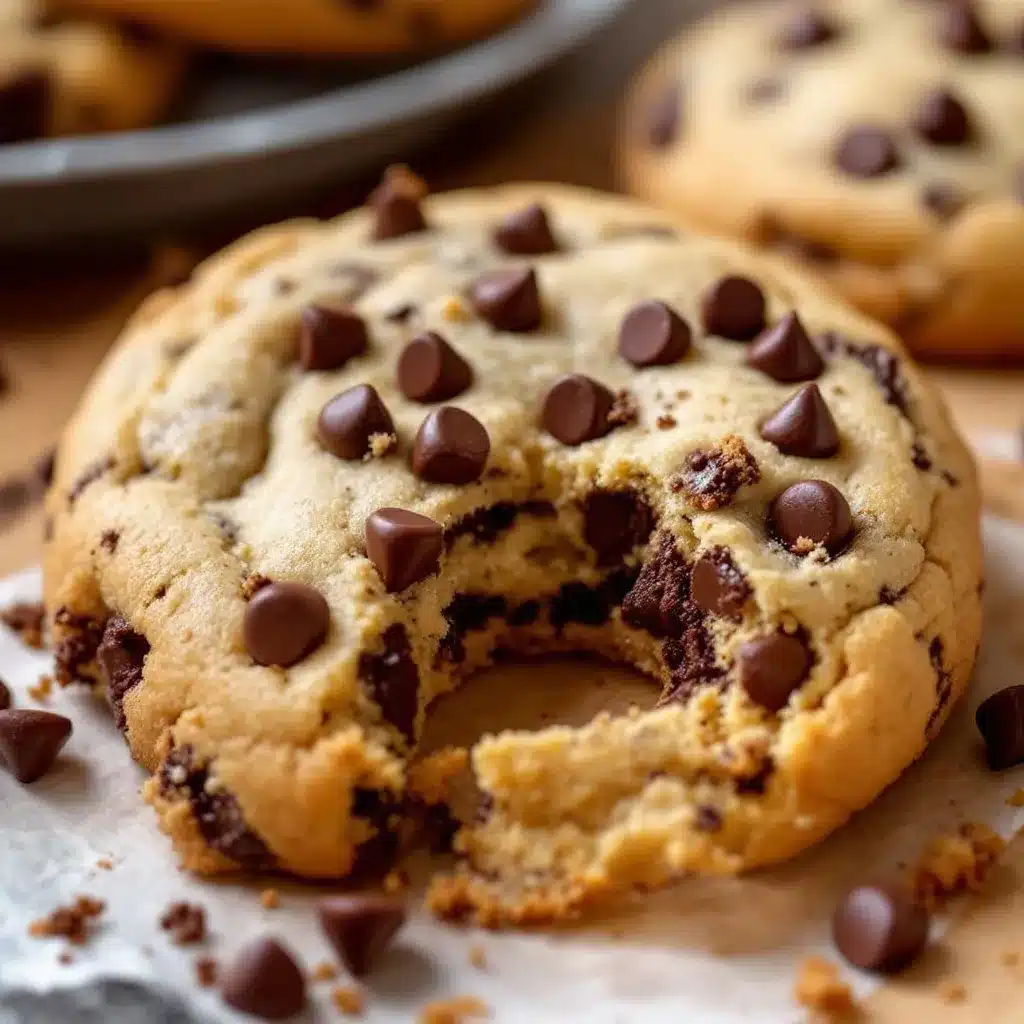
By the fourth batch in three days, I finally stopped creaming the butter and sugar by hand—and that, honestly, changed everything. My kitchen counter looked like a flour bomb had gone off, there were chocolate smudges on the fridge handle, and I was pretty sure I had granulated sugar in my hair. But I was on a mission. That specific bakery-style cookie—the one with the crackly top, the soft center that bends without breaking, and those pools of melted chocolate that stay liquid for way too long—had been living in my head rent-free. Every other recipe I tried got me close, but not close enough. Some spread into flat, greasy discs. Others came out cakey, which is fine for a different mood, but not what I was after. I wanted that specific chew. The kind that makes you close your eyes for a second. So I kept tweaking, kept baking, kept taking notes like a mad scientist. And on that fourth batch, with a slightly chilled dough, a precise ratio of brown to white sugar, and a folding technique I kind of figured out by accident, it finally happened. The crackle. The bend. The puddle of chocolate. I actually texted a photo to my mom at 10 PM. She didn’t reply, but I knew. These were the ones.
Why You’ll Love This Recipe
Look, I’ve tested a lot of cookie recipes. Some from famous chefs, some from the back of a chocolate chip bag, some from that one aunt who swears hers are the best (they weren’t). This one is different because it’s built on a specific, non-negotiable technique that delivers that bakery texture every single time.
- Soft & Chewy Perfection: The secret is all in the ratio of melted butter to brown sugar, plus a short chill time. You get a cookie that’s sturdy enough to hold a handful of chips but soft enough to bend without crumbling.
- Simple Pantry Ingredients: No weird flours, no specialty fats. You probably have everything you need right now—butter, sugar, eggs, flour, and a bag of good chocolate chips.
- Foolproof for Bakers of Any Level: I’ve made these with a stand mixer, a hand mixer, and even a whisk and a strong arm. They work every time as long as you follow the chill step.
- Perfect for Any Occasion: Weekend baking project, last-minute potluck contribution, or a Tuesday night treat. These cookies don’t judge.
- Better Than the Bakery (Honestly): They stay soft for days, which is more than I can say for the $4 cookie from the corner shop.
This isn’t just another chocolate chip cookie recipe. It’s the one that made me stop looking. The texture is that specific kind of addictive—crispy at the very edges, soft in the middle, and full of melty chocolate in every bite.
What Ingredients You Will Need
This recipe relies on a handful of simple, high-quality ingredients. The magic isn’t in a secret ingredient—it’s in how you handle them. Here’s what you’ll need and why each one matters.
- 2 ¼ cups (280g) all-purpose flour: Spoon and level your flour. Scooping directly from the bag packs in too much flour, which leads to dry, crumbly cookies.
- 1 teaspoon baking soda: This gives the cookies their spread and helps them brown. Make sure it’s fresh—test it by dropping a little into vinegar; it should fizz.
- 1 teaspoon salt: Don’t skip this. Salt balances the sweetness and deepens the chocolate flavor. I use fine sea salt.
- 1 cup (226g) unsalted butter, melted and slightly cooled: Melted butter is the key to that chewy texture. It eliminates air pockets that make cookies cakey. Let it cool for 5 minutes after melting so it doesn’t cook the eggs.
- 1 cup (200g) packed light brown sugar: Brown sugar is non-negotiable for chewiness. It has more moisture and molasses than white sugar, which keeps the cookies soft. Pack it firmly into the measuring cup.
- ½ cup (100g) granulated sugar: This helps the cookies spread and creates those beautiful crackly tops.
- 2 large eggs, room temperature: Cold eggs will seize the melted butter. Leave them on the counter for 30 minutes, or place them in a bowl of warm water for 5 minutes.
- 2 teaspoons vanilla extract: Use real vanilla, not imitation. It rounds out the flavor beautifully.
- 2 cups (340g) semisweet chocolate chips: I prefer Ghirardelli or Guittard for the best melt and flavor. You can also chop a high-quality chocolate bar for those flat, melty pools.
For a fun twist on a classic dessert, you might also enjoy this creamy vegan chocolate avocado pudding when you need a quick, no-bake chocolate fix.
Equipment Needed
You don’t need a fancy bakery setup for these cookies. Here’s what you’ll actually use:
- Large mixing bowls (2): One for the dry ingredients, one for the wet ingredients.
- Whisk: For mixing the dry ingredients and for whisking the eggs into the sugar mixture.
- Rubber spatula: This is better than a wooden spoon for folding in the chocolate chips without overmixing.
- Cookie scoop (1.5-tablespoon size): This ensures uniform cookies that bake evenly. A 2-tablespoon scoop works too, just add a minute to the bake time.
- Baking sheets (2): Light-colored, rimmed baking sheets are best. Dark sheets can cause the bottoms to burn.
- Parchment paper or silicone baking mats: Parchment paper is my go-to for the crispiest edges.
- Cooling rack: Essential for stopping the carryover cooking process so your cookies don’t over-bake.
If you don’t have a stand mixer, a hand mixer or even a strong whisk and some elbow grease will work just fine. I’ve made these with all three, and the texture is consistent as long as you don’t overmix the flour.
Preparation Method
This method is broken down into simple steps. Take your time, especially with the chilling step—it’s the secret to that bakery-style texture.
- Whisk the dry ingredients. In a medium bowl, whisk together the 2 ¼ cups of flour, 1 teaspoon of baking soda, and 1 teaspoon of salt. Set this aside.
- Combine the melted butter and sugars. In a large bowl, whisk the melted (and slightly cooled) butter with the 1 cup of brown sugar and ½ cup of granulated sugar. Whisk until it looks like wet sand and there are no lumps of brown sugar. This takes about 1 minute.
- Add the eggs and vanilla. Whisk in the 2 room-temperature eggs, one at a time, until each is fully incorporated. Then add the 2 teaspoons of vanilla extract. The mixture should look smooth, glossy, and slightly lighter in color. If it looks separated or greasy, your butter was too hot.
- Fold in the dry ingredients. Pour the dry ingredients into the wet mixture. Use your rubber spatula to fold gently. Stop folding as soon as you can’t see any more white streaks of flour. Overmixing at this stage develops gluten, which makes tough cookies.
- Fold in the chocolate chips. Add the 2 cups of chocolate chips and fold them in with just a few turns of the spatula. Reserve about ¼ cup of chips to press into the tops of the dough balls later for that bakery look.
- Chill the dough. This step is crucial. Cover the bowl with plastic wrap and refrigerate for at least 30 minutes, or up to 72 hours. Chilling solidifies the fat, which prevents the cookies from spreading too much in the oven. It also deepens the flavor as the ingredients meld. I’ve found that 1 hour is the sweet spot for texture and flavor.
- Preheat the oven. About 15 minutes before you’re ready to bake, preheat your oven to 375°F (190°C). Line two baking sheets with parchment paper.
- Scoop the dough. Use your cookie scoop to portion the dough into balls, about 1.5 tablespoons each. Place them 3 inches apart on the prepared baking sheets. Press a few of the reserved chocolate chips into the tops of each dough ball.
- Bake. Bake one sheet at a time for 10-12 minutes. The cookies are done when the edges are golden brown and the centers look slightly puffy and underdone. They will look a little soft in the middle—that’s exactly what you want. The carryover cooking will finish them on the baking sheet.
- Cool on the baking sheet. Let the cookies cool on the hot baking sheet for 5 minutes. This is non-negotiable. It allows the centers to set without over-baking. Then, transfer them to a wire rack to cool completely.
If you love a good sheet pan recipe for busy weeknights, you might want to try this easy lemon herb salmon sheet pan dinner for a savory meal that’s just as satisfying.
Cooking Tips & Techniques
Over the years, I’ve learned a few things the hard way. Here’s what I wish I knew from the start.
The biggest mistake I made was skipping the chill. The first few times I made these, I was impatient. I wanted cookies *now*. The dough went straight from the bowl to the oven, and the result was a flat, greasy pancake. The chill time isn’t just for convenience—it’s a structural requirement. It allows the flour to fully hydrate and the butter to firm up, which controls spread and creates that thick, chewy center.
Another common issue is overbaking. I’ve pulled cookies out of the oven that looked alarmingly soft, almost raw in the center. But that’s the goal. They continue to bake on the hot sheet for those 5 minutes. If you wait until they look fully set in the oven, they will be dry and crunchy by the time they cool. Trust the process and pull them early.
Use a light-colored baking sheet. I learned this after burning the bottoms of three consecutive batches. Dark, non-stick sheets absorb more heat and can cause the bottoms to darken too quickly while the centers remain underdone. A simple, light-colored aluminum sheet gives you a more even bake.
For the most consistent results, weigh your flour. I know it’s an extra step, but flour volume can vary wildly depending on how you scoop it. A kitchen scale is a game-changer for baking. If you don’t have one, fluff your flour with a spoon, then spoon it into your measuring cup and level it off with a knife.
Variations & Adaptations
This base recipe is incredibly versatile. Here are a few ways I’ve adapted it over the years.
- Dark Chocolate & Sea Salt: Swap the semisweet chips for dark chocolate chunks (60-70% cacao). After baking, sprinkle a tiny pinch of flaky sea salt (like Maldon) on each warm cookie. The salt cuts the sweetness and makes the chocolate taste even richer.
- Gluten-Free Version: Substitute the all-purpose flour with a 1:1 gluten-free baking flour blend that contains xanthan gum. I’ve used Bob’s Red Mill with great results. The texture will be slightly more tender, but the chewiness is still there. Do not skip the chill step for this version.
- Double Chocolate Chip: Reduce the flour to 2 cups (250g) and add ½ cup (45g) of unsweetened cocoa powder. Whisk it in with the other dry ingredients. The cookies will be darker, richer, and intensely chocolatey. Use white chocolate chips for a beautiful contrast.
- Nutty Crunch: Toast ¾ cup of chopped pecans or walnuts in a dry pan over medium heat for 3-4 minutes until fragrant. Let them cool, then fold them in along with the chocolate chips. The toasted nuts add a warm, savory note that balances the sweetness.
- M&M Cookies: Replace the chocolate chips with 1 ½ cups of M&Ms. This is a favorite for kids’ parties. Press a few extra M&Ms into the tops of the dough balls before baking for that colorful, bakery-style look.
Serving & Storage Suggestions
These cookies are best enjoyed warm, about 10 minutes after they come off the cooling rack. The chocolate is still molten, and the edges have that perfect snap.
For serving, I love pairing them with a tall glass of cold milk or a strong cup of black coffee. They’re also fantastic crumbled over a bowl of vanilla ice cream for an impromptu sundae. If you’re feeling fancy, sandwich two cookies with a scoop of vanilla bean ice cream for the ultimate ice cream sandwich.
For storage, keep the cookies in an airtight container at room temperature. They will stay soft and chewy for up to 5 days. I like to place a slice of plain white bread in the container with the cookies—the bread absorbs excess air and releases moisture, keeping the cookies soft. Replace the bread slice every other day.
To freeze the baked cookies, let them cool completely, then place them in a single layer in a freezer-safe bag or container. They will keep for up to 3 months. Thaw at room temperature for about 15 minutes, or pop them in a 300°F (150°C) oven for 5 minutes to re-crisp the edges.
To freeze the raw dough, scoop the dough balls onto a parchment-lined baking sheet and freeze until solid (about 1 hour). Transfer the frozen dough balls to a freezer bag. You can bake them directly from frozen—just add 2-3 minutes to the bake time. This is my favorite trick for having fresh cookies on demand.
For a refreshing drink to go alongside these cookies, try this refreshing cucumber mint green tea cooler—it’s the perfect palate cleanser between sweet bites.
Nutritional Information & Benefits
Let’s be real: chocolate chip cookies are a treat, not a health food. But knowing what’s in them helps you enjoy them mindfully. This recipe makes about 36 cookies. Per one cookie, the estimated nutritional values are:
- Calories: 165
- Fat: 9g
- Saturated Fat: 5g
- Carbohydrates: 21g
- Sugar: 14g
- Protein: 2g
- Fiber: 1g
Dietary Considerations: This recipe contains gluten, dairy, and eggs. For a gluten-free option, use a 1:1 gluten-free flour blend. For a dairy-free option, use vegan butter and dairy-free chocolate chips. I have not tested an egg-free version successfully.
Potential Allergens: Wheat, dairy, eggs. The chocolate may contain soy lecithin or traces of nuts, depending on the brand.
Health Benefits: Dark chocolate (if you use dark chocolate chips) contains antioxidants called flavonoids. A single cookie is a reasonable portion, making it easy to enjoy without overindulging. I like to think of these as a “controlled indulgence”—you get all the satisfaction of a bakery cookie without the oversized portion.
Conclusion
These soft, chewy, bakery-style chocolate chip cookies are the result of a lot of trial and error, a few burnt batches, and one very messy kitchen. But that fourth batch—the one that finally worked—made every sticky counter and late-night bake session worth it. The texture is exactly what I was chasing: edges that give a little crunch, a center that bends without breaking, and chocolate in every single bite.
I really hope you give these a try. Don’t be afraid to tweak them to your liking—add more salt, swap the chips for chunks, or press a few extra chips on top for that picture-perfect look. Baking should feel fun, not stressful.
If you make them, I’d love to hear about it. Leave a comment below with how they turned out, or tag me in your photos. And if you have a favorite variation, please share it—I’m always looking for new ideas. Until next time, happy baking!
For more delicious recipes, feel free to browse the full recipe collection for more inspiration.
Frequently Asked Questions
Why did my cookies turn out flat?
Flat cookies are usually the result of butter that was too warm or dough that wasn’t chilled. Make sure your melted butter is only slightly warm, not hot, and always chill the dough for at least 30 minutes. Also, check that your baking soda is fresh.
Can I use margarine instead of butter?
I don’t recommend it. Margarine has a higher water content than butter, which will make your cookies spread more and become greasy. Stick with unsalted butter for the best texture and flavor.
How do I make my cookies softer?
For softer cookies, use more brown sugar than white sugar (this recipe already does that), and slightly underbake them. Pull them out of the oven when the centers still look puffy and slightly underdone. The carryover cooking will finish them perfectly.
Can I use bread flour instead of all-purpose flour?
Yes, you can. Bread flour has a higher protein content, which creates more gluten and results in a chewier, slightly denser cookie. If you want an even chewier texture, substitute half the all-purpose flour with bread flour.
How long can I keep the dough in the refrigerator?
You can chill the dough for up to 72 hours. The longer it chills, the more the flavors develop, and the less the cookies will spread. If chilling for more than 24 hours, cover the bowl tightly with plastic wrap to prevent the dough from drying out.
Pin This Recipe!

The Best Soft Chewy Bakery-Style Chocolate Chip Cookies

These soft, chewy, bakery-style chocolate chip cookies have crackly tops, soft centers that bend without breaking, and pools of melted chocolate in every bite. The secret is in the ratio of melted butter to brown sugar, plus a short chill time.
- Prep Time: 15 minutes
- Cook Time: 12 minutes
- Total Time: 1 hour 27 minutes (including 1 hour chill time)
- Yield: 36 cookies 1x
- Category: Dessert
- Cuisine: American
Ingredients
- 2 ¼ cups (280g) all-purpose flour
- 1 teaspoon baking soda
- 1 teaspoon salt
- 1 cup (226g) unsalted butter, melted and slightly cooled
- 1 cup (200g) packed light brown sugar
- ½ cup (100g) granulated sugar
- 2 large eggs, room temperature
- 2 teaspoons vanilla extract
- 2 cups (340g) semisweet chocolate chips
Instructions
- Whisk the dry ingredients. In a medium bowl, whisk together the 2 ¼ cups of flour, 1 teaspoon of baking soda, and 1 teaspoon of salt. Set this aside.
- Combine the melted butter and sugars. In a large bowl, whisk the melted (and slightly cooled) butter with the 1 cup of brown sugar and ½ cup of granulated sugar. Whisk until it looks like wet sand and there are no lumps of brown sugar. This takes about 1 minute.
- Add the eggs and vanilla. Whisk in the 2 room-temperature eggs, one at a time, until each is fully incorporated. Then add the 2 teaspoons of vanilla extract. The mixture should look smooth, glossy, and slightly lighter in color. If it looks separated or greasy, your butter was too hot.
- Fold in the dry ingredients. Pour the dry ingredients into the wet mixture. Use your rubber spatula to fold gently. Stop folding as soon as you can’t see any more white streaks of flour. Overmixing at this stage develops gluten, which makes tough cookies.
- Fold in the chocolate chips. Add the 2 cups of chocolate chips and fold them in with just a few turns of the spatula. Reserve about ¼ cup of chips to press into the tops of the dough balls later for that bakery look.
- Chill the dough. This step is crucial. Cover the bowl with plastic wrap and refrigerate for at least 30 minutes, or up to 72 hours. Chilling solidifies the fat, which prevents the cookies from spreading too much in the oven. It also deepens the flavor as the ingredients meld. I’ve found that 1 hour is the sweet spot for texture and flavor.
- Preheat the oven. About 15 minutes before you’re ready to bake, preheat your oven to 375°F (190°C). Line two baking sheets with parchment paper.
- Scoop the dough. Use your cookie scoop to portion the dough into balls, about 1.5 tablespoons each. Place them 3 inches apart on the prepared baking sheets. Press a few of the reserved chocolate chips into the tops of each dough ball.
- Bake. Bake one sheet at a time for 10-12 minutes. The cookies are done when the edges are golden brown and the centers look slightly puffy and underdone. They will look a little soft in the middle—that’s exactly what you want. The carryover cooking will finish them on the baking sheet.
- Cool on the baking sheet. Let the cookies cool on the hot baking sheet for 5 minutes. This is non-negotiable. It allows the centers to set without over-baking. Then, transfer them to a wire rack to cool completely.
Notes
Chilling the dough is crucial for preventing spread and developing flavor. Use a light-colored baking sheet for even baking. Weigh your flour for consistent results. For softer cookies, slightly underbake and let carryover cooking finish them.
Nutrition
- Serving Size: 1 cookie
- Calories: 165
- Sugar: 14
- Fat: 9
- Saturated Fat: 5
- Carbohydrates: 21
- Fiber: 1
- Protein: 2
Keywords: chocolate chip cookies, soft chewy cookies, bakery-style cookies, easy cookie recipe, homemade cookies


