The faint crackle of a sugar-crusted top giving way to something impossibly soft underneath — that’s the whole reason I make these. Everything else — the pumpkin spice smell filling the kitchen, the way they disappear from the plate — is just a bonus. I first made them because I wanted a fall dessert that didn’t require pulling out the mixer, chilling dough, or waiting for butter to get to room temperature. You know, the kind of recipe you can start when the craving hits and eat before the hour’s up.
These aren’t cookies, exactly. They’re not quite cake, either. They land somewhere in that magical middle ground — dense and fudgy like a blondie but with that signature snickerdoodle tang from cream of tartar and a generous roll in cinnamon sugar. And the pumpkin? It keeps everything ridiculously moist without making it taste like a loaf of pumpkin bread. Honestly, I was skeptical the first time I tried the combo. Pumpkin and snickerdoodle felt like two different holiday parties crashing into each other. But one bite in, and I was sold.
These Perfect Pumpkin Snickerdoodle Blondies have become my go-to for everything from last-minute book club treats to “I need something for the bake sale tomorrow” emergencies. They come together in one bowl, bake in about 25 minutes, and somehow taste better the next day — if they last that long. There’s something about that crackly cinnamon top meeting the soft, pumpkin-spiced center that just works. It’s the kind of dessert you don’t overthink. You just make it, eat it, and probably make it again the same week.
Why You’ll Love This Recipe
I’ve tested this recipe more times than I care to admit — some batches were too cakey, others too flat, a few just straight-up weird. But this version? It’s the one. Here’s why I keep coming back to it:
- Quick & Easy: From start to finish, you’re looking at about 30 minutes. No stand mixer needed, no weird techniques. Just a bowl, a spatula, and an oven.
- Simple Ingredients: You probably have most of this in your pantry right now. The only “special” thing is cream of tartar, and honestly, it’s worth keeping around for the tang it brings.
- Perfect for Fall Gatherings: These blondies show up at every Halloween party, Friendsgiving, and cozy movie night I host. They’re not fussy, but they feel special.
- Crowd-Pleaser: Kids love the cinnamon-sugar top. Adults love that they’re not overly sweet. Everyone loves that they’re gone in ten minutes.
- Unbelievably Delicious: The texture is what gets people. That crackly top, the soft center, the little bit of chew around the edges. It’s comfort food in bar form.
What makes these different from other pumpkin desserts is the balance. So many pumpkin recipes end up tasting like spiced mush or dry cardboard. These blondies walk the line perfectly — moist but structured, spiced but not overpowering, sweet but with that tangy snickerdoodle finish. I’ve brought them to work, to family dinners, to neighbors I barely know, and I’ve never brought a single one home. That’s not a brag. That’s just the truth.
What Ingredients You Will Need
This recipe relies on a handful of pantry staples and a few seasonal favorites to create something that tastes way more complicated than it is. Here’s what you’ll need and why each one matters:
- Unsalted butter (½ cup, melted and slightly cooled): Butter gives these blondies their rich flavor and soft texture. I use unsalted so I can control the salt level. Melted butter means no waiting for it to soften — just melt and go.
- Light brown sugar (1 cup, packed): Brown sugar brings moisture and that deep, almost caramel-like sweetness that pairs perfectly with pumpkin. Don’t skip it — white sugar alone won’t give you the same chew.
- Granulated sugar (¼ cup): A little white sugar helps with structure and keeps the blondies from being too dense.
- Pumpkin purée (¾ cup): Not pumpkin pie filling — make sure you grab 100% pumpkin purée. I like Libby’s, but any brand works. It adds moisture, color, and a subtle earthy sweetness.
- Large egg (1, room temperature): The egg binds everything together and gives the blondies structure. Room temperature mixes more evenly into the melted butter.
- Vanilla extract (1 teaspoon): A good vanilla rounds out the spices and adds warmth. Use pure vanilla extract if you have it.
- All-purpose flour (1½ cups): Standard AP flour works perfectly here. Spoon and level it — don’t scoop straight from the bag or you’ll end up with dry blondies.
- Cream of tartar (1 teaspoon): This is the secret to the snickerdoodle tang. It gives the blondies that signature slightly sour, slightly sweet flavor that makes snickerdoodles so addictive.
- Baking powder (½ teaspoon): A little lift so the blondies aren’t flat as a pancake.
- Baking soda (¼ teaspoon): Helps with browning and texture.
- Salt (½ teaspoon): Don’t skip it. Salt balances the sweetness and makes the spices pop.
- Pumpkin pie spice (1½ teaspoons): You can use store-bought or make your own with cinnamon, nutmeg, ginger, and cloves. It’s the backbone of the fall flavor.
- Cinnamon (½ teaspoon, plus more for topping): Cinnamon and pumpkin are best friends. You’ll use some in the batter and more in the sugar coating.
- For the Cinnamon Sugar Topping:
- Granulated sugar (2 tablespoons): Mixed with cinnamon and sprinkled on top before baking. That’s what creates the crackly, crunchy crust.
- Cinnamon (1 teaspoon): For that classic snickerdoodle look and flavor.
Equipment Needed
You don’t need a fancy kitchen to make these. Here’s what I use:
- 8×8-inch baking pan: This is the perfect size for thick, fudgy blondies. A 9×9 will work, but they’ll be thinner and bake faster.
- Mixing bowls: One large bowl is all you need. Less dishes, more happiness.
- Whisk and spatula: A whisk for the wet ingredients, a spatula for folding in the dry stuff.
- Parchment paper: Line your pan with it, leaving some overhang. This makes lifting the blondies out so much easier — no scraping or fighting with stuck corners.
- Measuring cups and spoons: For accuracy. Baking is a science, even when it feels casual.
- Cooling rack: Helps the blondies cool evenly so they set properly before cutting.
If you don’t have an 8×8 pan, you can use a 9×9 — just check them a few minutes early. I’ve also made these in a disposable foil pan for potlucks, and they turned out just fine.
Preparation Method
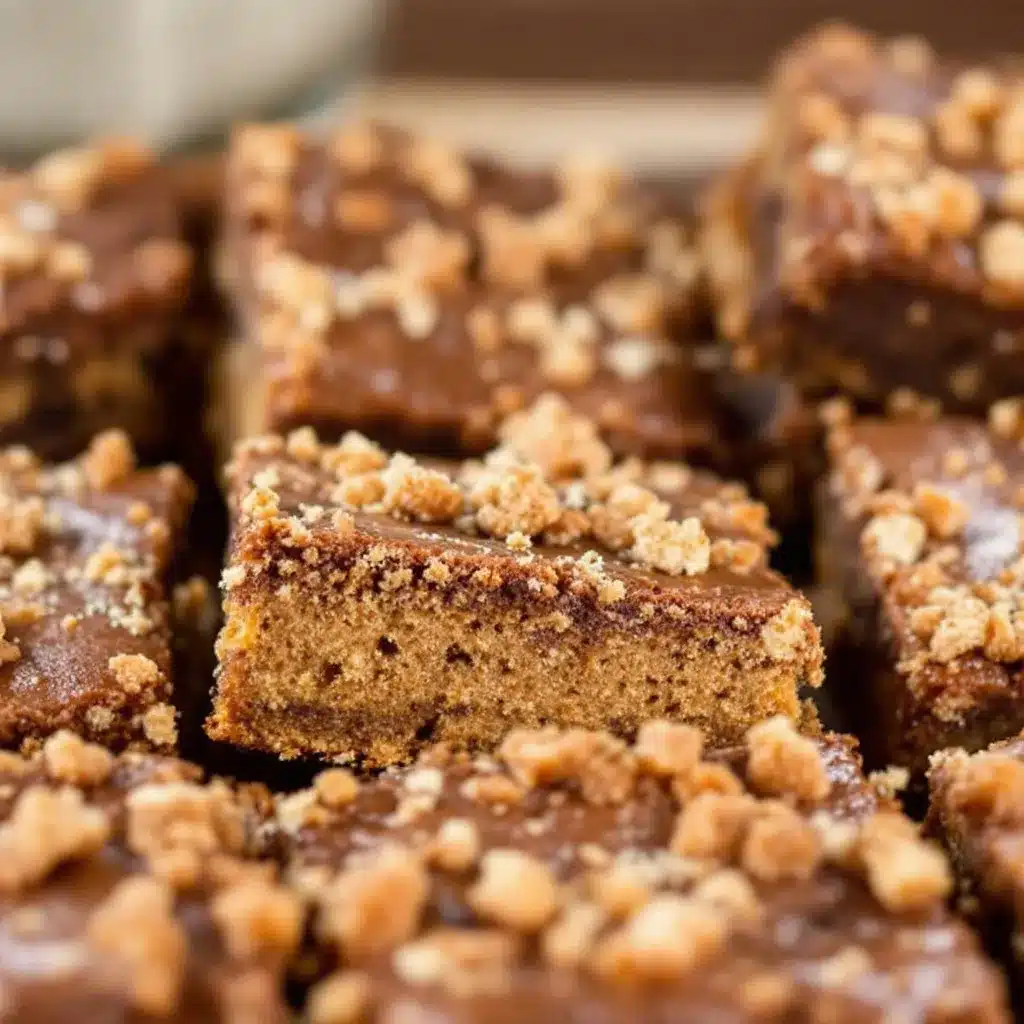
- Preheat your oven to 350°F (175°C). Line an 8×8-inch baking pan with parchment paper, leaving a couple inches of overhang on two sides. This is your lifeline for lifting the blondies out later.
- Melt the butter. In a large microwave-safe bowl, melt ½ cup unsalted butter in 30-second bursts until just melted. Let it cool for a couple minutes — you don’t want it hot enough to cook the egg.
- Mix the wet ingredients. To the melted butter, add 1 cup packed light brown sugar and ¼ cup granulated sugar. Whisk until smooth and combined. It should look like wet sand. Add ¾ cup pumpkin purée, 1 large egg, and 1 teaspoon vanilla extract. Whisk until everything is uniform and glossy.
- Combine the dry ingredients. In a separate bowl, whisk together 1½ cups all-purpose flour, 1 teaspoon cream of tartar, ½ teaspoon baking powder, ¼ teaspoon baking soda, ½ teaspoon salt, 1½ teaspoons pumpkin pie spice, and ½ teaspoon cinnamon. This ensures everything is evenly distributed — no one wants a pocket of baking powder.
- Fold the dry into the wet. Add the dry ingredients to the wet mixture in two additions, folding gently with a spatula after each. Stop as soon as you no longer see streaks of flour. Overmixing will make the blondies tough, and nobody wants tough blondies.
- Make the cinnamon sugar topping. In a small bowl, stir together 2 tablespoons granulated sugar and 1 teaspoon cinnamon.
- Assemble. Spread the batter evenly into your prepared pan. It will be thick — that’s normal. Use the spatula to smooth it into the corners. Sprinkle the cinnamon sugar mixture evenly over the top. Don’t be shy; every bit of that crackly crust is gold.
- Bake. Place the pan on the middle rack and bake for 22-27 minutes. The edges should look set and slightly golden, and the center should still feel soft when you gently press it. A toothpick inserted into the center should come out with a few moist crumbs — not wet batter, but not clean either. That’s the sweet spot.
- Cool completely. Let the blondies cool in the pan on a wire rack for at least 30 minutes. I know it’s hard to wait, but if you cut them too soon, they’ll fall apart. Use the parchment overhang to lift the whole block out, then slice into 9 or 16 squares, depending on how generous you’re feeling.
Cooking Tips & Techniques
I’ve made enough mistakes with these blondies to fill a small notebook. Here’s what I’ve learned so you don’t have to repeat my errors:
- Don’t overmix the batter. I know I said it already, but it’s worth repeating. Overmixing develops gluten, which makes the blondies dense and bread-like instead of tender and fudgy. Fold just until combined and walk away.
- Use room temperature egg. Cold egg can seize up the melted butter, creating a lumpy batter. If you forgot to take it out ahead of time, place the egg in a bowl of warm water for 5 minutes. Problem solved.
- Check for doneness early. Ovens run differently. Mine runs hot, so I start checking at 22 minutes. If the edges are pulling away from the pan and the center is just set, they’re done. Remember, they’ll continue baking in the hot pan as they cool.
- Let them cool completely. This is the hardest part. Warm blondies are tempting, but they’re also fragile. If you cut too soon, you’ll get a gooey mess. Trust the process — the wait is worth it.
- Line your pan properly. Parchment paper overhang is not optional. It makes removal effortless and keeps your pan clean. I learned this the hard way after spending 20 minutes scrubbing a pan.
One time, I forgot the cream of tartar and ended up with pumpkin bars that tasted fine but had zero snickerdoodle personality. They were just… pumpkin. Don’t skip it. That tangy little kick is what makes these blondies memorable.
Variations & Adaptations
This recipe is forgiving, which is one of the reasons I love it. Here are some ways to switch things up:
- Gluten-Free Version: Swap the all-purpose flour with a 1:1 gluten-free baking flour blend. I’ve used Bob’s Red Mill with good results. The texture will be slightly more delicate, but the flavor is spot on.
- Dairy-Free Option: Use a plant-based butter stick (not spreadable margarine) in place of regular butter. Melt and proceed as usual. I’ve done this for a friend with dairy issues, and nobody noticed the difference.
- Add Mix-Ins: Fold in ½ cup white chocolate chips, chopped pecans, or dried cranberries before baking. White chocolate and pumpkin are a dream team. Or go full fall mode with toasted walnuts.
- Extra Spiced: If you like your pumpkin desserts with a kick, add an extra ½ teaspoon of pumpkin pie spice or a pinch of ground cloves. I’ve also added a tiny pinch of black pepper once — weirdly good.
- Make It a Layer Dessert: Cool the blondies completely, then spread a thin layer of cream cheese frosting on top and sprinkle with more cinnamon. It’s over-the-top in the best way.
- Pumpkin-Free Version: Swap the pumpkin purée with sweet potato purée or butternut squash purée. The flavor will shift slightly, but the texture stays the same.
I once tried a version with chocolate chips and a drizzle of caramel sauce on top. It was ridiculous — in the best possible way — and I have no regrets.
Serving & Storage Suggestions
These blondies are wonderful at room temperature, but I also love them slightly warm with a scoop of vanilla ice cream or a drizzle of caramel sauce. They’re perfect for dessert, but I’ve definitely eaten one for breakfast with my coffee, and I’m not sorry about it.
For storage, place the blondies in an airtight container at room temperature. They’ll stay fresh for up to 4 days, though they rarely last that long. If you live in a humid climate, add a paper towel to the container to absorb excess moisture and keep the tops from getting sticky.
You can also freeze these blondies. Wrap individual squares tightly in plastic wrap, then place them in a freezer-safe bag. They’ll keep for up to 3 months. To thaw, just leave one on the counter for about 30 minutes, or microwave for 15 seconds for that fresh-from-the-oven feel.
Here’s a secret: these blondies actually taste better the next day. The flavors meld together overnight, and the texture becomes even more fudgy. So if you can resist eating them all on day one, you’re in for a treat on day two.
Nutritional Information & Benefits
Let’s be real — these are a dessert, not a health food. But they do have a few redeeming qualities. Pumpkin is packed with vitamin A and fiber, and it adds moisture without needing a ton of extra fat. Plus, you get a little calcium and iron from the flour and egg.
Here’s an approximate breakdown per blondie (based on 9 servings):
- Calories: 280
- Fat: 12g
- Carbohydrates: 41g
- Fiber: 2g
- Sugar: 26g
- Protein: 3g
If you’re watching your sugar intake, you can reduce the brown sugar to ¾ cup — the blondies will be slightly less sweet but still delicious. For a lower-fat version, substitute half the butter with unsweetened applesauce. The texture will be a bit cakier, but it works in a pinch.
Conclusion
These Perfect Pumpkin Snickerdoodle Blondies are everything I want in a fall dessert — easy to make, full of warm spices, and impossible to stop eating. They’re the kind of recipe you’ll make once and immediately commit to memory because you know you’ll be making them again and again. Whether you’re bringing them to a party, packing them for a lunchbox surprise, or just treating yourself on a cozy October afternoon, they never disappoint.
I’d love to hear how yours turn out. Did you add mix-ins? Make a gluten-free version? Eat three in one sitting (no judgment here)? Drop a comment below and let me know. And if you’re looking for more easy fall recipes, check out my Easy Slow Cooker Honey Garlic Chicken Meal Prep Bowls for a savory option, or my Refreshing Cucumber Mint Green Tea Cooler for a refreshing drink to balance out all that sweetness.
Happy baking, friends. Your kitchen is about to smell amazing.
Frequently Asked Questions
Can I use pumpkin pie filling instead of pumpkin purée?
No, please don’t. Pumpkin pie filling is pre-sweetened and spiced, which will throw off the sugar and spice balance in this recipe. Stick with 100% pumpkin purée for the best results.
Can I make these ahead of time?
Absolutely. These blondies actually taste even better the next day. Bake them, cool completely, and store in an airtight container at room temperature for up to 4 days. They’re perfect for meal prep or party planning.
Why did my blondies turn out dry?
Most likely, you overbaked them or overmeasured your flour. Make sure you spoon and level your flour — don’t scoop directly from the bag. And pull the blondies out when the center is still slightly soft. They’ll continue baking as they cool.
Can I freeze these blondies?
Yes! Wrap individual squares in plastic wrap, then place them in a freezer-safe bag. They’ll keep for up to 3 months. Thaw at room temperature or microwave for 15 seconds for a warm treat.
Can I skip the cream of tartar?
You can, but you’ll lose that signature snickerdoodle tang. If you don’t have cream of tartar, you can substitute with ½ teaspoon lemon juice or white vinegar added to the wet ingredients. It won’t be exactly the same, but it’ll give you a similar tangy note.
Pin This Recipe!
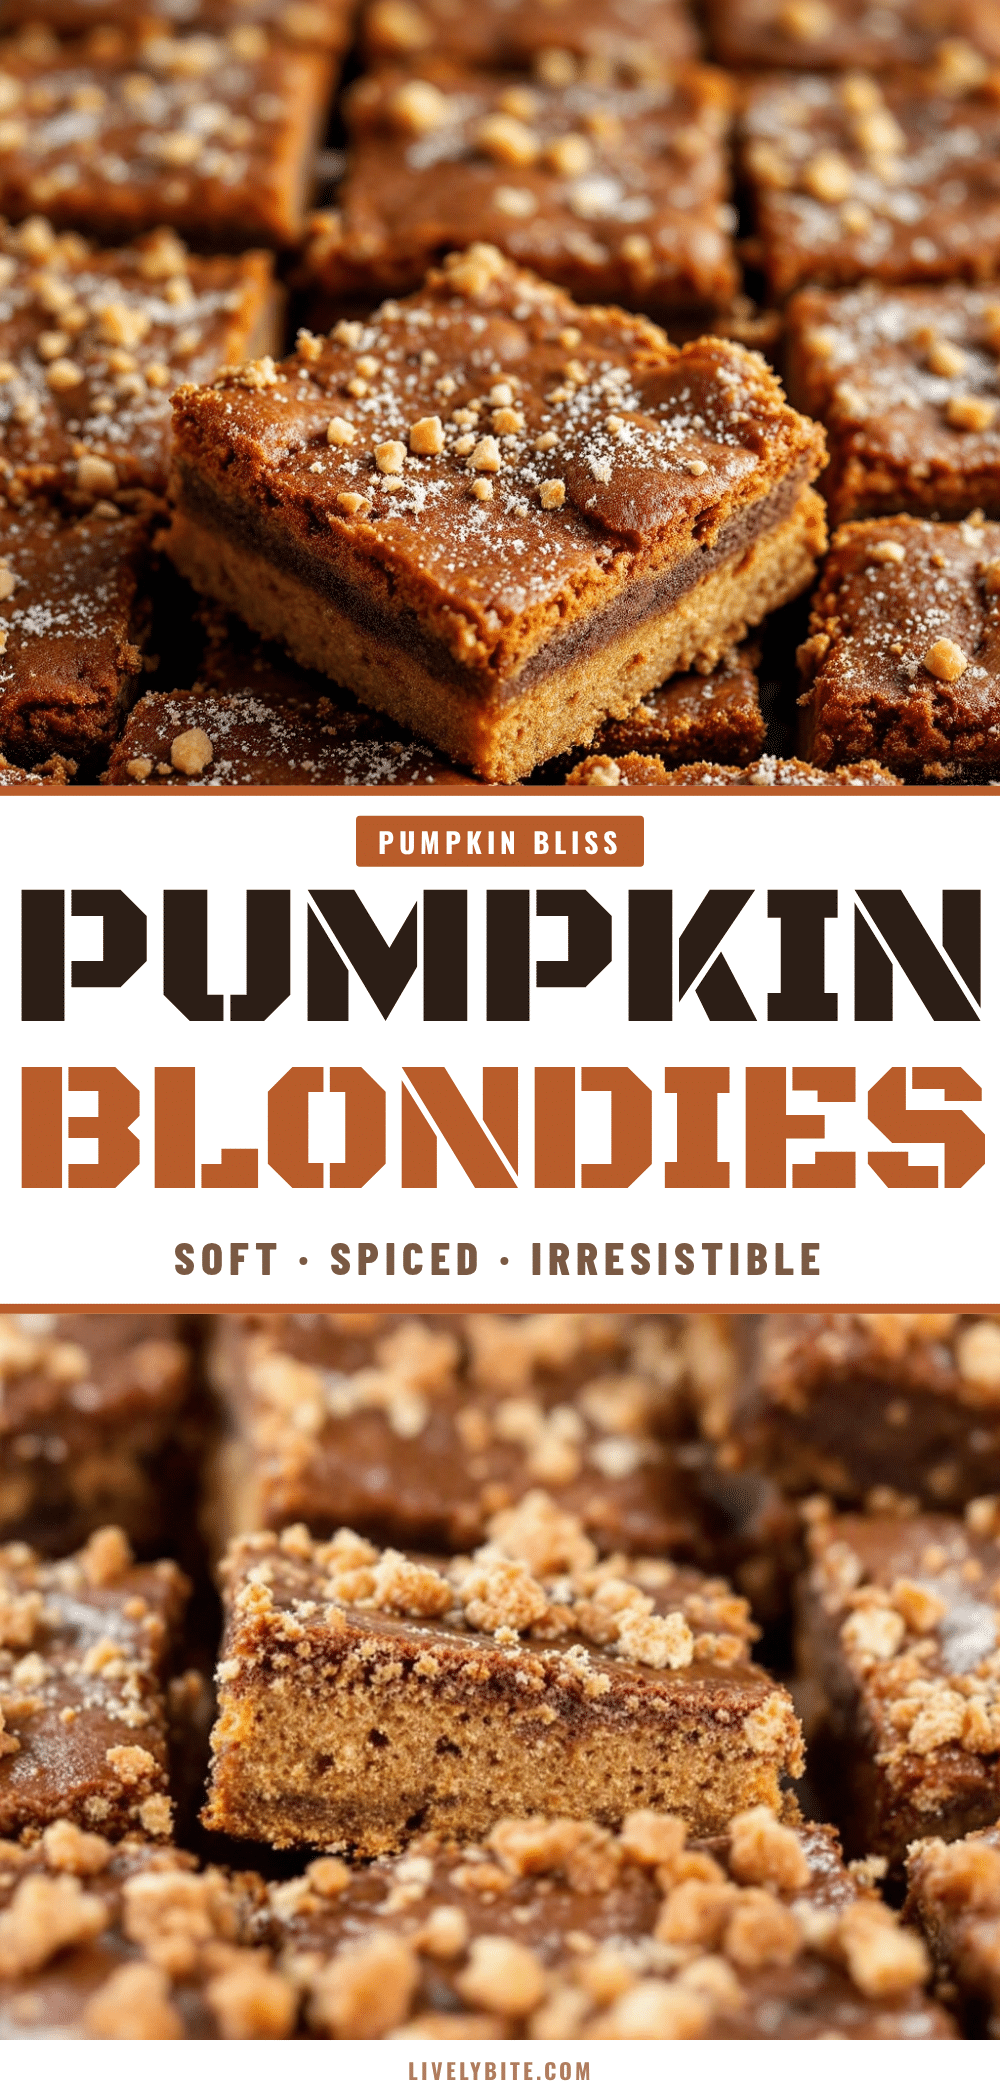
Perfect Pumpkin Snickerdoodle Blondies: Easy 30-Minute Fall Dessert
These Perfect Pumpkin Snickerdoodle Blondies are dense and fudgy like a blondie but with that signature snickerdoodle tang from cream of tartar and a generous roll in cinnamon sugar. They come together in one bowl, bake in about 25 minutes, and taste even better the next day.
- Prep Time: 10 minutes
- Cook Time: 25 minutes
- Total Time: 35 minutes
- Yield: 9 servings 1x
- Category: Dessert
- Cuisine: American
Ingredients
- ½ cup unsalted butter, melted and slightly cooled
- 1 cup light brown sugar, packed
- ¼ cup granulated sugar
- ¾ cup pumpkin purée (100% pumpkin, not pie filling)
- 1 large egg, room temperature
- 1 teaspoon vanilla extract
- 1½ cups all-purpose flour
- 1 teaspoon cream of tartar
- ½ teaspoon baking powder
- ¼ teaspoon baking soda
- ½ teaspoon salt
- 1½ teaspoons pumpkin pie spice
- ½ teaspoon cinnamon
- For the Cinnamon Sugar Topping:
- 2 tablespoons granulated sugar
- 1 teaspoon cinnamon
Instructions
- Preheat your oven to 350°F (175°C). Line an 8×8-inch baking pan with parchment paper, leaving a couple inches of overhang on two sides.
- In a large microwave-safe bowl, melt ½ cup unsalted butter in 30-second bursts until just melted. Let it cool for a couple minutes.
- To the melted butter, add 1 cup packed light brown sugar and ¼ cup granulated sugar. Whisk until smooth and combined. Add ¾ cup pumpkin purée, 1 large egg, and 1 teaspoon vanilla extract. Whisk until everything is uniform and glossy.
- In a separate bowl, whisk together 1½ cups all-purpose flour, 1 teaspoon cream of tartar, ½ teaspoon baking powder, ¼ teaspoon baking soda, ½ teaspoon salt, 1½ teaspoons pumpkin pie spice, and ½ teaspoon cinnamon.
- Add the dry ingredients to the wet mixture in two additions, folding gently with a spatula after each. Stop as soon as you no longer see streaks of flour.
- In a small bowl, stir together 2 tablespoons granulated sugar and 1 teaspoon cinnamon for the topping.
- Spread the batter evenly into your prepared pan. Sprinkle the cinnamon sugar mixture evenly over the top.
- Bake on the middle rack for 22-27 minutes. The edges should look set and slightly golden, and the center should still feel soft when gently pressed. A toothpick inserted into the center should come out with a few moist crumbs.
- Let the blondies cool in the pan on a wire rack for at least 30 minutes. Use the parchment overhang to lift the whole block out, then slice into 9 or 16 squares.
Notes
Don’t overmix the batter. Use room temperature egg. Check for doneness early. Let them cool completely before cutting. Line your pan with parchment paper for easy removal. These blondies taste even better the next day.
Nutrition
- Serving Size: 1 blondie
- Calories: 280
- Sugar: 26
- Sodium: 200
- Fat: 12
- Saturated Fat: 7
- Carbohydrates: 41
- Fiber: 2
- Protein: 3
Keywords: pumpkin snickerdoodle blondies, fall dessert, easy pumpkin recipe, one bowl blondies, 30 minute dessert


