“Wait — you can actually make a pumpkin roll that doesn’t crack?” That’s what my sister-in-law texted me last Thanksgiving, and honestly, I hadn’t thought about pumpkin rolls the same way since.
She’d tried three different recipes over the years, and every single one ended up looking more like a puzzle than a dessert. Cracks running through the cake, filling oozing out the sides, frustration levels reaching an all-time high. I knew exactly what she meant because I’d been there too. My first pumpkin roll looked like a geological disaster.
But here’s the thing — I’m stubborn when it comes to baking. I spent an embarrassing number of weekends testing, tweaking, and yes, failing, until I figured out what actually works. The secret isn’t some fancy technique or expensive ingredient. It’s about understanding how the cake behaves and working with it, not against it.
This Perfect No-Crack Pumpkin Roll with Cream Cheese Filling is the result of all those trials. It’s the recipe I now bring to every fall gathering, the one people ask for year after year.
Why You’ll Love This Recipe
Let me tell you why this pumpkin roll stands out from the dozens of versions floating around the internet.
- No Cracks, No Stress: The rolling technique and cooling method are foolproof. I’ve tested this with beginner bakers and seasoned pros, and the results are consistently smooth.
- Simple Pantry Ingredients: You probably already have most of what you need. No weird additives or hard-to-find items.
- Perfect for Fall Gatherings: Thanksgiving, Friendsgiving, Halloween parties, or just a cozy weekend treat — this dessert fits every occasion.
- Crowd-Pleaser: Kids love the cream cheese filling, adults appreciate the balanced pumpkin spice, and everyone goes back for seconds.
- Make-Ahead Friendly: This actually tastes better after sitting in the fridge overnight. The flavors meld together beautifully.
What makes this recipe different from the rest? It’s the combination of a perfectly hydrated cake batter and the right cooling technique. Most recipes tell you to roll the cake while it’s warm, but they don’t explain why or how to do it without tearing. I’ll walk you through every step so you get that beautiful spiral every single time.
Honestly, the first time I made this successfully, I almost cried. It was that moment when you realize all those failed attempts were worth it. This isn’t just another pumpkin roll recipe — it’s the one that works.
What Ingredients You Will Need
This recipe uses simple, wholesome ingredients that work together to create that tender, spiced cake and luscious cream cheese filling. Most of these are pantry staples, especially during fall baking season.
For the Pumpkin Cake
- ¾ cup all-purpose flour — spoon and level for accuracy (don’t scoop directly from the bag)
- 1 teaspoon baking powder — helps the cake rise evenly
- 1 teaspoon pumpkin pie spice — I prefer McCormick for consistent flavor
- ½ teaspoon ground cinnamon — adds warmth and depth
- ¼ teaspoon salt — balances the sweetness
- 3 large eggs, room temperature — cold eggs can make the batter seize up
- 1 cup granulated sugar — dissolves easily into the batter
- ⅔ cup pumpkin puree — not pumpkin pie filling (they’re different!)
- 1 teaspoon vanilla extract — pure, not imitation
- ¼ cup powdered sugar — for dusting the kitchen towel and rolling
For the Cream Cheese Filling
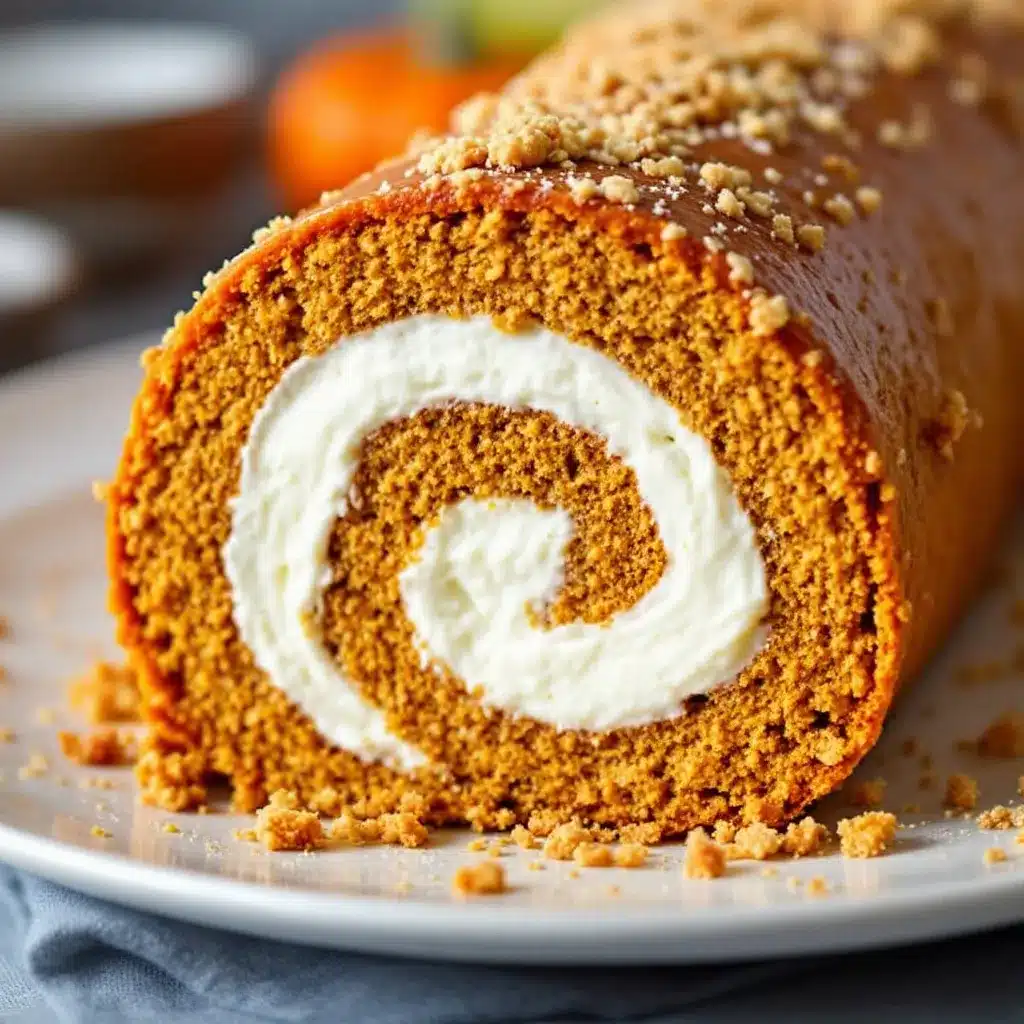
- 8 ounces cream cheese, softened — full-fat works best for stability
- ¼ cup unsalted butter, softened — adds richness and helps the filling set
- 1 cup powdered sugar, sifted — prevents lumps
- 1 teaspoon vanilla extract — enhances the cream cheese flavor
A quick note on pumpkin puree: I always use Libby’s because it’s consistently thick and not watery. If you use a different brand, you might need to blot the puree with paper towels to remove excess moisture. Too much water in the pumpkin can make the cake gummy and prone to cracking.
For the cream cheese, let it sit on the counter for at least 30 minutes before you start. Cold cream cheese creates lumpy filling, and nobody wants that.
Equipment Needed
You don’t need a professional bakery setup for this recipe, but having the right tools makes a big difference.
- 15×10-inch jelly roll pan — also called a half-sheet pan; this is non-negotiable for the right thickness
- Parchment paper — line the pan completely, with some overhang for easy lifting
- Clean kitchen towel — a thin, lint-free cotton towel works best (flour sack towels are perfect)
- Electric mixer — hand mixer or stand mixer both work; I use my KitchenAid for the filling
- Fine-mesh sieve — for sifting powdered sugar and dusting the towel
- Offset spatula — helps spread the batter evenly and smooth the filling
- Cooling rack — allows air to circulate around the cake
If you don’t have a jelly roll pan, you can use a 9×13-inch baking dish, but the cake will be thicker and harder to roll. Honestly, a jelly roll pan is worth the investment if you plan to make rolled cakes regularly. They’re usually under $15 at any kitchen supply store.
Preparation Method
- Preheat your oven to 350°F (175°C). Line your jelly roll pan with parchment paper, leaving about 2 inches of overhang on the short sides. This makes lifting the cake out much easier later.
- Whisk the dry ingredients together. In a medium bowl, combine the flour, baking powder, pumpkin pie spice, cinnamon, and salt. Set this aside while you work on the wet ingredients.
- Beat the eggs and sugar. In a large bowl, beat the eggs and granulated sugar together on medium-high speed for about 3 minutes. The mixture should become thick, pale, and fall in ribbons when you lift the beaters. This step is crucial — it incorporates air that helps the cake stay light and flexible.
- Add the pumpkin and vanilla. Reduce the mixer speed to low and beat in the pumpkin puree and vanilla extract until just combined. Don’t overmix here.
- Fold in the dry ingredients. Gently fold the flour mixture into the wet ingredients using a rubber spatula. Use a light hand and stop as soon as you no longer see streaks of flour. Overmixing at this stage develops gluten, which can make the cake tough and more likely to crack.
- Spread the batter in the pan. Pour the batter into your prepared pan and use an offset spatula to spread it evenly into all corners. The layer should be about ¼ inch thick. Give the pan a gentle tap on the counter to release any air bubbles.
- Bake for 12-14 minutes. The cake is done when it springs back lightly when touched in the center and the edges are just starting to pull away from the pan. Don’t overbake — this is the #1 cause of cracking later.
- Prepare your rolling station. While the cake bakes, lay your clean kitchen towel flat on the counter and dust it generously with powdered sugar. Use a fine-mesh sieve for even coverage. This sugar prevents the cake from sticking to the towel.
- Roll the cake while warm. As soon as the cake comes out of the oven, run a knife around the edges to loosen it. Invert the cake onto the prepared towel. Carefully peel off the parchment paper. Starting from one short end, roll the cake and towel together into a tight spiral. Let it cool completely on a wire rack — this takes about 1 hour.
- Make the filling. While the cake cools, beat the softened cream cheese and butter together until smooth and fluffy, about 2 minutes. Add the sifted powdered sugar and vanilla extract, then beat for another minute until creamy. Don’t overbeat or the filling can become too thin.
- Unroll and fill. Once the cake is completely cool, gently unroll it. Spread the cream cheese filling evenly over the cake, leaving a ½-inch border around the edges. Re-roll the cake (without the towel this time) as tightly as possible. Wrap it in plastic wrap and refrigerate for at least 2 hours before serving.
- Slice and serve. Use a sharp serrated knife to slice the ends off for a clean look, then cut into 1-inch slices. Dust with powdered sugar right before serving.
A quick sensory cue: when you spread the filling, it should feel cool and creamy against the warm-ish cake. The cake itself should be pliable and slightly springy — like a thin sponge that knows exactly what it’s supposed to do.
Cooking Tips & Techniques
I’ve made this recipe more times than I care to count, and I’ve learned a few things the hard way. Here’s what actually matters.
Don’t skip the towel rolling step. I know it seems fussy, but rolling the cake while it’s warm trains it to hold that shape. If you let it cool flat, it will crack the moment you try to roll it later. Trust me on this — I learned after my third failed attempt.
Watch your baking time like a hawk. Every oven runs differently. My old oven would bake this cake in exactly 12 minutes, but my current one takes 14. Start checking at 11 minutes and keep an eye on it. The cake should be golden on top and spring back when gently pressed.
Let the cake cool completely before filling. I know you’re excited, but warm filling on a warm cake creates a slippery, melty mess. The filling needs that cold cream cheese texture to spread properly and hold its shape.
Use a sharp knife for slicing. A dull knife will squish the cake and smear the filling. Run the knife under hot water, wipe it dry, and slice. Clean the blade between each cut for those picture-perfect slices.
One of my biggest failures? I once used pumpkin pie filling instead of puree. The cake was dense, overly sweet, and cracked in about seventeen places. Learn from my mistakes, friends.
Variations & Adaptations
This recipe is wonderfully adaptable. Here are some variations I’ve tried and loved.
- Gluten-Free Version: Substitute the all-purpose flour with a 1:1 gluten-free baking flour blend. I’ve used Bob’s Red Mill with great results. The texture is slightly more delicate, so handle it gently.
- Dairy-Free Option: Use dairy-free cream cheese and vegan butter for the filling. Miyoko’s brand works beautifully. The cake itself doesn’t contain dairy, so you’re only swapping the filling ingredients.
- Spice It Up: Add ¼ teaspoon of ground ginger or a pinch of cloves to the dry ingredients for a warmer, more complex spice profile. I do this when I’m serving it alongside a cozy fall dinner.
- Chocolate Twist: Swap 2 tablespoons of flour for unsweetened cocoa powder. The chocolate-pumpkin combination is surprisingly good — kind of like a mocha latte in dessert form.
- Nutty Addition: Sprinkle ¼ cup of finely chopped pecans over the filling before rolling. The crunch adds a lovely texture contrast.
My personal favorite variation? I add a tablespoon of bourbon to the cream cheese filling during the holidays. It gives the dessert a subtle warmth that pairs perfectly with the pumpkin spice.
Serving & Storage Suggestions
This pumpkin roll is best served chilled, straight from the refrigerator. The filling firms up beautifully, making each slice clean and picture-perfect.
Serving Temperature: Cold or slightly cool. If it sits at room temperature too long, the filling softens and the cake can become a bit sticky. I usually take it out of the fridge about 10 minutes before slicing.
Presentation Ideas: Dust with powdered sugar just before serving. Add a dollop of whipped cream on the side and a sprinkle of cinnamon for a restaurant-worthy look. For Thanksgiving, I arrange the slices on a platter with fresh cranberries and rosemary sprigs around the edges.
Pairing Suggestions: This dessert pairs beautifully with a hot cup of coffee, spiced chai latte, or a glass of cold milk. If you’re serving it after a big meal, the refreshing cucumber mint green tea cooler makes a surprisingly good palate cleanser between the main course and dessert.
Storage: Wrap the pumpkin roll tightly in plastic wrap and store it in the refrigerator for up to 5 days. The flavors actually improve after the first day — the spices meld with the cream cheese filling in a magical way.
Freezing Instructions: You can freeze the unfilled cake roll (wrapped in plastic and then foil) for up to 3 months. Thaw overnight in the refrigerator before filling and serving. Or freeze the completed pumpkin roll for up to 2 months — just wrap it well and slice it while still partially frozen for the cleanest cuts.
Reheating: Honestly, I don’t recommend reheating this dessert. It’s meant to be served cold. But if you absolutely must, a few seconds in the microwave will soften the cake slightly — just don’t let the filling get warm.
Nutritional Information & Benefits
Per slice (based on 10 slices):
- Calories: 285
- Fat: 14g
- Carbohydrates: 36g
- Protein: 5g
- Fiber: 1g
- Sugar: 27g
Pumpkin is packed with vitamin A and fiber, which supports eye health and digestion. The cream cheese filling provides calcium and protein, making this a more balanced dessert option than many other holiday treats.
This recipe is vegetarian and can be made gluten-free or dairy-free with simple substitutions. It contains eggs, dairy, and gluten (unless modified).
I love that this dessert feels indulgent but uses real, whole ingredients. It’s the kind of treat you can feel good about serving to your family — and yourself.
Conclusion
This Perfect No-Crack Pumpkin Roll with Cream Cheese Filling is more than just a holiday dessert. It’s the recipe that proves you can master something that once felt impossible. That first successful roll — the one that doesn’t crack, that spirals beautifully, that earns genuine “wows” from your guests — is worth every failed attempt.
I hope you give this recipe a try, whether it’s for Thanksgiving, a fall gathering, or just because you deserve a homemade treat. Customize it with your favorite spices, add-ins, or dietary swaps. Make it your own.
When you do make it, come back and tell me how it turned out. Did your family love it? Did you try a fun variation? Drop a comment below or tag me in your photos — I genuinely love seeing your baking wins.
And if you’re looking for more fall-inspired recipes to round out your menu, don’t miss the easy slow cooker honey garlic chicken meal prep bowls or the easy Mediterranean stuffed mini peppers with feta for a complete seasonal spread.
Happy baking, friends. You’ve got this.
Frequently Asked Questions
Why did my pumpkin roll crack?
The most common reasons are overbaking, rolling the cake when it’s too cool, or using too much moisture in the batter. Make sure you bake just until the cake springs back, roll it while still warm, and blot your pumpkin puree if it seems watery.
Can I make this pumpkin roll ahead of time?
Absolutely! In fact, it tastes better after sitting in the fridge overnight. Make it a day or two ahead, wrap it tightly in plastic wrap, and refrigerate. Just dust with powdered sugar right before serving.
Can I use fresh pumpkin instead of canned?
You can, but fresh pumpkin puree tends to be more watery than canned. Roast and puree your pumpkin, then strain it through cheesecloth or a fine-mesh sieve overnight to remove excess moisture. Otherwise, your cake might turn out gummy.
How do I get clean slices without smearing the filling?
Use a sharp serrated knife and run it under hot water between each cut. Wipe the blade dry before slicing. This gives you those beautiful, clean spirals every time.
Can I freeze the pumpkin roll with the filling inside?
Yes! Wrap the completed pumpkin roll tightly in plastic wrap, then in aluminum foil. Freeze for up to 2 months. Thaw overnight in the refrigerator before slicing and serving. The texture holds up remarkably well.
Pin This Recipe!
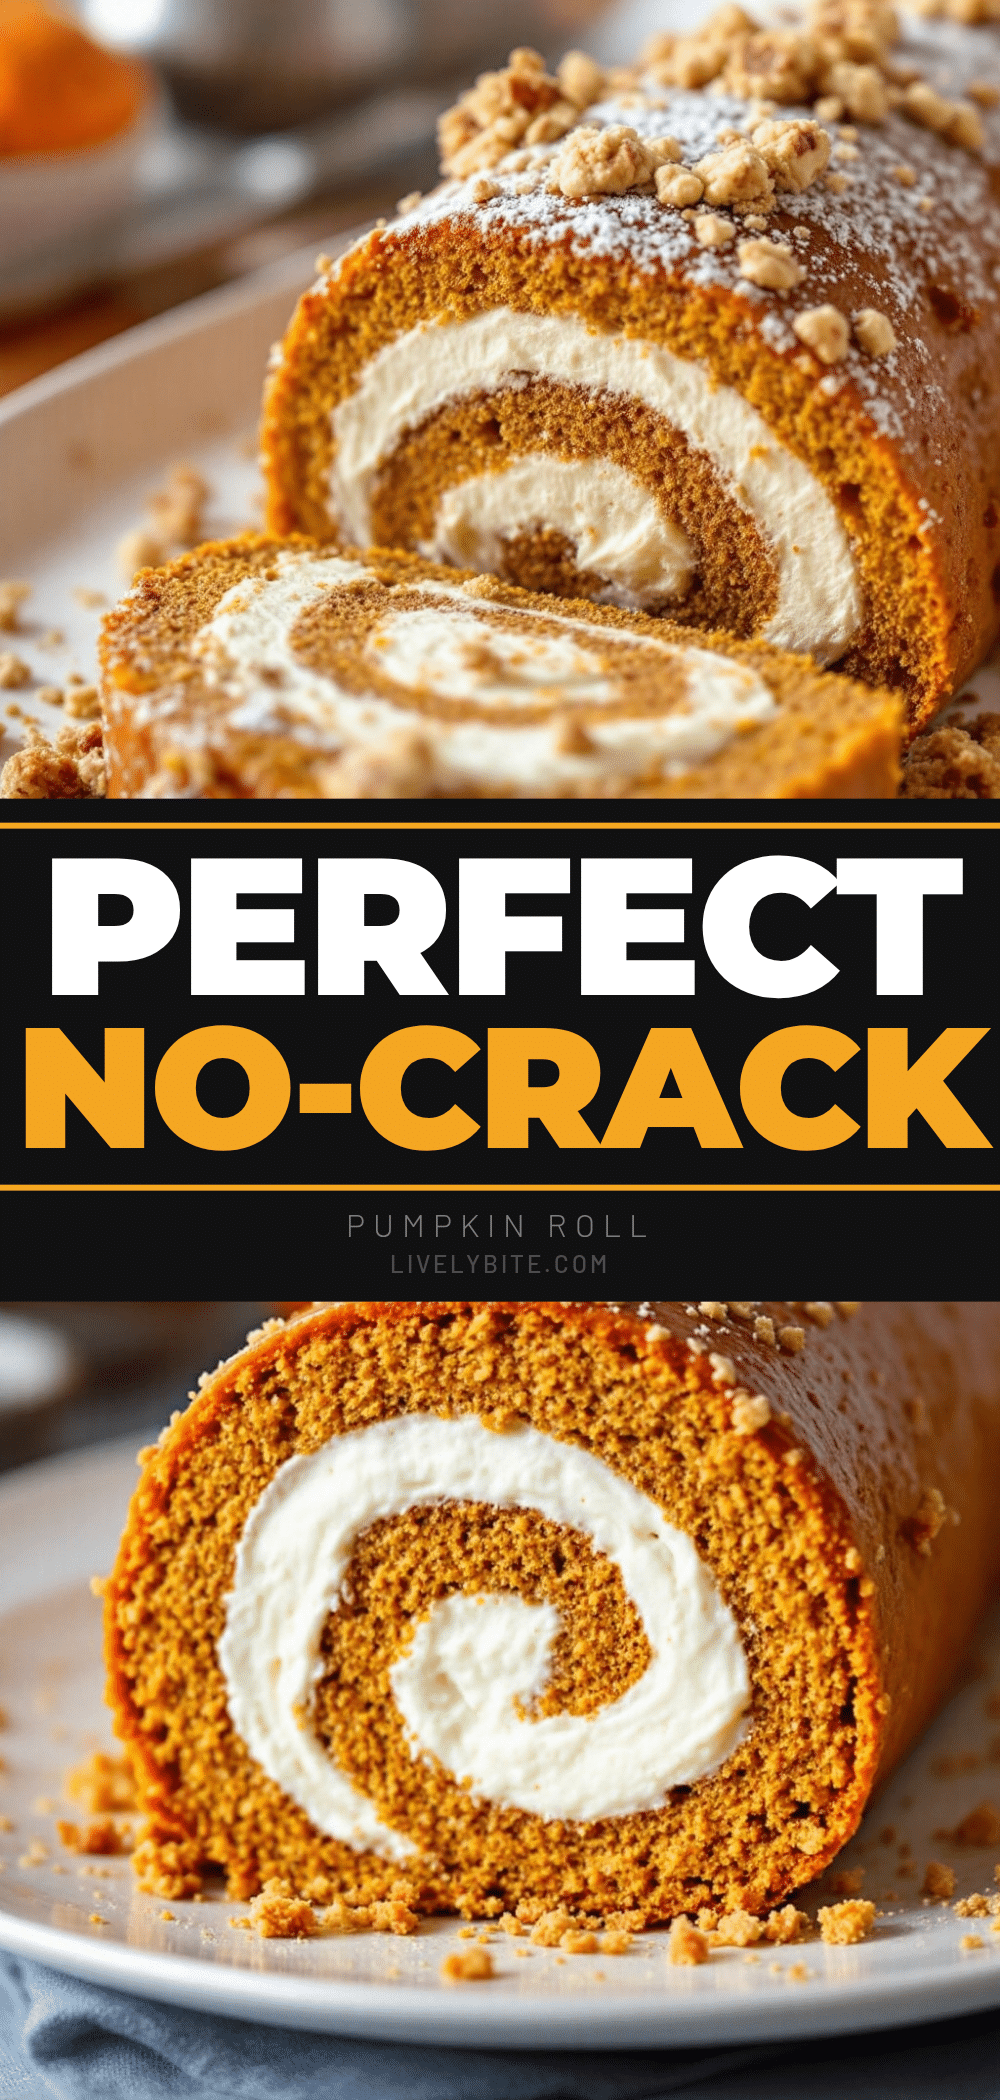
Perfect No-Crack Pumpkin Roll: Easy Cream Cheese Filled Dessert
This foolproof pumpkin roll recipe delivers a tender, spiced cake wrapped around a luscious cream cheese filling—no cracks, no stress. Perfect for fall gatherings and make-ahead friendly.
- Prep Time: 20 minutes
- Cook Time: 14 minutes
- Total Time: 3 hours 34 minutes (includes cooling and chilling)
- Yield: 10 servings 1x
- Category: Dessert
- Cuisine: American
Ingredients
- ¾ cup all-purpose flour
- 1 teaspoon baking powder
- 1 teaspoon pumpkin pie spice
- ½ teaspoon ground cinnamon
- ¼ teaspoon salt
- 3 large eggs, room temperature
- 1 cup granulated sugar
- ⅔ cup pumpkin puree (not pumpkin pie filling)
- 1 teaspoon vanilla extract
- ¼ cup powdered sugar (for dusting)
- 8 ounces cream cheese, softened
- ¼ cup unsalted butter, softened
- 1 cup powdered sugar, sifted
- 1 teaspoon vanilla extract
Instructions
- Preheat oven to 350°F (175°C). Line a 15×10-inch jelly roll pan with parchment paper, leaving 2 inches overhang on short sides.
- In a medium bowl, whisk together flour, baking powder, pumpkin pie spice, cinnamon, and salt. Set aside.
- In a large bowl, beat eggs and granulated sugar on medium-high speed for about 3 minutes until thick, pale, and ribbon-like.
- Reduce mixer speed to low and beat in pumpkin puree and vanilla extract until just combined.
- Gently fold dry ingredients into wet mixture using a rubber spatula until no streaks remain. Do not overmix.
- Pour batter into prepared pan and spread evenly with an offset spatula to about ¼-inch thickness. Tap pan gently on counter to release air bubbles.
- Bake for 12-14 minutes until cake springs back when touched and edges pull away from pan. Do not overbake.
- While cake bakes, lay a clean kitchen towel flat and dust generously with powdered sugar using a fine-mesh sieve.
- Immediately after baking, run a knife around edges, invert cake onto prepared towel, and carefully peel off parchment paper.
- Starting from one short end, roll cake and towel together into a tight spiral. Cool completely on a wire rack (about 1 hour).
- For filling: Beat softened cream cheese and butter until smooth and fluffy (about 2 minutes). Add sifted powdered sugar and vanilla, beat until creamy (about 1 minute).
- Once cake is completely cool, gently unroll. Spread filling evenly over cake, leaving ½-inch border. Re-roll cake (without towel) tightly.
- Wrap in plastic wrap and refrigerate for at least 2 hours before serving.
- To serve: Use a sharp serrated knife to trim ends, then slice into 1-inch pieces. Dust with powdered sugar just before serving.
Notes
Do not skip rolling the cake while warm—it trains the cake to hold its shape. Watch baking time carefully; overbaking is the #1 cause of cracking. Let cake cool completely before filling. Use a sharp serrated knife and clean blade between cuts for clean slices. For best flavor, refrigerate overnight before serving.
Nutrition
- Serving Size: 1 slice (1/10 of rol
- Calories: 285
- Sugar: 27
- Sodium: 210
- Fat: 14
- Saturated Fat: 8
- Carbohydrates: 36
- Fiber: 1
- Protein: 5
Keywords: pumpkin roll, pumpkin dessert, cream cheese filling, no-crack pumpkin roll, fall dessert, Thanksgiving dessert, pumpkin cake roll


