My sister didn’t trust pumpkin in bread. She said it sounded like a gimmick—something that would taste more like squash than dessert, and she was not about to waste a good chocolate chip on a loaf that couldn’t deliver. I heard her point. Honestly, I kind of agreed with her at first. Pumpkin bread always felt like it was trying too hard to be healthy, and when you’re craving that rich, tender slice of quick bread, you don’t want to feel like you’re eating a vegetable. So I tucked that thought away and started messing around in the kitchen anyway, mostly out of stubbornness.
The first few loaves were fine. Edible. But they weren’t the kind of thing you’d wake up early for or fight over the last slice. Then I made one small change—I stopped treating the pumpkin like a health ingredient and started treating it like what it really is: moisture. Pure, reliable, keeps-your-bread-soft-for-days moisture. That shift changed everything. The crumb got tender, the flavor deepened, and suddenly the chocolate chips weren’t fighting against the pumpkin—they were dancing with it.
This Easy One-Bowl Pumpkin Chocolate Chip Bread became the loaf my sister now requests for every fall gathering. She still won’t admit she was wrong, but the empty plate says enough. It’s the kind of recipe that doesn’t need a fancy intro or a long story—it just needs you to trust that pumpkin and chocolate belong together. And once you take that first warm bite, you’ll wonder why you ever doubted it.
Why You’ll Love This Recipe
Let me tell you why this one-bowl pumpkin chocolate chip bread has earned a permanent spot in my fall baking rotation. It’s not just about the flavor—though that part is pretty spectacular. It’s about how easy it is to pull together when you’re short on time but still want something that tastes like you spent hours in the kitchen.
- One Bowl, No Fuss : Mix everything in a single bowl. No stand mixer needed. No separating wet and dry ingredients like some finicky cake recipe. Just one bowl, a spatula, and about ten minutes of hands-on work.
- Pantry-Friendly Ingredients : You probably have most of this stuff already. Canned pumpkin, flour, sugar, eggs, oil, and chocolate chips. No weird specialty items that you’ll use once and forget about.
- Perfect for Fall Gatherings : Whether it’s a Thanksgiving brunch, a cozy weekend breakfast, or a last-minute potluck contribution, this loaf shows up and delivers. It travels well, slices cleanly, and disappears fast.
- Kid-Approved and Adult-Accredited : My niece devours this bread without asking what’s in it. My dad, who claims he doesn’t like pumpkin, ate three slices in one sitting. That’s the kind of universal appeal we’re talking about.
- Incredibly Moist : The pumpkin does exactly what I discovered in my early experiments—it keeps this bread soft for days. You won’t need to toast it to make it palatable on day three. It stays tender right out of the container.
What makes this recipe different from the dozens of pumpkin breads out there? It’s the balance. The pumpkin flavor is present but not overpowering, the chocolate chips provide little pockets of sweetness without making it cloying, and the texture is that perfect middle ground between cake and bread. I tested this version multiple times to get the ratio right—not too dense, not too fluffy. Just right.
This isn’t just another pumpkin bread recipe. It’s the one you’ll come back to year after year, the one that makes you close your eyes after the first bite and think, yeah, this is what fall tastes like.
What Ingredients You Will Need
This recipe relies on simple, everyday ingredients that come together to create something genuinely special. The pumpkin does the heavy lifting for moisture and color, while the chocolate chips add that little hit of sweetness that makes each slice feel like a treat.
- All-purpose flour – 1 ¾ cups (210g). Standard flour works perfectly here. Spoon it into your measuring cup and level it off—don’t scoop directly from the bag or you’ll end up with too much flour and a dry loaf.
- Granulated sugar – ¾ cup (150g). Just enough sweetness to balance the pumpkin and chocolate. You can reduce this slightly if you prefer a less sweet bread, but I wouldn’t go below ½ cup.
- Brown sugar – ½ cup (100g), packed. Light or dark both work. Brown sugar adds moisture and a subtle molasses note that complements the pumpkin beautifully. I prefer dark brown sugar when I have it on hand.
- Pumpkin puree – 1 cup (240g). Make sure you’re using pure pumpkin puree, not pumpkin pie filling. The filling has added sugar and spices that will throw off the balance. Libby’s is my go-to brand for consistent results.
- Vegetable oil – ½ cup (120ml). Oil keeps this bread tender and moist far longer than butter would. You can use melted coconut oil or avocado oil if you prefer, but stick with a neutral-flavored option.
- Eggs – 2 large, at room temperature. Room temperature eggs incorporate more evenly into the batter. If you forgot to take them out ahead of time, place them in a bowl of warm water for 5 minutes.
- Vanilla extract – 1 teaspoon. Pure vanilla extract makes a difference here. Skip the imitation stuff if you can—it adds a chemical note that doesn’t play nicely with the pumpkin.
- Baking soda – 1 teaspoon. This is your leavening agent. Make sure it’s fresh—if it’s been sitting in your cabinet for over a year, replace it.
- Baking powder – ½ teaspoon. Works alongside the baking soda to give the bread a nice rise without making it too airy.
- Salt – ½ teaspoon. Don’t skip this. Salt enhances the pumpkin flavor and balances the sweetness.
- Pumpkin pie spice – 2 teaspoons. If you don’t have pumpkin pie spice, make your own by mixing 1 teaspoon cinnamon, ½ teaspoon ginger, ¼ teaspoon nutmeg, and ¼ teaspoon cloves.
- Cinnamon – 1 teaspoon. Extra cinnamon because I firmly believe there’s no such thing as too much cinnamon in pumpkin bread.
- Semi-sweet chocolate chips – 1 cup (175g). I prefer semi-sweet because it’s not too sugary and it holds its own against the pumpkin. Dark chocolate chips work beautifully too. If you’re a milk chocolate person, go for it—just know the bread will be sweeter overall.
For a gluten-free version, swap the all-purpose flour with a 1:1 gluten-free baking flour blend that contains xanthan gum. I’ve had good results with Bob’s Red Mill. For a dairy-free option, this recipe is already dairy-free as written since we’re using oil instead of butter. Just double-check that your chocolate chips are dairy-free—many semi-sweet brands are, but it’s worth reading the label.
Equipment Needed
You don’t need a fancy kitchen to make this bread. Here’s what you’ll need:
- 9×5-inch loaf pan – The standard size for quick breads. A metal or glass pan works fine. If you’re using a dark non-stick pan, keep an eye on the baking time—it tends to brown faster.
- Large mixing bowl – Any big bowl will do. I use a ceramic one because it feels nice, but glass or stainless steel work just as well.
- Whisk or spatula – A whisk helps break up any lumps in the pumpkin, but a sturdy spatula gets the job done too.
- Measuring cups and spoons – For accuracy. I’ve learned the hard way that guessing measurements leads to inconsistent results.
- Parchment paper – Not strictly necessary, but it makes lifting the bread out of the pan so much easier. I always line my pan with a parchment sling.
- Cooling rack – Helps the bread cool evenly and prevents the bottom from getting soggy. If you don’t have one, you can balance the pan on two upside-down ramekins.
That’s it. No stand mixer, no food processor, no special attachments. Just basic kitchen tools you probably already own.
Preparation Method
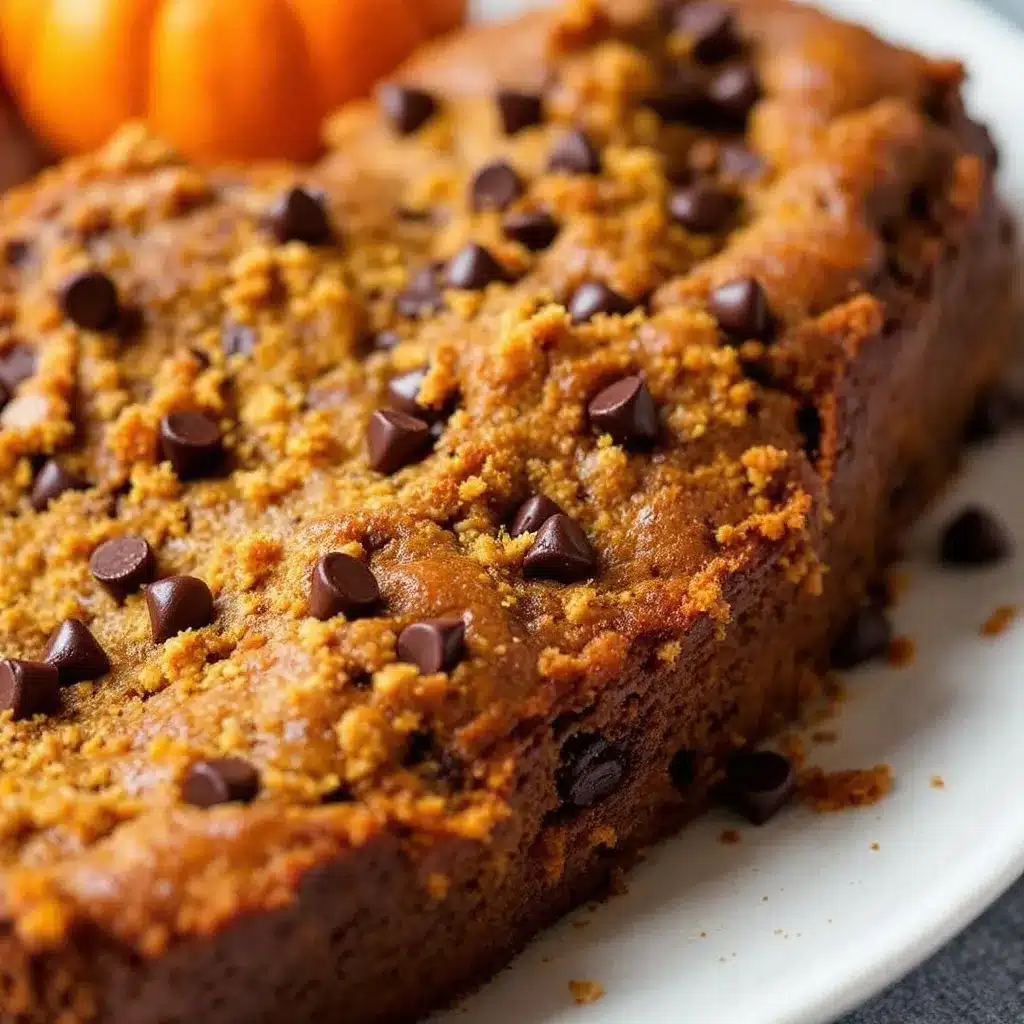
This is where the magic happens. Follow these steps, and you’ll have a beautiful loaf of pumpkin chocolate chip bread that looks like it came from a bakery. I’ve included my best tips and sensory cues so you know exactly what to look for at each stage.
- Preheat your oven to 350°F (175°C). Position the rack in the center of the oven. While it’s heating up, grease your 9×5-inch loaf pan with butter or cooking spray, then line it with a strip of parchment paper that hangs over the two long sides. This creates handles for easy removal later.
- In your large mixing bowl, combine the wet ingredients. Add the pumpkin puree, vegetable oil, eggs, and vanilla extract. Whisk everything together until it’s smooth and fully combined. The mixture should look glossy and uniform, with no streaks of egg white. This takes about 30 seconds of steady whisking.
- Add the sugars directly to the wet mixture. Pour in the granulated sugar and packed brown sugar. Whisk vigorously for about a minute until the sugars are mostly dissolved. You’ll notice the mixture becomes slightly thinner and more liquid. Don’t worry if you still feel a little grittiness—that’s normal.
- Sprinkle the dry ingredients over the wet mixture. Add the flour, baking soda, baking powder, salt, pumpkin pie spice, and cinnamon directly on top of the wet ingredients. Do not stir yet. This layering method prevents the leavening agents from clumping together.
- Fold the dry ingredients into the wet. Use a spatula to gently fold the flour into the pumpkin mixture. Start from the bottom and bring the spatula up and over, rotating the bowl as you go. Stop mixing as soon as you no longer see streaks of flour. Overmixing at this stage will develop gluten and make your bread tough. The batter should be thick but scoopable, with a few small lumps remaining—that’s perfectly fine.
- Fold in the chocolate chips. Reserve about 2 tablespoons of chocolate chips for the top. Sprinkle the rest over the batter and fold them in with just a few strokes. You want them evenly distributed without overworking the batter.
- Pour the batter into the prepared loaf pan. Use your spatula to scrape every last bit out of the bowl. Spread the batter evenly, smoothing the top. Sprinkle the reserved chocolate chips over the surface—this creates that beautiful, bakery-style top.
- Bake for 50-60 minutes. Place the pan in the center of the oven and set a timer for 50 minutes. At the 50-minute mark, insert a toothpick into the center of the bread. If it comes out clean or with just a few moist crumbs (not wet batter), it’s done. If the toothpick is still wet, bake for another 5 minutes and check again. My oven usually takes about 55 minutes. The top should be golden brown and slightly domed, and the edges will have pulled away from the pan slightly.
- Cool in the pan for 15 minutes. Place the pan on a cooling rack and let it rest. This allows the bread to set and makes it easier to remove without falling apart. After 15 minutes, use the parchment sling to lift the bread out of the pan and transfer it to the cooling rack.
- Cool completely before slicing. I know this is the hardest part, but trust me—slicing warm bread leads to crumbly, messy pieces. Let it cool for at least 1 hour. If you can wait 2 hours, even better. The texture firms up and the flavors meld together during this time.
A quick note on timing: if your bread is browning too quickly on top but the center isn’t done yet, tent a piece of aluminum foil loosely over the top for the last 15-20 minutes of baking. This prevents the crust from burning while the inside finishes cooking.
Cooking Tips & Techniques
I’ve made this pumpkin chocolate chip bread more times than I can count, and I’ve learned a few things along the way. Some of these lessons came from spectacular failures, and I’m sharing them so you don’t have to make the same mistakes.
Don’t overmix the batter. This is the number one mistake I see people make with quick breads. Once you add the flour, you want to mix just until it’s incorporated. Overmixing develops gluten, which gives you a tough, dense loaf instead of a tender, fluffy one. I speak from experience—my first few loaves were practically bricks. Mix until you don’t see dry flour anymore, then stop. A few lumps are your friend.
Use room temperature ingredients. Cold eggs and cold pumpkin puree don’t emulsify as well with the oil and sugar. The batter will be lumpier and the final texture won’t be as smooth. I usually set my eggs and pumpkin on the counter about 30 minutes before I start baking. If I forget, I place the eggs in a bowl of warm water for 5 minutes and microwave the pumpkin for 10-15 seconds—just enough to take the chill off.
Measure your flour correctly. This might seem basic, but it’s the most common reason for dry baked goods. Fluff the flour in your bag or container with a spoon, then spoon it into your measuring cup and level it off with a flat edge. Never scoop directly with the measuring cup—you’ll pack in up to 25% more flour than the recipe calls for. I learned this lesson after making a batch of cookies that came out like hockey pucks.
Let the bread cool completely. I mentioned this in the instructions, but it bears repeating. Warm bread is fragile bread. The crumb hasn’t fully set, and slicing into it will result in a pile of delicious but disappointing crumbs. I once served a still-warm loaf to guests and ended up with what looked like pumpkin bread hash. Tasted great, looked terrible.
Check your baking soda and powder freshness. If your bread doesn’t rise properly, old leavening agents are usually the culprit. To test baking soda, drop a small amount into vinegar—it should fizz vigorously. For baking powder, drop it into hot water and look for bubbles. If nothing happens, toss it and buy fresh.
Variations & Adaptations
One of the best things about this recipe is how adaptable it is. I’ve experimented with several variations over the years, and here are my favorites.
Gluten-Free Version : Substitute the all-purpose flour with a 1:1 gluten-free baking flour blend that contains xanthan gum. I’ve used Bob’s Red Mill with great results. The texture is slightly more tender than the original, but the flavor is spot on. Add an extra tablespoon of flour if the batter seems too thin.
Vegan Adaptation : Replace the two eggs with flax eggs (2 tablespoons ground flaxseed mixed with 6 tablespoons water, let sit for 5 minutes until gel-like). Use dairy-free chocolate chips. The bread will be slightly denser but still delicious. I’ve made this version for a vegan friend’s brunch and nobody guessed it was plant-based.
Spice It Up : If you love a strong spice profile, add an extra teaspoon of pumpkin pie spice and a pinch of ground cardamom. The cardamom adds a warm, floral note that pairs beautifully with the chocolate. I tried this on a whim one rainy Sunday and it’s become my go-to fall version.
Nutty Crunch : Fold in ½ cup of chopped pecans or walnuts along with the chocolate chips. Toast the nuts first in a dry skillet over medium heat for 3-4 minutes to deepen their flavor. My dad, the pumpkin skeptic, actually prefers this version with pecans.
Chocolate Lover’s Dream : Increase the chocolate chips to 1 ½ cups and use dark chocolate for an extra-rich loaf. You can also drizzle melted chocolate over the cooled bread for a show-stopping finish. This version disappears fastest at bake sales.
Lower Sugar Option : Reduce the granulated sugar to ½ cup and the brown sugar to ⅓ cup. The bread will be less sweet, but the chocolate chips still provide pockets of sweetness. This works well if you’re serving it with butter or cream cheese spread.
For a fun twist, try making these as muffins instead of a loaf. Divide the batter among a 12-cup muffin tin lined with paper cups and bake at 350°F for 18-22 minutes. Great for portion control and grab-and-go breakfasts.
Serving & Storage Suggestions
This pumpkin chocolate chip bread is versatile enough to serve at any time of day. Here’s how I like to enjoy it and how to keep it fresh.
Serving Temperature : The bread is excellent at room temperature, but I actually prefer it slightly warm. Pop a slice in the microwave for 10-15 seconds or toast it lightly in a toaster oven. The chocolate chips get a little melty, and the warmth brings out the pumpkin spice aromas. For a decadent treat, spread a thin layer of salted butter or cream cheese on top.
Pairing Suggestions : This bread pairs beautifully with a hot cup of coffee or a chai latte. For a more indulgent breakfast, serve it alongside scrambled eggs and fresh fruit. It also makes a lovely dessert with a scoop of vanilla ice cream or a dollop of whipped cream. During the holidays, I sometimes serve thin slices as part of a dessert board with other treats like creamy vegan chocolate avocado pudding for a fun contrast in textures.
Room Temperature Storage : Wrap the cooled bread tightly in plastic wrap or aluminum foil and store it at room temperature for up to 4 days. I prefer wrapping it in plastic wrap first, then foil, to lock in moisture. Keep it on the counter, not in the refrigerator—the fridge dries out baked goods faster.
Freezer Storage : This bread freezes beautifully. Wrap the cooled loaf (whole or sliced) tightly in plastic wrap, then again in aluminum foil, and place it in a freezer-safe bag. It will keep for up to 3 months. When you’re ready to enjoy it, thaw overnight in the refrigerator or at room temperature for a few hours. For individual slices, pop them straight from the freezer into the toaster or microwave.
Flavor Development : Here’s something interesting—this bread actually tastes better on the second day. The flavors have time to meld and deepen overnight. If you can resist the urge to slice into it immediately, wrap it up and let it sit on the counter until the next morning. The texture stays moist and the pumpkin spice becomes more pronounced. I’ve tested this side by side, and day two always wins.
Nutritional Information & Benefits
While this bread is definitely a treat, it does offer some nutritional perks thanks to the pumpkin. Here’s a breakdown per slice (based on 10 slices per loaf):
| Nutrient | Amount Per Slice |
|---|---|
| Calories | 310 |
| Total Fat | 14g |
| Saturated Fat | 4g |
| Carbohydrates | 44g |
| Fiber | 2g |
| Sugar | 26g |
| Protein | 4g |
| Vitamin A | 95% DV |
| Iron | 10% DV |
Health Highlights : Pumpkin is packed with vitamin A, which supports eye health and immune function. It’s also a good source of fiber, which helps with digestion and keeps you feeling full longer. The chocolate chips provide antioxidants from cocoa, and using oil instead of butter keeps the saturated fat content lower than traditional quick breads.
Dietary Considerations : This recipe is dairy-free as written (just confirm your chocolate chips are dairy-free). It can be made gluten-free with a simple flour swap and vegan with flax eggs. It contains eggs and wheat in the original version, so those with allergies should use the adaptations mentioned earlier.
I’m not a nutritionist, and I don’t pretend this bread is health food. But I do feel good about serving it to my family knowing that the pumpkin adds real nutritional value—not just flavor. It’s a dessert that happens to have a vegetable in it, and I think that’s a win-win.
Conclusion
This Easy One-Bowl Pumpkin Chocolate Chip Bread is the kind of recipe that proves simple things can be extraordinary. It’s forgiving enough for beginner bakers, reliable enough for busy weeknights, and impressive enough for holiday tables. The one-bowl cleanup doesn’t hurt either—because let’s face it, nobody wants to wash a sink full of dishes just to satisfy a pumpkin bread craving.
I encourage you to make this recipe your own. Add extra spices, swap the chocolate chips for nuts, turn it into muffins—whatever feels right to you. The base is solid, and it welcomes experimentation. That’s the beauty of a good recipe: it gives you a foundation to build on.
If you love this bread as much as I do, I’d love to hear about it. Leave a comment below sharing how it turned out or what variations you tried. And if you’re looking for more easy baking ideas, check out my full collection of recipes for more inspiration. Happy baking, and may your kitchen smell like pumpkin spice and chocolate all season long.
Frequently Asked Questions
Can I use fresh pumpkin instead of canned?
Yes, you can, but there’s a catch. Fresh pumpkin has more water content than canned puree. If you’re using fresh pumpkin, roast it until tender, then puree it and let it drain in a fine-mesh strainer or cheesecloth for about 30 minutes to remove excess moisture. Otherwise, your bread might turn out too wet and dense. I’ve done it both ways, and canned is honestly more consistent for baking.
Why did my bread sink in the middle?
A sunken middle usually means the bread was underbaked or the oven temperature was too low. Make sure your oven is fully preheated to 350°F and that you’re baking the bread on the center rack. If the top is browning too quickly but the center isn’t set, tent it with foil and continue baking. A toothpick inserted in the center should come out clean or with just a few moist crumbs—not wet batter.
Can I use chocolate chunks instead of chocolate chips?
Absolutely. Chocolate chunks work perfectly and actually create bigger, more dramatic pockets of chocolate in each slice. I’ve used chopped dark chocolate bars in a pinch and loved the result. Just keep the total amount around 1 cup (175g) to maintain the right balance of batter to chocolate.
How do I make this bread extra moist?
This recipe is already designed to be very moist thanks to the pumpkin and oil, but if you want to push it even further, try adding ¼ cup of applesauce or an extra tablespoon of oil. You can also brush the baked bread with a simple syrup made from equal parts sugar and water while it’s still warm—this adds moisture and a subtle sweetness. I do this for special occasions and it takes the bread to another level.
Can I double this recipe?
Yes, this recipe doubles beautifully. Use two 9×5-inch loaf pans and bake them at the same time. If your oven has hot spots, rotate the pans halfway through baking. The baking time might increase slightly—start checking at 55 minutes and go from there. I’ve doubled this for holiday gift-giving and it’s always a hit. Just don’t try to bake it in one giant pan—the center won’t cook through before the edges burn.
Pin This Recipe!
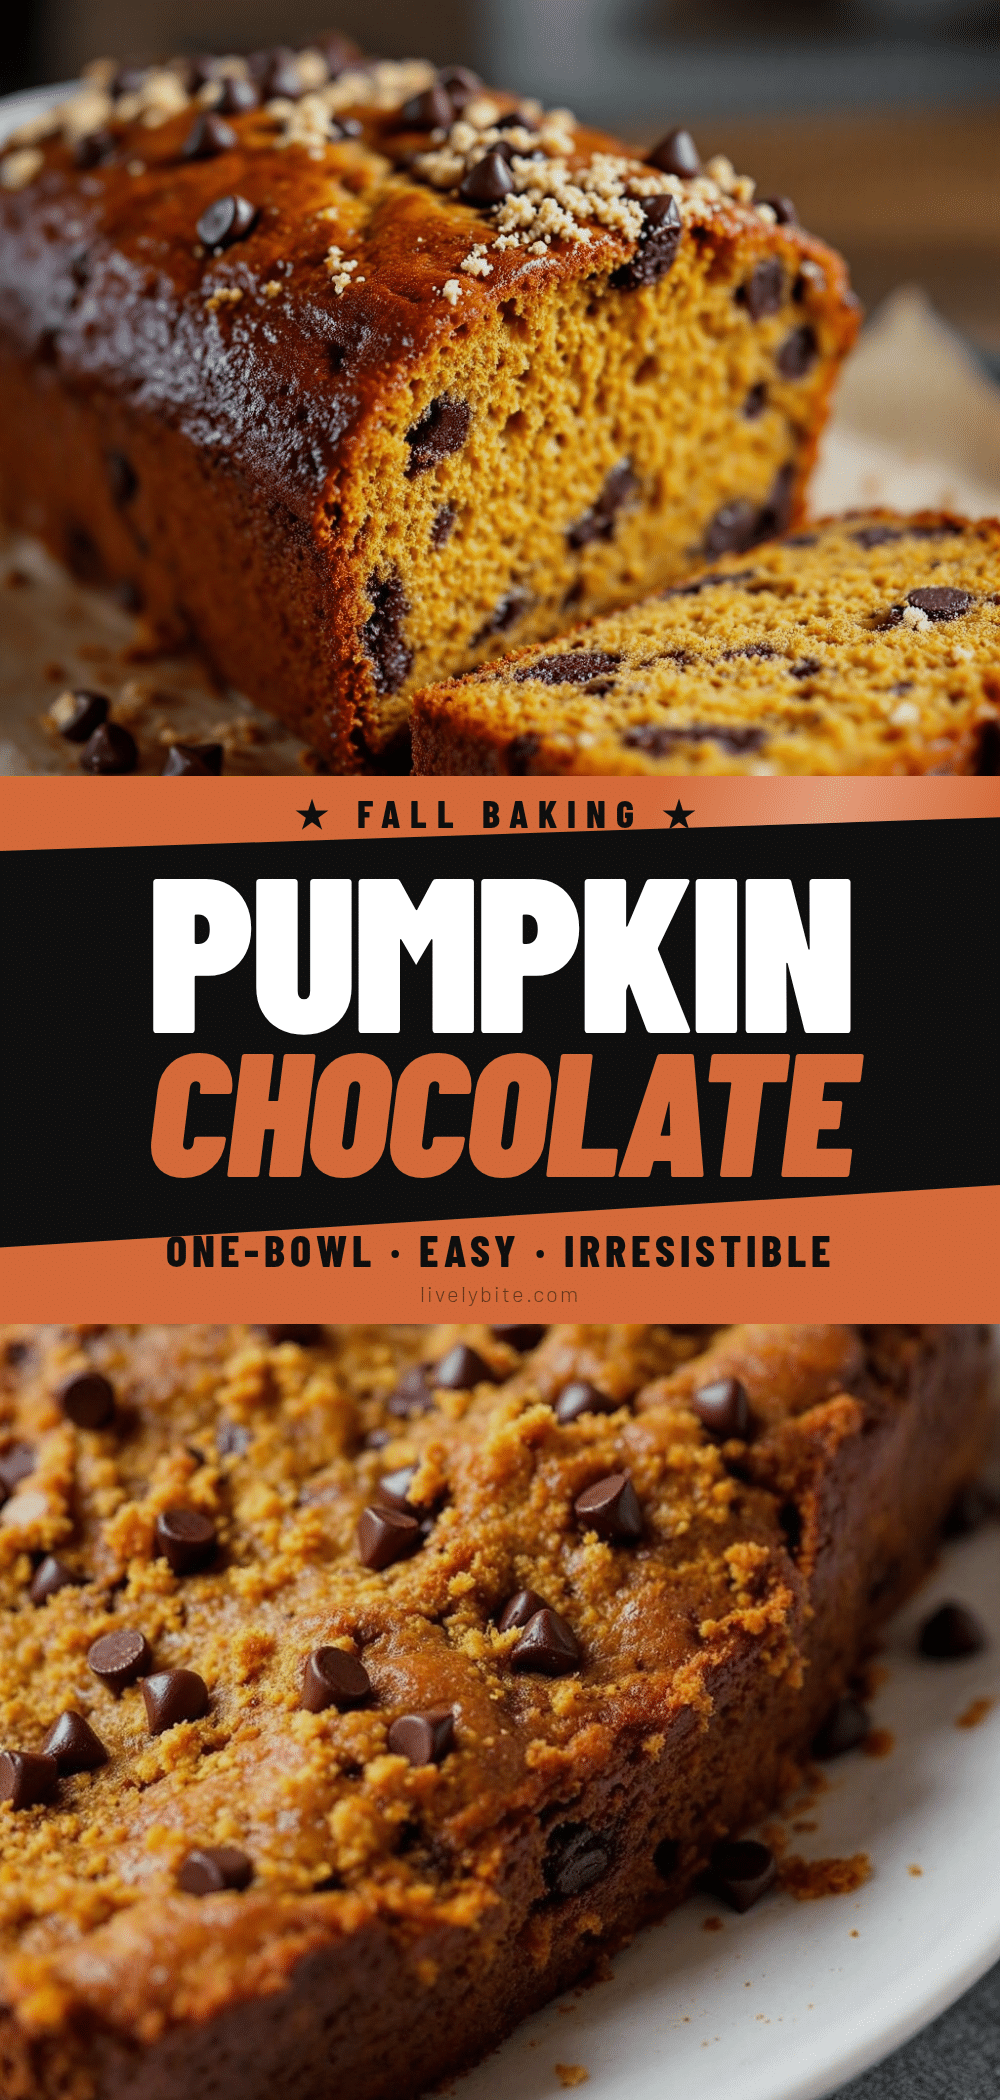
Easy One-Bowl Pumpkin Chocolate Chip Bread
This incredibly moist and flavorful pumpkin chocolate chip bread comes together in one bowl with simple pantry ingredients. It’s the perfect fall treat that’s kid-approved and adult-accredited, delivering a tender crumb and balanced pumpkin-chocolate flavor.
- Prep Time: 10 minutes
- Cook Time: 55 minutes
- Total Time: 1 hour 5 minutes
- Yield: 10 servings 1x
- Category: Dessert
- Cuisine: American
Ingredients
- 1 ¾ cups (210g) all-purpose flour
- ¾ cup (150g) granulated sugar
- ½ cup (100g) packed brown sugar (light or dark)
- 1 cup (240g) pumpkin puree (not pumpkin pie filling)
- ½ cup (120ml) vegetable oil (or melted coconut oil, avocado oil)
- 2 large eggs, at room temperature
- 1 teaspoon vanilla extract
- 1 teaspoon baking soda
- ½ teaspoon baking powder
- ½ teaspoon salt
- 2 teaspoons pumpkin pie spice
- 1 teaspoon cinnamon
- 1 cup (175g) semi-sweet chocolate chips (plus 2 tablespoons for topping)
Instructions
- Preheat oven to 350°F (175°C). Grease a 9×5-inch loaf pan and line with parchment paper, leaving overhang on the long sides.
- In a large mixing bowl, whisk together pumpkin puree, vegetable oil, eggs, and vanilla extract until smooth and glossy.
- Add granulated sugar and packed brown sugar to the wet mixture. Whisk vigorously for about 1 minute until mostly dissolved.
- Sprinkle flour, baking soda, baking powder, salt, pumpkin pie spice, and cinnamon over the wet mixture. Do not stir yet.
- Using a spatula, gently fold the dry ingredients into the wet until just combined. A few lumps are fine; do not overmix.
- Reserve 2 tablespoons of chocolate chips for topping. Fold the remaining chocolate chips into the batter with a few strokes.
- Pour batter into the prepared loaf pan, spread evenly, and sprinkle reserved chocolate chips on top.
- Bake for 50-60 minutes, or until a toothpick inserted in the center comes out clean or with a few moist crumbs. If browning too quickly, tent with foil for the last 15-20 minutes.
- Cool in the pan for 15 minutes, then lift out using the parchment sling and transfer to a cooling rack.
- Cool completely before slicing (at least 1 hour, preferably 2 hours).
Notes
For best results, use room temperature ingredients. Do not overmix the batter. The bread tastes even better on the second day. For a gluten-free version, use a 1:1 gluten-free flour blend with xanthan gum. For a vegan version, replace eggs with flax eggs and use dairy-free chocolate chips.
Nutrition
- Serving Size: 1 slice
- Calories: 310
- Sugar: 26
- Sodium: 240
- Fat: 14
- Saturated Fat: 4
- Carbohydrates: 44
- Fiber: 2
- Protein: 4
Keywords: pumpkin bread, chocolate chip bread, one-bowl recipe, fall baking, quick bread, pumpkin chocolate chip bread


