I wasn’t sure two squashes belonged in one loaf. Pumpkin and banana felt like they were competing for attention, not working together. Every hybrid recipe I’d tried before ended up tasting confused—neither fully pumpkin nor fully banana, just a muddy, damp loaf that couldn’t commit. So when a friend dropped off a bag of overripe bananas and I had half a can of pumpkin staring at me from the fridge, I almost tossed the pumpkin. But I’d promised myself I’d use it up before the season turned. So I threw them both in a bowl, grumbling the whole time, and figured I’d be eating my words along with a mediocre breakfast.
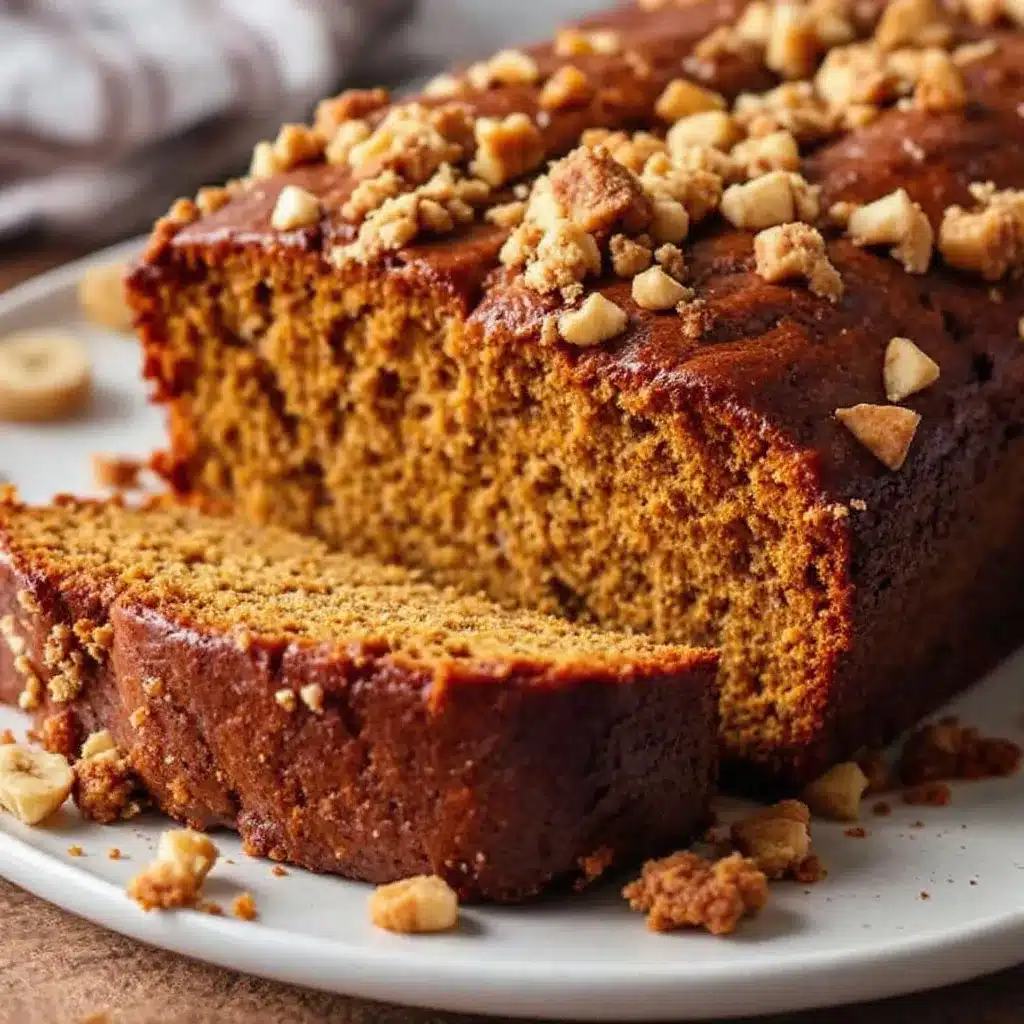
Turns out, I was eating my words—just in the best possible way. That first loaf came out of the oven looking like fall had taken a vacation in my kitchen. The top was domed and cracked in that perfect bakery way, the edges were caramelized, and the smell—honestly, it was ridiculous. The banana gave it this tender, almost buttery crumb, and the pumpkin added a velvety moisture that kept it from drying out even on day three. I stood at the counter, slicing off the heel while it was still warm, and I knew I’d stumbled onto something worth keeping.
This easy one-bowl pumpkin banana bread is the kind of recipe you make when you want something that tastes like you fussed but you really just wanted to use up what’s on your counter. It’s forgiving, it’s fast, and it solves the eternal debate of which squash wins in a loaf. Spoiler: they both do.
Why You’ll Love This Recipe
I’ve made this loaf more times than I can count now, and every time, it reminds me why simple baking is the best kind. Here’s what keeps me coming back:
- One Bowl, No Fuss: You don’t need a mixer, a stand mixer, or even a whisk if you’re feeling lazy. A fork and a single bowl get the job done. Less cleanup, more eating.
- Pantry-Friendly Ingredients: You probably have everything already. Canned pumpkin, ripe bananas, flour, sugar, eggs, oil, and spices. No trips to a specialty store for weird flours or obscure extracts.
- Perfect for Fall Mornings or Anytime Cravings: This bread works for breakfast, snack time, or dessert. I’ve packed it in lunchboxes, served it at brunch with a smear of honey butter, and eaten it straight from the foil at 10 p.m. No judgment here.
- Crowd-Pleaser Status: Kids love it, adults love it, and even the picky eaters in my house ask for seconds. The pumpkin flavor isn’t overwhelming—it just makes the banana bread softer and more interesting.
- Unbelievably Moist: The combo of pumpkin and banana creates a crumb that stays tender for days. You won’t need to toast it to make it edible after day two. It stays soft right out of the container.
What makes this recipe different from the hundred other pumpkin banana breads out there? It’s the ratio. I tested this about six times before I landed on the perfect balance—enough pumpkin to add moisture and depth, enough banana to keep the flavor bright and familiar. The spices are warm but not aggressive. It’s comfort food that doesn’t try too hard, and honestly, that’s the kind of recipe I actually want to make again.
What Ingredients You Will Need
This recipe uses simple, honest ingredients to create something that tastes far more complicated than it is. Here’s what you’ll need and why each one matters:
- All-purpose flour (1 ¾ cups / 220g): The backbone of the bread. Spoon and level it into your measuring cup—don’t scoop directly from the bag or you’ll end up with a dry, dense loaf. If you want to swap in whole wheat pastry flour, you can use up to half without changing the texture too much.
- Baking soda (1 teaspoon): This is your leavening agent. Make sure it’s fresh—if it’s been sitting in your cabinet for a year, test it by dropping a pinch into vinegar. If it fizzes, you’re good. If not, buy a new box.
- Salt (½ teaspoon): Don’t skip it. Salt balances the sweetness and brings out the warm spices. I use fine sea salt here.
- Ground cinnamon (1 ½ teaspoons): The star spice. I use a good-quality cinnamon like Saigon or Ceylon. It makes a difference in depth of flavor.
- Ground nutmeg (½ teaspoon): Freshly grated if you have it, but pre-ground works fine. Nutmeg adds that cozy, slightly floral warmth that makes pumpkin bread taste like fall.
- Ground ginger (½ teaspoon): A little kick of warmth. You can skip it if you don’t have it, but it really rounds out the spice blend.
- Cloves (¼ teaspoon, optional): I add this when I want the bread to taste extra spiced. It’s strong, so go easy.
- Granulated sugar (½ cup / 100g): Adds sweetness and helps with browning. I’ve tested this with coconut sugar and it works, but the loaf will be darker and slightly less sweet.
- Light brown sugar (½ cup / 100g, packed): This is where the moisture and chewiness come from. The molasses in brown sugar keeps the bread tender. Don’t substitute all granulated—you need that brown sugar flavor.
- Large eggs (2, room temperature): Eggs bind everything together and add structure. If your eggs are cold, place them in a bowl of warm water for 5 minutes before using.
- Vegetable oil (⅓ cup / 80ml): Oil keeps the bread moist longer than butter does. I use a neutral oil like avocado or canola. Melted coconut oil works too, but make sure your other ingredients are at room temp so it doesn’t solidify.
- Pumpkin purée (1 cup / 240g): Not pumpkin pie filling—make sure you grab the plain, 100% pumpkin purée. I use Libby’s because it’s consistent and not watery. If your purée looks loose, blot it with a paper towel before measuring.
- Ripe bananas (2 medium, mashed, about 1 cup / 240g): The riper, the better. You want them spotty and soft—almost black. That’s when they’re sweetest and easiest to mash. If your bananas aren’t ripe enough, roast them in the oven at 300°F for 15 minutes to soften and sweeten them up.
- Vanilla extract (1 teaspoon): Enhances all the other flavors. Use pure vanilla if you can, but imitation works fine in a baked good like this.
Optional add-ins:
- Chocolate chips (½ cup / 90g) for a sweeter, richer loaf
- Chopped walnuts or pecans (½ cup / 60g) for crunch
- Dried cranberries (¼ cup / 30g) for tart pops of flavor
Equipment Needed
You don’t need a fancy kitchen to make this bread. Here’s what I use every time:
- Large mixing bowl: Any bowl will do, but I prefer a wide, deep one so I can mix without splattering. My go-to is a ceramic nesting bowl set I picked up at a home goods store for $15.
- Fork or whisk: A fork works perfectly for mashing bananas and mixing the batter. A whisk is nice if you want to aerate the dry ingredients a bit, but it’s not required.
- 9×5-inch loaf pan: Standard size. If you have a dark nonstick pan, reduce the oven temperature by 25°F to prevent over-browning. Glass or ceramic pans work too, but they may need a few extra minutes in the oven.
- Parchment paper: I line my pan with a sling of parchment paper so the loaf lifts out cleanly. If you don’t have parchment, grease the pan well with butter or nonstick spray and dust it with flour.
- Cooling rack: Lets air circulate around the loaf so the bottom doesn’t get soggy. If you don’t have one, you can use the inverted lid of a roasting pan or even a clean wire oven rack.
- Measuring cups and spoons: Dry and liquid measuring cups are ideal, but you can get away with using the same set if you’re careful. Just don’t measure oil in a dry cup and expect it to be exact.
Preparation Method
Preheat your oven to 350°F (175°C). Position the rack in the center of the oven. Line your 9×5-inch loaf pan with a sheet of parchment paper, leaving a couple inches of overhang on the long sides—this creates handles for lifting the bread out later. If you’re not using parchment, grease the pan thoroughly with butter or nonstick spray and dust it lightly with flour.
- Mash the bananas: In your large mixing bowl, add the two ripe bananas. Mash them with a fork until they’re mostly smooth with a few small lumps remaining. You want some texture—completely smooth puree loses that banana character. It should look like chunky applesauce when you’re done.
- Add the wet ingredients: To the mashed bananas, add the pumpkin purée, vegetable oil, eggs, and vanilla extract. Stir everything together with your fork or a whisk until it’s fully combined. The mixture will look a little streaky at first—that’s fine. Keep stirring until it’s one uniform, glossy batter. Don’t overmix; just get it combined.
- Add the sugars: Pour in the granulated sugar and the packed brown sugar. Stir until the sugars are mostly dissolved—you shouldn’t feel gritty sugar at the bottom of the bowl. This takes about 30 seconds of steady stirring.
- Combine the dry ingredients: Sprinkle the flour, baking soda, salt, cinnamon, nutmeg, ginger, and cloves (if using) over the wet mixture. Don’t dump them all in one pile—scatter them a bit so they start incorporating evenly. Stir gently with a spatula or your fork, using a folding motion. Stop as soon as you no longer see streaks of flour. A few small lumps are okay. Overmixing at this stage will make the bread tough and dense.
- Fold in any add-ins: If you’re using chocolate chips, nuts, or dried fruit, gently fold them in now. Use about 10 strokes—just enough to distribute them evenly. The batter will be thick and slightly sticky, like a typical quick bread batter.
- Transfer to the pan: Scrape the batter into your prepared loaf pan using a rubber spatula. Spread it into an even layer, smoothing the top. Give the pan a gentle tap on the counter to release any air bubbles.
- Bake: Place the pan in the preheated oven and bake for 50 to 60 minutes. Start checking at 50 minutes. The bread is done when a toothpick or skewer inserted into the center comes out clean or with just a few moist crumbs attached. If the top is browning too quickly (after about 40 minutes), tent the pan loosely with aluminum foil.
- Cool in the pan: Remove the loaf from the oven and place it on a cooling rack. Let it cool in the pan for 15 minutes. This allows the structure to set so it doesn’t fall apart when you remove it.
- Remove and cool completely: After 15 minutes, lift the bread out of the pan using the parchment sling. Place it directly on the cooling rack. Let it cool completely before slicing—about 1 hour. I know it’s hard to wait, but slicing while it’s warm will give you crumbly, gummy slices. Trust me, I’ve ruined a few loaves this way.
Sensory cues to watch for: The batter should be thick and scoopable, not runny. When you stir in the dry ingredients, you’ll smell the cinnamon and nutmeg immediately. During baking, your kitchen will smell like a bakery—warm, spiced, and sweet. The loaf will be deep golden brown on top and will feel firm when you gently press the center.
Cooking Tips & Techniques
I’ve made my share of mistakes with quick breads, and I’ve learned a few things the hard way. Here’s what I wish someone had told me sooner:
Don’t overmix the batter. This is the number one mistake people make. Once flour hits liquid, gluten starts developing. Stir too much and you’ll end up with a tough, rubbery loaf instead of a tender, fluffy one. Mix until you don’t see dry flour anymore, then stop. A few lumps are your friends.
Use room temperature ingredients. Cold eggs and cold pumpkin will make the batter seize up and create a denser crumb. If you forgot to take them out ahead of time, place the eggs in a bowl of warm water for 5 minutes and microwave the pumpkin for 15 seconds. It makes a real difference.
Check your baking soda’s freshness. Baking soda loses potency over time. If your bread doesn’t rise well, your baking soda might be old. I test mine every few months by dropping a pinch into vinegar—if it fizzes vigorously, it’s good. If it barely bubbles, toss it.
Rotate the pan halfway through. Ovens have hot spots. About 25 minutes into baking, quickly rotate the pan 180 degrees. This ensures even browning and prevents one side from doming higher than the other.
Let it cool completely. I know the smell is torture, but cutting into warm bread releases steam and makes the crumb gummy. If you absolutely can’t wait (I’ve been there), use a serrated knife and saw gently—it’ll create less drag than a straight blade.
Variations & Adaptations
This recipe is incredibly flexible. Here are some ways I’ve adapted it depending on what I have on hand or who I’m feeding:
- Gluten-Free Version: Substitute the all-purpose flour with a 1:1 gluten-free baking flour blend that contains xanthan gum. I’ve used Bob’s Red Mill 1-to-1 with great results. The texture will be slightly more delicate, so let the bread cool completely before slicing.
- Vegan Adaptation: Replace the two eggs with two flax eggs (2 tablespoons ground flaxseed mixed with 5 tablespoons water, let sit for 5 minutes until gel-like). Use a neutral oil instead of butter and make sure your sugar is vegan-friendly. The bread will be a bit denser but still delicious.
- Lower Sugar Option: Reduce the granulated sugar to ¼ cup and use ⅓ cup brown sugar. Add an extra ½ ripe banana for sweetness. The bread won’t be as sweet, but the pumpkin and banana flavors will shine through more.
- Chocolate Chip Pumpkin Banana Bread: Fold in ½ cup of semi-sweet chocolate chips along with the dry ingredients. The chocolate pairs beautifully with the warm spices. I’ve also used dark chocolate chunks for a more intense flavor.
- Nutty Crunch Version: Add ½ cup of toasted chopped walnuts or pecans. Toast them first in a dry skillet over medium heat for 3-4 minutes until fragrant. It brings out their oils and adds a deeper flavor.
- Spiced Up Version: Add an extra ½ teaspoon of cinnamon and a pinch of cardamom. Cardamom adds a floral, citrusy note that’s unexpected but lovely with pumpkin.
I once made a version with dried cherries and white chocolate chips for a holiday brunch, and it disappeared in ten minutes. Don’t be afraid to experiment—this batter is forgiving.
Serving & Storage Suggestions
How to serve: This bread is fantastic at room temperature, but it’s even better warm. Slice it and toast it lightly in a toaster or under the broiler for about a minute. Spread with salted butter, honey butter, or cream cheese. For a decadent treat, top a slice with a dollop of whipped cream and a drizzle of maple syrup.
It pairs beautifully with a hot cup of coffee or a refreshing cucumber mint green tea cooler for a cozy afternoon snack. For a more complete breakfast, serve it alongside a easy lemon herb salmon sheet pan dinner might not be the obvious pairing, but a slice of this bread makes a lovely side for a savory meal.
Storage: Store the bread in an airtight container at room temperature for up to 3 days. If your kitchen is warm, you can refrigerate it, but the texture will be slightly denser. To keep it extra moist, place a paper towel in the bottom of the container and another on top of the bread.
Freezing: This bread freezes beautifully. Let it cool completely, then wrap it tightly in plastic wrap, followed by a layer of aluminum foil. Freeze for up to 3 months. To thaw, leave it at room temperature for a few hours or unwrap and microwave individual slices for 20 seconds. You can also freeze sliced bread—just separate slices with parchment paper so you can grab one at a time.
Flavor development: The flavors actually deepen after a day. The spices meld together, and the banana and pumpkin become more pronounced. I often make this bread a day ahead when I’m serving it for company. It’s even better on day two.
Nutritional Information & Benefits
Here’s an approximate nutritional breakdown per slice (based on 10 slices, without add-ins):
| Nutrient | Amount per Slice |
|---|---|
| Calories | 245 |
| Total Fat | 9g |
| Saturated Fat | 1.5g |
| Carbohydrates | 38g |
| Fiber | 2g |
| Sugar | 20g |
| Protein | 4g |
This bread offers some real nutritional perks. Pumpkin is packed with vitamin A (in the form of beta-carotene), which supports eye health and immune function. Bananas provide potassium and vitamin B6, which help with heart health and energy metabolism. The cinnamon in this recipe has anti-inflammatory properties and may help regulate blood sugar. If you use whole wheat pastry flour for half the flour, you’ll add extra fiber and nutrients.
For those watching their sugar intake, you can reduce the sugar as noted in the variations. This bread is also nut-free if you skip the add-ins, making it a safe option for school lunches or gatherings.
Conclusion
This easy one-bowl pumpkin banana bread has become a staple in my kitchen for good reason. It’s the recipe I turn to when I want something that feels like a treat but doesn’t require a lot of effort or planning. The combination of pumpkin and banana creates a loaf that’s moist, tender, and full of warm, comforting flavor. It’s forgiving enough for beginners and reliable enough for experienced bakers who just want something good without the fuss.
I love that I can make it with ingredients I almost always have on hand. I love that it fills my kitchen with that cozy, spiced smell that makes everyone wander in asking what’s baking. And I love that it’s versatile enough to adapt to whatever I’m craving or whatever I have in the pantry.
If you try this recipe, I’d love to hear how it turned out. Did you add chocolate chips? Try it with pecans? Make it gluten-free? Drop a comment below and let me know—your adaptations might inspire someone else to give it a try. And if you’re looking for more simple, delicious recipes, check out our full collection of recipes for more inspiration. Happy baking!
Frequently Asked Questions
Can I use fresh pumpkin instead of canned?
Yes, you can. Roast a small sugar pumpkin until tender, scoop out the flesh, and puree it in a food processor until smooth. Just make sure to drain off any excess liquid—fresh pumpkin can be more watery than canned. Spread the puree on a paper towel-lined plate for a few minutes to remove extra moisture before measuring.
Why did my bread sink in the middle?
A sunken middle usually means the bread was underbaked or the oven temperature was too low. Make sure your oven is fully preheated and check for doneness with a toothpick. If the top is browning too quickly but the center is still raw, tent the loaf with foil and continue baking. Also, avoid opening the oven door during the first 30 minutes of baking—the temperature drop can cause the bread to collapse.
Can I make this into muffins instead of a loaf?
Absolutely. Grease a 12-cup muffin tin or line it with paper liners. Divide the batter evenly among the cups (about ¾ full). Bake at 350°F for 18-22 minutes, or until a toothpick inserted into the center of a muffin comes out clean. Muffins will bake faster than a loaf, so start checking at 18 minutes.
How do I know when my bananas are ripe enough?
Look for bananas with plenty of brown spots—they should feel soft when you squeeze them gently. The skin might even look almost black in places. If your bananas are still yellow and firm, you can speed up the ripening process by placing them in a paper bag with an apple or a ripe banana overnight. Or roast them in a 300°F oven for 15-20 minutes until the skins turn black and the flesh is soft.
Can I reduce the oil in this recipe?
You can reduce the oil to ¼ cup, but the bread will be slightly less moist. To compensate, add an extra ¼ cup of pumpkin purée or an extra ¼ cup of applesauce. I’ve also used Greek yogurt in place of half the oil with good results—it adds protein and keeps the crumb tender. Just make sure to use plain, full-fat yogurt for the best texture.
Pin This Recipe!
Easy One-Bowl Pumpkin Banana Bread Recipe
This easy one-bowl pumpkin banana bread combines the best of both squashes into a moist, tender loaf that tastes like fall. It’s forgiving, fast, and perfect for using up ripe bananas and leftover pumpkin purée.
- Prep Time: 15 minutes
- Cook Time: 55 minutes
- Total Time: 1 hour 10 minutes
- Yield: 10 servings 1x
- Category: Quick Bread
- Cuisine: American
Ingredients
- 1 ¾ cups (220g) all-purpose flour
- 1 teaspoon baking soda
- ½ teaspoon fine sea salt
- 1 ½ teaspoons ground cinnamon
- ½ teaspoon ground nutmeg
- ½ teaspoon ground ginger
- ¼ teaspoon ground cloves (optional)
- ½ cup (100g) granulated sugar
- ½ cup (100g) packed light brown sugar
- 2 large eggs, room temperature
- ⅓ cup (80ml) vegetable oil (avocado or canola)
- 1 cup (240g) pumpkin purée (not pumpkin pie filling)
- 2 medium ripe bananas, mashed (about 1 cup / 240g)
- 1 teaspoon vanilla extract
- ½ cup (90g) chocolate chips (optional)
- ½ cup (60g) chopped walnuts or pecans (optional)
- ¼ cup (30g) dried cranberries (optional)
Instructions
- Preheat oven to 350°F (175°C). Position rack in center. Line a 9×5-inch loaf pan with parchment paper, leaving overhang on long sides. If not using parchment, grease pan with butter or nonstick spray and dust with flour.
- In a large mixing bowl, mash the bananas with a fork until mostly smooth with a few small lumps.
- Add pumpkin purée, vegetable oil, eggs, and vanilla extract. Stir with fork or whisk until fully combined and glossy.
- Add granulated sugar and packed brown sugar. Stir until mostly dissolved, about 30 seconds.
- Sprinkle flour, baking soda, salt, cinnamon, nutmeg, ginger, and cloves (if using) over the wet mixture. Stir gently with a spatula or fork using a folding motion until no streaks of flour remain. Do not overmix.
- If using add-ins (chocolate chips, nuts, dried cranberries), fold them in gently with about 10 strokes.
- Scrape batter into prepared loaf pan, spread evenly, and tap pan gently on counter to release air bubbles.
- Bake for 50 to 60 minutes, starting to check at 50 minutes. Bread is done when a toothpick inserted into center comes out clean or with a few moist crumbs. If top browns too quickly, tent with foil after 40 minutes.
- Remove from oven and cool in pan on a wire rack for 15 minutes.
- Lift bread out using parchment sling and cool completely on rack, about 1 hour, before slicing.
Notes
Don’t overmix the batter to avoid a tough loaf. Use room temperature ingredients for best texture. Check baking soda freshness by testing with vinegar. Rotate pan halfway through baking for even browning. Let bread cool completely before slicing to prevent gummy crumb. Bread stays moist for up to 3 days at room temperature in an airtight container. Freezes well for up to 3 months.
Nutrition
- Serving Size: 1 slice (1/10 of loa
- Calories: 245
- Sugar: 20
- Sodium: 280
- Fat: 9
- Saturated Fat: 1.5
- Carbohydrates: 38
- Fiber: 2
- Protein: 4
Keywords: pumpkin banana bread, easy one-bowl recipe, fall baking, moist banana bread, pumpkin bread, quick bread, breakfast bread


