My mom did not trust “one-bowl” recipes. For years, she stood by her three-bowl banana bread method—one for mashing, one for wet ingredients, one for dry—like it was a sacred ritual. So when I told her I made banana bread using a single bowl and no mixer, she actually laughed. “That’s not how baking works,” she said, wiping her hands on her apron. “You need to aerate the flour. You need to fold properly. You can’t just dump everything together and hope for the best.”
And honestly? For a while, I believed her. I grew up watching her sift flour into separate bowls, beat butter and sugar until pale, and gently fold everything together with the kind of precision that made me nervous to help. So when I stumbled onto the idea of one-bowl banana bread (no mixer needed) during a particularly lazy Sunday morning when I had three overripe bananas and zero patience, I was skeptical myself. I thought, this is going to be a dense, rubbery disaster. But I had coffee brewing and a toddler tugging at my leg, so I grabbed the biggest bowl I owned and just went for it.
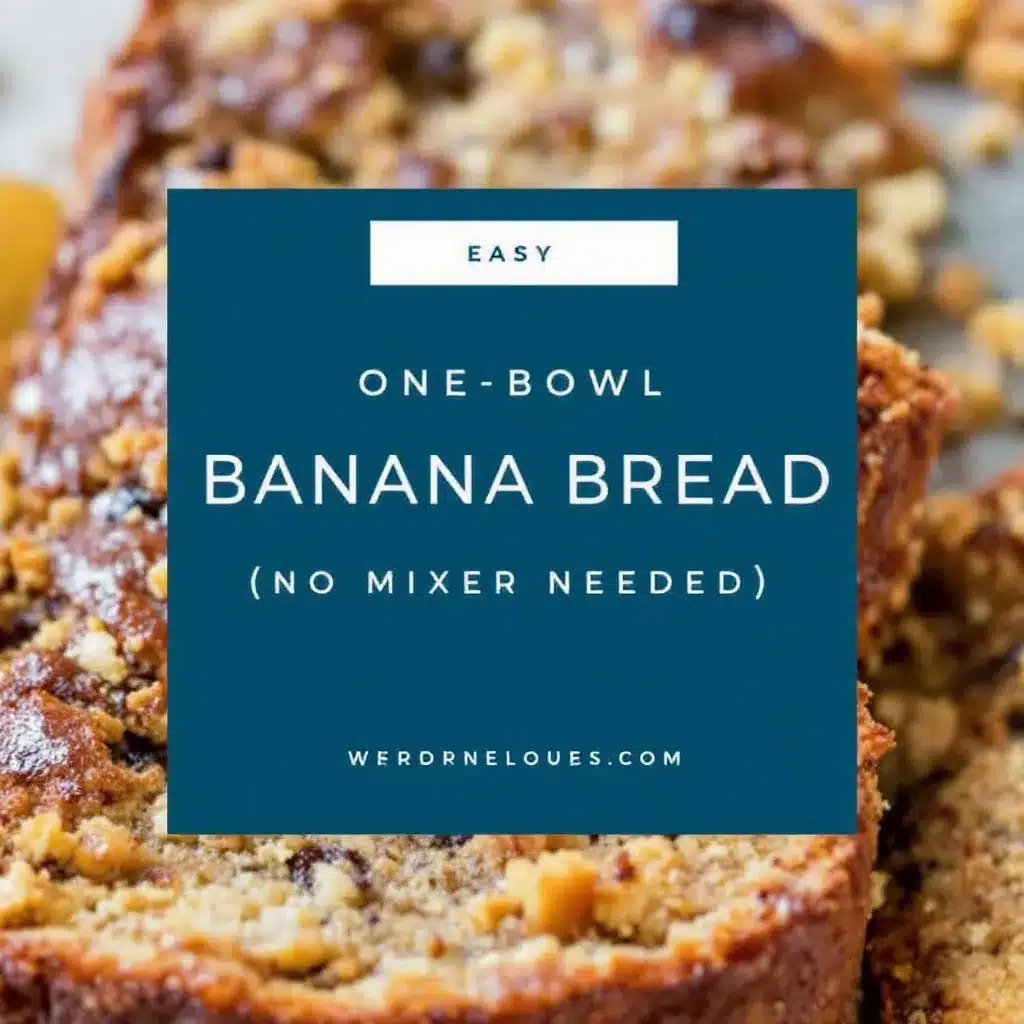
Here’s the thing—I was wrong. So wrong. That first loaf came out tender, moist, and perfectly domed on top. The texture was everything you want from banana bread: soft crumb, slightly caramelized edges, and that melt-in-your-mouth quality that makes you forget you’re eating something made from fruit that looked like it belonged in the compost bin. My mom tried a slice later that day and didn’t say much. But the next week, I found her old mixing bowls in the back of her pantry, collecting dust. She’d switched to one bowl too. Sometimes the simplest way really is the best way, and this recipe proves it every single time.
Why You’ll Love This Recipe
Let me tell you why this easy one-bowl banana bread has become my most-requested recipe among friends and family. It’s not fancy, but it’s honest—and that matters more.
- No Mixer Required: You don’t need a stand mixer, hand mixer, or any fancy gadget. Just a bowl and a sturdy spoon. Your arms do the work, and honestly, it takes less than two minutes of stirring.
- One Bowl, Minimal Cleanup: This isn’t just a catchy title. You literally use one bowl for everything—mashing, mixing, pouring. That means fewer dishes, less time at the sink, and more time eating warm banana bread.
- Perfect for Busy Mornings: From start to oven in under 10 minutes. While the bread bakes, you can tackle laundry, answer emails, or just sit down with your coffee and breathe.
- Pantry-Friendly Ingredients: You probably already have everything you need. Butter, sugar, eggs, flour, baking soda, salt, and those sad-looking bananas sitting on your counter. No special trips to the store.
- Foolproof for Beginners: I’ve taught this recipe to friends who’ve never baked anything from scratch. Every single one nailed it on the first try. The method is forgiving, and the results are consistent.
- Customizable Without Stress: Want to add chocolate chips? Walnuts? A swirl of peanut butter? Go for it. This batter handles add-ins like a champ without losing its texture.
What makes this recipe different from the dozens of banana bread recipes out there? It’s the technique of mashing the bananas first, then letting the sugar sit with the butter for a minute before adding the eggs. That small pause creates a creamier base without any electric mixer. Plus, I use melted butter instead of softened, which means you don’t have to wait for butter to come to room temperature. It’s these little shortcuts that save time without sacrificing quality.
This is the kind of banana bread that makes you close your eyes after the first bite. It’s comfort food at its simplest—no fuss, no stress, just pure, soul-soothing satisfaction. Perfect for a lazy Sunday, a weekday treat, or when you need to use up bananas that have seen better days.
What Ingredients You Will Need
This recipe uses simple, everyday ingredients to create something truly special. Most of these are probably already in your kitchen, which is exactly how baking should feel—approachable and uncomplicated.
For the Banana Bread
- Ripe bananas, mashed – 3 medium (about 1 to 1.5 cups mashed). The riper, the better. Look for bananas with plenty of brown spots—they’re sweeter and easier to mash. If your bananas aren’t ripe enough, you can speed things up by baking them at 300°F for 15 minutes until the skins turn black.
- Unsalted butter, melted – 1/3 cup (75g). I prefer using unsalted so I can control the salt level. Melt it gently in the microwave or on the stovetop, then let it cool for a minute so it doesn’t cook the eggs.
- Granulated sugar – 1/2 cup (100g). Regular white sugar works perfectly. You can substitute coconut sugar for a deeper flavor, but the texture will be slightly denser.
- Light brown sugar, packed – 1/4 cup (50g). This adds moisture and a subtle caramel flavor. If you only have dark brown sugar, that works too—just expect a richer taste.
- Large eggs – 1, at room temperature. Cold eggs can seize the melted butter, so let yours sit out for 15 minutes or place them in a bowl of warm water for 5 minutes.
- Vanilla extract – 1 teaspoon. Pure vanilla extract gives the best flavor, but imitation vanilla works in a pinch.
- All-purpose flour – 1.5 cups (190g). Spoon and level your flour—don’t scoop directly from the bag, or you’ll end up with too much and a dry loaf. For a gluten-free version, use a 1:1 gluten-free baking flour blend.
- Baking soda – 1 teaspoon. Make sure it’s fresh—test by dropping a pinch into vinegar; if it fizzes vigorously, it’s good to go.
- Salt – 1/2 teaspoon. Fine sea salt or table salt works best. Salt balances the sweetness and enhances the banana flavor.
- Optional mix-ins – 1/2 cup chocolate chips, chopped walnuts, or pecans. I usually add chocolate chips because, well, chocolate makes everything better.
I recommend using Land O’Lakes butter for its consistent fat content and King Arthur Flour for reliable results, but any brand you trust will work. If you’re using salted butter, simply reduce the added salt to 1/4 teaspoon.
Equipment Needed
One of the best things about this recipe is how little equipment you need. Here’s what you’ll need to have on hand:
- Large mixing bowl – Any bowl works, but I prefer a wide, deep ceramic or glass bowl. It gives you room to mash and stir without splattering. My go-to is a 4-quart Pyrex mixing bowl.
- Fork or potato masher – A fork works perfectly for mashing bananas, but a potato masher makes the job faster and gives you a smoother consistency. I’ve used both and honestly, the fork does just fine.
- Wooden spoon or silicone spatula – For mixing the batter. A wooden spoon is sturdy and gets the job done, but a silicone spatula lets you scrape the sides clean. I keep both nearby.
- 9×5-inch loaf pan – Standard size for banana bread. If you use an 8×4-inch pan, your bread will be taller and可能需要 bake a few minutes longer. A 9×5 gives you that classic shape with evenly baked edges.
- Parchment paper or non-stick spray – Parchment paper is my preference because it creates a sling that lets you lift the bread out cleanly. If you use spray, make sure it’s a baking spray with flour for best results.
- Cooling rack – Essential for letting the bread cool evenly. If you don’t have one, you can use the inverted loaf pan or even the stovetop grates in a pinch.
- Measuring cups and spoons – For accuracy. I’ve been baking long enough to eyeball most things, but for consistent results, measure carefully.
That’s it. No mixer, no sifter, no fancy gadgets. If you have these basics, you’re ready to bake.
Preparation Method
Let me walk you through this step by step. I’ve made this recipe dozens of times, and these are the exact steps I follow every time for perfect results.
- Preheat your oven to 350°F (175°C). Position the rack in the center of the oven. While it heats up, line your 9×5-inch loaf pan with parchment paper, leaving some overhang on the long sides—this creates handles for lifting the bread out later. If you’re using non-stick spray, give the pan a good coating, especially the corners.
- Mash the bananas in your large mixing bowl. Peel the bananas and drop them into the bowl. Use a fork or potato masher to mash them until smooth with a few small lumps remaining. You want some texture—completely smooth banana puree can make the bread dense. Aim for a consistency similar to chunky applesauce. This should take about 30 seconds.
- Add the melted butter and both sugars. Pour the melted butter over the mashed bananas, then add the granulated sugar and brown sugar. Stir with your wooden spoon or spatula until everything is combined. The mixture will look slightly grainy at this point—that’s normal. Let it sit for 1 minute. This brief rest helps the sugar dissolve slightly and creates a creamier base.
- Crack in the egg and add vanilla. Add the room-temperature egg and vanilla extract to the bowl. Stir vigorously for about 30 seconds until the mixture becomes smooth, glossy, and slightly lighter in color. You’ll notice it starts to look more like a batter than a chunky mess. If your egg was cold, don’t worry—just stir a bit longer until it’s fully incorporated.
- Add the dry ingredients. Sprinkle the flour, baking soda, and salt over the wet mixture. Here’s the important part: don’t dump it all in one spot. Scatter it evenly so the baking soda distributes properly. Stir gently, using a folding motion, until just combined. You should see a few streaks of flour remaining—overmixing at this stage will make your banana bread tough. About 15 to 20 strokes is all you need.
- Fold in any mix-ins. If you’re adding chocolate chips, nuts, or anything else, gently fold them in with 3 to 4 strokes. Don’t overwork the batter. The mix-ins should be evenly distributed but not beaten in.
- Pour the batter into the prepared pan. Use your spatula to scrape every last bit of batter into the pan. Spread it evenly, giving the pan a gentle tap on the counter to release any air bubbles. The batter should fill the pan about two-thirds full.
- Bake for 50 to 60 minutes. Place the pan in the center of the oven and bake until a toothpick inserted into the center comes out clean or with a few moist crumbs. The top should be golden brown and cracked in the center—that’s the signature banana bread look. Start checking at 50 minutes. If the top is browning too quickly, tent the pan loosely with aluminum foil for the last 10 to 15 minutes.
- Cool in the pan for 10 minutes. Remove the pan from the oven and place it on a cooling rack. Let it rest for exactly 10 minutes—this allows the bread to set so it doesn’t fall apart when you remove it.
- Lift the bread out and cool completely. Use the parchment paper sling to lift the bread out of the pan. Place it directly on the cooling rack. Let it cool completely before slicing, about 1 hour. I know it’s tempting to cut into it warm, but slicing too early will give you a gummy, crumbly mess. Trust me, I’ve learned this the hard way.
Cooking Tips & Techniques
After making this easy one-bowl banana bread more times than I can count, I’ve picked up a few tricks that make a real difference. Let me share them with you.
The banana ripeness rule: The darker and spottier your bananas, the better your bread will taste. Green or yellow bananas lack the sugar and moisture needed for that soft, sweet loaf. If your bananas are barely ripe, you can bake them at 300°F for 15 minutes until the skins turn black—this concentrates the sugars and makes them mashable. I’ve done this in a pinch, and it works surprisingly well.
Don’t overmix the batter: This is the most common mistake I see beginners make. Once you add the flour, stir only until you can’t see dry flour anymore. Overmixing develops gluten, which makes your banana bread tough and rubbery instead of tender. A few lumps are perfectly fine—they’ll bake out in the oven.
Check for doneness properly: A toothpick test is reliable, but insert it in the center crack, not the side. The center is the last part to bake through. If the toothpick comes out with wet batter, give it 5 more minutes and check again. If it comes out with a few moist crumbs, it’s done. The internal temperature should be around 200°F to 205°F if you want to use a thermometer.
Room temperature ingredients matter: I know it’s tempting to use cold eggs straight from the fridge, but room temperature ingredients emulsify better, giving you a smoother, more evenly textured bread. If you forgot to take the egg out, place it in a bowl of warm water for 5 minutes—it works like a charm.
Let it cool completely: I cannot stress this enough. Warm banana bread is delicious, but it’s also fragile. Slicing into it too early will give you a crumbly, gummy mess. Patience pays off here. I once ruined a beautiful loaf because I couldn’t wait 15 more minutes. Learn from my mistake.
Variations & Adaptations
This one-bowl banana bread is incredibly versatile. Here are some of my favorite ways to change it up, depending on what I’m craving or what I have in the pantry.
Chocolate Chip Banana Bread: Fold in 1/2 cup of semi-sweet or dark chocolate chips along with the dry ingredients. The chocolate melts into little pockets of richness throughout the bread. I’ve also used white chocolate chips for a sweeter version—it’s dangerously good.
Nutty Banana Bread: Add 1/2 cup of chopped walnuts or pecans, toasted first for extra flavor. Toast them in a dry skillet over medium heat for 3 to 4 minutes until fragrant, then let them cool before folding into the batter. The crunch adds a lovely contrast to the soft crumb.
Vegan Version: Replace the egg with a flax egg (1 tablespoon ground flaxseed mixed with 3 tablespoons water, let sit for 5 minutes). Use melted coconut oil or vegan butter instead of dairy butter. The texture will be slightly denser but still delicious. I’ve made this for vegan friends and it disappeared quickly.
Gluten-Free Option: Substitute the all-purpose flour with a 1:1 gluten-free baking flour blend that contains xanthan gum. I’ve had good results with Bob’s Red Mill 1-to-1 Baking Flour. The crumb will be slightly more tender, so handle with care when slicing.
Spiced Banana Bread: Add 1 teaspoon of cinnamon, 1/2 teaspoon of nutmeg, and a pinch of cloves along with the dry ingredients. This gives the bread a warm, cozy flavor that’s perfect for fall. I sometimes add a teaspoon of pumpkin pie spice for a similar effect.
Peanut Butter Swirl: Drop spoonfuls of peanut butter over the batter before baking, then swirl with a knife. Use about 1/4 cup of creamy peanut butter. The salty-sweet combination is absolutely addictive. I’ve also tried almond butter and cashew butter—both work beautifully.
Serving & Storage Suggestions
This banana bread is wonderful fresh out of the oven, but it also gets better over the next day or two as the flavors meld together. Here’s how I like to serve and store it.
Serving: Serve slices at room temperature or lightly toasted. Toasting brings out the caramelized edges and makes the interior extra soft. I love it with a pat of butter that melts into the warm bread, or with a drizzle of honey for extra sweetness. For a special treat, spread a thin layer of cream cheese on top—it’s a game-changer.
Pair it with a hot cup of coffee or tea for a cozy afternoon snack. It also goes beautifully with a glass of cold milk, especially if you’ve added chocolate chips. For a more substantial breakfast, serve it alongside scrambled eggs and fresh fruit. If you’re in the mood for something refreshing, try it with our refreshing cucumber mint green tea cooler for a surprising but delightful combination.
Storage: Store leftover banana bread in an airtight container at room temperature for up to 4 days. Wrap the loaf tightly in plastic wrap or aluminum foil before placing it in the container to keep it from drying out. If your kitchen is warm or humid, you can refrigerate it, but the texture will be slightly denser—bring slices to room temperature before serving.
Freezing: This banana bread freezes beautifully. Wrap the cooled loaf tightly in plastic wrap, then in a layer of aluminum foil, and freeze for up to 3 months. You can also freeze individual slices—wrap each one in plastic wrap, then place them in a freezer bag. To thaw, leave slices at room temperature for about 30 minutes, or pop them in the toaster for a quick warm-up. The flavor actually improves after freezing, as the banana flavor becomes more concentrated.
Flavors develop over time, so day-old banana bread often tastes even better than fresh-baked. The moisture redistributes, and the sweetness becomes more balanced. If you can resist eating it all on day one, you’re in for a treat on day two.
Nutritional Information & Benefits
While banana bread is definitely a treat, it does have some redeeming qualities. Here’s a rough estimate of the nutritional content per slice (based on 10 slices, without mix-ins):
- Calories: Approximately 220
- Total Fat: 9g
- Saturated Fat: 5g
- Cholesterol: 40mg
- Sodium: 220mg
- Total Carbohydrates: 33g
- Dietary Fiber: 1g
- Sugars: 18g
- Protein: 4g
Bananas are a good source of potassium, vitamin B6, and vitamin C. They also provide fiber, which aids digestion and helps you feel full longer. Using melted butter instead of oil keeps the fat content moderate, and the brown sugar adds a touch of molasses for depth without going overboard on sweetness.
This recipe is vegetarian-friendly and can easily be made vegan or gluten-free with the substitutions mentioned earlier. It contains dairy (butter) and gluten (flour), so it’s not suitable for those with related allergies unless modified. The egg can be replaced for a vegan option, but note that the texture will be slightly denser.
I personally love that this banana bread feels indulgent but isn’t overly heavy. It’s the kind of treat you can enjoy without guilt, especially when you know exactly what went into it—real ingredients, no preservatives, and a whole lot of love.
Conclusion
This easy one-bowl banana bread is proof that you don’t need fancy equipment, complicated techniques, or a dozen bowls to make something truly delicious. It’s the recipe I turn to when I need a little comfort, when bananas are about to go bad, or when I just want to fill my kitchen with that warm, sweet smell that makes everything feel right.
I love that this recipe is forgiving enough for beginners but satisfying enough for experienced bakers who appreciate a no-fuss approach. It’s become a staple in my home, and I hope it becomes one in yours too. Play around with the mix-ins, adjust the sweetness to your taste, and make it your own. That’s the beauty of a simple recipe—it leaves room for you.
If you give this banana bread a try, I’d love to hear how it turned out. Leave a comment below and tell me what add-ins you used, or tag me in your photos on social media. Your feedback helps other readers know what works, and honestly, it just makes my day to see your creations. For more easy, one-bowl recipes like this, check out our full collection of recipes—you might find your next favorite dessert waiting there.
Happy baking, friends. You’ve got this.
Frequently Asked Questions
Can I use frozen bananas for this recipe?
Absolutely! Frozen bananas work great. Thaw them completely at room temperature or in the microwave, then drain off any excess liquid before mashing. The thawed bananas will be very soft and almost liquidy, which actually makes them easier to mash. Just note that the batter might be slightly wetter, so you may need to bake for an extra 5 to 10 minutes.
Why did my banana bread sink in the middle?
A sunken middle usually means the bread was underbaked or the oven temperature was too low. Make sure your oven is fully preheated to 350°F and that you’re using an oven thermometer to verify the temperature—oven dials can be off by 25 degrees or more. Also, don’t open the oven door during the first 40 minutes of baking, as the cold air can cause the bread to collapse.
Can I make this recipe into muffins instead of a loaf?
Yes! This batter works beautifully for muffins. Grease a 12-cup muffin tin or line with paper liners. Fill each cup about two-thirds full and bake at 350°F for 18 to 22 minutes, or until a toothpick comes out clean. You’ll get about 12 muffins. They’re perfect for grab-and-go breakfasts or lunchbox treats.
How do I know when my bananas are ripe enough?
Look for bananas with plenty of brown spots or even fully black skins. They should feel soft to the touch and smell sweet. If you press gently, your finger should leave a slight indentation. Under-ripe bananas will give you a less sweet, more starchy bread. When in doubt, let them sit on the counter for a few more days—they’ll get there.
Can I reduce the sugar in this recipe?
You can reduce the sugar by up to 1/4 cup without significantly affecting the texture, but the bread will be less sweet. If your bananas are very ripe and spotty, they’ll provide more natural sweetness, so you can cut back more. I’ve made it with 1/2 cup total sugar (instead of 3/4 cup) and it was still delicious, just more subtle in sweetness. For a sugar-free option, try using a monk fruit sweetener blend, but note that the texture may be slightly different.
PrintEasy One-Bowl Banana Bread: Best Homemade Recipe
This easy one-bowl banana bread is tender, moist, and perfectly domed on top. Made with simple pantry ingredients and no mixer required, it’s a foolproof recipe that delivers comfort food at its simplest.
- Prep Time: 10 minutes
- Cook Time: 55 minutes
- Total Time: 1 hour 5 minutes
- Yield: 10 servings 1x
- Category: Dessert
- Cuisine: American
Ingredients
- 3 medium ripe bananas, mashed (about 1 to 1.5 cups)
- 1/3 cup (75g) unsalted butter, melted
- 1/2 cup (100g) granulated sugar
- 1/4 cup (50g) light brown sugar, packed
- 1 large egg, at room temperature
- 1 teaspoon vanilla extract
- 1.5 cups (190g) all-purpose flour
- 1 teaspoon baking soda
- 1/2 teaspoon salt
- 1/2 cup chocolate chips, chopped walnuts, or pecans (optional)
Instructions
- Preheat your oven to 350°F (175°C). Position the rack in the center of the oven. Line a 9×5-inch loaf pan with parchment paper, leaving some overhang on the long sides, or grease with non-stick spray.
- Mash the bananas in a large mixing bowl using a fork or potato masher until smooth with a few small lumps remaining.
- Add the melted butter, granulated sugar, and brown sugar to the mashed bananas. Stir until combined. Let the mixture sit for 1 minute.
- Add the room-temperature egg and vanilla extract. Stir vigorously for about 30 seconds until the mixture becomes smooth, glossy, and slightly lighter in color.
- Sprinkle the flour, baking soda, and salt evenly over the wet mixture. Stir gently using a folding motion until just combined, about 15 to 20 strokes. A few streaks of flour should remain.
- If using mix-ins, gently fold them in with 3 to 4 strokes.
- Pour the batter into the prepared loaf pan and spread evenly. Tap the pan gently on the counter to release air bubbles.
- Bake for 50 to 60 minutes, until a toothpick inserted into the center comes out clean or with a few moist crumbs. If the top browns too quickly, tent loosely with aluminum foil for the last 10 to 15 minutes.
- Cool the bread in the pan for 10 minutes, then use the parchment paper sling to lift it out and transfer to a cooling rack. Cool completely before slicing, about 1 hour.
Notes
Use very ripe bananas with brown spots for best sweetness and moisture. Don’t overmix the batter once flour is added to avoid a tough loaf. Let the bread cool completely before slicing to prevent a gummy texture. For a vegan version, replace the egg with a flax egg (1 tablespoon ground flaxseed mixed with 3 tablespoons water) and use melted coconut oil or vegan butter. For a gluten-free version, use a 1:1 gluten-free baking flour blend.
Nutrition
- Serving Size: 1 slice
- Calories: 220
- Sugar: 18
- Sodium: 220
- Fat: 9
- Saturated Fat: 5
- Carbohydrates: 33
- Fiber: 1
- Protein: 4
Keywords: banana bread, one-bowl banana bread, easy banana bread, homemade banana bread, no mixer banana bread, moist banana bread


