The pie had been sitting on the counter for maybe twenty minutes when my neighbor texted: “What did you bring to the potluck? I need the recipe. Now.” I hadn’t even posted about it. She just tasted it, tracked me down, and demanded answers. That’s when I knew this no-bake pumpkin pie with Cool Whip wasn’t just good—it was dangerous in the best way.
Look, I love a traditional baked pumpkin pie as much as the next person. The smell of cinnamon and cloves filling the house? Classic. But let’s be honest—between the blind baking, the cracked custard, and the hour-long bake time, it’s a project. And sometimes, you just want the payoff without the work.
This recipe started as a happy accident. I had a can of pumpkin puree, a tub of Cool Whip, and about fifteen minutes before guests arrived. I threw things together, crossed my fingers, and ended up with something so creamy, so perfectly spiced, and so ridiculously easy that I’ve never gone back to the baked version. (Seriously—it’s become my go-to for every holiday gathering since.)
The best part? Nobody believes it’s no-bake. They take a bite, look at me suspiciously, and ask, “Wait—this didn’t come from a bakery?” Nope. Just my kitchen, a few ingredients, and zero oven time. If you’re looking for a dessert that tastes like you spent hours but actually took minutes, this is it.
Why You’ll Love This Recipe
I’ve tested this recipe more times than I care to admit. I’ve made it with different crusts, different sweeteners, different mixing methods. And after all that trial and error, I can tell you exactly why this version wins every single time.
- No Oven Required: This is the kind of recipe that saves your sanity when the oven is already packed with sides or when you’re just too tired to deal with baking. It sets up beautifully in the fridge with zero heat needed.
- Five Ingredients: That’s it. Pumpkin puree, Cool Whip, instant pudding mix, a pre-made graham cracker crust, and pumpkin pie spice. No fancy grocery store trips required.
- Ready in Under 15 Minutes: I’m not exaggerating. Mix, pour, chill. That’s the whole process. Perfect for last-minute holiday dinners or when a pumpkin pie craving hits out of nowhere.
- Foolproof Texture: No cracks, no sinking, no soggy crust. The Cool Whip keeps everything light and airy while the pudding mix gives it that perfect sliceable consistency.
- Make-Ahead Friendly: This pie actually gets better after a day in the fridge. The flavors meld together, the texture firms up perfectly, and you get to cross “dessert” off your to-do list a full day early.
What makes this different from every other no-bake pumpkin pie out there? It’s the texture. Most versions use cream cheese, which makes the filling dense and heavy. By using Cool Whip instead, you get this impossibly light, mousse-like consistency that practically melts on your tongue. It’s like eating pumpkin clouds. And the flavor? Perfectly spiced without being overpowering. It’s comfort food that feels almost indulgent, but comes together with less effort than making boxed mac and cheese.
What Ingredients You Will Need
Here’s the beautiful thing about this recipe—it uses ingredients you probably already have in your pantry or can grab in one quick aisle at the grocery store. No hunting down obscure spices or specialty items. Just simple, honest ingredients that work together like magic.
- 1 can (15 oz) pumpkin puree – Not pumpkin pie filling. Make sure you grab pure pumpkin puree. I prefer Libby’s for its consistent texture and deep flavor, but store brands work fine too. (Pro tip: taste it before using—some brands can be slightly bitter.)
- 1 container (8 oz) Cool Whip, thawed – The star of the show. Thaw it in the fridge overnight or on the counter for about an hour. You want it soft but still cold. Don’t use frozen—it won’t mix properly.
- 1 box (3.4 oz) instant vanilla pudding mix – This is what gives the pie structure without baking. Jell-O brand works great, but any instant vanilla pudding mix will do. Do NOT use cook-and-serve pudding—it won’t set up correctly.
- 1 pre-made graham cracker crust (9-inch) – Keebler makes a solid one, but any brand works. You can also use a chocolate crust for a fun twist, or make your own if you’re feeling ambitious. (More on that in the variations section.)
- 1 teaspoon pumpkin pie spice – You can buy it pre-mixed or make your own with cinnamon, nutmeg, ginger, and cloves. I actually prefer making my own because I like a little extra cinnamon. More on that below.
- Optional: ¼ cup brown sugar – I add this when I want a deeper, molasses-like sweetness. It’s not necessary, but it takes the flavor from good to “what bakery did you get this from?”
- Optional: Extra Cool Whip for topping – Because more is more.
For the homemade pumpkin pie spice blend (if you want to make your own):
- 2 tablespoons cinnamon
- 2 teaspoons ground ginger
- 1 teaspoon ground nutmeg
- ½ teaspoon ground cloves
- ½ teaspoon allspice (optional, but I love it)
Mix these together and store in a small jar. You’ll have enough for this recipe and about ten more batches. I keep mine in the spice cabinet and use it for everything from pumpkin bread to spiced lattes.
Ingredient substitution notes: If you need a dairy-free version, use dairy-free Cool Whip and a graham cracker crust that doesn’t contain butter (some store-bought brands are accidentally vegan). For a gluten-free option, use a gluten-free graham cracker crust or make one with gluten-free cookies. The filling itself is naturally gluten-free.
Equipment Needed
One of the reasons I make this pie so often is the minimal cleanup. You really don’t need much.
- Large mixing bowl – Any bowl will do, but I prefer a glass or stainless steel bowl. Plastic bowls can sometimes hold onto odors, and nobody wants their pumpkin pie to taste like last week’s chili.
- Whisk or electric hand mixer – A whisk works if you’ve got some arm strength, but an electric hand mixer makes this ridiculously easy. I use my KitchenAid hand mixer and it takes about thirty seconds to get everything perfectly combined.
- Rubber spatula – For scraping every last bit of filling into the crust. Trust me, you don’t want to waste any of this.
- Measuring spoons – For the pumpkin pie spice and optional brown sugar.
- Refrigerator space – The pie needs at least 4 hours to set, preferably overnight. Make sure you’ve got a flat spot in your fridge.
Budget-friendly note: Don’t own an electric mixer? No problem. A sturdy whisk and a little elbow grease will get the job done. The mixture comes together easily, and honestly, the arm workout is a bonus. (I speak from experience—I’ve made this pie with a whisk more times than I can count.)
Preparation Method
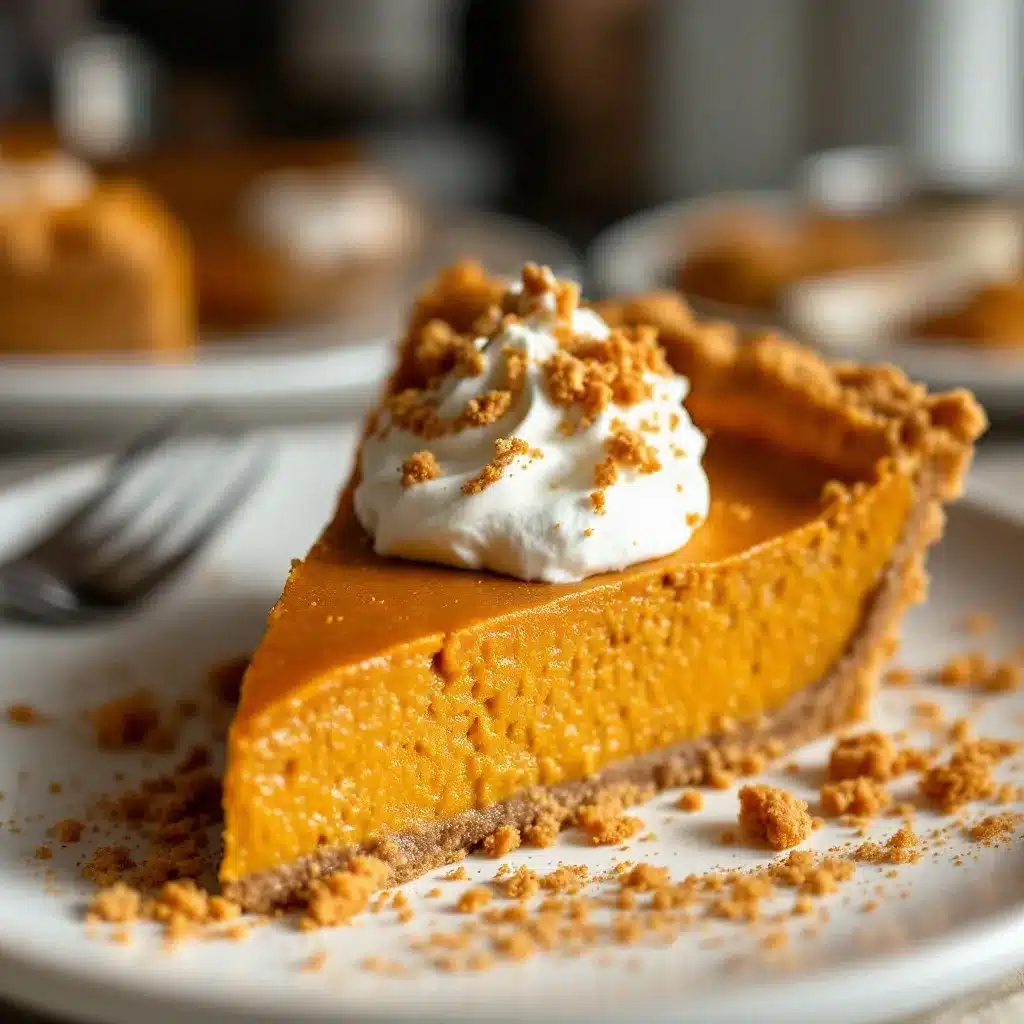
Alright, let’s get to the good part. This is so simple you’ll probably memorize it after one try.
- Thaw your Cool Whip. If you forgot to put it in the fridge overnight, don’t panic. Let it sit on the counter for about 45 minutes to an hour. You want it soft enough to scoop but still cold. (Trust me on this—if it gets too warm, your pie won’t set up properly.)
- Mix the dry ingredients. In your large mixing bowl, combine the instant vanilla pudding mix and the pumpkin pie spice. Whisk them together until evenly distributed. This step matters because it ensures every bite has consistent flavor. (I learned this the hard way after one bite tasted like pure cloves and the next had no spice at all.)
- Add the pumpkin puree. Dump in the entire can of pumpkin puree. Using your whisk or electric mixer, beat until smooth and fully combined. The mixture will be thick and smell amazing at this point. Take a moment to inhale—this is what fall smells like.
- Fold in the Cool Whip. This is the most important step. Add the thawed Cool Whip to the pumpkin mixture. If you’re using an electric mixer, switch to low speed and mix just until combined. If you’re whisking by hand, use a gentle folding motion. You want to incorporate the Cool Whip without deflating it. The final mixture should be light, fluffy, and a beautiful pale orange color. (If it looks streaky, keep mixing gently. If it looks soupy, you’ve overmixed—but don’t worry, it’ll still taste great.)
- Add brown sugar (optional). If you’re using brown sugar, sprinkle it in now and mix gently until incorporated. Taste the filling at this point. It should be sweet but not cloying, with warm spice notes and that distinct pumpkin flavor. Adjust spice or sweetness to your liking.
- Pour into the crust. Grab your pre-made graham cracker crust and pour the filling in. Use your rubber spatula to spread it evenly. Give the pie a few gentle taps on the counter to release any air bubbles. (Don’t slam it—you’ll crack the crust. I’ve done that. It’s sad.)
- Smooth the top. Use the back of a spoon or your spatula to create a smooth, even surface. Some people like to create little swirls on top for a decorative effect. I usually go for smooth because I’m covering it with extra Cool Whip anyway.
- Chill, chill, chill. Place the pie in the refrigerator, uncovered, for at least 4 hours. Overnight is better. The filling needs time to set up and become sliceable. If you try to cut it too early, you’ll end up with pumpkin soup. (I know this because I’ve definitely been impatient before.)
- Top and serve. Once the pie is fully set, spread a layer of extra Cool Whip on top if desired. Slice with a sharp knife, wiping the blade clean between cuts for neat slices. Serve cold and watch everyone’s faces light up.
Sensory cue checklist: When properly mixed, the filling should be thick enough to hold its shape when you lift the spatula. It should smell like pumpkin pie spice with a hint of vanilla. After chilling, the top should feel firm to the touch, not jiggly. A toothpick inserted in the center should come out clean.
Cooking Tips & Techniques
After making this pie more times than I can count (and messing it up a few memorable times), I’ve collected some tips that make a real difference.
Don’t overmix the Cool Whip. This is the number one mistake I see people make. Overmixing deflates the Cool Whip, turning your light and fluffy filling into something dense and heavy. Fold gently, stop when combined, and resist the urge to keep mixing. I once got distracted and overmixed an entire batch. The pie still tasted fine, but it had the texture of a brick. Learn from my mistakes.
Let it chill overnight if you can. Four hours is the minimum, but overnight is where the magic happens. The flavors meld together, the texture firms up perfectly, and the crust softens just enough to complement the filling. If you’re making this for Thanksgiving, make it the day before. Your future self will thank you.
Keep it cold. This pie doesn’t do well at room temperature for extended periods. If you’re serving it at a gathering, keep it in the fridge until just before serving. Leftovers should go back in the fridge within an hour. (I learned this the hard way at a picnic when my beautiful pie turned into a puddle.)
Use a sharp knife for clean slices. Run your knife under hot water, wipe it dry, then slice. Wipe the blade clean between each cut. This gives you those beautiful, Instagram-worthy slices that make people think you’re a professional baker.
Room temperature ingredients matter. I know I said to keep the Cool Whip cold, but the pumpkin puree should be at room temperature. Cold pumpkin doesn’t mix well with the pudding mix and can lead to lumps. Take it out of the fridge about 30 minutes before you start.
Don’t skip the pudding mix. I’ve tried making this without it, thinking I could just use more Cool Whip. Disaster. The pudding mix is what gives the pie structure. Without it, you’re basically eating pumpkin-flavored whipped cream. Delicious, but not sliceable.
Variations & Adaptations
One of the things I love about this recipe is how easy it is to customize. Here are some variations I’ve tried and loved.
Chocolate Pumpkin Pie: Use a chocolate graham cracker crust instead of regular. The chocolate and pumpkin flavors complement each other beautifully. I did this on a whim one year and it was a huge hit. The slight bitterness of the chocolate balances the sweetness of the filling perfectly.
Vegan Version: Use dairy-free Cool Whip (Soyatoo makes a good one) and a vegan graham cracker crust. Check the labels on your pudding mix—some brands use gelatin, but many are accidentally vegan. This version is just as creamy and delicious, and honestly, most people can’t tell the difference.
Extra Spiced: If you’re like me and can’t get enough warm spices, double the pumpkin pie spice and add an extra ¼ teaspoon of cinnamon. You can also add a pinch of cayenne pepper for a subtle heat that catches people off guard in the best way.
Maple Pumpkin Pie: Replace the brown sugar with ¼ cup of pure maple syrup. Reduce the Cool Whip by about ¼ cup to compensate for the extra liquid. The maple flavor adds a cozy, autumn warmth that’s absolutely addictive. I made this version for a Friendsgiving and had three people ask for the recipe.
Pumpkin Cheesecake Style: Add 4 oz of softened cream cheese to the pumpkin mixture before folding in the Cool Whip. Beat the cream cheese until smooth, then add the pumpkin and pudding mix. This gives you a richer, denser filling that’s closer to cheesecake. It’s a little more work, but worth it for special occasions.
Mini Pies: Use mini graham cracker crusts instead of one large one. These are perfect for parties or portion control. The chilling time is shorter—about 2 hours—since the mini pies set up faster. I made these for a holiday party once and they disappeared in minutes.
Serving & Storage Suggestions
This pie is best served cold, straight from the fridge. I like to take it out about 10 minutes before serving to take the chill off slightly—it makes the texture even creamier. But don’t let it sit out too long, or it’ll start to soften.
Presentation ideas: Top with a generous swirl of extra Cool Whip, a sprinkle of cinnamon or pumpkin pie spice, and maybe a few candied pecans for crunch. You can also drizzle caramel sauce over the top for extra decadence. If you’re feeling fancy, pipe the Cool Whip on using a star tip for a professional look.
What to serve with it: This pie pairs beautifully with a cup of hot coffee or spiced apple cider. For a full dessert spread, serve it alongside creamy vegan chocolate avocado pudding for a fun contrast of flavors. The chocolate and pumpkin combination is surprisingly good. You could also add a scoop of vanilla ice cream or a dollop of homemade whipped cream if you want to go all out.
Storage: Cover the pie with plastic wrap or aluminum foil and keep it in the refrigerator. It will stay good for up to 5 days, though I doubt it’ll last that long. The texture actually improves after a day or two as the flavors continue to meld.
Freezing instructions: This pie freezes beautifully. Wrap it tightly in plastic wrap, then a layer of aluminum foil, and freeze for up to 2 months. To serve, thaw in the refrigerator overnight. Don’t thaw at room temperature—it can get soggy. I’ve made this pie weeks before Thanksgiving and pulled it out with zero issues.
Reheating (if you must): While this is meant to be served cold, I’ve had friends who prefer it slightly warm. If that’s you, microwave individual slices for about 10-15 seconds. The filling will soften but won’t lose its structure. Personally, I think it’s best cold, but hey—you do you.
Nutritional Information & Benefits
Let’s be real—this is dessert, not a health food. But it does have some redeeming qualities.
Estimated nutrition per slice (based on 8 servings):
- Calories: 280
- Fat: 12g
- Carbohydrates: 40g
- Fiber: 3g
- Sugar: 28g
- Protein: 3g
- Vitamin A: 190% of daily value
Health highlights: Pumpkin is packed with vitamin A, which is great for eye health and immune function. It’s also a good source of fiber, which helps with digestion and keeps you feeling full. The Cool Whip adds air and lightness without a ton of extra calories, making this a lighter option compared to traditional baked pumpkin pie (which often has double the calories per slice).
Dietary considerations: This recipe can easily be made gluten-free (use a gluten-free crust), vegetarian (it already is), and with some modifications, vegan (as mentioned above). It contains dairy from the Cool Whip and crust, so it’s not suitable for those with dairy allergies unless you use alternatives.
My personal take: I don’t make this pie because it’s healthy. I make it because it’s delicious and easy and brings people together. But knowing that it has some nutritional benefits? That’s just a bonus. It’s comfort food that doesn’t leave you feeling guilty or weighed down.
Conclusion
Look, I know there are a million pumpkin pie recipes out there. But this one? This one is different. It’s the one I make when I’m short on time but still want to impress. It’s the one I turn to when the oven is full and the stress is high. It’s the one that gets the most requests, the most compliments, and the most empty plates.
What I love most about this recipe is how it proves that simple doesn’t mean boring. Five ingredients, fifteen minutes of work, and you’ve got a dessert that tastes like you spent hours in the kitchen. It’s the kind of recipe that makes you look like a hero without actually having to try that hard. And honestly? That’s my favorite kind of recipe.
I’d love to hear how this turns out for you. Did you add any fun variations? Did your family guess it was no-bake? Drop a comment below and let me know. And if you’re looking for more easy, crowd-pleasing recipes, check out the full recipe collection for more inspiration. Happy baking—or, you know, happy mixing and chilling!
Frequently Asked Questions
Can I use homemade whipped cream instead of Cool Whip?
You can, but the texture will be different. Homemade whipped cream doesn’t have the stabilizers that Cool Whip has, so the pie won’t set up as firmly. If you want to try it, add a tablespoon of powdered sugar and a teaspoon of vanilla extract to stabilize the cream. It’ll still be delicious, just a bit softer.
How long does this pie need to chill?
At least 4 hours, but overnight is best. The filling needs time to firm up so you can get clean slices. If you’re in a hurry, you can pop it in the freezer for about 2 hours, but keep an eye on it—you don’t want it to freeze solid.
Can I use pumpkin pie filling instead of pumpkin puree?
I wouldn’t recommend it. Pumpkin pie filling already has sugar and spices added, which will throw off the flavor balance. Plus, it has a different consistency that can make the pie too sweet or too soft. Stick with pure pumpkin puree for the best results.
Why did my pie turn out runny?
This usually happens for one of three reasons: the Cool Whip was too warm when you mixed it in, you didn’t chill it long enough, or you used cook-and-serve pudding instead of instant. Make sure everything is properly chilled and use instant pudding mix for the right texture.
Can I make this pie sugar-free?
Yes! Use sugar-free instant vanilla pudding mix and sugar-free Cool Whip. You can also skip the optional brown sugar or use a sugar substitute like Swerve. The texture will be slightly different, but it still sets up well and tastes great. I’ve made this version for friends with dietary restrictions and they loved it.
Pin This Recipe!

Easy No-Bake Pumpkin Pie with Cool Whip Is the Best

A creamy, perfectly spiced no-bake pumpkin pie that comes together in under 15 minutes with just five ingredients. This foolproof dessert is light, mousse-like, and always a crowd-pleaser.
- Prep Time: 15 minutes
- Cook Time: 0 minutes
- Total Time: 4 hours 15 minutes (includes chilling)
- Yield: 8 servings 1x
- Category: Dessert
- Cuisine: American
Ingredients
- 1 can (15 oz) pumpkin puree
- 1 container (8 oz) Cool Whip, thawed
- 1 box (3.4 oz) instant vanilla pudding mix
- 1 pre-made graham cracker crust (9-inch)
- 1 teaspoon pumpkin pie spice
- ¼ cup brown sugar (optional)
- Extra Cool Whip for topping (optional)
Instructions
- Thaw your Cool Whip. If you forgot to put it in the fridge overnight, let it sit on the counter for about 45 minutes to an hour. You want it soft enough to scoop but still cold.
- In your large mixing bowl, combine the instant vanilla pudding mix and the pumpkin pie spice. Whisk them together until evenly distributed.
- Add the entire can of pumpkin puree. Using your whisk or electric mixer, beat until smooth and fully combined.
- Fold in the thawed Cool Whip. If using an electric mixer, switch to low speed and mix just until combined. If whisking by hand, use a gentle folding motion. The final mixture should be light, fluffy, and a beautiful pale orange color.
- If using brown sugar, sprinkle it in now and mix gently until incorporated. Taste and adjust spice or sweetness to your liking.
- Pour the filling into the pre-made graham cracker crust. Use a rubber spatula to spread it evenly. Give the pie a few gentle taps on the counter to release any air bubbles.
- Smooth the top with the back of a spoon or spatula.
- Place the pie in the refrigerator, uncovered, for at least 4 hours, preferably overnight, until set.
- Once fully set, spread a layer of extra Cool Whip on top if desired. Slice with a sharp knife, wiping the blade clean between cuts. Serve cold.
Notes
For best results, chill overnight. Do not overmix the Cool Whip. Keep pie refrigerated until serving. Use instant pudding mix, not cook-and-serve.
Nutrition
- Serving Size: 1 slice
- Calories: 280
- Sugar: 28
- Fat: 12
- Carbohydrates: 40
- Fiber: 3
- Protein: 3
Keywords: no-bake pumpkin pie, easy pumpkin pie, Cool Whip pumpkin pie, quick dessert, Thanksgiving dessert


