I burned the garlic butter on these shrimp skewers four times before I figured out what I was doing wrong.
Not a little burnt. I mean blackened, bitter, smoke-alarm-going-off, whole-kitchen-smells-like-regret burnt. And here’s the thing—I kept blaming the shrimp. Thought they were cooking too fast, or the skewers were the problem, or maybe I just wasn’t meant to make shrimp at home. Turns out, I was just rushing the butter. Classic mistake, honestly.
These Easy Garlic Butter Shrimp Skewers with Lemon were born from that frustration. I wanted something that tasted like the ones you get at a seaside grill—juicy, garlicky, with that bright lemon kick—but without the stress. Without the smoke alarm. Without standing over a hot stove wondering if tonight’s dinner was going to be another kitchen disaster.
And you know what? After that fourth burned batch, I sat down, took a breath, and started over. Slower this time. I let the butter just barely melt with the garlic, kept the heat medium, and paid attention to what the shrimp were actually doing instead of what I thought they should be doing. The difference was night and day.
These skewers are the kind of meal that makes you feel like you’re on vacation, even on a random Tuesday. They come together in 15 minutes flat, use ingredients you probably already have, and somehow feel fancy without any of the fuss. That first perfect batch—golden, fragrant, with just the right char—I knew I had to share it. Not because it’s complicated or impressive in a chef-y way, but because it’s the kind of recipe that actually works when you’re tired, hungry, and just want something good.
Why You’ll Love These Easy Garlic Butter Shrimp Skewers
Let me tell you why these skewers have become my go-to for busy nights, last-minute guests, and even lazy weekends. I’ve tested this recipe more times than I care to count, and it never lets me down.
- Ready in 15 Minutes : From start to finish, you’re looking at about 15 minutes. That’s faster than takeout delivery, and honestly, way better.
- Simple Pantry Ingredients : Shrimp, butter, garlic, lemon, salt, pepper. That’s it. No fancy grocery run required.
- Perfect for Weeknights or Entertaining : These skewers look gorgeous on a platter but take almost no effort. Great for impromptu dinners or summer cookouts.
- Crowd-Pleaser : I’ve served these to picky eaters, seafood skeptics, and hardcore foodies. Everyone goes back for seconds.
- Unbelievably Delicious : The combination of browned butter, fragrant garlic, and bright lemon is just magic. The shrimp stay juicy and tender, never rubbery.
What makes this version different from all the others? It’s the technique. Most recipes tell you to cook the garlic butter separately or brush it on while grilling. I do it differently—I let the garlic infuse the butter gently, then baste the shrimp at just the right moment. No burning, no bitterness, just pure garlicky goodness.
This isn’t just another shrimp recipe. It’s the one that makes you close your eyes after the first bite. The one that turns a simple Tuesday into something worth looking forward to. And honestly? It’s the recipe that taught me to slow down and trust the process.
What Ingredients You Will Need
This recipe uses simple, wholesome ingredients that work together to create something truly special. No complicated shopping lists here—just real food that delivers real flavor.
- Large shrimp , peeled and deveined (about 1 pound, or 450g) — I prefer 21-25 count shrimp for skewers. They’re big enough to stay juicy but cook quickly. Look for raw shrimp, not pre-cooked. Tail-on or tail-off is your call; I leave tails on for presentation.
- Unsalted butter , 4 tablespoons (56g) — Use unsalted so you can control the salt level. I recommend Kerrygold for its rich flavor, but any good-quality butter works.
- Fresh garlic , 4-5 cloves, minced — Please use fresh garlic here. The pre-minced stuff in a jar burns faster and doesn’t have the same punch. Trust me on this one.
- Fresh lemon , 1 large — You’ll use both the zest and the juice. The zest adds bright, aromatic flavor that juice alone can’t match. Roll the lemon on the counter before juicing to get more out of it.
- Extra-virgin olive oil , 1 tablespoon (15ml) — Just a touch helps the shrimp brown without burning the butter. I use a mild olive oil here, not the peppery finishing kind.
- Salt , about ½ teaspoon (3g) — I use fine sea salt. Start with less; you can always add more.
- Black pepper , freshly ground, about ¼ teaspoon (1g) — Freshly ground makes a difference. Don’t skip it.
- Red pepper flakes (optional), ¼ teaspoon — Adds a gentle warmth without real heat. Leave it out if you’re sensitive to spice.
- Fresh parsley , chopped, about 2 tablespoons — For garnish and a fresh finish. Flat-leaf parsley is best.
- Wooden or metal skewers — If using wooden skewers, soak them in water for 20 minutes before using to prevent burning.
Ingredient Tips: For the best texture, look for shrimp that feel firm and smell like the ocean, not fishy. If using frozen shrimp, thaw them overnight in the fridge or in a bowl of cold water for about 15 minutes. Pat them very dry with paper towels before cooking—wet shrimp won’t brown properly.
Substitutions: You can use salted butter, just reduce the added salt. No fresh garlic? Use 1 teaspoon garlic powder, but honestly, fresh is worth it here. For a dairy-free version, use a good-quality vegan butter or ghee if you tolerate it. Lemon can be swapped with lime for a different twist.
Equipment Needed
You don’t need a fancy kitchen to make these skewers. Here’s what you’ll actually use:
- Skewers — Metal skewers are reusable and don’t need soaking. Wooden ones work fine too; just soak them first. I’ve used both and honestly prefer metal for the even heat distribution.
- Large skillet or grill pan — A 12-inch cast iron skillet is my go-to. It holds heat well and gives beautiful color. A non-stick pan works too, just don’t crank the heat too high.
- Tongs — For turning the skewers. Silicone-tipped ones won’t scratch your pans.
- Mixing bowl — For tossing the shrimp with oil and seasonings.
- Small saucepan — For melting the butter with garlic. You can also do this in the microwave, but I find the stovetop gives better control.
- Microplane or zester — For lemon zest. A box grater works in a pinch.
- Cutting board and knife — For mincing garlic and chopping parsley.
- Paper towels — Essential for drying the shrimp. Don’t skip this step.
Budget-Friendly Tip: If you don’t have skewers, you can cook the shrimp directly in the skillet. They’ll still be delicious—just flip them individually with tongs. I’ve done this plenty of times when I couldn’t find my skewers.
Preparation Method
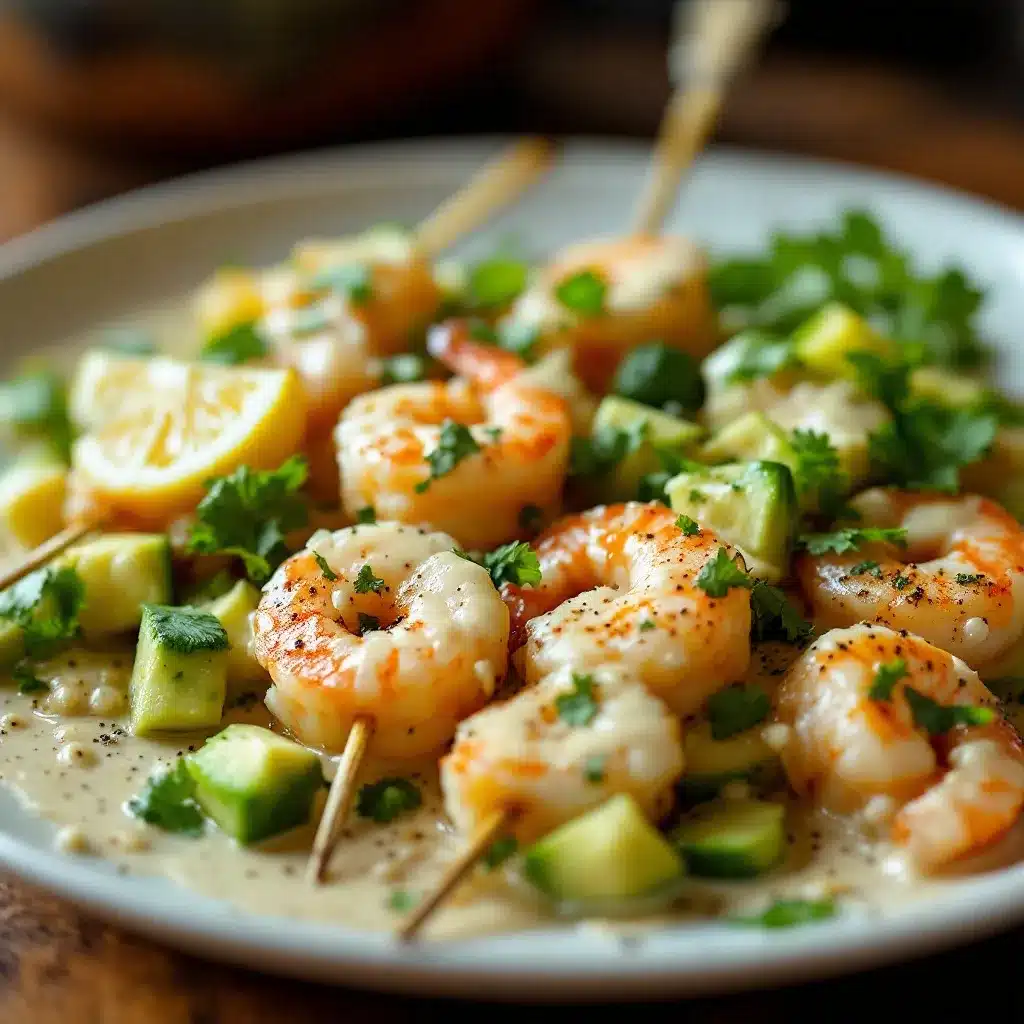
Let me walk you through this step by step. I’ve made these skewers dozens of times, and these are the exact steps that work every single time.
-
Prep the shrimp. Start by patting your shrimp completely dry with paper towels. This is non-negotiable—wet shrimp steam instead of sear, and you’ll end up with sad, rubbery bites. Place them in a bowl, drizzle with the olive oil, and sprinkle with salt and pepper. Toss gently to coat. Let them sit while you prep everything else, about 5 minutes.
-
Make the garlic butter. In a small saucepan, melt the butter over low heat. Once it’s mostly melted, add the minced garlic and lemon zest. Let it cook for about 1 minute, stirring constantly. You want the garlic to become fragrant and just soften, not brown. If it starts to color, pull the pan off the heat immediately. Burnt garlic is bitter and will ruin the whole dish. Set the butter aside.
-
Thread the skewers. If using wooden skewers, make sure they’ve soaked for at least 20 minutes. Thread 4-5 shrimp onto each skewer, pushing them close together but not squished. Leave a little space between each shrimp so heat can circulate. You should get about 4-5 skewers depending on the size of your shrimp.
-
Heat your pan. Place your skillet over medium-high heat. Let it get hot—about 2 minutes. You want it hot enough that a drop of water sizzles on contact, but not smoking. If your pan starts smoking, turn the heat down slightly.
-
Sear the skewers. Place the skewers in the hot pan in a single layer. Don’t crowd them—work in batches if needed. Let them cook undisturbed for 2 minutes. You’ll see the edges start to turn pink and opaque. Flip each skewer carefully with tongs. Cook for another 1-2 minutes on the second side, until the shrimp are pink and just cooked through. The total cooking time is about 3-4 minutes for medium shrimp, 4-5 minutes for large.
-
Add the garlic butter. During the last minute of cooking, drizzle the garlic butter over the skewers. Let it sizzle and coat the shrimp. Use a spoon to baste any exposed spots. The butter will bubble and brown slightly, creating that incredible nutty flavor.
-
Finish with lemon. Squeeze fresh lemon juice over the skewers right in the pan. Sprinkle with red pepper flakes if using. Give everything a gentle toss or baste one more time.
-
Serve immediately. Transfer the skewers to a serving platter. Spoon any remaining garlic butter from the pan over the top. Garnish with fresh parsley and a few lemon wedges. Serve hot.
Visual Cue: Perfectly cooked shrimp will be pink and opaque with a slight golden-brown crust on the outside. They should curl into a loose C-shape. If they curl into a tight O, they’re overcooked. If they’re still gray, give them another 30 seconds.
My Personal Tip: Don’t walk away from the pan during step 5. Shrimp cook fast—like, really fast. I once got distracted by my phone and ended up with overcooked shrimp in under 60 seconds. Stay close, watch carefully, and trust your eyes more than the timer.
Cooking Tips & Techniques
After burning that garlic butter four times, I learned a few things the hard way. Here’s what I wish someone had told me from the start.
Dry your shrimp thoroughly. This is the number one mistake people make. Wet shrimp don’t sear—they steam. And steamed shrimp are sad, rubbery, and flavorless. Take an extra 30 seconds to pat them dry with paper towels. Your future self will thank you.
Don’t overcrowd the pan. If you put too many skewers in at once, the pan temperature drops and the shrimp release liquid instead of browning. Cook in batches if needed. It takes an extra 4 minutes and makes a world of difference.
Low and slow for the garlic. Garlic burns at a lower temperature than you think. Always cook it over low heat, and always add it to the butter after the butter has mostly melted. If you add garlic to screaming-hot butter, it’ll burn before you can blink.
Use the right pan. Cast iron gives the best sear, but stainless steel works too. Avoid non-stick if you want good browning—it doesn’t get hot enough for that beautiful crust.
Let the pan get hot. A hot pan is your best friend here. If the pan isn’t hot enough, the shrimp will stick and release liquid. Test it with a drop of water—if it sizzles and evaporates immediately, you’re good to go.
The lemon goes on last. Adding lemon juice too early can make the shrimp tough and the butter separate. Always squeeze it on at the very end, right before serving.
Variations & Adaptations
One of the best things about this recipe is how easy it is to change up. Here are some variations I’ve tried and loved.
Spicy Cajun Version: Skip the garlic butter and toss the shrimp with 1 tablespoon Cajun seasoning and a drizzle of olive oil before skewering. Cook the same way, then squeeze lemon over the top. I made this for a game day party and it disappeared in minutes.
Herb Garden Twist: Add 1 tablespoon each of fresh chopped rosemary and thyme to the garlic butter. Let them infuse with the garlic for an extra minute. The herbs add an earthy depth that’s incredible with the lemon.
Grilled Version: Cook these on an outdoor grill over medium-high heat for 2-3 minutes per side. Brush with the garlic butter during the last minute. The smoky char takes them to another level—perfect for summer cookouts.
Dairy-Free Adaptation: Use a good-quality vegan butter or ghee in place of regular butter. I’ve tried both, and ghee actually gives a richer, nuttier flavor. Just watch the heat—ghee has a higher smoke point but can still burn.
Air Fryer Method: Preheat your air fryer to 400°F. Place the skewers in the basket in a single layer. Cook for 5-6 minutes, flipping halfway through. Brush with garlic butter during the last 2 minutes. This method is perfect for when you don’t want to stand over a stove.
My Personal Favorite: I once added a splash of white wine to the pan after flipping the shrimp, let it bubble for 30 seconds, then added the garlic butter. The wine deglazed the pan and created this incredible pan sauce. It’s not in the original recipe, but it’s become my secret trick for special occasions.
Serving & Storage Suggestions
These skewers are best served hot, right off the pan. Here’s how to make the most of them.
Serving Temperature: Serve immediately while the shrimp are hot and the butter is still glossy. They cool quickly, so have everything else ready before you start cooking. If you’re serving a crowd, keep the finished skewers on a warm platter in a low oven (200°F) while you cook the rest.
What to Serve With: These skewers pair beautifully with so many sides. I love them over a bed of fluffy rice or quinoa to soak up the garlic butter. A simple green salad with lemon vinaigrette cuts through the richness perfectly. For a low-carb option, serve with roasted asparagus or zucchini noodles. And honestly? A crusty baguette for dipping into that leftover butter is non-negotiable in my house.
Drink Pairings: A crisp white wine like Sauvignon Blanc or Pinot Grigio is perfect. For beer drinkers, a light lager or wheat beer works great. If you’re avoiding alcohol, sparkling water with lemon is refreshing and doesn’t compete with the flavors.
Storage: These are best eaten fresh, but leftovers will keep in an airtight container in the refrigerator for up to 2 days. The texture won’t be quite as good reheated, but the flavor is still there.
Reheating: The best way to reheat is in a skillet over medium heat with a little butter or olive oil. About 1-2 minutes per side, just until warmed through. Don’t microwave—it’ll turn the shrimp rubbery. If you must use a microwave, do it in 15-second bursts on low power.
Freezer-Friendly? I don’t recommend freezing cooked shrimp skewers. The texture suffers too much. However, you can freeze raw, seasoned shrimp on skewers for up to 3 months. Thaw in the fridge overnight and cook as directed.
Flavor Development: The garlic butter flavor actually deepens overnight. If you have leftovers, try flaking the cold shrimp over a salad the next day. It’s a happy accident I discovered one lunchtime.
Nutritional Information & Benefits
Here’s a rough breakdown for one serving (about 4-5 shrimp with garlic butter). This is based on using 1 pound of shrimp and 4 tablespoons of butter, serving 4 people.
| Nutrient | Amount Per Serving |
|---|---|
| Calories | 285 |
| Protein | 24g |
| Fat | 18g |
| Saturated Fat | 9g |
| Carbohydrates | 3g |
| Fiber | 0g |
| Sugar | 1g |
| Sodium | 480mg |
Health Benefits: Shrimp are an excellent source of lean protein and contain omega-3 fatty acids, which are great for heart and brain health. They’re also rich in selenium, vitamin B12, and iodine. Garlic is known for its immune-boosting properties, and lemon provides a good dose of vitamin C. Butter gets a bad rap, but in moderation, it’s a source of fat-soluble vitamins A, D, E, and K.
Dietary Notes: This recipe is naturally low-carb and gluten-free. It’s also keto-friendly if you watch your butter portions. For a lower-fat option, reduce the butter to 2 tablespoons and use cooking spray instead of olive oil. The flavor won’t be as rich, but it’ll still be good.
Allergen Warning: This recipe contains shellfish (shrimp) and dairy (butter). If you have allergies, use the dairy-free adaptation above and skip the butter entirely. Always check your ingredients for cross-contamination if allergies are a concern.
Personal Perspective: I love that this recipe feels indulgent but is actually pretty balanced. It’s proof that eating well doesn’t mean sacrificing flavor. When I’m trying to eat lighter, I serve these over a big pile of greens and it feels like a treat, not a compromise.
Conclusion
These Easy Garlic Butter Shrimp Skewers with Lemon are the recipe I turn to when I need a win in the kitchen. They’re fast enough for a frantic weeknight, fancy enough for company, and simple enough that anyone can make them. After burning that butter four times, I finally figured out that the secret isn’t a fancy technique or a secret ingredient—it’s just paying attention and trusting the process.
I love that this recipe has become my go-to for so many occasions. Summer cookouts, lazy Sunday dinners, quick lunches, even date nights at home. It’s versatile, forgiving, and always, always delicious. The first time I made it without burning anything, I actually did a little dance in my kitchen. That’s the kind of recipe this is—one that makes you feel like a rockstar even on a Tuesday.
Now I want to hear from you. Have you tried these skewers? Did you add your own twist? Did you burn the butter like I did? Let me know in the comments below—I read every single one. And if you loved this recipe, share it with a friend who needs a quick, delicious dinner in their life. Happy cooking, friends!
Frequently Asked Questions
Can I use frozen shrimp for this recipe?
Yes, absolutely. Just thaw them completely first. The best way is to place frozen shrimp in a bowl of cold water for about 15 minutes, changing the water halfway through. Pat them very dry before cooking—frozen shrimp hold more moisture, so drying is extra important here.
How do I know when the shrimp are fully cooked?
Perfectly cooked shrimp turn pink and opaque all the way through. They should curl into a loose C-shape. If they curl into a tight O, they’re overcooked. The internal temperature should reach 120°F, but honestly, the visual cues are more reliable. When in doubt, cut one open—it should be white and firm, not translucent or gray.
Can I make these ahead of time?
You can prep everything ahead—peel the shrimp, mince the garlic, make the garlic butter, and thread the skewers. Store the prepared skewers in the fridge for up to 4 hours. Cook them just before serving. The garlic butter can be made up to 3 days ahead and stored in the fridge; reheat gently before using.
What if I don’t have skewers?
No problem at all. Just cook the shrimp directly in the skillet. They’ll cook a little faster since more surface area is exposed, so reduce the cooking time by about 30 seconds per side. The flavor will be exactly the same—you’ll just miss the fun presentation of skewers.
How can I make this recipe spicier?
Add ½ teaspoon of red pepper flakes to the garlic butter while it melts, or toss the raw shrimp with 1 teaspoon of cayenne pepper or your favorite hot sauce. For a smoky heat, add ½ teaspoon of smoked paprika along with the salt and pepper. I’ve tried all three, and the smoked paprika version is my personal favorite.
Pin This Recipe!
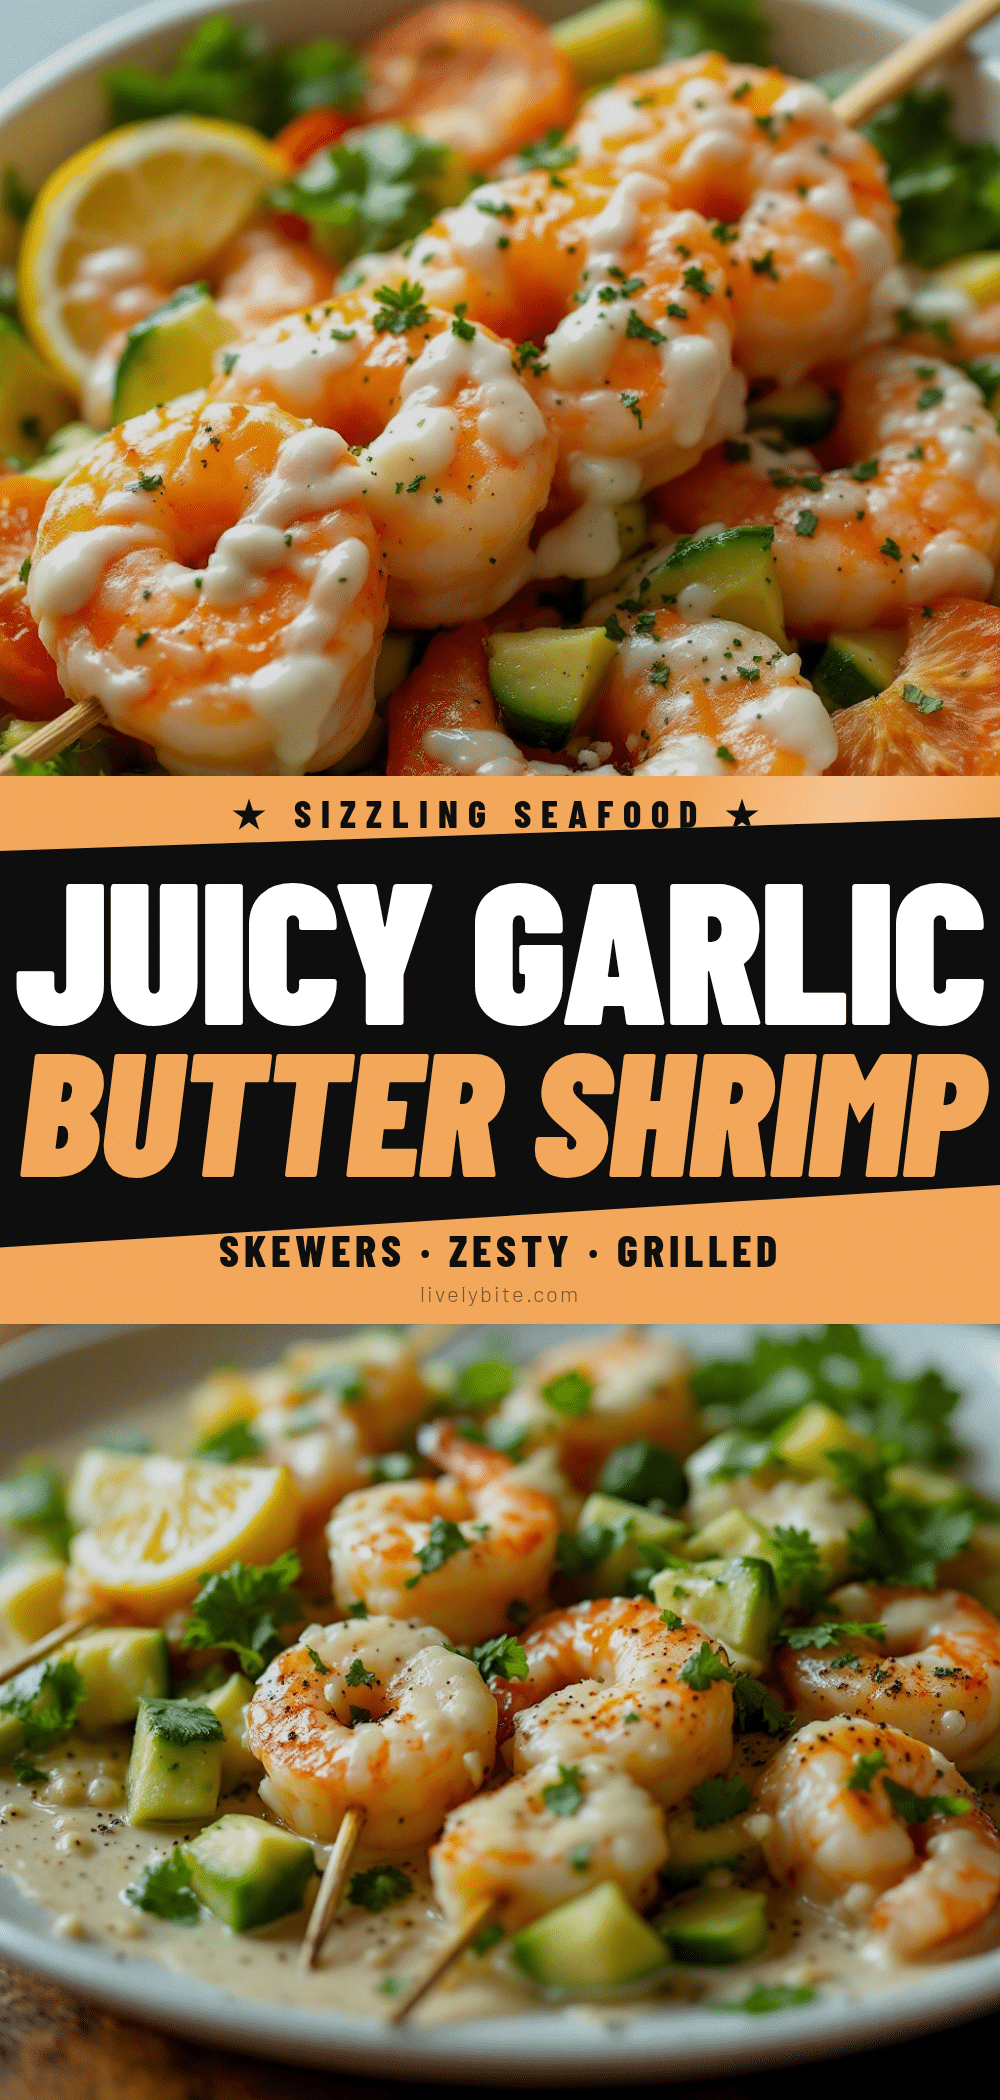
Easy Garlic Butter Shrimp Skewers: Best 15-Minute Dinner
Juicy, garlicky shrimp skewers with a bright lemon kick, ready in 15 minutes. Perfect for busy weeknights or entertaining, with simple pantry ingredients and a foolproof technique that prevents burnt garlic butter.
- Prep Time: 10 minutes
- Cook Time: 5 minutes
- Total Time: 15 minutes
- Yield: 4 servings 1x
- Category: Main Course
- Cuisine: American
Ingredients
- 1 pound large shrimp, peeled and deveined (21–25 count)
- 4 tablespoons unsalted butter
- 4–5 cloves fresh garlic, minced
- 1 large fresh lemon (zest and juice)
- 1 tablespoon extra-virgin olive oil
- ½ teaspoon fine sea salt
- ¼ teaspoon freshly ground black pepper
- ¼ teaspoon red pepper flakes (optional)
- 2 tablespoons fresh parsley, chopped
- Wooden or metal skewers (soak wooden ones for 20 minutes)
Instructions
- Pat the shrimp completely dry with paper towels. Place in a bowl, drizzle with olive oil, and sprinkle with salt and pepper. Toss gently to coat. Let sit for about 5 minutes.
- In a small saucepan, melt the butter over low heat. Once mostly melted, add the minced garlic and lemon zest. Cook for about 1 minute, stirring constantly, until fragrant and just softened (do not let it brown). Set aside.
- Thread 4-5 shrimp onto each skewer, leaving a little space between each. You should get about 4-5 skewers.
- Heat a large skillet (preferably cast iron) over medium-high heat for about 2 minutes, until a drop of water sizzles on contact.
- Place the skewers in the hot pan in a single layer (work in batches if needed). Cook undisturbed for 2 minutes, then flip carefully with tongs. Cook for another 1-2 minutes, until shrimp are pink and just cooked through (total 3-4 minutes for medium shrimp, 4-5 for large).
- During the last minute of cooking, drizzle the garlic butter over the skewers. Let it sizzle and coat the shrimp, using a spoon to baste any exposed spots.
- Squeeze fresh lemon juice over the skewers right in the pan. Sprinkle with red pepper flakes if using. Give everything a gentle toss or baste one more time.
- Transfer the skewers to a serving platter. Spoon any remaining garlic butter from the pan over the top. Garnish with fresh parsley and lemon wedges. Serve immediately.
Notes
Pat shrimp very dry to ensure proper searing. Don’t overcrowd the pan; cook in batches if needed. Cook garlic over low heat to prevent burning. Add lemon juice at the very end to avoid toughening the shrimp. For best results, serve immediately.
Nutrition
- Serving Size: 4-5 shrimp with garl
- Calories: 285
- Sugar: 1
- Sodium: 480
- Fat: 18
- Saturated Fat: 9
- Carbohydrates: 3
- Protein: 24
Keywords: garlic butter shrimp, shrimp skewers, easy dinner, 15-minute meal, seafood, weeknight dinner, grilled shrimp, lemon garlic shrimp


