That first crackle of a Rice Krispie treat—the one that happens the second your teeth break through that buttery, marshmallow shell—still takes me straight to my Aunt Carol’s linoleum kitchen floor. I must have been six, maybe seven, sitting cross-legged with a square of the stuff in my hand, watching her pull a fresh batch from the fridge. She never used a recipe. She just knew. A little extra butter here, a pinch of salt there, and somehow her version was always softer, more pillowy, and impossibly more satisfying than the box on the grocery store shelf.
Fast forward a couple of decades and a few too many sad, store-bought birthday treats, and I found myself standing in my own kitchen, staring at a bag of marshmallows, a box of cereal, and a jar of rainbow sprinkles. I wanted that same nostalgic hit—that soft, buttery chew—but I wanted it to feel like a party. I wanted it on a stick. Because honestly, is there anything more fun than food on a stick?
That’s how these Easy Funfetti Rice Krispie Birthday Treat Pops were born. They’re not just a dessert; they’re a tiny, edible celebration. They’re the kind of thing you make when you want to show up for someone—or yourself—without spending hours in the kitchen. And the best part? They come together in about 15 minutes flat.
Why You’ll Love This Recipe
Let’s be real for a second—there are a million ways to make a Rice Krispie treat. But these pops? They’re in a league of their own. Here’s why they’ll become your new go-to for birthdays, bake sales, or just a random Tuesday that needs a little sparkle.
- Quick & Easy : From start to finish, you’re looking at about 15 minutes of active work. No baking, no complicated steps, just melt, mix, press, and dip. Perfect for those last-minute party panic moments.
- Simple Ingredients : You probably have everything you need in your pantry right now. Butter, marshmallows, cereal, sprinkles, and some melting chocolate. That’s it. No fancy grocery trips required.
- Perfect for Celebrations : These are made for birthdays, but honestly, they work for any occasion that calls for a little joy. Baby showers, holidays, classroom parties, or just a “you’re awesome” treat for yourself.
- Crowd-Pleaser : I’ve brought these to potlucks, kid’s parties, and even office gatherings. They disappear. Every single time. Adults love the nostalgia, kids love the sprinkles and the stick.
- Unbelievably Delicious : The texture is everything—soft and chewy on the inside with a slight crunch from the chocolate shell. The funfetti adds that pop of color and tiny burst of sweetness that makes every bite feel like a celebration.
What makes these different from every other Rice Krispie treat recipe out there? It’s the method. I’ve tested this more times than I care to admit, and the secret is in the marshmallow-to-butter ratio. Too much butter and they fall apart. Too little and they’re bricks. This version? It’s the Goldilocks of Rice Krispie treats. Plus, dipping them in chocolate and sticking them on a popsicle stick transforms them from a simple square into an event.
These treats aren’t just good—they’re the kind that makes you close your eyes after the first bite. It’s comfort food reimagined: a little bit fancy, a whole lot of fun, and with the same soul-soothing satisfaction of the original. Perfect for impressing a crowd of kids without stressing yourself out, or turning a simple weekday into something memorable.
What Ingredients You Will Need
This recipe uses simple, pantry-friendly ingredients to deliver that perfect balance of buttery, marshmallowy sweetness and crunchy chocolate coating. Here’s what you’ll need to gather.
For the Treat Base:
- 3 tablespoons unsalted butter (I prefer using Land O’Lakes for its consistent quality; salted butter works too, just skip the added salt)
- 1 (10-ounce) bag mini marshmallows (Jet-Puffed is my go-to brand—they melt evenly and give that perfect stretchy texture)
- 1/4 teaspoon vanilla extract (pure, not imitation, for a cleaner flavor)
- Pinch of salt (this balances the sweetness and makes the flavors pop)
- 6 cups crispy rice cereal (like Kellogg’s Rice Krispies; the generic versions work but can be slightly less crunchy)
- 1/3 cup rainbow sprinkles (use jimmies, not nonpareils—the little round ones bleed color and turn your treats into a gray mess)
For the Coating & Decoration:
- 1 1/2 cups white melting wafers or white chocolate chips (I recommend Ghirardelli White Melting Wafers for the smoothest melt and best snap; if using chips, add a teaspoon of coconut oil to thin it out)
- 1/2 cup rainbow sprinkles (for decorating; you’ll need more than you think because you’ll want to go heavy on the coating)
- 12-14 popsicle sticks or lollipop sticks
Ingredient Selection Tips: When choosing sprinkles, look for bright, vibrant colors—duller sprinkles mean older sprinkles, and they won’t pop as nicely against the white chocolate. For the cereal, check the expiration date. Stale cereal leads to stale-tasting treats, and nobody wants that. If you’re making these for a party, consider using organic marshmallows—they’re made without high-fructose corn syrup and have a cleaner vanilla flavor.
Substitution Guidance: Need to make these gluten-free? Most crispy rice cereals are naturally gluten-free, but double-check the label. For a dairy-free version, use a plant-based butter like Miyoko’s and dairy-free white chocolate chips. You can swap the rainbow sprinkles for seasonal colors—red and green for Christmas, pastels for Easter, or orange and black for Halloween. The possibilities are endless.
Equipment Needed
You don’t need a fancy kitchen to pull these off. Here’s what you’ll need:
- Large saucepan or Dutch oven (a 4-quart size is perfect; gives you room to stir without making a mess)
- Wooden spoon or silicone spatula (silicone is better—it won’t scratch your pan and the marshmallow slides right off)
- 9×13-inch baking dish (glass or metal both work; just grease it well)
- Parchment paper (for lining the dish and for easy cleanup)
- Popsicle sticks or lollipop sticks (available at craft stores or online; I like the 4-inch size for these)
- Microwave-safe bowl or double boiler (for melting the chocolate)
- Baking sheet lined with parchment or wax paper (for setting the dipped pops)
- Small offset spatula or butter knife (for smoothing the chocolate if needed)
Budget-Friendly Alternatives: No popsicle sticks? You can use pretzel sticks for a salty-sweet twist, or just skip the sticks entirely and cut them into squares. No 9×13 dish? A 9×9 square pan works—your treats will just be thicker. No microwave? Melt the chocolate in a heatproof bowl set over a pot of simmering water (stovetop double boiler method).
Personal Tip: I’ve tried making these with both a glass and a metal baking dish, and I honestly prefer metal. It cools faster, which means you can cut and shape the treats sooner. Just make sure you line it with parchment paper—trust me on this one. The first time I forgot, I spent 20 minutes scrubbing marshmallow cement off the pan.
Preparation Method

Alright, let’s get to the fun part. Here’s how to make these little birthday pops of joy.
Step 1: Prep Your Pan
Line a 9×13-inch baking dish with parchment paper, leaving a few inches of overhang on two sides. This creates “handles” that make lifting the treats out later a breeze. Lightly grease the parchment with butter or non-stick spray. Set aside.
Step 2: Melt the Butter and Marshmallows
In a large saucepan over medium-low heat, melt the 3 tablespoons of butter. Once it’s fully melted and just starting to bubble (about 2 minutes), add the entire bag of mini marshmallows. Stir constantly with a silicone spatula. You want the marshmallows to melt slowly and evenly—if the heat is too high, they’ll seize up and turn into a grainy, rubbery mess.
This takes about 4-5 minutes. The mixture will look smooth, glossy, and stretchy when it’s ready. Remove from heat immediately.
Step 3: Add Vanilla and Salt
Stir in the 1/4 teaspoon of vanilla extract and a pinch of salt. The salt is non-negotiable here—it cuts the sweetness and makes the butter flavor sing. Give it a good stir until everything is combined. The mixture should be pale yellow, smooth, and smell like heaven.
Step 4: Mix in the Cereal and Sprinkles
Add the 6 cups of crispy rice cereal to the pot. Gently fold it into the marshmallow mixture using a folding motion—don’t stir aggressively or you’ll crush the cereal. You want some texture, not mush. Once the cereal is mostly coated, add the 1/3 cup of rainbow sprinkles. Fold gently until the sprinkles are evenly distributed. The mixture will look like a confetti explosion, exactly what we’re going for.
Step 5: Press Into the Pan
Transfer the mixture to your prepared baking dish. Here’s the trick—don’t press it down too hard. If you compact it, the treats will turn out hard and crunchy instead of soft and chewy. Use your hands (lightly greased with butter or non-stick spray) or a piece of greased parchment to gently press the mixture into an even layer. Aim for about 1/2-inch thickness.
Let the treats cool at room temperature for about 15-20 minutes. Don’t rush this—if they’re too warm when you try to cut them, they’ll fall apart.
Step 6: Cut and Insert Sticks
Once cooled, use the parchment handles to lift the slab out of the pan. Place it on a cutting board. Using a sharp knife or a pizza cutter, cut the slab into rectangles or squares—I aim for about 2×3-inch rectangles, which gives you 12-14 pieces depending on how you cut.
Gently insert a popsicle stick into the bottom of each piece, pushing it about halfway through. Set them on a parchment-lined baking sheet and pop them in the fridge for 10 minutes to firm up. This step is crucial—cold treats hold together better when you dip them in warm chocolate.
Step 7: Melt the Chocolate
While the treats are chilling, melt the 1 1/2 cups of white melting wafers in a microwave-safe bowl. Microwave in 30-second intervals, stirring after each, until smooth and completely melted. Be careful not to overheat—white chocolate burns easily and turns into a grainy, clumpy mess.
If you’re using white chocolate chips instead of wafers, add 1 teaspoon of coconut oil or vegetable shortening to help thin it out for dipping.
Step 8: Dip and Decorate
Remove the chilled treats from the fridge. Holding each by the stick, dip the treat into the melted chocolate, tilting the bowl to get full coverage. Let any excess drip off back into the bowl. Place the dipped pop back on the parchment-lined baking sheet.
Immediately—and I mean immediately—sprinkle the top with rainbow sprinkles. The chocolate sets fast, so you have about 10-15 seconds before the sprinkles won’t stick. Work in batches of 2-3 pops at a time.
Step 9: Let Them Set
Once all the pops are dipped and decorated, place the baking sheet in the fridge for 15-20 minutes to let the chocolate fully harden. The chocolate should have a clean snap when you bite into it.
Cooking Tips & Techniques
I’ve made these pops about a dozen times now, and I’ve learned a few things the hard way. Here are my best tips to make sure yours turn out perfect every time.
Don’t Overheat the Marshmallows. This is the number one mistake I see people make. Marshmallows are mostly sugar and water, and if you cook them too long or on too high heat, the water evaporates and the sugar crystallizes. You end up with a grainy, stiff mess that won’t hold together. Keep the heat on medium-low and stir constantly. The second everything is smooth and glossy, pull it off the heat.
Use Fresh Marshmallows. Stale marshmallows are dry and won’t melt properly. If your bag has been sitting in the pantry for six months, buy a new one. Trust me on this. Fresh marshmallows make all the difference in texture.
Grease Your Hands. When pressing the mixture into the pan, lightly grease your hands with butter or non-stick spray. The marshmallow mixture is incredibly sticky, and without greasing, you’ll end up with a sticky mess on your fingers and a lumpy, uneven slab. I learned this one the hard way during a particularly frustrating batch for my nephew’s birthday party.
Chill Before Cutting. I know you’re excited, but let the treats cool completely before cutting. Warm treats are soft and will squish when you try to cut them. A 15-minute rest at room temperature is usually enough, but if you’re in a hurry, 10 minutes in the fridge works too.
Work in Batches for Dipping. Don’t try to dip all 12 pops at once. The chocolate will start to set, and by the time you get to the last few, the chocolate will be too thick to coat evenly. Work in batches of 3-4 pops, and if the chocolate starts to thicken, pop it back in the microwave for 10 seconds to loosen it up.
Use a Deep Bowl for Dipping. A shallow bowl means you have to tilt the treat at awkward angles to get full coverage. A deep, narrow bowl (like a coffee mug or a small ramekin) allows you to dip the treat straight down and get a clean, even coating.
Variations & Adaptations
These pops are endlessly customizable. Here are some of my favorite variations.
Chocolate Lover’s Version: Swap the white chocolate for milk or dark chocolate melting wafers. Use chocolate sprinkles or crushed chocolate sandwich cookies for the topping. The combination of chocolate and marshmallow is a classic for a reason.
Birthday Cake Version: Add 1/4 cup of yellow cake mix (dry, straight from the box) to the marshmallow mixture along with the cereal. It adds that distinct “birthday cake” flavor that’s hard to describe but instantly recognizable. Just make sure the cake mix is gluten-free if you’re serving anyone with sensitivities.
Peppermint Holiday Pops: Swap the rainbow sprinkles for crushed candy canes or peppermint bits. Use dark chocolate for dipping and sprinkle with more crushed candy canes. Perfect for Christmas parties or holiday bake sales.
Nutella Swirl Pops: After pressing the cereal mixture into the pan, drizzle 2-3 tablespoons of Nutella over the top and swirl it in with a knife before it sets. Then dip in milk chocolate and sprinkle with chopped hazelnuts. These are dangerously good.
Dietary Adaptations: For a vegan version, use plant-based butter, vegan marshmallows (Dandies is a great brand), and dairy-free white chocolate. For a lower-sugar version, use a sugar-free marshmallow and a sugar-free white chocolate alternative. The texture will be slightly different, but the flavor is still there.
Personal Variation: My absolute favorite twist is the “S’mores Pop.” I add 1/2 cup of mini marshmallows and 1/2 cup of crushed graham crackers to the cereal mixture. Then I dip the pops in milk chocolate and sprinkle with more crushed graham crackers. It’s like a campfire on a stick.
Serving & Storage Suggestions
These pops are best served at room temperature, straight from the fridge. The chocolate shell should be firm and snappy, while the inside stays soft and chewy. Arrange them on a platter or stand them upright in a vase or mason jar filled with beans or rice for a fun, festive presentation.
Complementary Dishes: These pops pair beautifully with a cold glass of milk (obviously), a hot cup of coffee, or a Refreshing Cucumber Mint Green Tea Cooler for a grown-up twist. They also make a great addition to a dessert table alongside Creamy Vegan Chocolate Avocado Pudding for a fun textural contrast.
Storage Instructions: Store the pops in an airtight container at room temperature for up to 3 days. If you need them to last longer, store them in the refrigerator for up to a week. The chocolate may develop a slight bloom (white streaks) after a few days, but they’re still perfectly safe to eat.
Freezer Instructions: You can freeze these pops for up to 3 months. Place them in a single layer in a freezer-safe container, separating layers with parchment paper. To serve, let them thaw in the refrigerator overnight or at room temperature for about 20 minutes. The texture will be slightly softer after freezing, but the flavor holds up beautifully.
Reheating Tips: These are meant to be eaten cold or at room temperature, so no reheating needed. If you want a slightly gooey center, pop one in the microwave for 5-7 seconds. Just be careful—the chocolate shell will melt quickly.
Flavor Development: Honestly, these pops taste best the day they’re made. The cereal stays crunchy, the chocolate is perfectly snappy, and the sprinkles are bright and vibrant. After a day or two, the cereal starts to absorb moisture from the marshmallow and loses some of its crunch. That said, they’re still delicious—just a little softer.
Nutritional Information & Benefits
Let’s be real—these are a treat, not a health food. But here’s a rough estimate of what you’re looking at per pop (based on 14 pops).
| Nutrient | Amount per Pop |
|---|---|
| Calories | 185 |
| Total Fat | 8g |
| Saturated Fat | 5g |
| Carbohydrates | 28g |
| Sugar | 18g |
| Protein | 2g |
| Sodium | 95mg |
Health Benefits: While these aren’t exactly a superfood, there are a few bright spots. The crispy rice cereal is fortified with iron and B vitamins. The butter provides a small amount of vitamin A. And the sprinkles? Well, they make you smile, and that counts for something.
Dietary Considerations: These pops are nut-free (check your chocolate brand to be sure), egg-free, and can easily be made gluten-free and vegan with simple substitutions. They are not low-carb or keto-friendly due to the high sugar content from marshmallows and cereal.
Allergen Note: White chocolate often contains dairy and soy lecithin. If you’re serving someone with allergies, check labels carefully or use a dedicated allergen-free brand.
Personal Perspective: I believe in balance. These pops are a celebration food, meant to be enjoyed in moderation. They’re not an everyday snack, and they shouldn’t be. But for a birthday party, a holiday gathering, or just a Tuesday that needs a little joy? They’re perfect.
Conclusion
These Easy Funfetti Rice Krispie Birthday Treat Pops are more than just a dessert—they’re a tiny, edible party on a stick. They’re quick enough for a last-minute celebration, simple enough for kids to help make, and festive enough to impress even the most jaded party guest. With their soft, chewy center, crunchy chocolate shell, and that burst of rainbow color, they bring a little bit of joy to every bite.
I love this recipe because it reminds me that you don’t need fancy ingredients or complicated techniques to create something special. Sometimes the best treats are the ones that come from a box of cereal, a bag of marshmallows, and a little bit of imagination. These pops are proof that simple can be spectacular.
So go ahead—make a batch for your next birthday party, your kid’s classroom celebration, or just because it’s Tuesday. Customize them with your favorite colors and flavors. And when you do, I’d love to hear about it. Drop a comment below, share a photo on social media, or tag me in your creation. Let’s spread a little more funfetti joy in this world, one pop at a time.
Happy celebrating!
Frequently Asked Questions
Can I use regular marshmallows instead of mini marshmallows?
Yes, you can. Use about 40 regular marshmallows (one 10-ounce bag of minis equals about 4 cups of regular marshmallows). Just make sure to cut them into smaller pieces before melting so they melt evenly. Mini marshmallows are easier to work with because they melt faster and more uniformly.
How do I keep the treats from getting too hard?
The key is not pressing them too firmly into the pan. Gently pat the mixture into an even layer without compacting it. Also, make sure you don’t overcook the marshmallows—cook them just until melted and smooth. Overcooking evaporates moisture and leads to hard, crunchy treats.
Can I make these ahead of time for a party?
Absolutely! You can make the full pops (dipped and decorated) up to 3 days in advance. Store them in an airtight container at room temperature. If you want to prep even further ahead, you can make the undipped treats up to a week in advance and freeze them. Just dip and decorate the day of your party for the freshest look and taste.
My chocolate is clumping and not melting smoothly. What went wrong?
This usually happens when the chocolate gets too hot or when moisture gets into the bowl. White chocolate is especially sensitive to heat and moisture. Make sure your bowl is completely dry before adding the chocolate, and melt it in short 30-second bursts, stirring well between each. If it still seizes, you can try adding a teaspoon of coconut oil or vegetable shortening to smooth it out.
Can I use a different cereal for this recipe?
Yes, but the texture will change. Cocoa Krispies make a chocolate version, Fruity Pebbles add a fruity flavor and color, or you can use a puffed rice cereal for a lighter texture. Just keep the total volume at 6 cups. If you use a cereal with a different shape or density, you may need to adjust the marshmallow ratio slightly.
Pin This Recipe!
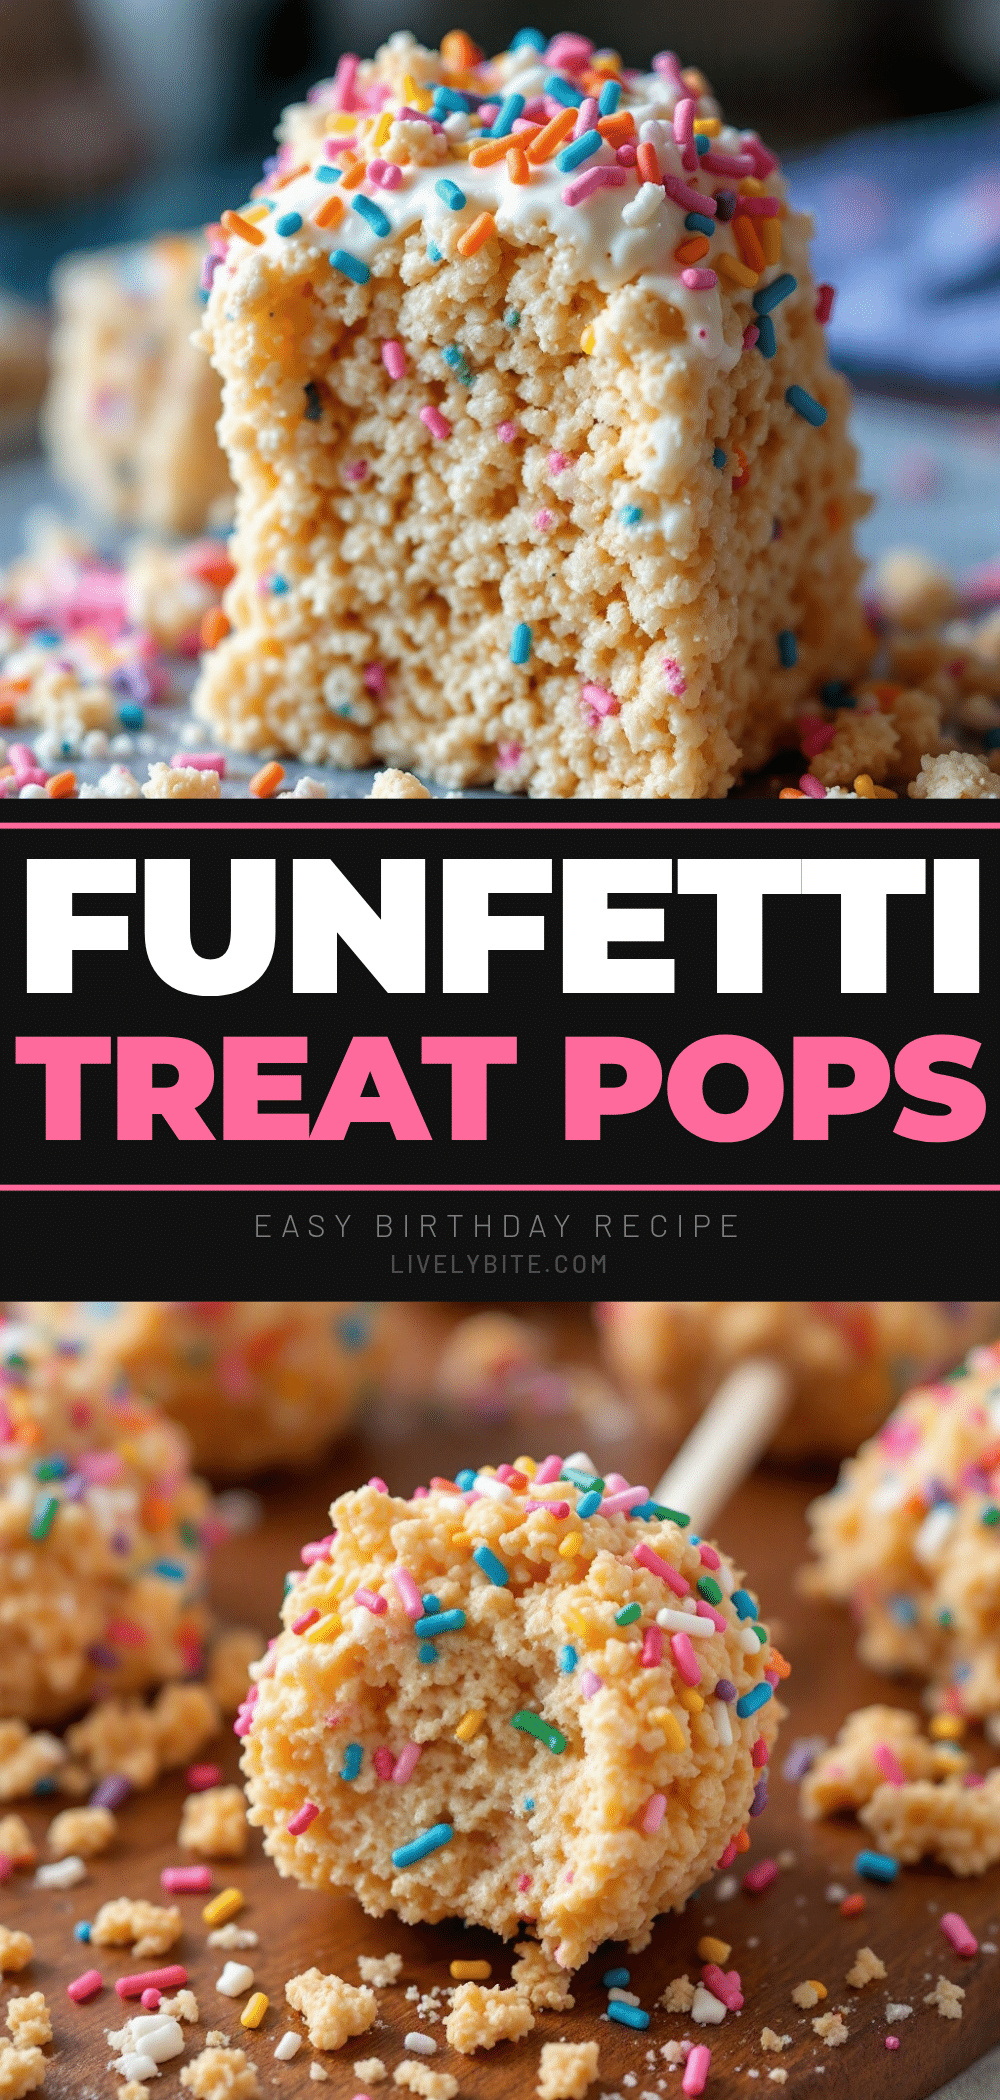
Easy Funfetti Rice Krispie Birthday Pops Recipe

These Easy Funfetti Rice Krispie Birthday Treat Pops are a tiny, edible celebration on a stick. They come together in about 15 minutes and are perfect for birthdays, bake sales, or any occasion that needs a little sparkle.
- Prep Time: 15 minutes
- Cook Time: 5 minutes
- Total Time: 20 minutes
- Yield: 12-14 servings 1x
- Category: Dessert
- Cuisine: American
Ingredients
- 3 tablespoons unsalted butter
- 1 (10-ounce) bag mini marshmallows
- 1/4 teaspoon vanilla extract
- Pinch of salt
- 6 cups crispy rice cereal
- 1/3 cup rainbow sprinkles (jimmies)
- 1 1/2 cups white melting wafers or white chocolate chips
- 1/2 cup rainbow sprinkles (for decorating)
- 12–14 popsicle sticks or lollipop sticks
Instructions
- Line a 9×13-inch baking dish with parchment paper, leaving overhang on two sides. Lightly grease the parchment with butter or non-stick spray. Set aside.
- In a large saucepan over medium-low heat, melt the butter. Once melted and just starting to bubble (about 2 minutes), add the mini marshmallows. Stir constantly with a silicone spatula until smooth, glossy, and stretchy (about 4-5 minutes). Remove from heat immediately.
- Stir in the vanilla extract and a pinch of salt until combined.
- Add the crispy rice cereal to the pot. Gently fold into the marshmallow mixture using a folding motion. Add the 1/3 cup of rainbow sprinkles and fold gently until evenly distributed.
- Transfer the mixture to the prepared baking dish. Using lightly greased hands or a piece of greased parchment, gently press the mixture into an even layer about 1/2-inch thick. Do not press too hard. Let cool at room temperature for 15-20 minutes.
- Once cooled, lift the slab out of the pan using the parchment handles. Place on a cutting board. Cut into rectangles (about 2×3 inches) to yield 12-14 pieces. Gently insert a popsicle stick into the bottom of each piece, pushing about halfway through. Place on a parchment-lined baking sheet and refrigerate for 10 minutes to firm up.
- While the treats chill, melt the white melting wafers in a microwave-safe bowl. Microwave in 30-second intervals, stirring after each, until smooth and completely melted. If using white chocolate chips, add 1 teaspoon of coconut oil to thin.
- Remove the chilled treats from the fridge. Holding each by the stick, dip into the melted chocolate, tilting the bowl to get full coverage. Let excess drip off. Place back on the parchment-lined baking sheet. Immediately sprinkle the top with rainbow sprinkles. Work in batches of 2-3 pops at a time.
- Once all pops are dipped and decorated, place the baking sheet in the fridge for 15-20 minutes to let the chocolate fully harden.
Notes
Don’t overheat the marshmallows; cook just until smooth. Use fresh marshmallows for best texture. Grease your hands when pressing the mixture into the pan. Chill before cutting. Work in batches for dipping to prevent chocolate from setting. Use a deep bowl for easier dipping.
Nutrition
- Serving Size: 1 pop
- Calories: 185
- Sugar: 18
- Sodium: 95
- Fat: 8
- Saturated Fat: 5
- Carbohydrates: 28
- Protein: 2
Keywords: funfetti, rice krispie treats, birthday pops, easy dessert, no-bake, sprinkles, party food


