The empty platter sat on the counter, a stark white circle of abandonment in the center of the kitchen chaos. It was only 8:45 PM, and the little ghosts had already vanished, dragging their parents toward the door with that specific, high-energy urgency that only Halloween night possesses. I looked at the clock, then at the crumbs, and felt a quiet, surprising pride settle in my chest. It wasn’t just that the recipe worked; it was that these little mummy bites had become the unofficial currency of the neighborhood party. My neighbor, Sarah, had actually stopped me by the mailbox the next morning, holding up an empty napkin like a trophy, asking if I had the secret to the crispy coating. She didn’t want the fancy fruit platter. She didn’t want the complicated veggie dip. She wanted the cheese balls wrapped in dough, baked until golden, and served warm.
I didn’t set out to create a Halloween sensation. Honestly, I was just trying to use up some leftover cream cheese and puff pastry scraps after making dinner for my own kids. But something clicked when I realized that wrapping savory cheese in sweet-ish dough created this perfect salty-sweet crunch that kids devour without even realizing they’re eating protein. It’s funny how the best party recipes often come from accident or necessity. I started making them on a whim, rolling them into tiny, lumpy ovals and wrapping them with strips of dough that looked less like mummies and more like confused bandages. The first batch was a disaster—soggy bottoms and raw dough. But by the third attempt, I had it down. The cheese stays cool and creamy while the outside shatters with every bite. Now, every time October hits, my phone blows up with requests for these. It’s a strange thing, really, how a simple bite of cheese and dough can become a tradition, but here we are.
Why You’ll Love This Recipe
There is a specific kind of magic in making food that looks complicated but is actually incredibly simple. These Crispy Mini Mummy Cheese Ball Bites are the perfect example of that magic. They look like they came from a high-end caterer, but the truth is, you can make them in your pajamas while watching a scary movie. I’ve tested this recipe more times than I care to admit, mostly because my family kept asking for “just one more batch” until I had to hide the ingredients in the back of the pantry. The secret isn’t just in the ingredients; it’s in the texture contrast. You get that flaky, buttery crunch from the pastry, followed by the sharp, tangy pop of the cheese. It’s comfort food disguised as a costume.
Here is why these little bites have earned a permanent spot in my recipe rotation:
- Quick & Easy: You can have these from fridge to oven in under 30 minutes. The cheese balls can be prepped hours in advance, so you’re not stressed when the party starts. It’s perfect for busy weeknights or last-minute Halloween gatherings.
- Simple Ingredients: You likely already have everything in your kitchen. Cream cheese, sharp cheddar, puff pastry, and an egg wash are staples. No fancy grocery trips needed for obscure spices or hard-to-find items.
- Perfect for Halloween Parties: These are the ultimate finger food. They’re small enough to eat in two bites, which means guests will take more, but they’re savory enough to keep people from getting sugar fatigue. Great for trick-or-treat drop-offs or classroom parties.
- Crowd-Pleaser: Always gets rave reviews from kids and adults alike. The mummy shape is cute without being childish, so adults feel comfortable eating them too. It’s a rare dish that bridges the age gap perfectly.
- Unbelievably Delicious: The texture and flavor combo is next-level comfort food. The sharp cheddar cuts through the richness of the cream cheese, and the pastry adds a necessary crunch that makes every bite interesting.
What makes this recipe different from the rest is the technique for keeping the cheese firm. Many recipes fail because the cheese melts into a puddle before the dough cooks. By freezing the cheese balls briefly before wrapping them, you ensure they hold their shape. It’s a small step that makes a huge difference. This isn’t just another cheese ball recipe; it’s your best version, refined through trial and error to ensure every bite is crispy, creamy, and completely addictive.
What Ingredients You Will Need
This recipe uses simple, wholesome ingredients to deliver bold flavor and satisfying texture without the fuss. The beauty of these mummy bites lies in the balance between the savory filling and the flaky exterior. You don’t need expensive gourmet cheeses or artisanal flours. In fact, using standard, accessible ingredients often leads to the most reliable results because you’re not fighting against unusual textures or moisture levels. I prefer using ingredients that I know my family will eat, rather than experimenting with exotic flavors that might fall flat. The key is quality within simplicity—good cream cheese and real butter make all the difference.
Here is what you’ll need to gather before you start rolling:
- For the Cheese Filling:
- 8 oz cream cheese, softened to room temperature (I recommend Block brand for best texture; the tub stuff can be too wet).
- 1 cup sharp cheddar cheese, freshly shredded (pre-shredded cheese contains anti-caking agents that can make the filling gritty).
- 1 tablespoon Worcestershire sauce (adds a deep, savory umami note).
- 1/2 teaspoon garlic powder (not fresh garlic, which can burn or release too much water).
- 1/4 teaspoon onion powder.
- Salt and black pepper to taste.
- For the Mummy Wrapping:
- 1 sheet puff pastry, thawed but still cold (keep it cold until you’re ready to roll; brands like Pepperidge Farm work well).
- 1 large egg, beaten with 1 tablespoon of water (for the egg wash).
- 1 tablespoon sesame seeds or poppy seeds (optional, for the eyes).
- Optional: A tiny dot of black food coloring or a drop of balsamic glaze for the eyes.
If you are looking to substitute ingredients, you can use goat cheese instead of half the cream cheese for a tangier profile. For a gluten-free option, you can use gluten-free puff pastry, though the texture might be slightly denser. If you’re dairy-free, there are solid vegan cream cheese options available, but the melting behavior will differ slightly, so keep an eye on the baking time. The sharp cheddar is crucial here; mild cheddar won’t provide enough flavor punch to stand up to the buttery pastry.
Equipment Needed
You don’t need a professional kitchen to pull this off, but having the right tools makes the process much smoother. The most important piece of equipment here is a baking sheet. I prefer a heavy-gauge metal baking sheet because it distributes heat evenly, preventing the bottoms of the mummies from burning. If you use a thin, flimsy sheet, you might end up with soggy bottoms. Line it with parchment paper for easy cleanup, because cheese and pastry residue can stick if you’re not careful.
A small paring knife is essential for trimming the puff pastry strips. You want clean cuts so the mummies look tidy rather than ragged. A teaspoon or a small cookie scoop is also helpful for portioning the cheese mixture evenly. Consistency in size ensures that all the mummies bake at the same rate. If you don’t have a cookie scoop, a melon baller works well too.
I also recommend using a silicone baking mat if you have one. It’s reusable and provides a non-stick surface that is gentler on delicate pastry than parchment paper in some cases. For the egg wash, a small silicone brush is ideal. It allows you to control the amount of wash you apply, which prevents the pastry from becoming soggy. Avoid using a large paintbrush-style brush, as it holds too much liquid.
If you are making a large batch, having a second baking sheet ready is wise. You’ll need to freeze the assembled mummies before baking, so having extra space on the counter or a second tray to move them around is helpful. Budget-friendly options include using a standard spoon instead of a scoop and a regular kitchen knife instead of a paring knife, but sharpness matters more than the specific tool.
Preparation Method
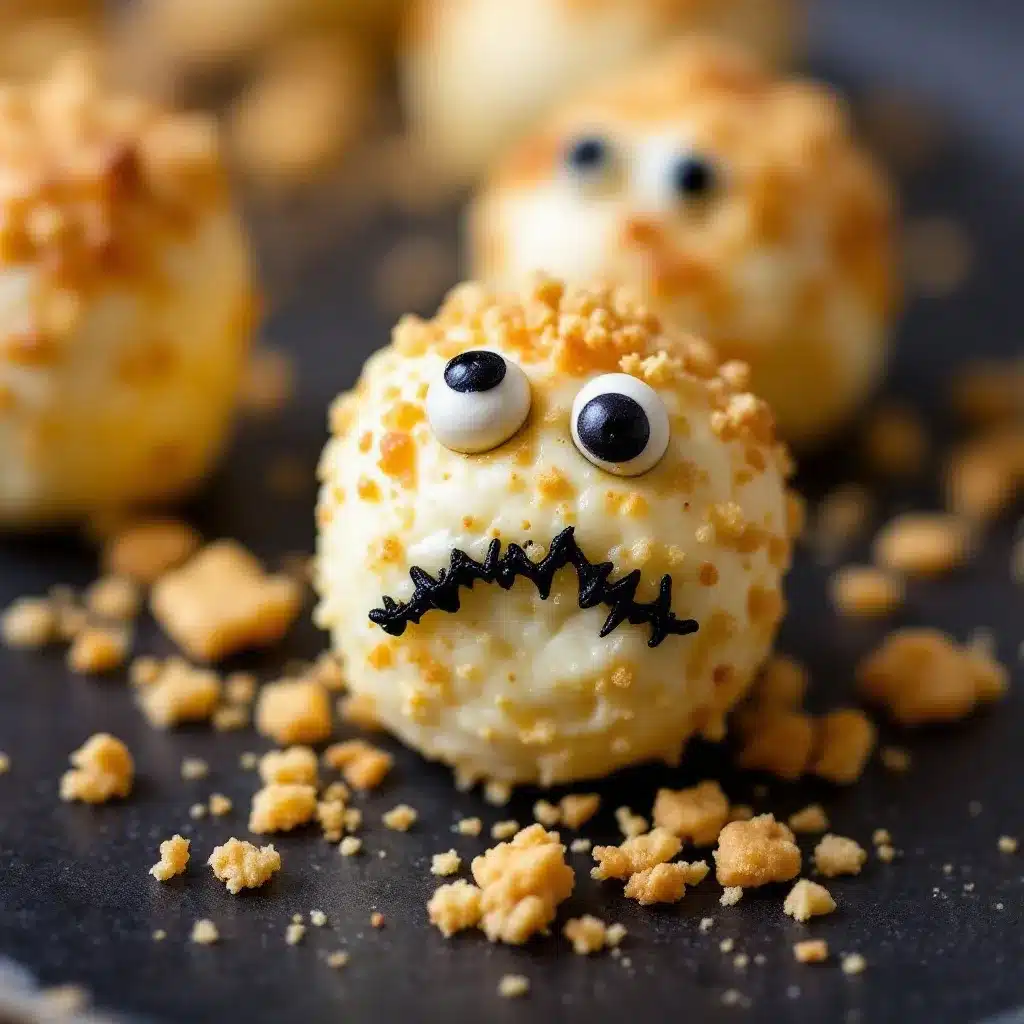
Getting these mummy bites ready is a process of patience and precision. The goal is to create small, uniform cheese balls that are firm enough to handle, then wrap them in pastry strips that stay in place during baking. Here is how to do it step by step.
- Prepare the Cheese Mixture: In a medium mixing bowl, combine the softened cream cheese, shredded cheddar, Worcestershire sauce, garlic powder, onion powder, salt, and pepper. Use a wooden spoon or a spatula to mix until completely smooth and well combined. The mixture should be thick and hold its shape. If it feels too sticky, add a little more shredded cheese. If it’s too dry, add a tiny bit more cream cheese. This step takes about 3-5 minutes. Tip: Make sure your cream cheese is truly softened. Cold cream cheese creates lumps that are hard to mix out.
- Form the Cheese Balls: Line a baking sheet with parchment paper. Scoop out about 1 tablespoon of the cheese mixture and roll it into a ball between your palms. Try to keep them as smooth and round as possible. Place them on the lined baking sheet, leaving a little space between each one. You should get about 20-24 small balls. Once all the balls are formed, place the baking sheet in the freezer for at least 30 minutes. This is crucial—it firms up the cheese so it doesn’t melt into the dough during baking. Warning: Do not skip the freezing step. Soft cheese will make the pastry slide off.
- Prepare the Pastry: Preheat your oven to 400°F (200°C). Take the thawed puff pastry sheet out of the package. On a lightly floured surface, roll it out slightly if needed to make it even. Using a pizza cutter or a sharp knife, cut the pastry into strips about 1/2 inch wide. You want long strips so you can wrap them around the cheese balls. Tip: Keep the pastry cold. If it starts to get warm and sticky, put it back in the fridge for 10 minutes.
- Wrap the Mummies: Remove the cheese balls from the freezer. Take one strip of puff pastry and wrap it around a cheese ball. Leave a small gap at the top to create the “head” of the mummy. Wrap another strip around the middle, and one near the bottom. The strips should overlap slightly to ensure the cheese is fully covered. Use a little water on the edges of the pastry to help them stick together. Repeat with all the cheese balls. Tip: Don’t wrap too tightly, or the pastry will burst when it expands in the oven. A loose wrap allows for even rising.
- Add the Eyes: Once the mummies are wrapped, use the tip of a knife to poke two small holes for the eyes. You can insert a tiny piece of black olive, a dot of black food coloring mixed with water, or just leave them as dark spots if the pastry browns evenly. For a more defined look, use a tiny bit of sesame seeds or poppy seeds for the eyes, pressing them gently into the dough. Tip: If using food coloring, use a toothpick to apply it for precision.
- Egg Wash and Bake: Brush the tops of the mummies with the egg wash. This will give them a beautiful golden-brown color. Place the baking sheet in the preheated oven and bake for 15-18 minutes, or until the pastry is puffed and golden brown. Sensory Cue: You should smell the buttery pastry and sharp cheese filling wafting through the kitchen. The edges of the pastry should look crispy.
- Cool and Serve: Remove from the oven and let them cool on the baking sheet for 5 minutes. The cheese inside will be extremely hot, so let it settle. Serve warm. Tip: They are best eaten within an hour of baking for maximum crispiness.
Cooking Tips & Techniques
There are a few tricks I’ve learned the hard way that can save you from a kitchen disaster. The biggest mistake people make is letting the pastry get too warm. Puff pastry is all about layers of butter, and if the butter melts before it hits the oven, you lose the lift. Keep your hands cool, work quickly, and return the pastry to the fridge if it starts to look shiny or oily.
Another common issue is soggy bottoms. This usually happens if the cheese filling is too wet or if the pastry isn’t cooked through. Ensure your cheese mixture is thick. If you’re using fresh herbs, chop them very finely and use sparingly, as they release water. Also, make sure your oven is fully preheated. A 400°F oven is necessary to create the steam that puffs the pastry quickly before the cheese melts.
Timing is everything. Don’t overbake them, or the pastry will become hard and stale. You want it tender and flaky. If your mummies are browning too quickly on top but the bottoms are pale, try lowering the rack in the oven or covering the tops with foil for the last few minutes.
I also recommend making a test batch of two or three mummies to check your oven’s actual temperature. Ovens can vary, and seeing how your first batch turns out helps you adjust the time for the rest. Consistency is key to getting that perfect golden hue every time.
Variations & Adaptations
While the classic sharp cheddar and cream cheese combo is a winner, there are plenty of ways to twist this recipe. If you want a spicier kick, add a teaspoon of diced jalapeños or a dash of cayenne pepper to the cheese mixture. It adds a nice heat that balances the cool cheese.
For a different flavor profile, try using goat cheese and sun-dried tomatoes. Crumble the goat cheese and mix it with finely chopped sun-dried tomatoes and a little basil. It’s a bit more gourmet and pairs well with a balsamic glaze drizzle after baking.
If you’re feeding guests with dietary restrictions, you can easily make these gluten-free by using gluten-free puff pastry. The texture might be slightly less flaky, but the flavor remains the same. For a dairy-free version, use vegan cream cheese and dairy-free butter puff pastry. Note that vegan cheese doesn’t melt the same way, so the filling will stay firmer.
I also like to add a layer of cooked, crumbled bacon to the cheese mixture for a smoky depth. It’s a bit heavier, but the combination of bacon and cheddar is irresistible. Just make sure the bacon is cooled and crumbled finely so it distributes evenly.
Serving & Storage Suggestions
These mummy bites are best served warm, right out of the oven. The contrast between the hot, crispy exterior and the cool, creamy interior is what makes them special. Arrange them on a platter with a spooky Halloween theme, maybe using a black slate board or a white plate with orange napkins.
They are perfect as an appetizer at parties, or even as a fun snack for kids’ lunchboxes (if you’re feeling brave!). They pair well with a crisp apple cider or a light white wine if you’re serving adults.
If you have leftovers, store them in an airtight container in the refrigerator for up to 3 days. To reheat, place them in a 350°F oven for 5-7 minutes. This restores the crispiness better than a microwave, which can make the pastry chewy. You can also freeze the unbaked mummies on a baking sheet, then transfer them to a freezer bag. Bake them straight from frozen, adding a few extra minutes to the baking time.
Nutritional Information & Benefits
These bites are rich in protein and calcium from the cheese, making them a more substantial snack than plain chips or crackers. However, they are also high in fat and sodium due to the cream cheese and puff pastry. Enjoy them in moderation as a treat rather than a daily staple.
For those watching their carb intake, the puff pastry adds significant carbohydrates. If you’re looking to reduce carbs, you could try wrapping the cheese balls in thin slices of prosciutto or bacon, though this changes the flavor profile entirely.
The sharp cheddar provides a good amount of vitamin A and B12. The cream cheese adds vitamin A as well. While not a health food, they offer a balanced mix of macronutrients that can satisfy a craving without leaving you feeling completely sluggish, especially if you pair them with some fresh fruit or vegetables.
Conclusion
These Crispy Mini Mummy Cheese Ball Bites are more than just a Halloween treat; they are a testament to the joy of simple, well-executed cooking. They bring a smile to faces, both young and old, and create a memorable experience around the table. I love making them because they allow me to be creative in the kitchen while still providing something comforting and familiar.
I encourage you to try this recipe and make it your own. Add your favorite herbs, swap the cheeses, or experiment with different eye decorations. The process is part of the fun. If you try them, I’d love to hear how they turned out. Leave a comment below with your thoughts or share a photo of your spooky creations.
Happy baking, and may your Halloween be filled with delicious surprises.
Frequently Asked Questions
Can I make these ahead of time?
Yes, you can assemble the mummies and freeze them on a baking sheet until solid, then transfer them to a freezer bag. Bake them directly from frozen, adding 2-3 minutes to the baking time. You can also prepare the cheese filling a day in advance and store it in the fridge.
Why did my puff pastry get soggy?
This usually happens if the cheese filling was too warm when wrapped, or if the oven wasn’t hot enough. Ensure the cheese balls are frozen solid before wrapping, and preheat your oven fully. Also, avoid using too much egg wash, which can weigh down the pastry.
Can I use refrigerated crescent roll dough instead of puff pastry?
You can, but the texture will be different. Crescent roll dough is softer and less flaky. It will still taste good, but it won’t have that signature shatter-crisp exterior that puff pastry provides. Puff pastry is highly recommended for the best result.
How do I store leftovers?
Store leftovers in an airtight container in the refrigerator for up to 3 days. Reheat in the oven at 350°F for 5-7 minutes to restore crispiness. Avoid the microwave, as it will make the pastry chewy.
Are these safe for kids to eat?
Yes, they are generally safe, but be careful of the hot cheese filling when serving to young children. Let them cool for at least 5-10 minutes before serving. Also, ensure any decorations for the eyes are non-toxic and safe for ingestion.
Pin This Recipe!
Crispy Mini Mummy Cheese Ball Bites: Easy Halloween Treats

These festive Halloween appetizers feature sharp cheddar and cream cheese balls wrapped in flaky puff pastry, baked until golden and crispy. They are easy to make, perfect for parties, and offer a delicious salty-sweet crunch.
- Prep Time: 30 minutes
- Cook Time: 18 minutes
- Total Time: 48 minutes
- Yield: 20-24 servings 1x
- Category: Appetizer
- Cuisine: American
Ingredients
- 8 oz cream cheese, softened to room temperature
- 1 cup sharp cheddar cheese, freshly shredded
- 1 tablespoon Worcestershire sauce
- 1/2 teaspoon garlic powder
- 1/4 teaspoon onion powder
- Salt and black pepper to taste
- 1 sheet puff pastry, thawed but still cold
- 1 large egg, beaten with 1 tablespoon of water
- 1 tablespoon sesame seeds or poppy seeds (optional, for eyes)
- Optional: Black food coloring or balsamic glaze for eyes
Instructions
- In a medium mixing bowl, combine softened cream cheese, shredded cheddar, Worcestershire sauce, garlic powder, onion powder, salt, and pepper. Mix until smooth and thick.
- Scoop about 1 tablespoon of the cheese mixture and roll into balls. Place on a parchment-lined baking sheet and freeze for at least 30 minutes to firm up.
- Preheat oven to 400°F (200°C). Roll out the puff pastry slightly and cut into 1/2 inch wide strips.
- Remove cheese balls from the freezer. Wrap each ball with pastry strips, leaving a small gap at the top for the head. Overlap strips slightly and seal edges with a little water.
- Poke two small holes for eyes and insert sesame seeds, poppy seeds, or a dot of food coloring.
- Brush the tops with egg wash.
- Bake for 15-18 minutes until the pastry is puffed and golden brown.
- Cool on the baking sheet for 5 minutes before serving warm.
Notes
Ensure cream cheese is fully softened to avoid lumps. Freeze cheese balls solid before wrapping to prevent melting. Keep puff pastry cold until baking to ensure flakiness. Do not skip the freezing step. Best eaten within an hour of baking for maximum crispiness.
Nutrition
- Serving Size: 1-2 bites per servin
- Calories: 150
- Sugar: 1
- Sodium: 200
- Fat: 10
- Saturated Fat: 5
- Carbohydrates: 12
- Protein: 4
Keywords: Halloween recipes, cheese ball bites, puff pastry appetizers, mummy cheese balls, easy party snacks, kid-friendly recipes, fall appetizers


