I want something crunchy, salty, and dippable right now, but I also want to pretend I’m being healthy. That’s the exact thought that hits me every single time I’m standing in front of my open fridge at 3 PM with no clear plan and a grumbling stomach. The chips in the pantry are calling my name, but honestly, I’m tired of the grease and the mid-afternoon slump that follows. So I grab a zucchini, a block of Parmesan, and I get to work because this craving isn’t going to solve itself.
That first batch I made was a total experiment, the kind where you’re not sure if you’re making dinner or a science project. I sliced the zucchini too thick, the coating fell off in sad clumps, and I ended up with a tray of sad, soggy green discs. But the flavor was there, buried under the texture fail, and I knew I was onto something. I tweaked the breading ratio, figured out the perfect thickness, and discovered the magic of a wire rack on a baking sheet. Now, these crispy baked Parmesan zucchini chips are my go-to when I need that crunch without the guilt.
It’s funny how a simple snack can become a staple, a little ritual that feels both indulgent and smart. These chips have that perfect golden crust, a salty, cheesy kick, and a tender center that actually tastes like zucchini, not just a vehicle for breadcrumbs. They’re the kind of thing you make for yourself on a Tuesday and then bring to a party on Saturday, and everyone asks for the recipe. That’s the sign of a keeper, you know?
Why You’ll Love This Recipe
Let me tell you why these crispy baked Parmesan zucchini chips have earned a permanent spot in my kitchen rotation. I’ve tested this recipe more times than I care to admit, tweaking the oven temperature, the breading technique, and the cheese blend to get that perfect crunch every single time. This isn’t just another healthy snack recipe—it’s the one that finally works.
- Quick & Easy: From fridge to table in under 30 minutes. Perfect for those moments when a snack attack hits and you need something satisfying fast.
- Simple Ingredients: You probably have everything in your kitchen right now. Zucchini, Parmesan, breadcrumbs, and a few pantry staples. No fancy trips required.
- Perfect for Snacking: Great for game day, afternoon cravings, or a light appetizer before dinner. They disappear fast, so make a double batch.
- Crowd-Pleaser: Even my picky eaters go back for seconds. There’s something about that cheesy, crunchy exterior that wins over everyone.
- Unbelievably Delicious: The texture is what gets me every time. Crispy on the outside, tender on the inside, with that rich Parmesan flavor that makes you forget you’re eating vegetables.
What makes this recipe different from the rest? It’s the technique. I use a two-step breading process that actually sticks, and I bake them on a wire rack so the air circulates and creates that all-over crunch. No flipping, no soggy bottoms, no sad results. This isn’t just another version of zucchini chips—it’s my best version, perfected through trial and error so you don’t have to go through the same frustration.
These chips are the kind of snack that makes you close your eyes after the first bite. It’s comfort food reimagined—healthier, faster, but with the same soul-soothing satisfaction. Perfect for impressing guests without stress, or turning a simple snack into something memorable.
What Ingredients You Will Need
This recipe uses simple, wholesome ingredients to deliver bold flavor and satisfying crunch without any fuss. Most of these are pantry staples, which makes this the kind of recipe you can whip up on a whim. Here’s what you’ll need and a few notes on each.
- Zucchini (2 medium, about 8-10 ounces each): Look for firm, medium-sized zucchini that are not too large. Bigger ones tend to have more seeds and water, which can make your chips soggy. I prefer organic when I can find them because the skin is thin and flavorful.
- Grated Parmesan Cheese (1 cup, finely grated): This is the star of the show. Use the good stuff from a block, not the powdery stuff in a green can. I recommend a high-quality Parmigiano-Reggiano for the best flavor and melt. The pre-grated stuff has anti-caking agents that don’t stick as well.
- Panko Breadcrumbs (1/2 cup): Panko gives you that extra-crispy texture that regular breadcrumbs just can’t match. They’re lighter and flakier, which means more crunch. You can use gluten-free panko if needed.
- Large Eggs (2): These help the breading stick to the zucchini slices. Make sure they’re at room temperature for the best consistency when whisking.
- All-Purpose Flour (1/4 cup): A light dusting of flour helps the egg wash adhere to the zucchini. You can substitute with almond flour or gluten-free flour blend if needed.
- Garlic Powder (1 teaspoon): Adds a subtle savory depth that complements the Parmesan beautifully. Don’t skip this—it makes a difference.
- Dried Italian Seasoning (1 teaspoon): A blend of oregano, basil, and thyme works perfectly. It gives the chips a little herbaceous lift.
- Salt and Black Pepper (to taste): Go easy on the salt since Parmesan is already salty. A few cracks of fresh black pepper add warmth.
- Olive Oil Spray (for coating): A light spray helps the chips brown and crisp up in the oven. You can use a mister or a store-bought spray. Avoid pouring oil directly—it’ll make them greasy.
For the best results, I recommend using freshly grated Parmesan from a block. It melts more evenly and has a nuttier, more complex flavor. If you’re dairy-free, you can try a high-quality vegan Parmesan, but the texture will be slightly different. The panko breadcrumbs are non-negotiable for that signature crunch, but if you’re gluten-free, look for gluten-free panko at most grocery stores.
Equipment Needed
You don’t need a lot of fancy equipment for this recipe, which is part of the beauty. Here’s what I use and a few tips from my own kitchen.
- Baking Sheet (1 large, rimmed): A standard half-sheet pan works perfectly. I prefer light-colored metal pans because they brown more evenly than dark ones.
- Wire Rack (fits inside the baking sheet): This is the secret weapon. Placing the zucchini chips on a wire rack allows hot air to circulate underneath, creating that all-over crunch without flipping. It’s a game-changer.
- Sharp Knife or Mandoline Slicer: A sharp chef’s knife works great, but a mandoline slicer gives you perfectly even slices every time. If you’re using a knife, aim for 1/4-inch thick slices. Too thin and they’ll burn; too thick and they won’t crisp up.
- Three Shallow Bowls: You’ll need one for flour, one for beaten eggs, and one for the Parmesan-panko mixture. I use wide, shallow bowls for easy dipping.
- Parchment Paper (optional but helpful): Lining your baking sheet makes cleanup a breeze. Just make sure the wire rack is on top of the parchment.
- Kitchen Towels or Paper Towels: For patting the zucchini slices dry. This step is crucial for removing excess moisture that can make the chips soggy.
If you don’t have a wire rack, you can bake the chips directly on a parchment-lined baking sheet, but you’ll need to flip them halfway through and they won’t be quite as crispy. A mandoline slicer is a great investment if you make a lot of vegetable chips, but a sharp knife and a steady hand work just fine. I’ve been using the same OXO mandoline for years, and it’s worth every penny.
Preparation Method

Alright, let’s get to the good part. Follow these steps carefully, and you’ll have a tray of perfectly crispy zucchini chips that will make you wonder why you ever bought the bagged stuff.
- Preheat your oven to 425°F (220°C). This high heat is essential for getting that golden, crispy exterior. Place your wire rack on top of your baking sheet and set it aside. Give the oven plenty of time to come to temperature—about 15 minutes.
- Prep the zucchini. Wash and dry your zucchini thoroughly. Trim off the ends, then slice them into 1/4-inch thick rounds. I use a mandoline for consistency, but a sharp knife works well too. Try to keep them all the same thickness so they cook evenly. Place the slices on a clean kitchen towel or paper towels in a single layer, then pat them dry with another towel. This step is non-negotiable—excess moisture is the enemy of crispiness.
- Set up your breading station. Grab three shallow bowls. In the first bowl, add the all-purpose flour, garlic powder, Italian seasoning, and a pinch of salt and pepper. Stir to combine. In the second bowl, beat the two eggs until they’re smooth and slightly frothy. In the third bowl, combine the finely grated Parmesan cheese and panko breadcrumbs. Mix them together with your fingers, breaking up any clumps of cheese.
- Bread the zucchini slices. Working one slice at a time, dredge the zucchini in the flour mixture, shaking off any excess. Then dip it into the beaten eggs, letting the excess drip off. Finally, press it into the Parmesan-panko mixture, making sure both sides are well coated. Place the breaded slice on the wire rack. Repeat with all the slices. Don’t overcrowd the rack—leave a little space between each chip for air circulation.
- Spray with oil. Once all the slices are on the rack, give them a light, even spray with olive oil. This helps them brown and crisp up in the oven. Don’t drench them—just a light misting will do. You can also use a pastry brush to apply a thin layer of oil if you don’t have a spray.
- Bake for 15-18 minutes. Place the baking sheet in the preheated oven and bake for 15 to 18 minutes, or until the chips are golden brown and crispy. Keep an eye on them after the 12-minute mark—oven temperatures vary, and you don’t want them to burn. The chips should be firm to the touch and the edges should be deeply golden.
- Cool on the rack. Remove the baking sheet from the oven and let the chips cool on the wire rack for 3-5 minutes. This allows them to set and become even crispier. Don’t skip this step—moving them too soon can cause the coating to separate.
- Serve immediately. Transfer the chips to a serving platter and enjoy them while they’re warm and crispy. They’re best eaten fresh, but I’ll share storage tips below if you have leftovers (which is rare in my house).
Cooking Tips & Techniques
I’ve made plenty of mistakes with zucchini chips so you don’t have to. Here are the lessons I learned the hard way, plus some professional tips to make your batch perfect every time.
Don’t skip the drying step. Zucchini is basically a water balloon with skin. If you don’t pat the slices dry before breading, the moisture will steam the coating right off in the oven. I learned this the hard way when my first batch came out looking like sad, soggy messes. Take the extra minute to blot them dry, and you’ll be rewarded with chips that actually crunch.
Use a wire rack for maximum crispiness. This is the single most important tip I can give you. When you bake the chips directly on a baking sheet, the bottom gets soggy from trapped steam. A wire rack lifts them up, allowing hot air to circulate all around. It’s a game-changer, and it’s worth the extra minute of setup.
Don’t overcrowd the rack. Give each chip a little breathing room. If they’re touching, they’ll steam each other and you’ll lose that crispy texture. I usually do two batches if I’m making a large amount. It’s better to take a little extra time than to end up with a tray of limp chips.
Watch the oven like a hawk. Ovens can be sneaky. Some run hot, some run cool. Start checking your chips at the 12-minute mark. You’re looking for a deep golden brown color, not pale yellow. If the edges are browning faster than the centers, your slices might be uneven. That’s okay—just pull the smaller ones out first.
Season strategically. Since Parmesan is already salty, go easy on the additional salt. I add a pinch to the flour mixture and then let the cheese do the heavy lifting. You can always sprinkle a little flaky sea salt on top after baking if you need more.
Variations & Adaptations
This recipe is incredibly versatile, and I’ve tried quite a few variations over the years. Here are some of my favorites, along with notes on what works and what doesn’t.
Spicy Chipotle Version: Add 1/2 teaspoon of chipotle powder and a pinch of cayenne to the flour mixture. It gives the chips a smoky, spicy kick that pairs beautifully with the Parmesan. I made this version for a game day party and they disappeared in minutes.
Gluten-Free Adaptation: Swap the all-purpose flour for almond flour or a gluten-free flour blend, and use gluten-free panko breadcrumbs. The texture is slightly different—a bit more delicate—but still incredibly satisfying. I’ve tested this with my gluten-sensitive friends and they gave it two thumbs up.
Herb and Lemon Twist: Add the zest of one lemon and 2 tablespoons of fresh chopped parsley or basil to the Parmesan-panko mixture. The bright, citrusy flavor cuts through the richness of the cheese and makes the chips taste fresher. This is my go-to version for spring and summer.
Air Fryer Method: If you have an air fryer, you’re in luck. Preheat to 400°F (200°C), arrange the breaded zucchini chips in a single layer in the basket (don’t overcrowd), and cook for 8-10 minutes, shaking the basket halfway through. They come out even crispier than the oven version, and they’re ready in half the time.
Dairy-Free Option: Replace the Parmesan with a high-quality dairy-free Parmesan alternative, or use nutritional yeast for a cheesy flavor without the dairy. The texture won’t be quite as crispy, but the flavor is still fantastic. I’ve used the Follow Your Heart brand with good results.
Serving & Storage Suggestions
These chips are best served warm and fresh from the oven, but I’ve got a few ideas for making the most of them.
Serving Temperature and Presentation: Serve them immediately on a platter while they’re still warm and crispy. I like to arrange them in a single layer, slightly overlapping, with a small bowl of dipping sauce in the center. A simple marinara sauce, ranch dressing, or garlic aioli are all excellent choices. For a lighter option, try a lemon-tahini dip or tzatziki.
Complementary Dishes: These chips pair beautifully with a refreshing cucumber mint green tea cooler for a light, satisfying snack. They’re also great alongside a easy lemon herb salmon sheet pan dinner for a complete meal that feels special but comes together quickly.
Storage Instructions: If you have leftovers (a rare occurrence in my house), let them cool completely, then store them in an airtight container at room temperature for up to 2 days. Do not refrigerate them—the moisture will make them soggy. For longer storage, you can freeze them in a single layer on a baking sheet, then transfer to a freezer bag. They’ll keep for up to 2 months.
Reheating Methods: To bring back the crunch, reheat the chips in a 400°F (200°C) oven for 3-5 minutes, or in an air fryer at 375°F (190°C) for 2-3 minutes. Skip the microwave—it will turn them into sad, rubbery discs. I’ve tried it, and I regret it every time.
Flavor Development: These chips are best eaten fresh, but if you do store them, the flavor actually mellows and becomes more savory overnight. The crunch won’t be the same, but the taste is still delicious. I sometimes make a double batch and use the leftovers crumbled over salads or pasta for a cheesy, crunchy topping.
Nutritional Information & Benefits
Let’s talk numbers and why this snack is a winner for your body as well as your taste buds. These values are estimates based on the recipe as written, using 2 medium zucchini and making about 4 servings.
- Calories: Approximately 180 per serving
- Protein: 12g
- Fat: 9g
- Carbohydrates: 14g
- Fiber: 3g
- Sugar: 4g
Health Benefits of Key Ingredients: Zucchini is packed with vitamin C, vitamin A, and potassium, and it’s incredibly low in calories. It’s also a good source of antioxidants, which help fight inflammation. Parmesan cheese provides calcium and protein, while the eggs add a boost of high-quality protein and healthy fats. The olive oil spray adds heart-healthy monounsaturated fats.
Dietary Considerations: This recipe is naturally low-carb and can be made gluten-free with a simple swap. It’s also vegetarian-friendly. If you’re watching your sodium intake, go easy on the added salt since Parmesan is already quite salty.
Potential Allergens: This recipe contains dairy (Parmesan cheese) and eggs. It also contains gluten if using regular panko breadcrumbs. For a dairy-free version, use a vegan Parmesan alternative. For an egg-free version, you can try a flax egg (1 tablespoon ground flaxseed mixed with 3 tablespoons water, let sit for 5 minutes), but the texture will be slightly different.
Personal Wellness Perspective: I love that I can satisfy my crunchy snack craving without reaching for a bag of greasy potato chips. These zucchini chips feel indulgent but are actually packed with nutrients. They’re the kind of snack that makes you feel good about what you’re eating, and that’s a win in my book.
Conclusion
These crispy baked Parmesan zucchini chips are the perfect example of how a simple, wholesome snack can be just as satisfying as anything from a bag. They’re quick to make, use ingredients you probably already have, and deliver that irresistible crunch without the guilt. I love that I can whip up a batch in under 30 minutes and feel good about what I’m eating.
I encourage you to make this recipe your own. Try the spicy chipotle version for a kick, or the lemon-herb twist for a fresh summer snack. Play with the seasonings and find your favorite combination. That’s the beauty of cooking—it’s always a little different every time, and that’s what keeps it exciting.
Honestly, this recipe has become a staple in my kitchen because it’s reliable, delicious, and always makes me happy. I hope it does the same for you. If you give it a try, I’d love to hear how it turned out. Drop a comment below and let me know your favorite variation, or share a photo of your chips on social media. Happy cooking, my friend!
Frequently Asked Questions
Can I make these zucchini chips in an air fryer?
Absolutely! Preheat your air fryer to 400°F (200°C), arrange the breaded zucchini chips in a single layer in the basket (don’t overcrowd), and cook for 8-10 minutes, shaking the basket halfway through. They come out even crispier than the oven version, and they’re ready in half the time.
Why did my zucchini chips turn out soggy?
Soggy chips are usually the result of too much moisture. Make sure you pat the zucchini slices dry thoroughly before breading them. Also, don’t overcrowd the baking sheet—the chips need space for air to circulate. Using a wire rack on your baking sheet also helps prevent sogginess.
Can I use yellow squash instead of zucchini?
Yes, you can! Yellow squash works beautifully in this recipe. It has a slightly milder flavor and a bit more water content, so make sure to pat it extra dry. The cooking time should be about the same.
How do I make these chips gluten-free?
Simply swap the all-purpose flour for almond flour or a gluten-free flour blend, and use gluten-free panko breadcrumbs. The texture will be slightly more delicate, but they’ll still be delicious and crispy.
Can I freeze these zucchini chips?
Yes! Let the chips cool completely, then freeze them in a single layer on a baking sheet. Once frozen, transfer them to a freezer bag. They’ll keep for up to 2 months. To reheat, pop them in a 400°F (200°C) oven for 3-5 minutes or in an air fryer at 375°F (190°C) for 2-3 minutes.
Pin This Recipe!
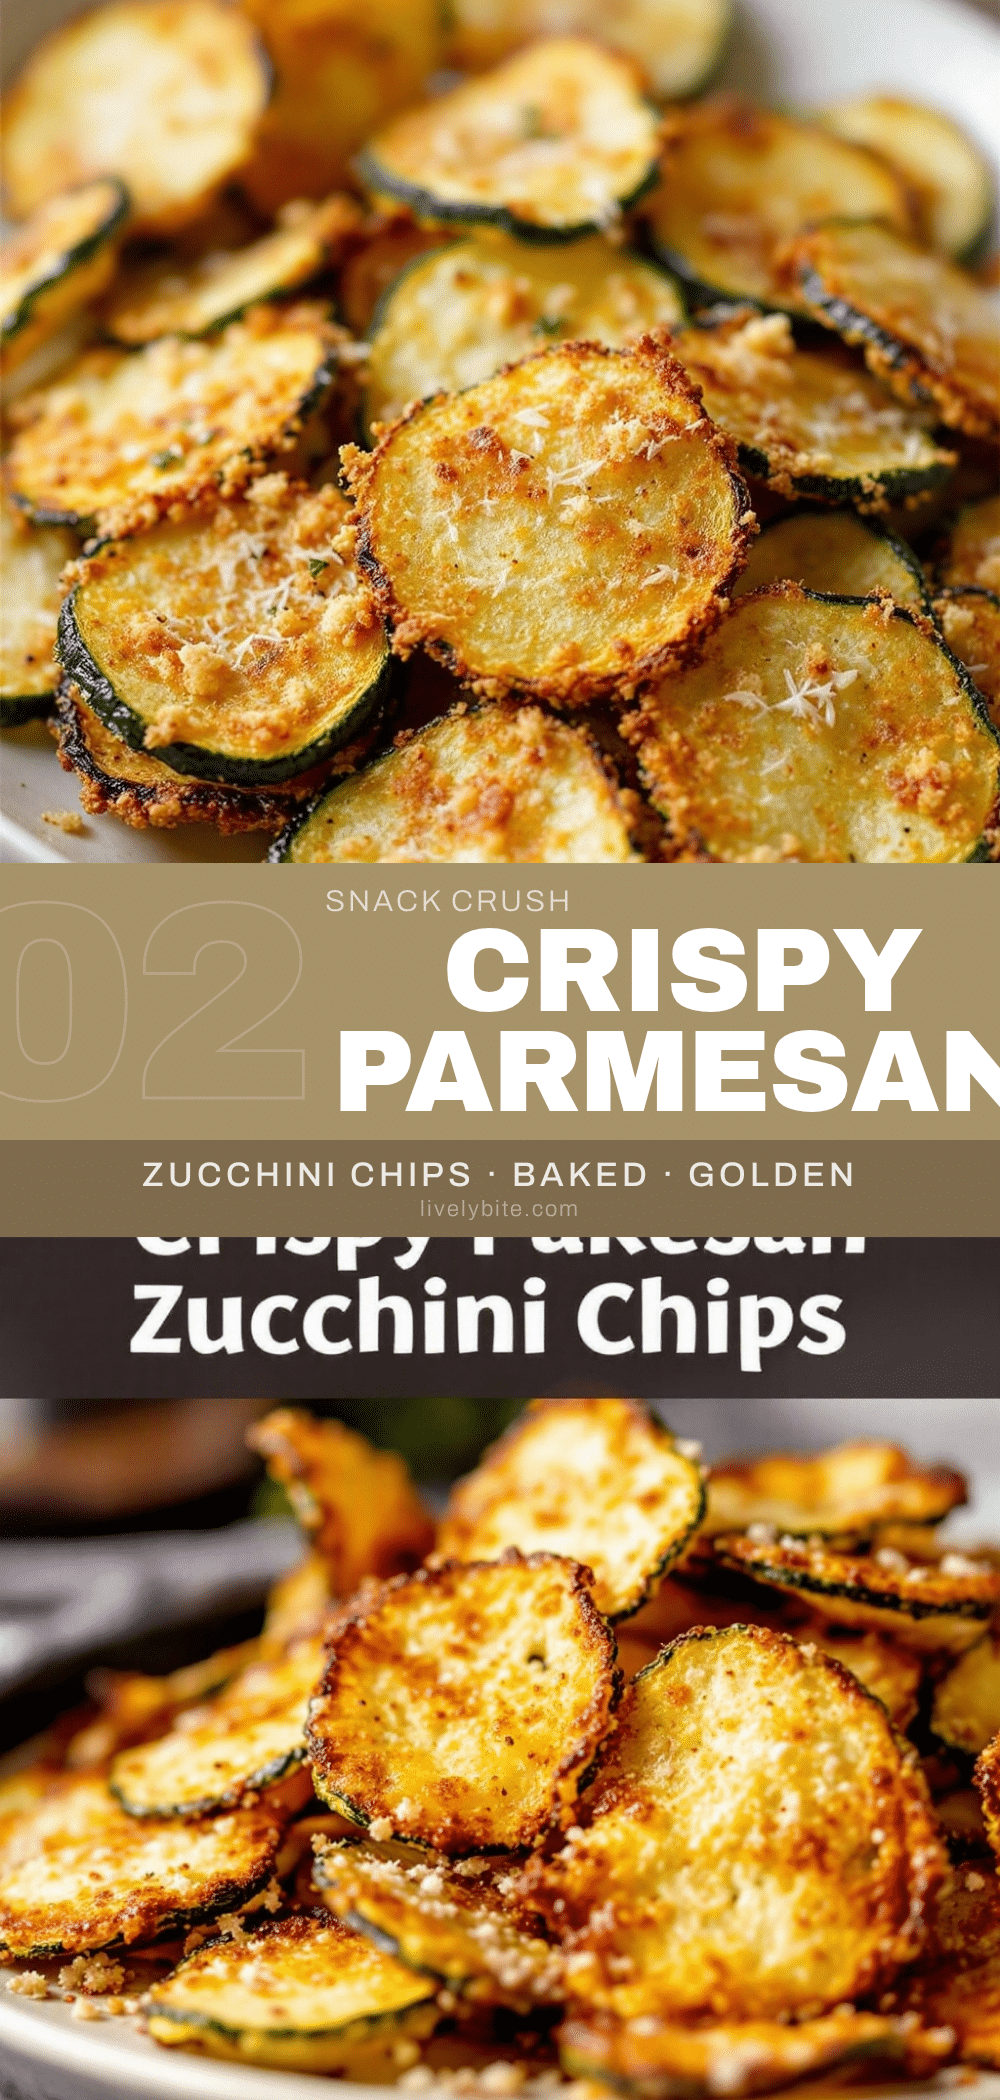
Crispy Baked Parmesan Zucchini Chips
These crispy baked Parmesan zucchini chips are the perfect healthy snack, offering a satisfying crunch with a salty, cheesy kick. Made with simple ingredients and ready in under 30 minutes, they’re a crowd-pleaser that’s both indulgent and smart.
- Prep Time: 15 minutes
- Cook Time: 18 minutes
- Total Time: 33 minutes
- Yield: 4 servings 1x
- Category: Appetizer
- Cuisine: American
Ingredients
- 2 medium zucchini (about 8–10 ounces each)
- 1 cup finely grated Parmesan cheese
- 1/2 cup panko breadcrumbs
- 2 large eggs
- 1/4 cup all-purpose flour
- 1 teaspoon garlic powder
- 1 teaspoon dried Italian seasoning
- Salt and black pepper to taste
- Olive oil spray
Instructions
- Preheat your oven to 425°F (220°C). Place a wire rack on top of a rimmed baking sheet and set aside.
- Wash and dry the zucchini thoroughly. Trim off the ends, then slice into 1/4-inch thick rounds. Pat the slices dry with a clean kitchen towel or paper towels.
- Set up a breading station with three shallow bowls. In the first bowl, combine flour, garlic powder, Italian seasoning, and a pinch of salt and pepper. In the second bowl, beat the eggs until smooth. In the third bowl, mix the grated Parmesan and panko breadcrumbs.
- Working one slice at a time, dredge the zucchini in the flour mixture, shaking off excess. Dip into the beaten eggs, letting excess drip off. Press into the Parmesan-panko mixture, coating both sides. Place on the wire rack. Repeat with all slices, leaving space between each.
- Lightly spray the breaded zucchini slices with olive oil.
- Bake for 15-18 minutes, until golden brown and crispy. Check after 12 minutes to prevent burning.
- Let the chips cool on the wire rack for 3-5 minutes to set and become crispier.
- Serve immediately while warm and crispy.
Notes
For maximum crispiness, use a wire rack on the baking sheet. Pat zucchini slices dry thoroughly to remove excess moisture. Do not overcrowd the rack. Watch the oven closely after 12 minutes to avoid burning. Season strategically since Parmesan is salty.
Nutrition
- Serving Size: 1 serving (about 1/4
- Calories: 180
- Sugar: 4
- Sodium: 450
- Fat: 9
- Saturated Fat: 4
- Carbohydrates: 14
- Fiber: 3
- Protein: 12
Keywords: zucchini chips, baked zucchini chips, Parmesan zucchini chips, healthy snack, crispy zucchini chips, easy snack recipe


