For the longest time, I just accepted that butternut squash mac and cheese wasn’t going to taste like the real thing. You know the drill—watery sauce, a faint sweetness that fights the cheese, and pasta that somehow gets gummy. I’d tried a dozen versions, each one leaving me a little more convinced that you couldn’t have a bowl that was both creamy *and* actually tasted like mac and cheese. It was a quiet frustration, not a dramatic one. I just stopped ordering it at restaurants and skipped past the recipes online.
Then, on a chilly Tuesday in late October, I had a surplus of butternut squash from a farm share bag that was starting to look sad. I had sage in the garden that was about to get hit by frost. And I had a block of sharp cheddar that needed using. So, I did what any stubborn home cook would do—I started roasting the squash whole, not in cubes, and I let it get real soft. I blended it with the cooking water instead of milk, and I added a pinch of nutmeg that I almost skipped. The crispy sage was an afterthought, honestly, born from a pan of butter I’d left on the stove.
That first bite was quiet. No fireworks. Just a slow, knowing nod. The sauce was thick enough to coat the back of a spoon but light enough that it didn’t sit heavy. The sage had turned into these little crunchy, savory leaves that tasted like autumn in a chip. It wasn’t a compromise. It was its own thing. This creamy butternut squash mac and cheese with crispy sage became the only version I’ve made since, and it’s the one I actually look forward to eating.
Why You’ll Love This Recipe
This isn’t one of those “healthy” swaps that leaves you disappointed. It’s a bowl of honest comfort food that happens to have a vegetable blended into the sauce. Here’s why it works:
- Unbelievably Creamy Without Heavy Cream : The secret is roasting the squash until it’s caramelized, then blending it with the pasta cooking water. You get a silky sauce that clings to every noodle without feeling greasy.
- Simple, Real Ingredients : You don’t need a specialty cheese aisle or weird thickeners. Sharp cheddar, butter, sage, and a good butternut squash do all the work.
- Perfect for a Cozy Fall Dinner : This is the kind of meal you make when the windows are fogged up and you want something that feels like a hug. It’s also great for Thanksgiving as a side dish that steals the show.
- Crowd-Pleaser for Kids and Adults : My nephew asked for seconds before he even knew there was squash in it. The crispy sage on top makes it feel fancy enough for guests, but it’s dead simple to throw together.
- Better Than Boxed, Faster Than You Think : The active cooking time is about 30 minutes. The oven does most of the work while you boil pasta. It’s weeknight-friendly, I promise.
What makes this version different from the rest is the technique. Most recipes steam or boil the squash, which waters down the flavor. Roasting concentrates that natural sweetness and gives the sauce a deeper, almost nutty taste. And the crispy sage? It’s not just a garnish. It adds a textural crunch and an herbal pop that cuts through the richness. This isn’t just another butternut squash mac—it’s the one that made me stop searching.
What Ingredients You Will Need
This recipe uses a short list of pantry-friendly ingredients, but each one pulls its weight. The squash provides the creamy base, the sage brings the aroma, and the cheese delivers that classic mac and cheese punch you’re craving.
- Butternut Squash (1 medium, about 2–2.5 lbs) — Look for one that feels heavy for its size with a firm, unblemished skin. You’ll roast it whole (halved and seeded) to concentrate the flavor. Avoid pre-cut cubes for this; they dry out too fast.
- Elbow Macaroni or Cavatappi (12 oz) — I love cavatappi because the ridges catch the sauce beautifully. Any short pasta works, though. Just don’t use shells—they trap too much air and the sauce slides off.
- Sharp Cheddar Cheese (8 oz, freshly grated) — Pre-shredded cheese has anti-caking agents that make the sauce grainy. Buy a block and grate it yourself. It melts into a velvety smooth sauce that coats every noodle.
- Fresh Sage Leaves (about 20–25 leaves) — You’ll fry these in butter until they’re crackly and dark green. They turn into little savory chips that make the dish. Dried sage won’t work here—it burns too fast.
- Unsalted Butter (4 tablespoons) — Two tablespoons go into the sauce for richness, and two are for frying the sage. Use European-style butter if you have it; it has a higher fat content and browns more evenly.
- Whole Milk or Half-and-Half (1 cup) — Whole milk keeps it creamy without being too heavy. Half-and-half makes it extra luxurious. Avoid skim milk; it can make the sauce feel thin.
- Garlic (2 cloves, smashed) — You’ll simmer this in the milk to infuse it with gentle garlic flavor. Don’t skip this step—it adds a savory depth that balances the squash’s sweetness.
- Dijon Mustard (1 teaspoon) — A tiny spoonful brightens the cheese sauce and keeps it from tasting flat. You won’t taste mustard, I promise. It just makes the cheese taste cheesier.
- Nutmeg (¼ teaspoon, freshly grated) — This is non-negotiable. Nutmeg and squash are best friends. It adds a warm, aromatic note that ties the whole dish together.
- Salt and Black Pepper — Use fine sea salt for the pasta water and kosher salt for seasoning. Freshly cracked black pepper adds a little bite.
- Pasta Water (reserved, about 1 cup) — This starchy water is the secret to a silky sauce. It helps the cheese emulsion stay smooth and gives the sauce body without adding fat.
I get my butternut squash from the farmers’ market when I can, but grocery store squash works just fine. Just make sure it’s not too stringy—older squash can get fibrous. If you’re in a pinch, you can use frozen butternut squash puree (thawed and drained), but the flavor won’t be as caramelized.
Equipment Needed
You don’t need a lot of fancy tools for this recipe. Here’s what you’ll actually use:
- Sheet Pan — For roasting the squash. A rimmed baking sheet works best to catch any juices.
- Large Pot — For boiling the pasta. Use a 5- to 6-quart pot so the pasta has room to move.
- High-Speed Blender or Immersion Blender — A blender makes the sauce silky smooth. An immersion blender works, too, but you’ll need a deep pot or bowl to avoid splatters. I’ve used a food processor in a pinch, but the texture isn’t quite as velvety.
- Medium Skillet — For frying the sage. A non-stick or stainless steel pan works fine. Cast iron holds heat too well and can burn the butter.
- Cheese Grater — A box grater or Microplane for grating the cheddar. Please don’t buy pre-shredded.
- Wooden Spoon or Silicone Spatula — For stirring the sauce and pasta. A wooden spoon won’t scratch your pot.
- Measuring Cups and Spoons — For accuracy. I know some people eyeball it, but this recipe benefits from precision, especially with the nutmeg and mustard.
If you don’t have a blender, you can mash the roasted squash with a potato masher until it’s smooth, then whisk it into the milk. It won’t be as silky, but it’ll still taste great. I’ve done it when my blender was in the dishwasher, and honestly, a little texture isn’t the worst thing.
Preparation Method
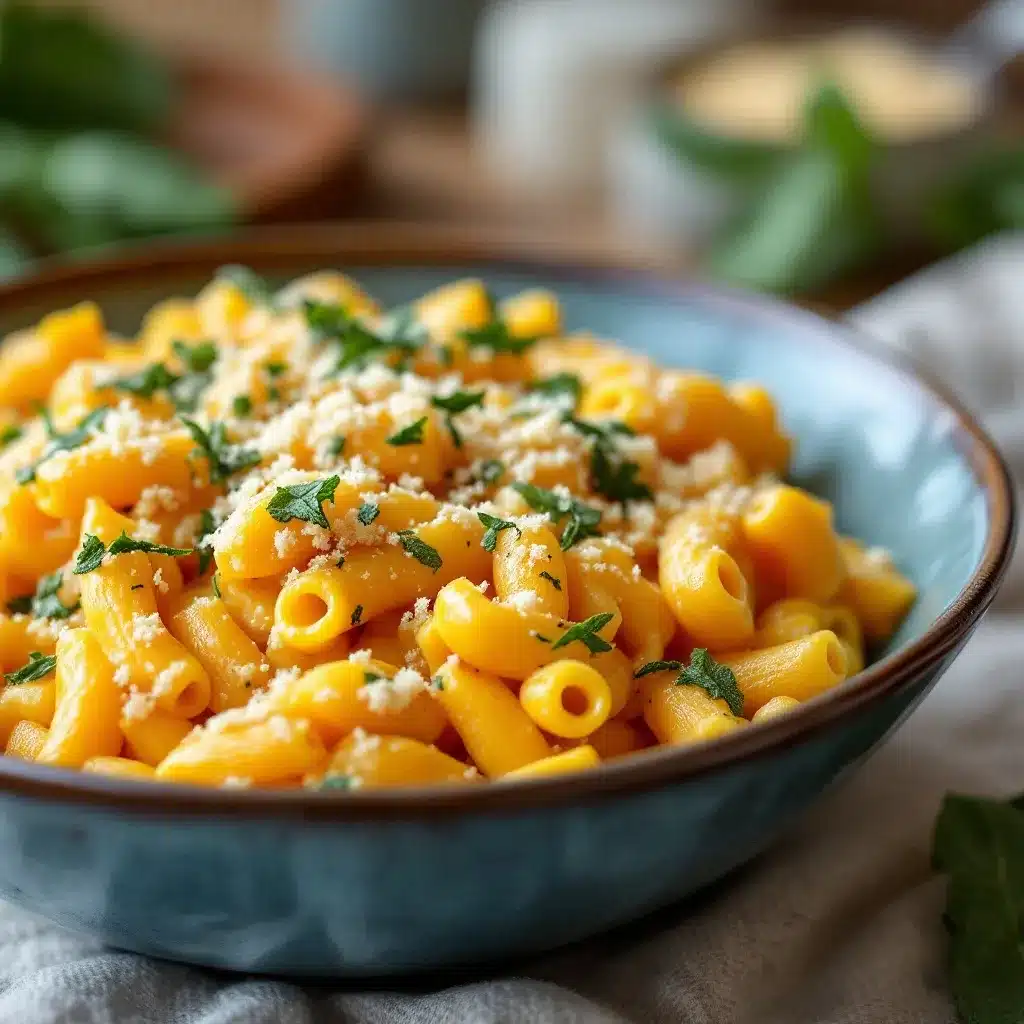
Let’s get cooking. This method is broken down into steps so you don’t miss anything. The total time is about an hour, but most of that is hands-off roasting.
- Preheat the oven to 400°F (200°C). Line a sheet pan with parchment paper or foil for easy cleanup. Cut the butternut squash in half lengthwise and scoop out the seeds with a spoon. Don’t peel it yet. Place the halves cut-side down on the sheet pan. Roast for 35–40 minutes, until a fork slides into the flesh easily with no resistance. The skin will look slightly wrinkled and the edges will be caramelized. Let it cool for 10 minutes—enough so you can handle it without burning your fingers.
- While the squash roasts, bring a large pot of salted water to a boil. Add the pasta and cook according to the package directions until al dente. I usually cook it 1 minute less than the suggested time because it’ll finish cooking in the sauce later. Before you drain the pasta, scoop out 1 cup of the starchy pasta water and set it aside. Drain the pasta and return it to the pot off the heat. Drizzle a tiny bit of olive oil over it to keep it from sticking while you finish the sauce.
- In a small saucepan, warm the milk over low heat with the smashed garlic cloves. Let it simmer gently for 5 minutes. Don’t let it boil—scorched milk tastes awful. The garlic will infuse the milk with a subtle savory flavor. Remove the garlic cloves with a slotted spoon and discard them. Keep the milk warm on the lowest setting.
- Once the squash is cool enough to handle, scoop the flesh out of the skin. It should come out in large, soft chunks. Transfer the squash to a blender. Add the warmed milk (discard the garlic), the Dijon mustard, the grated nutmeg, ½ teaspoon of salt, and ¼ teaspoon of black pepper. Blend on high until completely smooth, about 30–45 seconds. If the sauce is too thick, add a splash of the reserved pasta water and blend again. It should be the consistency of heavy cream.
- Pour the squash mixture into a large skillet or the pasta pot. Add 2 tablespoons of butter and stir over medium heat until the butter is melted and the sauce is hot. Reduce the heat to low. Gradually add the grated cheddar cheese, a handful at a time, stirring constantly. Wait until each handful is fully melted before adding the next. This prevents the sauce from breaking or turning grainy. Once all the cheese is in, stir in about ¼ cup of the reserved pasta water. The sauce should be smooth and thick enough to coat the back of a spoon.
- Add the drained pasta to the cheese sauce. Toss gently with a wooden spoon or silicone spatula until every piece of pasta is coated. If the sauce seems too thick, add more pasta water a tablespoon at a time until it loosens up. Taste and adjust salt and pepper. Set the pot aside, covered, while you fry the sage.
- In a small skillet, melt the remaining 2 tablespoons of butter over medium heat. Once the butter is foaming, add the sage leaves in a single layer. Fry for 30–45 seconds per side, until the leaves turn dark green and crispy. They should look like little chips. Be careful—they can burn quickly. Transfer the sage leaves to a paper towel-lined plate to drain. Sprinkle a tiny pinch of salt over them while they’re still warm.
- Serve the mac and cheese in bowls. Top each serving with a generous scattering of crispy sage leaves. Eat immediately while the sage is still crunchy. The contrast between the creamy pasta and the crackly sage is the whole point.
One thing I learned the hard way: don’t skip the step of warming the milk. Cold milk will shock the hot squash puree and make the sauce seize up. It’ll still taste okay, but the texture won’t be as smooth. Also, if your sauce looks a little thin at first, don’t panic. It will thicken as it sits on the pasta, especially if you let it rest for a minute before serving.
Cooking Tips & Techniques
I’ve made this recipe about a dozen times, and I’ve messed it up in almost every way possible. Here’s what I’ve learned so you don’t have to repeat my mistakes.
Roast the squash whole (halved) instead of cubed. Cubes dry out and burn on the edges before the inside is tender. Halves roast evenly and stay moist. Plus, you don’t have to peel a raw squash—that’s a battle nobody wins. The skin slides right off after roasting.
Don’t skimp on the pasta water. That starchy liquid is liquid gold. It helps the cheese sauce cling to the pasta and keeps it from getting gluey. I always save a full cup, even if I only use half. Leftover pasta water can be refrigerated for a day or two and used to loosen leftovers.
Grate your own cheese. I know, I know. It’s an extra step. But pre-shredded cheese is coated in cellulose and potato starch, which prevent it from melting smoothly. You’ll end up with a gritty, clumpy sauce instead of a velvety one. A block of sharp cheddar takes two minutes to grate, and the difference is night and day.
Fry the sage at the very end. If you fry it too early, it’ll lose its crunch before you serve. Sage leaves go from crispy to soggy in about five minutes once they hit the air. I fry mine while the pasta is resting in the sauce, so they go straight from pan to plate.
Use a light hand with the nutmeg. It’s a strong spice, and a little goes a long way. I grate it fresh from a whole nutmeg because pre-ground nutmeg tastes dusty and flat. If you don’t have a Microplane, a fine grater works. Just go easy—you can always add more, but you can’t take it out.
If the sauce breaks, don’t panic. Sometimes the emulsion separates if the heat was too high or the cheese was added too fast. To fix it, remove the pot from the heat and whisk in a splash of cold milk or a tablespoon of cold butter. The shock of cold fat can bring the sauce back together. It’s not perfect, but it’s salvageable.
One time, I forgot to reserve the pasta water and had to use plain tap water to thin the sauce. It worked, but the sauce was noticeably less silky. So, really—set that cup aside before you drain the pasta. Future you will be grateful.
Variations & Adaptations
This recipe is a great base to play with. Here are a few ways to change it up depending on what you have on hand or who you’re feeding.
- Make It Gluten-Free : Swap the regular pasta for your favorite gluten-free variety. Brown rice pasta or chickpea pasta works well. Just be careful not to overcook it—gluten-free pasta gets mushy fast. The sauce itself is naturally gluten-free, so no changes needed there.
- Make It Vegan : Use a high-quality vegan cheddar shred (I like the brand Violife for melting), unsalted vegan butter, and oat milk or unsweetened cashew milk. The sauce will be slightly less creamy, but it still works. Skip the Dijon mustard if your vegan cheese has a tangy flavor already.
- Add Protein : Stir in some shredded rotisserie chicken, crispy bacon bits, or sautéed mushrooms right before serving. If you’re feeling ambitious, you can even fold in some leftover easy slow cooker honey garlic chicken for a sweet-savory combo that’s surprisingly good.
- Change the Cheese : Sharp cheddar is classic, but you can swap half of it for smoked Gouda, Gruyère, or even a little blue cheese for a funkier flavor. Just keep the total amount the same. Smoked Gouda adds a bacon-like smokiness that pairs beautifully with the sage.
- Seasonal Twist : In the summer, swap the butternut squash for roasted sweet potato or carrot puree. The flavor will be sweeter and a little earthier. In the winter, add a pinch of cayenne or smoked paprika for warmth. I’ve even made this with leftover roasted acorn squash after Thanksgiving—it worked great.
- Make It a Meal : Serve it as a side dish alongside a simple protein. It pairs beautifully with easy lemon herb salmon sheet pan dinner for a complete, cozy dinner that feels fancy but takes almost no effort.
I tried a version once with a handful of chopped sun-dried tomatoes stirred in at the end. It was a little weird, honestly—the sweetness of the tomatoes clashed with the squash. But my friend loved it, so maybe it’s a matter of taste. Don’t be afraid to experiment, but maybe start with a small batch first.
Serving & Storage Suggestions
This mac and cheese is best served immediately, while the sauce is still loose and the sage is crunchy. Spoon it into wide, shallow bowls so the pasta isn’t piled too high. A sprinkle of flaky sea salt on top of the sage leaves adds a nice finishing touch. I like to serve it with a simple green salad dressed with lemon vinaigrette—the acidity cuts through the richness perfectly.
Storage: Leftovers can be refrigerated in an airtight container for up to 4 days. The sauce will thicken significantly as it sits, so don’t be alarmed. To reheat, add a splash of milk or water to the pasta and warm it in a skillet over medium-low heat, stirring gently. You can also microwave it in 30-second bursts, stirring in between. Just know that the sauce won’t be as silky the second time around—it’s a trade-off.
Freezing: This recipe freezes surprisingly well. Let the mac and cheese cool completely, then transfer it to a freezer-safe container. It will keep for up to 3 months. Thaw it in the refrigerator overnight, then reheat in a skillet with a splash of milk. The sage leaves won’t survive freezing, so I recommend making a fresh batch of crispy sage when you’re ready to serve the leftovers.
Flavor Development: Honestly, the flavors meld together even more after a day in the fridge. The squash and cheese marry into this deep, savory-sweet thing that’s almost better the next day. It’s a great make-ahead option for a busy weeknight—just reheat and top with fresh sage.
If you’re serving this for a crowd, you can keep it warm in a slow cooker on the “keep warm” setting. Stir in a little extra milk before transferring it to thin the sauce slightly. It won’t be as perfect as fresh, but it’ll still be a hit at a potluck or holiday gathering.
Nutritional Information & Benefits
This isn’t a “diet” recipe, but it’s a lot lighter than traditional mac and cheese. The butternut squash replaces most of the heavy cream and butter you’d normally use, adding fiber, vitamin A, and antioxidants. Here’s a rough estimate per serving (based on 6 servings):
| Nutrient | Amount per Serving |
|---|---|
| Calories | ~420 |
| Total Fat | 18g |
| Saturated Fat | 11g |
| Carbohydrates | 52g |
| Fiber | 6g |
| Sugar | 8g |
| Protein | 16g |
| Vitamin A | 210% DV |
| Calcium | 25% DV |
Health Highlights: Butternut squash is packed with beta-carotene, which your body converts into vitamin A for healthy vision and immune function. The sage leaves contain antioxidants and anti-inflammatory compounds. And the sharp cheddar provides calcium and protein. It’s comfort food that actually gives you something back.
Dietary Considerations: This recipe is vegetarian. To make it gluten-free, use gluten-free pasta. To make it lower in fat, use reduced-fat cheddar and 2% milk—though the sauce won’t be as creamy. It’s not low-carb by any stretch, but the squash adds more fiber than traditional mac and cheese, so it’s a little more satisfying per bite.
I’m not a nutritionist, but I’ve learned to listen to my body. A bowl of this leaves me feeling full and happy, not sluggish. That’s a win in my book.
Conclusion
This creamy butternut squash mac and cheese with crispy sage is the kind of recipe that proves you don’t have to choose between healthy and indulgent. It’s rich and satisfying, but it doesn’t weigh you down. The roasted squash brings a natural sweetness that plays beautifully with the sharp cheddar, and the crispy sage adds a savory crunch that makes every bite interesting.
I’ve made this for weeknight dinners, for holiday side dishes, and for lazy Sunday lunches when I wanted something that felt like a project but not a chore. It’s flexible enough to adapt to whatever you have in the fridge, and it’s forgiving enough that even a burnt sage leaf or two won’t ruin it. Honestly, I think it’s the kind of recipe that becomes a staple—the one you make without thinking, the one you crave when the weather turns cold.
I’d love to hear how it turns out for you. Did you add something unexpected? Did you swap the cheese? Drop a comment below and let me know—I read every single one. And if you loved it, share it with a friend who needs a little comfort food in their life. Happy cooking!
Frequently Asked Questions
Can I use frozen butternut squash instead of fresh?
Yes, you can. Thaw the frozen squash completely and drain off any excess water before blending. Roasting isn’t necessary if you use frozen puree, but you’ll lose some of the caramelized flavor. To compensate, add an extra tablespoon of butter and a pinch of smoked paprika to the sauce.
Why did my sauce turn out grainy?
Grainy sauce usually happens when the cheese is added too quickly or the heat is too high. Always add cheese gradually over low heat, stirring constantly. Also, pre-shredded cheese often contains anti-caking agents that prevent smooth melting. Grating your own cheese from a block solves this problem almost every time.
Can I make this recipe ahead of time?
Absolutely. Assemble the mac and cheese completely (without the crispy sage), transfer it to a baking dish, and refrigerate it for up to 24 hours. When you’re ready to serve, reheat it in a 350°F oven for about 20 minutes, covered with foil. Make the crispy sage fresh right before serving for the best texture.
What can I use instead of fresh sage?
Fresh sage is really the star here, but if you can’t find it, you can substitute with fresh thyme or rosemary. Fry them the same way in butter. The flavor will be different—more piney or floral—but still delicious. Dried sage won’t work for frying; it burns too quickly and tastes dusty.
Can I add other vegetables to this mac and cheese?
Sure. Stir in some steamed broccoli florets, roasted cauliflower, or sautéed spinach right before serving. If you’re adding vegetables, make sure they’re well-drained so they don’t water down the sauce. I’ve also folded in some caramelized onions for extra sweetness—it’s a great variation.
Pin This Recipe!
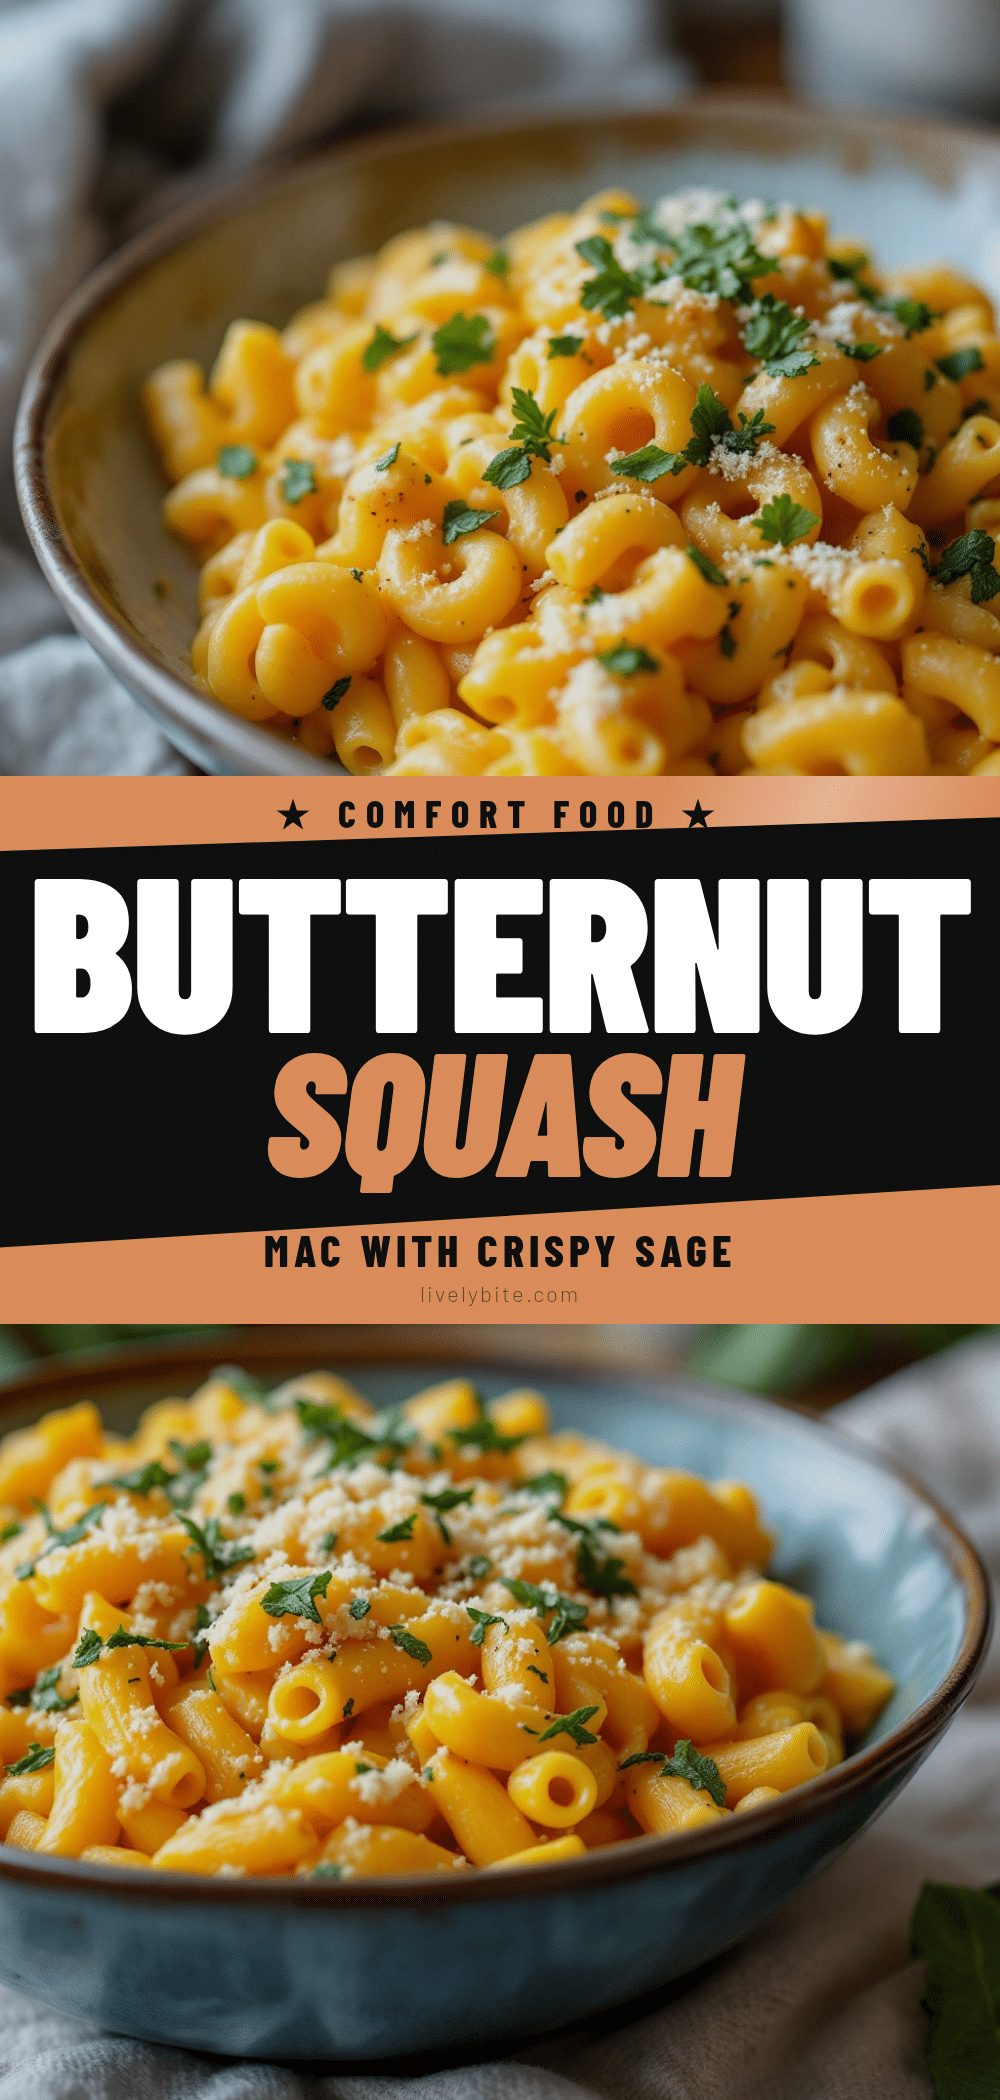
Creamy Butternut Squash Mac and Cheese with Crispy Sage

This creamy butternut squash mac and cheese with crispy sage is a bowl of honest comfort food that happens to have a vegetable blended into the sauce. Roasted squash creates a silky, nutty sauce that clings to every noodle, topped with crunchy sage leaves for a perfect fall dinner.
- Prep Time: 15 minutes
- Cook Time: 40 minutes
- Total Time: 55 minutes
- Yield: 6 servings 1x
- Category: Main Course
- Cuisine: American
Ingredients
- 1 medium butternut squash (about 2–2.5 lbs)
- 12 oz elbow macaroni or cavatappi
- 8 oz sharp cheddar cheese, freshly grated
- 20–25 fresh sage leaves
- 4 tablespoons unsalted butter
- 1 cup whole milk or half-and-half
- 2 cloves garlic, smashed
- 1 teaspoon Dijon mustard
- ¼ teaspoon freshly grated nutmeg
- Salt and black pepper to taste
- 1 cup reserved pasta water
Instructions
- Preheat the oven to 400°F (200°C). Line a sheet pan with parchment paper or foil. Cut the butternut squash in half lengthwise and scoop out the seeds. Place the halves cut-side down on the sheet pan. Roast for 35–40 minutes, until a fork slides into the flesh easily. Let cool for 10 minutes.
- While the squash roasts, bring a large pot of salted water to a boil. Add the pasta and cook according to package directions until al dente (cook 1 minute less than suggested). Before draining, reserve 1 cup of pasta water. Drain the pasta and return to the pot off the heat; drizzle with a little olive oil to prevent sticking.
- In a small saucepan, warm the milk over low heat with the smashed garlic cloves. Simmer gently for 5 minutes (do not boil). Remove the garlic cloves with a slotted spoon and discard. Keep the milk warm on the lowest setting.
- Once the squash is cool enough to handle, scoop the flesh out of the skin. Transfer to a blender. Add the warmed milk, Dijon mustard, nutmeg, ½ teaspoon salt, and ¼ teaspoon black pepper. Blend on high until completely smooth, about 30–45 seconds. If too thick, add a splash of reserved pasta water and blend again.
- Pour the squash mixture into a large skillet or the pasta pot. Add 2 tablespoons of butter and stir over medium heat until melted and hot. Reduce heat to low. Gradually add the grated cheddar cheese, a handful at a time, stirring constantly until each handful is fully melted. Stir in about ¼ cup of reserved pasta water until smooth and thick.
- Add the drained pasta to the cheese sauce. Toss gently until every piece is coated. If the sauce seems too thick, add more pasta water a tablespoon at a time. Taste and adjust salt and pepper. Set aside, covered, while you fry the sage.
- In a small skillet, melt the remaining 2 tablespoons of butter over medium heat. Once foaming, add the sage leaves in a single layer. Fry for 30–45 seconds per side until dark green and crispy. Transfer to a paper towel-lined plate and sprinkle with a tiny pinch of salt while warm.
- Serve the mac and cheese in bowls. Top each serving with a generous scattering of crispy sage leaves. Eat immediately.
Notes
Roast the squash whole (halved) instead of cubed for even moisture. Don’t skip warming the milk—cold milk can seize the sauce. Grate your own cheese for a smooth sauce. Fry the sage at the very end to keep it crunchy. If the sauce breaks, whisk in a splash of cold milk or a tablespoon of cold butter.
Nutrition
- Serving Size: 1 serving
- Calories: 420
- Sugar: 8
- Sodium: 480
- Fat: 18
- Saturated Fat: 11
- Carbohydrates: 52
- Fiber: 6
- Protein: 16
Keywords: butternut squash mac and cheese, creamy mac and cheese, fall dinner, comfort food, vegetarian, crispy sage


