I burned the first three batches of Pan de Muerto before I figured out what I was doing wrong. Not slightly overbaked—I mean charcoal disks that my abuela would have gently, lovingly, and completely disowned me for. The fourth batch came out edible. The fifth was passable. The sixth? That one made my neighbor knock on my door to ask what smelled so good, and I knew I was finally onto something.
This bread has a way of humbling you, honestly. It looks simple—a round loaf with those iconic bone-shaped decorations on top—but it demands patience. I spent years treating it like a regular sweet bread, rushing the proofing, skipping the resting, and wondering why it came out dense. Turns out, Pan de Muerto isn’t difficult. It just won’t let you take shortcuts.
That’s what I love about it now. Every time I make this Classic Pan de Muerto with Orange Blossom Glaze, I slow down. I pay attention to the dough, the way it feels when it’s ready, the smell that fills the kitchen as it bakes. It’s become my favorite way to welcome Día de Muertos—not just because the bread tastes incredible, but because the process itself feels like a ritual.
The orange blossom glaze wasn’t part of the original plan, either. I added it on a whim one year when I had a bottle of orange blossom water sitting in my cabinet, and it turned into the thing people ask for by name. The floral sweetness cuts through the buttery richness of the bread perfectly. I don’t think I’ll ever make it without the glaze again.
Why You’ll Love This Recipe
This isn’t just another bread recipe. This is the one that makes your kitchen smell like a Mexican bakery on a cool November morning. Here’s why it works:
- Surprisingly Doable: If I can go from burning bread to baking bakery-quality loaves, you can absolutely nail this on your first try. The recipe walks you through every step.
- Pantry-Friendly: Flour, sugar, butter, eggs, yeast—nothing exotic except maybe the orange blossom water, and that’s easy to find online or at a specialty grocery store.
- Perfect for Día de Muertos: Whether you’re celebrating with a full ofrenda or just want to honor the tradition, this bread is the centerpiece. It’s also incredible for any fall gathering.
- That Glaze Though: The orange blossom glaze isn’t optional in my house anymore. It adds a floral, citrusy brightness that takes the bread from good to unforgettable.
- Freezes Like a Dream: Make extra. You’ll thank yourself later when you pull a loaf out of the freezer for unexpected guests.
I’ve tested this recipe more times than I care to count. Every adjustment—the proofing time, the butter temperature, the glaze ratio—came from a real failure in my own kitchen. This version works. Trust me on that.
What Ingredients You Will Need
This recipe uses simple ingredients, but each one plays a specific role in creating that soft, slightly sweet, aromatic bread. Let me walk you through what you’ll need and why it matters.
For the Dough
- All-purpose flour (4 cups / 500g): Nothing fancy here. I’ve tried bread flour, and it makes the loaf a bit too chewy. All-purpose gives you that tender, pillowy crumb.
- Active dry yeast (2¼ teaspoons / 7g or one packet): Make sure your yeast is fresh. Old yeast is the number one reason bread doesn’t rise. I use Fleischmann’s, but any brand works.
- Warm milk (½ cup / 120ml, heated to 110°F): Whole milk adds richness. You can use 2%, but full-fat gives a better texture.
- Granulated sugar (½ cup / 100g): Just enough sweetness to make this a pan dulce without being dessert-level sweet.
- Unsalted butter (½ cup / 113g, softened): Room temperature is crucial here. Cold butter won’t incorporate properly, and melted butter changes the texture. Let it sit out for at least an hour.
- Large eggs (3, room temperature): Eggs add richness and structure. Cold eggs can shock your yeast, so take them out of the fridge 30 minutes before starting.
- Orange zest (1 tablespoon from 1 large orange): Fresh zest only—no dried zest or extract. The oils in fresh zest give that bright, authentic citrus flavor.
- Salt (1 teaspoon): Don’t skip it. Salt controls yeast activity and enhances flavor.
- Vanilla extract (1 teaspoon): Pure vanilla, not imitation. It makes a difference.
For the Orange Blossom Glaze
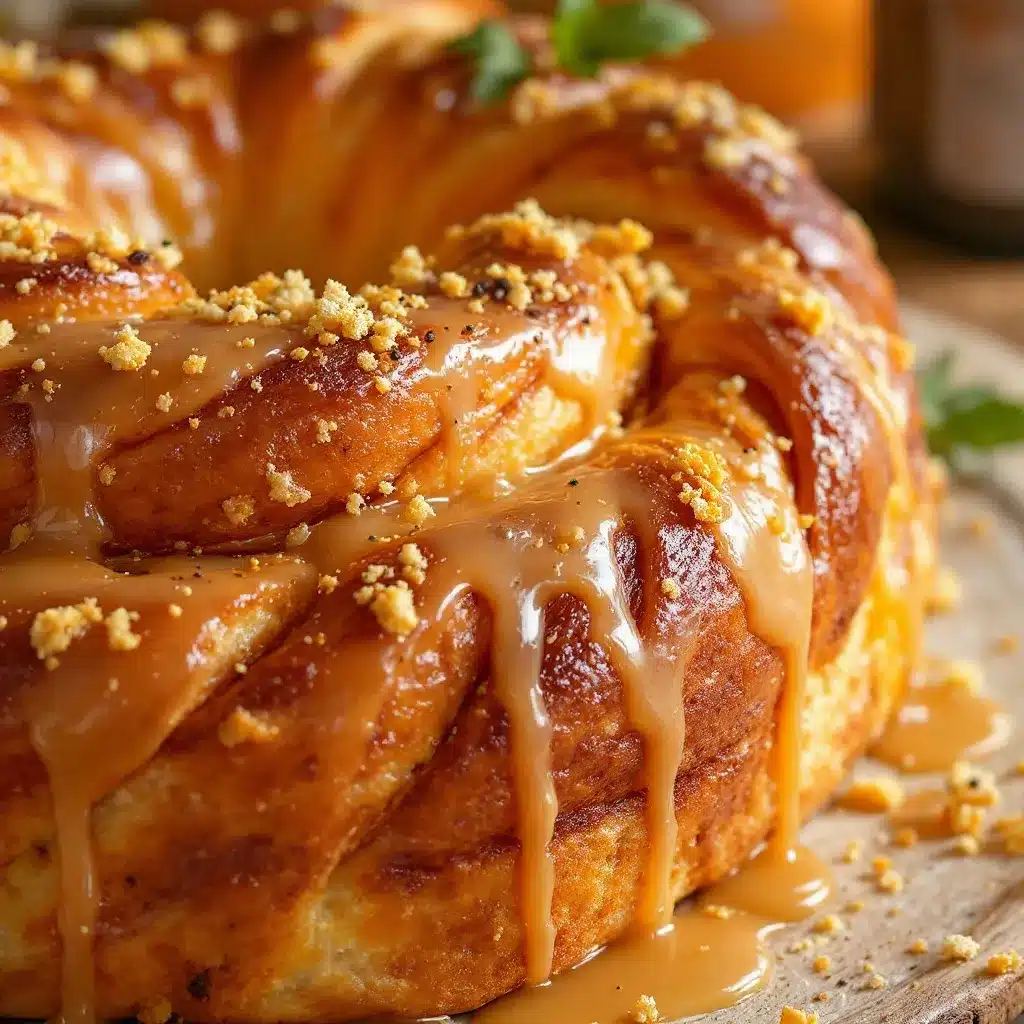
- Powdered sugar (1 cup / 120g): Sift it if it’s lumpy. Nobody wants lumpy glaze.
- Orange blossom water (2 tablespoons): This is the star. I use Cortas brand—it’s widely available and has a beautiful floral aroma without being overpowering.
- Milk (1-2 tablespoons): To adjust consistency. Start with one tablespoon and add more if needed.
- Orange zest (1 teaspoon, optional): For an extra citrus kick.
For the Topping
- Granulated sugar (¼ cup / 50g): For sprinkling on top after glazing.
Equipment Needed
You don’t need a professional bakery setup for this. Here’s what I use:
- Stand mixer with dough hook: Highly recommended. Kneading by hand takes about 15 minutes of solid work, and the dough is sticky. If you have a stand mixer, let it do the heavy lifting. I use a KitchenAid, but any brand works.
- Large mixing bowl: For proofing the dough. Glass or ceramic works best—plastic can retain odors.
- Baking sheet: A standard half-sheet pan works perfectly. Line it with parchment paper.
- Plastic wrap or a clean kitchen towel: For covering the dough during proofing.
- Cooling rack: Essential for even cooling. Don’t skip this, or the bottom of your bread will get soggy.
- Whisk and small bowl: For the glaze.
- Pastry brush (optional): For applying the glaze evenly.
If you don’t have a stand mixer, you can absolutely knead by hand. It’s a great arm workout. Just be prepared for a sticky dough—resist the urge to add too much flour. A bench scraper helps manage the stickiness.
Preparation Method
Let’s make some bread. I’ll walk you through every step, including the little details that make the difference between good Pan de Muerto and unforgettable Pan de Muerto.
Step 1: Activate the Yeast (10 minutes)
In the bowl of your stand mixer, combine the warm milk (110°F—warm but not hot to the touch) with 1 tablespoon of the sugar and the active dry yeast. Stir gently and let it sit for 5-10 minutes until it becomes foamy. If it doesn’t foam, your yeast is dead. Start over with fresh yeast. I learned this the hard way after waiting an hour for dough that never rose.
Step 2: Mix the Dough (5 minutes)
Add the remaining sugar, softened butter, eggs, orange zest, vanilla extract, and salt to the yeast mixture. With the dough hook attachment, mix on low speed until combined. Add the flour one cup at a time, mixing on low until a shaggy dough forms. It will look messy—that’s normal.
Step 3: Knead the Dough (8-10 minutes)
Increase the speed to medium and knead for 8-10 minutes. The dough should pull away from the sides of the bowl and become smooth and elastic. It will still be slightly sticky—that’s okay. If it’s sticking to the bottom of the bowl like gum, add flour one tablespoon at a time until it releases. Don’t over-flour. A slightly sticky dough makes a softer bread.
You’ll know it’s ready when you can stretch a small piece of dough thin enough to see light through it without it tearing. That’s the windowpane test, and it’s your best friend.
Step 4: First Proof (1.5 – 2 hours)
Shape the dough into a ball and place it in a lightly greased bowl. Cover with plastic wrap or a clean kitchen towel. Let it rise in a warm, draft-free spot until doubled in size. My go-to spot is inside my oven with the light on (oven off). This usually takes about 1.5 to 2 hours. Go watch a movie. Read a book. Don’t peek every five minutes—the dough needs consistent warmth.
Step 5: Shape the Loaf (15 minutes)
Punch the dough down gently to release the air. Turn it out onto a lightly floured surface. Cut off about one-third of the dough and set it aside—this will become the decorations.
Shape the larger piece into a smooth ball by tucking the edges underneath and rotating it in your hands. Place it on your parchment-lined baking sheet.
Now for the fun part—the decorations. Divide the reserved dough into four equal pieces. Roll each piece into a rope about 6 inches long. These will become the “bones.” Place two ropes across the top of the loaf in an X shape, letting the ends hang down the sides. Place the other two ropes parallel to each other on top of the X, creating a cross shape. Roll a small ball of dough for the top center piece (the “skull”).
Press the decorations gently into the loaf so they stick during baking.
Step 6: Second Proof (45 minutes – 1 hour)
Cover the shaped loaf loosely with plastic wrap and let it rise again until puffy, about 45 minutes to 1 hour. It won’t double this time, but it should look noticeably larger and feel light when you touch it.
Step 7: Bake (25-30 minutes)
Preheat your oven to 350°F (175°C) about 20 minutes before the second proof finishes. Bake the loaf on the middle rack for 25-30 minutes, until the top is golden brown and the loaf sounds hollow when you tap the bottom. If the top is browning too quickly, tent it loosely with foil after 15 minutes.
Step 8: Cool (30 minutes)
Transfer the loaf to a cooling rack. Let it cool completely before glazing—at least 30 minutes, but an hour is better. Warm bread will soak up the glaze and get soggy.
Step 9: Glaze and Finish (5 minutes)
Whisk together the powdered sugar, orange blossom water, and 1 tablespoon of milk until smooth. Add more milk a teaspoon at a time if it’s too thick. The glaze should be thick but pourable. Brush or drizzle it over the cooled loaf. Sprinkle generously with granulated sugar while the glaze is still wet.
Cooking Tips & Techniques
I’ve made every mistake you can make with this bread. Here’s what I learned so you don’t have to repeat my failures.
Temperature matters more than you think. Cold ingredients will slow down your yeast and give you a dense loaf. I keep a kitchen thermometer handy and check my milk temperature every time. It’s worth the extra 10 seconds.
Don’t rush the first proof. I know it’s tempting to cut it short, but under-proofed dough makes a tight, heavy bread. Let it go until it’s truly doubled. In my chilly kitchen, that sometimes takes 2.5 hours. Patience pays off.
The dough will be sticky. Resist the urge to add flour. Sticky dough makes soft bread. Dry dough makes bricks. If you’re kneading by hand, use a bench scraper to manage the stickiness instead of adding more flour.
Watch the oven like a hawk. Every oven runs differently. My first batch burned because I trusted the timer instead of my eyes. Start checking at 20 minutes. The bread is done when it’s golden brown and sounds hollow when tapped.
Let it cool completely. I know the smell is intoxicating. I know you want to tear into it immediately. Don’t. Hot bread is gummy bread. Give it time.
Variations & Adaptations
Once you’ve mastered the classic version, feel free to play around. Here are some variations I’ve tried and loved:
- Chocolate Pan de Muerto: Replace ¼ cup of the flour with unsweetened cocoa powder. Add ½ cup of chocolate chips to the dough during the last minute of kneading. The chocolate version is dangerously good.
- Vegan Adaptation: Use plant-based butter (I like Miyoko’s), flax eggs (1 tablespoon ground flaxseed + 3 tablespoons water per egg), and oat milk. The texture is slightly denser but still delicious. The orange blossom glaze is already vegan-friendly.
- Anise Seed Version: Add 1 teaspoon of anise seeds to the dough along with the flour. This is a traditional variation in some regions of Mexico, and the licorice-like flavor pairs beautifully with the orange blossom.
- Gluten-Free Option: Use a 1:1 gluten-free baking flour blend. The dough will be stickier and harder to shape, but the flavor is still there. I’ve had the most success with Cup4Cup brand.
My personal favorite variation is the anise seed version. I stumbled into it by accident when I mistook anise seeds for sesame seeds, and it turned into a happy mistake I now make on purpose every other time.
Serving & Storage Suggestions
Pan de Muerto is best enjoyed the day it’s made, but it keeps beautifully if stored properly.
Serving: Serve at room temperature with a cup of hot coffee, Mexican hot chocolate, or a warm cucumber mint green tea cooler for a non-traditional but refreshing pairing. The bread is also incredible toasted the next day with a pat of butter.
Storage: Store in an airtight container at room temperature for up to 3 days. Do not refrigerate—it will dry out the bread. If your kitchen is humid, the glaze might get sticky. That’s fine. It still tastes amazing.
Freezing: This bread freezes beautifully. Wrap the unglazed, cooled loaf tightly in plastic wrap, then in foil, and freeze for up to 3 months. Thaw at room temperature, then glaze and serve. I always make two loaves and freeze one for later.
Reheating: Pop slices in a 300°F oven for 5-7 minutes to revive that fresh-baked texture. The microwave will make it rubbery—avoid it if you can.
Nutritional Information & Benefits
Let’s be real—this is a celebratory bread, not a health food. But here’s the breakdown if you’re curious:
Per serving (1/8 of loaf with glaze): Approximately 380 calories, 12g fat, 60g carbohydrates, 8g protein, 25g sugar, 2g fiber.
Healthier notes: The orange zest and orange blossom water add a dose of antioxidants and anti-inflammatory compounds. The eggs provide protein and healthy fats. And honestly? There’s something genuinely good for the soul about making bread from scratch. The process itself is meditative. The aroma fills your home with warmth. That counts.
Dietary considerations: This recipe contains gluten, dairy, and eggs. For gluten-free and vegan options, see the variations section above. The orange blossom glaze is naturally vegan and gluten-free.
Conclusion
This Classic Pan de Muerto with Orange Blossom Glaze has become my favorite way to honor Día de Muertos, but honestly, I make it year-round now. It’s that good. There’s something about pulling a golden, fragrant loaf out of the oven that makes everything feel right in the world.
I hope you give this recipe a try. Don’t worry if your first loaf isn’t perfect—mine wasn’t either. The beauty of this bread is in the making of it, in the patience it teaches you, in the way it fills your home with the smell of orange and butter and warmth.
If you make this, I’d love to hear how it turned out. Leave a comment below or tag me in your photos. And if you’re looking for more comforting recipes, check out our full recipe collection for more inspiration. Happy baking, friends.
Frequently Asked Questions
Can I make Pan de Muerto without a stand mixer?
Absolutely. I made my first successful loaves by hand. The dough is sticky, so use a bench scraper and keep your hands lightly oiled. Knead for about 15 minutes until smooth and elastic. It’s a great arm workout.
What can I use instead of orange blossom water?
If you can’t find orange blossom water, you can substitute with 2 tablespoons of fresh orange juice mixed with ½ teaspoon of orange extract. The flavor won’t be exactly the same—the floral notes are unique—but it’s still delicious. Rose water is another option if you want a different floral profile.
My dough isn’t rising. What went wrong?
Most likely, your yeast is dead or your kitchen is too cold. Check the expiration date on your yeast, and make sure your milk was warm (110°F) but not hot. If your kitchen is chilly, try placing the dough in your oven with the light on, or on top of your refrigerator where it’s warmer.
How do I get the bone shapes right?
Practice makes perfect. Roll the dough ropes evenly, about ½ inch thick. When placing them on the loaf, press gently but firmly so they adhere during baking. If they fall off during baking, don’t worry—just glue them back on with a bit of glaze after the bread cools.
Can I double this recipe?
Yes! This recipe doubles beautifully. Just make sure your mixing bowl is big enough—the dough will be substantial. I often make a double batch around Día de Muertos and freeze one loaf for later. If you’re looking for another make-ahead option for busy weeks, check out this slow cooker honey garlic chicken meal prep for a savory alternative.
Pin This Recipe!
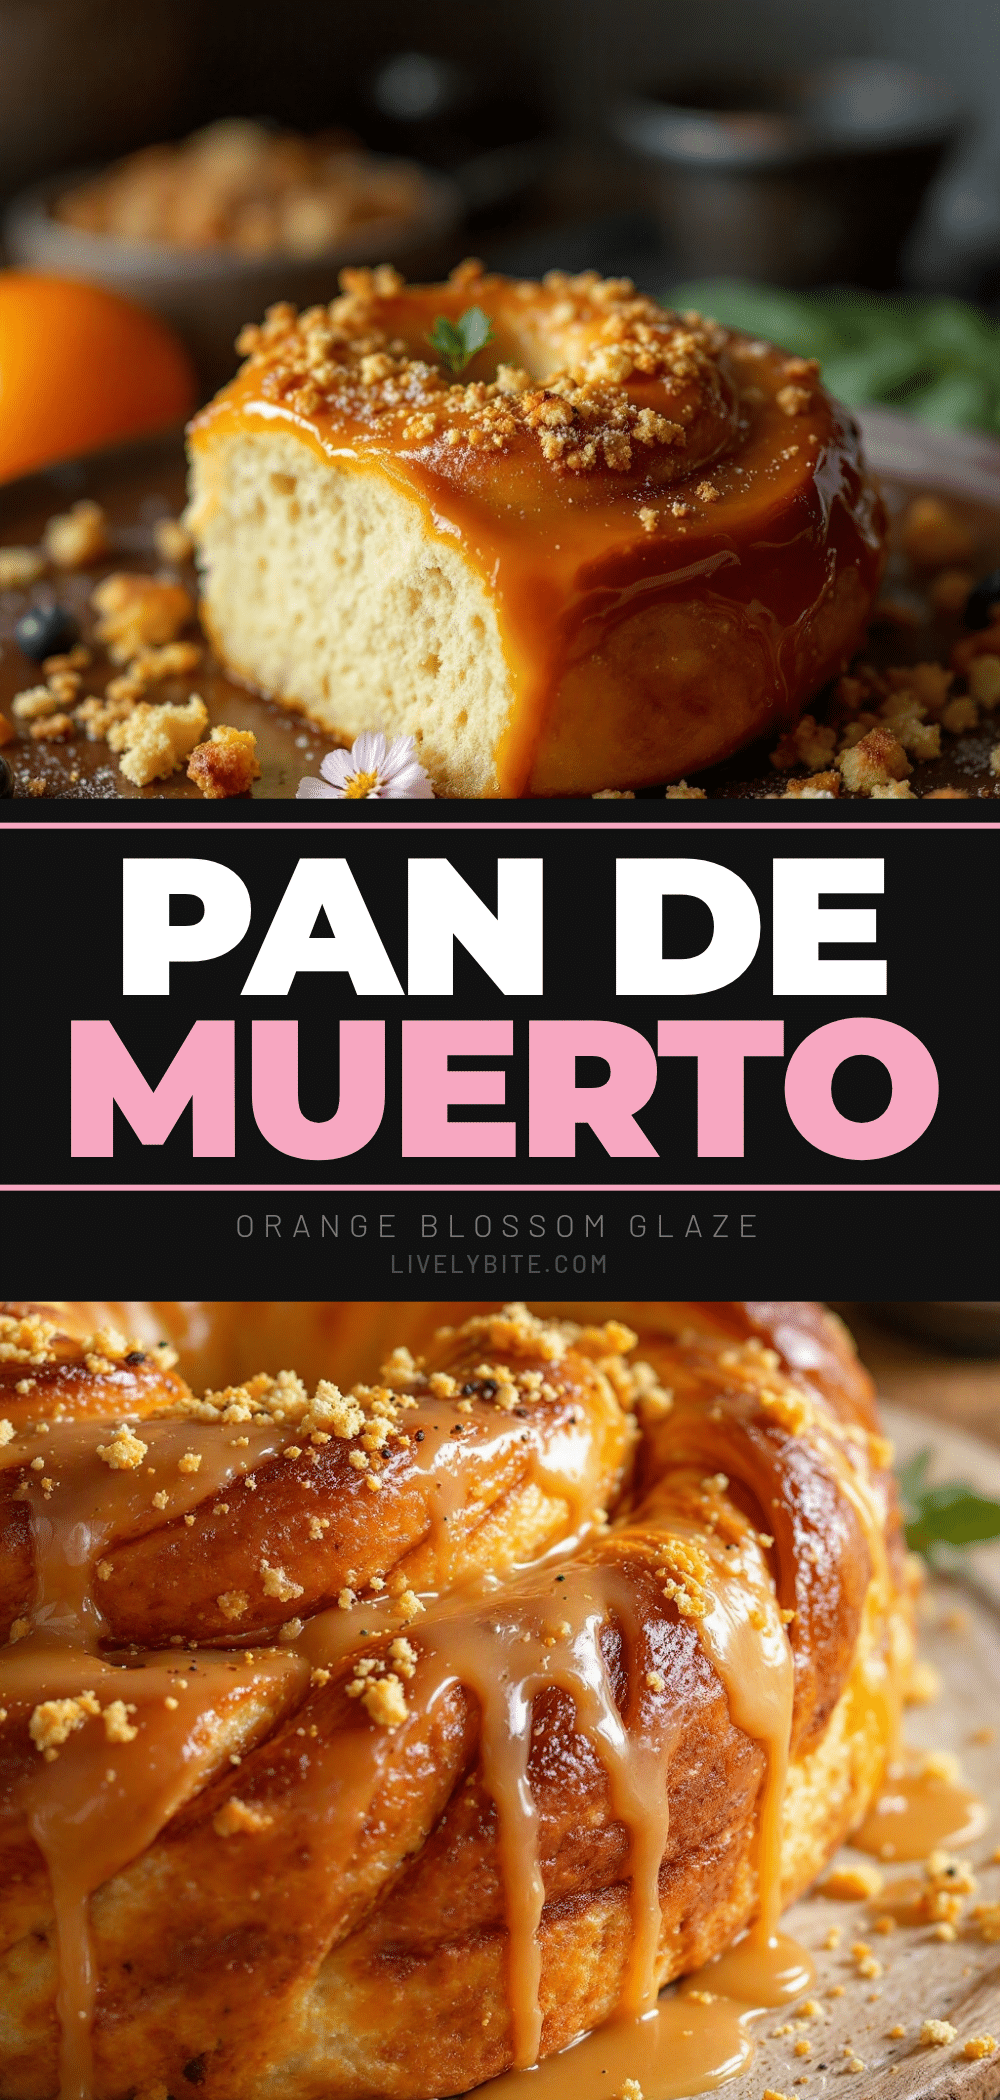
Classic Pan de Muerto with Easy Orange Blossom Glaze
This Classic Pan de Muerto with Orange Blossom Glaze is a soft, slightly sweet bread with a floral citrus glaze, perfect for Día de Muertos or any fall gathering. The recipe walks you through every step to achieve a bakery-quality loaf.
- Prep Time: 30 minutes
- Cook Time: 30 minutes
- Total Time: 3 hours 30 minutes
- Yield: 8 servings 1x
- Category: Bread
- Cuisine: Mexican
Ingredients
- 4 cups all-purpose flour (500g)
- 2¼ teaspoons active dry yeast (7g or one packet)
- ½ cup warm milk (120ml, heated to 110°F)
- ½ cup granulated sugar (100g)
- ½ cup unsalted butter (113g, softened)
- 3 large eggs (room temperature)
- 1 tablespoon orange zest (from 1 large orange)
- 1 teaspoon salt
- 1 teaspoon vanilla extract
- 1 cup powdered sugar (120g)
- 2 tablespoons orange blossom water
- 1–2 tablespoons milk
- 1 teaspoon orange zest (optional)
- ¼ cup granulated sugar (50g, for topping)
Instructions
- Activate the yeast: In the bowl of a stand mixer, combine warm milk (110°F) with 1 tablespoon of sugar and active dry yeast. Stir gently and let sit for 5-10 minutes until foamy.
- Mix the dough: Add remaining sugar, softened butter, eggs, orange zest, vanilla extract, and salt to the yeast mixture. With the dough hook attachment, mix on low speed until combined. Add flour one cup at a time, mixing on low until a shaggy dough forms.
- Knead the dough: Increase speed to medium and knead for 8-10 minutes until dough is smooth and elastic. It should pass the windowpane test.
- First proof: Shape dough into a ball and place in a lightly greased bowl. Cover with plastic wrap or a towel. Let rise in a warm, draft-free spot until doubled in size, about 1.5 to 2 hours.
- Shape the loaf: Punch down dough and turn onto a lightly floured surface. Cut off about one-third of the dough for decorations. Shape the larger piece into a smooth ball and place on a parchment-lined baking sheet. Divide reserved dough into four equal pieces, roll into 6-inch ropes, and arrange in a cross pattern on top of the loaf. Add a small ball of dough for the top center.
- Second proof: Cover shaped loaf loosely with plastic wrap and let rise until puffy, about 45 minutes to 1 hour.
- Bake: Preheat oven to 350°F (175°C). Bake on middle rack for 25-30 minutes until golden brown and hollow-sounding when tapped. Tent with foil after 15 minutes if browning too quickly.
- Cool: Transfer to a cooling rack and let cool completely, at least 30 minutes to 1 hour.
- Glaze and finish: Whisk together powdered sugar, orange blossom water, and 1 tablespoon milk until smooth. Add more milk if needed. Brush or drizzle over cooled loaf. Sprinkle with granulated sugar while glaze is wet.
Notes
Temperature matters: use warm milk (110°F) and room temperature eggs. Don’t rush the first proof; let dough double in size. The dough will be sticky—resist adding too much flour. Let bread cool completely before glazing to avoid sogginess. For best results, use fresh yeast and fresh orange zest.
Nutrition
- Serving Size: 1/8 of loaf with gla
- Calories: 380
- Sugar: 25
- Sodium: 300
- Fat: 12
- Saturated Fat: 7
- Carbohydrates: 60
- Fiber: 2
- Protein: 8
Keywords: Pan de Muerto, Day of the Dead bread, orange blossom glaze, Mexican sweet bread, Día de Muertos recipe, traditional Mexican bread


