I figured glazing carrots with apple cider would be a straightforward, foolproof task. It took about ten minutes for that assumption to fall apart completely. I had the pan on medium heat, confident in my ability to reduce liquid to a sticky syrup. You know how it goes. You’re multitasking, checking your phone, and suddenly the kitchen smells like burnt sugar and regret.
The cider wasn’t reducing; it was boiling over, splattering sticky amber droplets across my stovetop. I grabbed a towel, panicked for a second, and then realized the carrots underneath were actually getting that beautiful, caramelized char I was chasing. The mess was real, but the flavor? That was the good part.
Honestly, that chaotic afternoon taught me more about this recipe than any cookbook ever did. You have to respect the sugar content in the cider. It burns faster than you think, but if you keep it moving, it creates this incredible glossy coat that clings to every single carrot. It’s not just sweet; it’s complex.
I ended up scraping the burnt bits from the pan bottom and stirring them back in. Weird? Maybe. Delicious? Absolutely. That’s when I knew I had found the “best ever” version. It’s messy, it’s aromatic, and it smells like autumn even if you’re cooking in July.
Now, I use a wider pan and keep the heat lower. The result is tender carrots with a snap, coated in a glaze that isn’t cloyingly sweet. It’s the kind of side dish that disappears before you can even think about seconds. I make these for every family dinner now, and they’re always the first plate to go empty. It’s a simple trick, but it changes everything about how you eat vegetables.
Why You’ll Love This Recipe
There is a specific kind of magic that happens when you combine the earthiness of root vegetables with the bright, tart notes of apple cider. This isn’t just another boiled carrot recipe. It’s a transformation. After years of testing different glazes, from brown sugar to honey, I found that apple cider offers a depth of flavor that stands up to the carrots without overwhelming them. It’s balanced, nuanced, and surprisingly sophisticated for something so simple.
Here is why this maple cider glazed carrots recipe has earned its spot as a staple in my kitchen:
- Quick & Easy: This comes together in under 20 minutes. The reduction happens fast, and the carrots cook quickly, making it perfect for busy weeknights when you want something special but don’t have hours to spare.
- Simple Ingredients: No fancy grocery trips needed. You likely already have carrots, butter, maple syrup, and apple cider in your kitchen. It relies on pantry staples to deliver restaurant-quality results.
- Perfect for Fall Gatherings: Whether it’s Thanksgiving, a cozy Sunday dinner, or a holiday potluck, this dish fits right in. The warm spices and caramelized edges bring that seasonal comfort vibe instantly.
- Crowd-Pleaser: Even the pickiest eaters usually love these. The sweetness appeals to kids, while the savory butter and pepper appeal to adults. It’s a safe bet that always gets rave reviews.
- Unbelievably Delicious: The texture is next-level. The carrots stay firm-tender, not mushy, and the glaze provides a sticky, savory-sweet crunch that you can’t get with just plain butter.
What makes this recipe different from the rest is the technique. Most people just dump everything in a pot. I recommend reducing the cider first to concentrate the flavor, then finishing with the maple syrup and butter. This prevents burning and ensures a glossy finish. It’s a small step that makes a huge difference.
This recipe isn’t just good—it is the kind that makes you close your eyes after the first bite. It’s comfort food reimagined. It’s healthier than a candied yam but has that same soul-soothing satisfaction. It’s perfect for impressing guests without stress, or turning a simple meal into something memorable.
What Ingredients You Will Need
This recipe uses simple, wholesome ingredients to deliver bold flavor and satisfying texture without the fuss. The beauty of this dish lies in its minimalism. You don’t need a long list of obscure spices or hard-to-find items. Just a few high-quality components that work together to create something greater than the sum of their parts.
Here is what you need to get started:
- Carrots: Look for fresh, firm carrots with bright orange skin. Medium-sized carrots are ideal because they cook evenly. If you buy organic, you can leave the skins on for extra nutrients and texture. Wash them well and trim the tops. Peeling is optional but recommended for a smoother finish.
- Apple Cider: This is the star of the show. Use 100% pure apple cider, not apple juice. Apple juice is often filtered and sweetened, which won’t reduce properly. You need the tartness and body of real cider. Look for brands like POM or local farm-stand ciders. About 1 cup (240 ml) is perfect.
- Unsalted Butter: Butter adds richness and helps the glaze emulsify. Use high-quality butter, like Kerrygold or a local European-style butter. It has a higher fat content, which makes the glaze silkier. You will need 2 tablespoons (30 grams).
- Maple Syrup: Real maple syrup is non-negotiable. Avoid “pancake syrup” which is mostly corn syrup. Look for Grade A Amber or Dark Maple Syrup for a deeper flavor. It adds a woody sweetness that complements the cider. Use about 1 tablespoon (15 ml).
- Salt and Pepper: Kosher salt is best for seasoning because it’s easy to control. Freshly cracked black pepper adds a nice heat that cuts through the sweetness. Don’t skip the pepper; it balances the dish.
- Optional Garnish: Chopped fresh parsley or thyme adds a pop of color and freshness. Toasted pecans or walnuts can add crunch if you want to make it a more substantial side dish.
If you can’t find apple cider, you can substitute with a mix of apple juice and a splash of vinegar, but the flavor won’t be quite the same. For a dairy-free option, swap the butter for olive oil or vegan butter. The rest of the ingredients are naturally gluten-free and vegan-friendly (excluding butter).
Which Carrots Are Best?
I prefer baby carrots for convenience, but large carrots cut into batons have a better texture. They hold their shape better during the reduction. If you use large carrots, cut them into uniform sticks so they cook at the same rate. This ensures no mushy bits and no raw centers.
The Cider Choice Matters
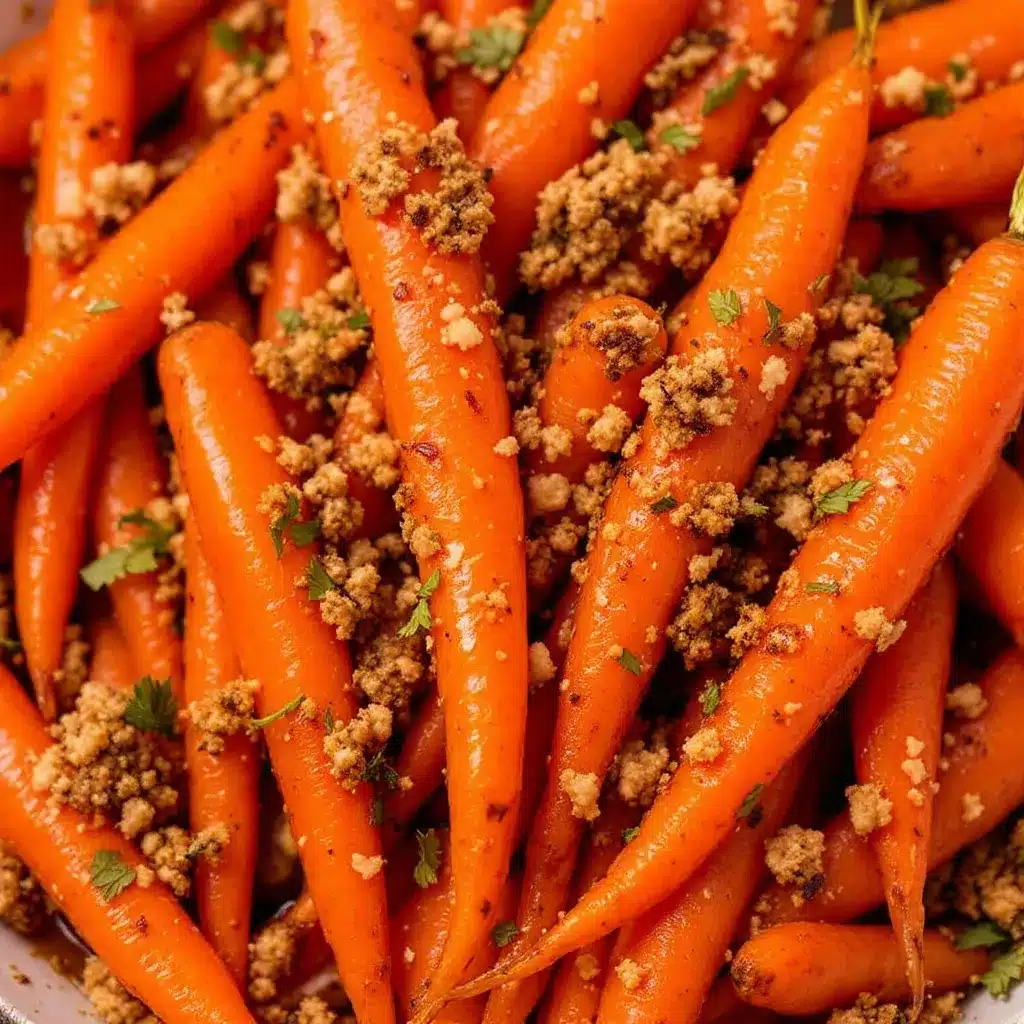
Do not use filtered, clear apple juice. It lacks the pectin and tartness needed for a proper glaze. The pectin helps thicken the sauce naturally. If you can find cloudy, unfiltered cider, that is the gold standard. It adds a rustic, homemade feel to the dish.
Equipment Needed
You don’t need a lot of fancy tools to make this recipe. In fact, keeping it simple is part of the appeal. Here is what you will need:
- Large Skillet or Sauté Pan: A 12-inch skillet is ideal. You need enough surface area for the carrots to sit in a single layer. If they are stacked, they will steam instead of sauté, and you won’t get that nice caramelization. A stainless steel or cast-iron skillet works best. Non-stick is fine too, but you might lose a little bit of the fond (the browned bits) that adds flavor.
- Wooden Spoon or Spatula: You need a sturdy utensil to stir the carrots frequently. A wooden spoon is gentle on the pan and great for scraping up any stuck bits.
- Measuring Cups and Spoons: Basic measuring tools for the cider and maple syrup. Precision helps, especially with the syrup, since too much can make the glaze too sweet.
- Peeler (Optional): If you are peeling your carrots, a standard Y-peeler works well. It’s faster than a knife and removes the tough outer layer evenly.
- Sharp Knife and Cutting Board: For trimming and cutting the carrots into uniform pieces. Uniformity is key for even cooking.
If you don’t have a large skillet, you can use a wide Dutch oven or a large sauté pan. Just make sure it has high sides to prevent splatter. The cider can bubble up aggressively when it first hits the heat.
I recommend keeping your pan clean before you start. A dirty pan can impart off-flavors. Also, make sure your butter is at room temperature if you have time. It melts faster and integrates more smoothly into the glaze.
Preparation Method
Let’s get into the nitty-gritty. This method is designed to be forgiving but precise enough to guarantee success. Follow these steps closely, and you will have restaurant-quality carrots in no time.
- Prep the Carrots (5 minutes): Wash the carrots thoroughly under cold water. Trim off the green tops and the hairy ends. If you are peeling them, do so now. Cut the carrots into uniform batons or coins. If using baby carrots, you can leave them whole or halve them lengthwise. Aim for pieces that are about 2-3 inches long. Uniform size ensures even cooking. Place them in a colander to drain.
- Reduce the Apple Cider (8-10 minutes): Heat your large skillet over medium-high heat. Pour in the apple cider. Let it come to a simmer. You want it to bubble actively. Let it reduce by about half. This concentrates the flavor and removes excess water. You should have about 1/2 cup of liquid left. This step is crucial. If you skip it, your glaze will be watery and thin. Stir occasionally to prevent burning.
- Add the Carrots (2 minutes): Once the cider is reduced, add the drained carrots to the pan. Toss them in the cider to coat them evenly. The liquid should still be bubbling. Let the carrots cook in the cider for about 2 minutes. This starts the cooking process and infuses them with the apple flavor.
- Steam and Sauté (5 minutes): Reduce the heat to medium. Add the butter to the pan. Stir until the butter melts and combines with the cider. Cover the pan with a lid for 3-4 minutes. This steams the carrots, making them tender. Check them after 3 minutes. They should be fork-tender but still have a slight bite. If they are still hard, cover for another minute.
- Glaze and Finish (3 minutes): Remove the lid. Add the maple syrup. Stir everything together. Let the mixture cook uncovered for 2-3 minutes. The liquid will evaporate further, and the syrup will thicken into a glossy glaze. Toss the carrots constantly to coat them evenly. The glaze should cling to the carrots, not pool at the bottom. If it looks too thick, add a splash of water. If too thin, cook for another minute.
- Season and Serve: Remove the pan from the heat. Season with kosher salt and freshly cracked black pepper. Taste and adjust seasoning if needed. Sprinkle with fresh herbs if using. Serve immediately while hot and glossy. The glaze will set slightly as it cools, which is part of the charm.
The key here is timing. Don’t walk away during the reduction phase. It can go from perfect to burnt in seconds. Keep an eye on the color. It should turn a deep amber, not black.
Cooking Tips & Techniques
I’ve made this recipe enough times to know where people usually trip up. Here are some professional tips to ensure your carrots turn out perfectly every time.
- Don’t Crowd the Pan: If you are making a large batch, use two pans. Crowding the pan causes steaming instead of sautéing. You want those carrots to get some color. Color equals flavor.
- Control the Heat: Maple syrup burns easily. Once you add the syrup, keep the heat at medium or medium-low. High heat will caramelize the sugars too quickly and make them bitter. Low and slow is the way to go for a sweet glaze.
- Taste as You Go: Apple cider varies in sweetness. Some ciders are tart, some are sweet. Taste the cider after reduction. If it’s very tart, you might need a little more maple syrup. If it’s already sweet, you might need less salt to balance it.
- Use a Wide Pan: As mentioned, surface area matters. A wide pan allows the liquid to evaporate faster, which helps create that thick glaze. A deep pot will take much longer and might not reduce properly.
- Rescue a Broken Glaze: If your glaze separates or looks oily, add a teaspoon of cold water and whisk vigorously. The starch in the cider and the emulsion from the butter can be coaxed back together with a little agitation.
I once made this with too much heat and ended up with burnt maple syrup. It tasted bitter and ruined the batch. Lesson learned: respect the sugar. It’s delicate. Now I always err on the side of lower heat.
Another tip is to have all your ingredients measured and ready before you start. This is a fast recipe. Once the cider is reduced, you have to move quickly. Mise en place is your friend here.
Variations & Adaptations
While the classic maple cider version is my favorite, there are plenty of ways to twist this recipe to suit your taste or dietary needs.
- Honey Thyme Variation: Swap the maple syrup for honey and add a sprig of fresh thyme during the reduction. The thyme adds an earthy, floral note that pairs beautifully with the apple. This is great for a more savory profile.
- Spicy Maple Glaze: Add a pinch of cayenne pepper or red pepper flakes when you add the maple syrup. The heat cuts through the sweetness and adds a kick. This is perfect for those who like a little fire with their food.
- Dairy-Free Option: Substitute the butter with olive oil or coconut oil. Olive oil adds a fruity note that complements the cider well. Coconut oil adds a subtle sweetness. The texture will be slightly different, but still delicious.
- Roasted Method: For a hands-off approach, toss the carrots with oil, salt, and pepper, and roast them at 400°F (200°C) for 25 minutes. Toss them with the reduced cider and maple syrup in the last 5 minutes of roasting. This gives a charred, smoky flavor.
- Orange Glaze: Substitute half of the apple cider with orange juice. The citrus adds a bright, zesty note that is wonderful in the spring or summer. Add a strip of orange zest for extra aroma.
I tried the spicy version for a dinner party, and it was a hit. The contrast of sweet and heat is addictive. It’s a great way to use up leftover cider in the fall.
For a vegan version, just ensure your maple syrup is vegan (most are) and use olive oil instead of butter. The rest of the recipe is naturally plant-based.
Serving & Storage Suggestions
These carrots are best served immediately while the glaze is warm and glossy. They make a perfect side dish for roast chicken, pork chops, or turkey. The sweetness pairs well with savory meats.
Pairing Suggestions
Serve these alongside a crisp green salad to balance the richness. A glass of cider or a light white wine also complements the flavors well. For a full meal, pair with lemon herb salmon for a complete dinner.
Storage Instructions
Store leftovers in an airtight container in the refrigerator for up to 3 days. The glaze will thicken as it cools, which is normal.
Reheating Tips
Reheat in a skillet over low heat with a splash of water to loosen the glaze. You can also microwave them, but the texture might become softer. Avoid high heat, or the glaze might burn again.
Freezing
I don’t recommend freezing these carrots. The texture changes when thawed, and they can become mushy. It’s best to make them fresh.
Nutritional Information & Benefits
Carrots are a nutritional powerhouse. They are rich in beta-carotene, which your body converts to vitamin A. This is great for eye health and immune function. They also contain fiber, which aids digestion, and antioxidants that fight inflammation.
The maple cider adds natural sugars, so keep portion sizes in mind if you are watching your sugar intake. However, compared to candy or dessert, this is a healthy treat. The butter adds healthy fats, which help absorb the fat-soluble vitamins in the carrots.
This recipe is naturally gluten-free. It can be made vegan by swapping the butter. It’s a nutrient-dense side dish that doesn’t feel like a chore to eat.
Conclusion
This maple cider glazed carrots recipe is a testament to the power of simple ingredients. It’s sweet, savory, and incredibly satisfying. I love making this because it’s quick, but it feels special. It’s the kind of dish that reminds you to slow down and enjoy the flavors of the season.
I encourage you to try this recipe and make it your own. Add your favorite herbs, spices, or nuts. Experiment with different ciders. The possibilities are endless.
If you make this, I’d love to hear how it turned out. Leave a comment below with your thoughts or share a photo. Tag me on social media if you do. I always love seeing your creations.
Thanks for reading, and happy cooking!
FAQs
Can I use apple juice instead of apple cider?
It’s not recommended. Apple juice is often filtered and sweetened, so it won’t reduce properly. Apple cider has the tartness and pectin needed for a good glaze. If you must, use a mix of juice and vinegar, but the flavor won’t be the same.
How do I know when the carrots are done?
Pierce a carrot with a fork. It should go in easily but still have a slight resistance. They should be tender-crisp, not mushy. If they are too soft, they will fall apart when you toss them in the glaze.
Can I make this ahead of time?
You can prep the carrots and reduce the cider ahead of time. But it’s best to cook and glaze them just before serving. The glaze loses its glossiness if it sits too long.
Is this recipe gluten-free?
Yes, naturally. Just ensure your maple syrup and cider are certified gluten-free if you have celiac disease. Most brands are, but it’s good to check labels.
Can I add nuts to this dish?
Absolutely. Toasted pecans or walnuts add a great crunch. Add them after you remove the pan from the heat to keep them crunchy. They pair beautifully with the maple and cider flavors.
Pin This Recipe!
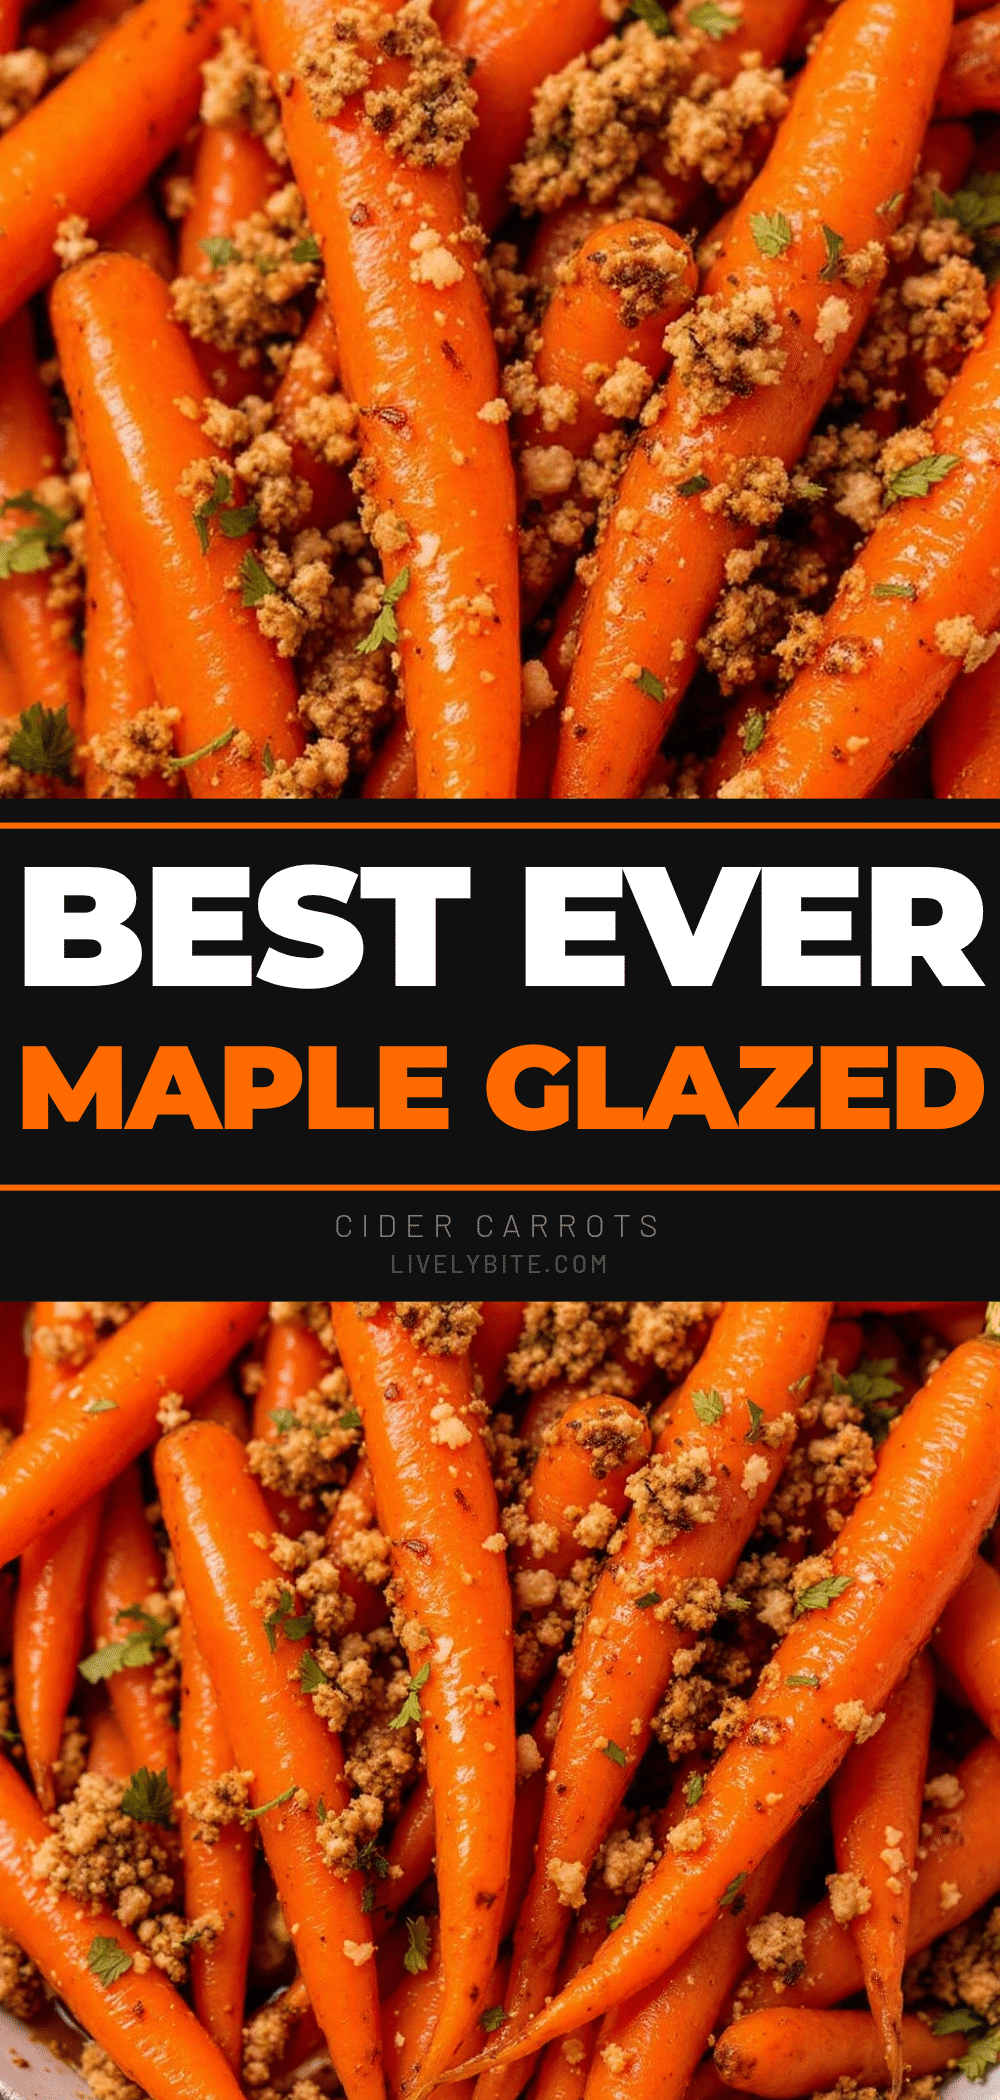
Best Ever Maple Cider Glazed Carrots
A quick and easy fall side dish featuring tender carrots glazed with reduced apple cider, maple syrup, and butter for a sweet, savory, and sophisticated flavor.
- Prep Time: 5 minutes
- Cook Time: 15 minutes
- Total Time: 20 minutes
- Yield: 4 servings 1x
- Category: Side Dish
- Cuisine: American
Ingredients
- 1 lb carrots, peeled and cut into uniform batons or coins
- 1 cup (240 ml) pure apple cider
- 2 tablespoons (30 grams) unsalted butter
- 1 tablespoon (15 ml) Grade A Amber or Dark Maple Syrup
- Kosher salt, to taste
- Freshly cracked black pepper, to taste
- Optional: Chopped fresh parsley or thyme for garnish
- Optional: Toasted pecans or walnuts for crunch
Instructions
- Wash, trim, and cut carrots into uniform pieces (2-3 inches long). Place in a colander to drain.
- Heat a large skillet over medium-high heat. Add apple cider and bring to a simmer.
- Reduce cider by half (about 8-10 minutes) until you have approximately 1/2 cup of liquid. Stir occasionally to prevent burning.
- Add carrots to the reduced cider and toss to coat. Cook for 2 minutes.
- Reduce heat to medium. Add butter and stir until melted. Cover the pan and steam carrots for 3-4 minutes until fork-tender but still firm.
- Remove lid. Add maple syrup and stir. Cook uncovered for 2-3 minutes, tossing constantly, until the glaze thickens and coats the carrots.
- Remove from heat. Season with salt and pepper. Garnish with herbs or nuts if desired and serve immediately.
Notes
Do not use filtered apple juice as it lacks the pectin and tartness needed for a proper glaze. Use a wide pan to ensure proper reduction and caramelization. Keep heat at medium or lower once maple syrup is added to prevent burning. For a dairy-free or vegan version, substitute butter with olive oil or vegan butter.
Nutrition
- Serving Size: 1 cup
- Calories: 180
- Sugar: 22
- Sodium: 150
- Fat: 8
- Saturated Fat: 5
- Carbohydrates: 28
- Fiber: 4
- Protein: 2
Keywords: maple glazed carrots, apple cider carrots, fall side dish, easy vegetable recipe, gluten-free side dish, maple syrup carrots


