Third batch in three days, and I finally stopped over-mixing. The first batch came out flat—like little pumpkin pucks, honestly. Second batch? Better, but the brown butter was still too hot when I added the egg. Curdled. We don’t talk about that batch. But the third time—that was the one. The edges had that perfect crinkled crackle, the centers were pillowy and soft, and the smell of browned butter mixed with pumpkin and cinnamon? It hung in my kitchen for hours. I knew I had to write it down before I forgot what I did differently.
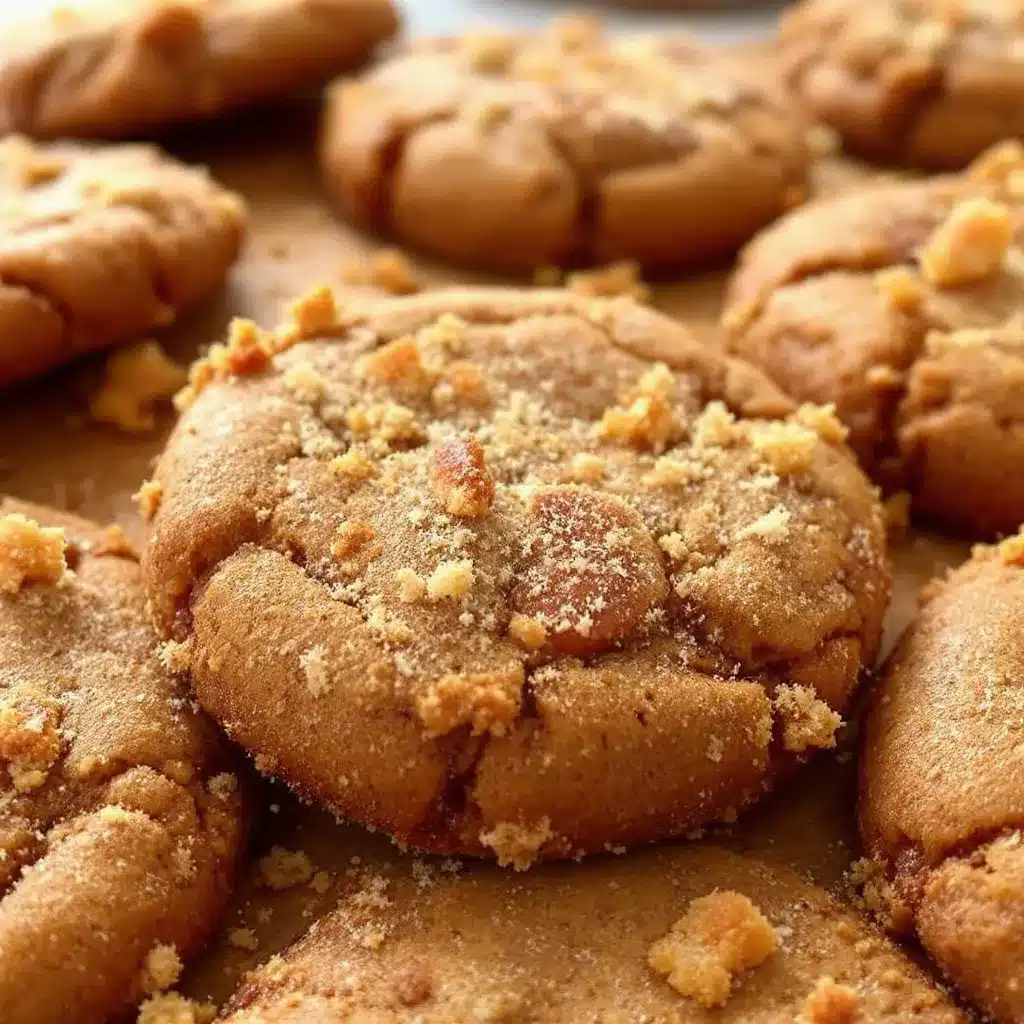
Here’s the thing about these cookies: they’re not trying to be pumpkin pie. They’re not trying to be a muffin masquerading as a cookie. These are snickerdoodles first—with that classic tang from cream of tartar and that cinnamon-sugar coat that shatters when you bite in. But the brown butter? That’s where the magic lives. It adds this nutty, toasty depth that pumpkin alone just can’t pull off. And the pumpkin? It keeps them stupidly soft for days. You get the best of both worlds without any of the weird, cakey texture that plagues most pumpkin cookies.
I’ve made these for my neighbor, for my book club, and for a “just because” Tuesday. Every single time, someone asks for the recipe before they’ve even finished the first cookie. That’s how I knew this one was a keeper.
Why You’ll Love This Recipe
- Quick & Easy: From start to finish, you’re looking at about 25 minutes. No complicated steps, no fancy equipment. Just good cookies, fast.
- Simple Ingredients: You probably have most of this in your pantry right now. Brown butter sounds fancy, but it’s just butter that you cook a little longer. That’s it.
- Perfect for Fall Gatherings: These are the cookies you bring to a Friendsgiving, a pumpkin patch picnic, or a cozy night in with a hot drink. They fit every autumn occasion.
- Crowd-Pleaser: I’ve watched kids and adults polish off a whole batch in one sitting. They’re not too sweet, not too spicy—just right.
- Unbelievably Delicious: The texture is the star here. Crispy edges, soft centers, and that cinnamon-sugar crunch on the outside. It’s everything you want in a snickerdoodle, but with a warm, nutty twist from the brown butter and a subtle pumpkin flavor that doesn’t overpower.
This isn’t just another pumpkin cookie recipe. I tested it six times to get the ratio right—enough pumpkin for moisture, but not so much that the dough turns into a sticky mess. The brown butter adds a richness that canned pumpkin just can’t match on its own. And the cream of tartar? That’s the secret to the signature snickerdoodle tang and that soft, chewy center. This is my best version, and I’m pretty proud of it.
What Ingredients You Will Need
This recipe uses simple, wholesome ingredients that work together to create something truly special. Most of these are pantry staples, so you might not even need a trip to the store.
- 1 cup (2 sticks) unsalted butter – This is the star. Browning the butter gives it a nutty, caramelized flavor that’s impossible to replicate. I prefer using a good quality butter like Kerrygold for the best flavor, but any unsalted butter works fine.
- 1/2 cup granulated sugar – For sweetness and that crisp edge.
- 1/2 cup packed light brown sugar – Adds moisture and a hint of molasses that pairs beautifully with the pumpkin and brown butter.
- 1/2 cup pumpkin puree – Make sure you’re using 100% pure pumpkin, not pumpkin pie filling. I like Libby’s for its consistent texture. Pat it with a paper towel to remove excess moisture—this is a game-changer for preventing flat cookies.
- 1 large egg, room temperature – Room temperature egg blends more evenly into the brown butter. Cold egg can seize the butter and ruin the texture.
- 1 teaspoon vanilla extract – Use pure vanilla extract if you have it. It rounds out the flavors.
- 2 cups all-purpose flour – Spoon and level your flour. Scooping directly from the bag packs in too much flour and makes dry cookies.
- 1 teaspoon cream of tartar – This is non-negotiable for a true snickerdoodle. It gives the cookies their signature tang and helps with the chewy texture.
- 1/2 teaspoon baking soda – Helps the cookies spread just enough without turning into pancakes.
- 1 teaspoon ground cinnamon – For warmth and that classic snickerdoodle flavor.
- 1/2 teaspoon ground ginger – Adds a little zing that cuts through the richness.
- 1/4 teaspoon ground nutmeg – Freshly grated is best, but pre-ground works in a pinch.
- 1/4 teaspoon ground cloves – Just a pinch for depth.
- 1/2 teaspoon salt – Balances the sweetness and enhances all the flavors.
For the Cinnamon-Sugar Coating:
- 1/4 cup granulated sugar
- 1 tablespoon ground cinnamon
Equipment Needed
You don’t need a lot of fancy tools for this recipe, which is one of the reasons I love it. Here’s what you’ll need:
- Large skillet or saucepan – A light-colored skillet is best for browning butter so you can see the color change. I use a stainless steel pan, but a non-stick works too.
- Mixing bowls – You’ll need one large bowl for the wet ingredients and one medium bowl for the dry ingredients.
- Whisk – For mixing the brown butter and sugars.
- Rubber spatula – For folding the dough together without over-mixing.
- Baking sheet – A light-colored, rimmed baking sheet is best for even browning. Dark sheets can cause the bottoms to burn.
- Parchment paper or silicone baking mat – Non-stick and makes cleanup a breeze.
- Cookie scoop (1.5 tablespoon size) – For uniform cookies that bake evenly. A regular spoon works, but a scoop is more consistent.
- Cooling rack – Lets the cookies cool without steaming and getting soggy on the bottom.
Preparation Method
- Brown the butter. Place the butter in a light-colored skillet over medium heat. Swirl the pan occasionally as it melts. It will foam up, then subside, and you’ll see little brown specks forming at the bottom. This takes about 5-7 minutes. Once it smells nutty and the specks are a deep amber color, remove it from the heat immediately. Pour it into a large mixing bowl to stop the cooking process. Let it cool for 10 minutes—you want it warm, not hot.
- Mix the wet ingredients. Add the granulated sugar and brown sugar to the cooled brown butter. Whisk vigorously until the mixture looks like wet sand and is slightly thickened. This takes about a minute. Add the pumpkin puree, room temperature egg, and vanilla extract. Whisk until smooth and fully combined. The mixture will look a little glossy.
- Combine the dry ingredients. In a separate medium bowl, whisk together the all-purpose flour, cream of tartar, baking soda, cinnamon, ginger, nutmeg, cloves, and salt. Make sure everything is evenly distributed—nobody wants a pocket of baking soda in their cookie.
- Fold the dough together. Pour the dry ingredients into the wet ingredients. Use a rubber spatula to fold gently until just combined. Stop as soon as you no longer see streaks of flour. Over-mixing develops gluten and makes tough cookies. The dough will be soft and slightly sticky—that’s exactly what you want.
- Chill the dough (optional but recommended). Cover the bowl with plastic wrap and refrigerate for 30 minutes. This firms up the butter and prevents the cookies from spreading too much in the oven. If you’re in a hurry, you can skip this step, but your cookies will be flatter.
- Preheat the oven. Set your oven to 350°F (175°C). Line two baking sheets with parchment paper or silicone mats.
- Make the cinnamon-sugar coating. In a small shallow bowl, whisk together the 1/4 cup granulated sugar and 1 tablespoon cinnamon.
- Scoop and roll. Using a 1.5-tablespoon cookie scoop, portion out the dough. Roll each portion into a ball between your palms. Drop the ball into the cinnamon-sugar mixture and roll to coat evenly. Place the coated dough balls on the prepared baking sheets, spacing them about 2 inches apart.
- Bake. Bake one sheet at a time on the center rack for 10-12 minutes. The edges should look set and lightly golden, but the centers will still look slightly soft and puffy. They will continue to set as they cool. Do not over-bake, or you’ll lose that soft center.
- Cool. Let the cookies rest on the baking sheet for 5 minutes. This is crucial—they are fragile when they first come out of the oven. After 5 minutes, transfer them to a wire cooling rack to cool completely. The centers will sink slightly and develop that perfect crinkled top.
Cooking Tips & Techniques
I’ve made enough mistakes with these cookies to fill a small notebook. Here’s what I learned the hard way so you don’t have to.
Don’t skip browning the butter properly. The first time I tried this, I took the butter off the heat too early. It was barely golden, and the cookies tasted flat. You need those deep amber specks and that unmistakable nutty smell. Watch it closely—it goes from perfect to burnt in about 30 seconds.
Pat your pumpkin puree dry. This is the single biggest tip for preventing flat cookies. Pumpkin has a lot of water, and that water creates steam in the oven, which makes cookies spread. I spoon the puree onto a paper towel-lined plate, cover it with another paper towel, and gently press to absorb the excess moisture. It makes a huge difference.
Use room temperature ingredients. I know it’s tempting to use a cold egg straight from the fridge, but it will shock the brown butter and make the dough grainy. Leave the egg on the counter for 30 minutes, or place it in a bowl of warm water for 5 minutes.
Measure flour correctly. Fluff your flour with a spoon, then spoon it into your measuring cup and level it off with a knife. Scooping directly from the bag can add 20-30% more flour, which makes dry, cakey cookies.
Chill the dough for even baking. I know you want cookies now, but that 30-minute chill is worth it. It solidifies the butter, which means the cookies spread slower in the oven. You get thicker centers and crispier edges. If you skip it, your cookies will be flatter and more spread out.
Bake one sheet at a time. Your oven has hot spots, and two sheets at once can cause uneven baking. If you need to bake two batches, let the second sheet of dough sit in the fridge while the first batch bakes.
Variations & Adaptations
One of the best things about this recipe is how easy it is to tweak. Here are a few ways I’ve played with it.
- Gluten-Free Version: Swap the all-purpose flour with a 1:1 gluten-free baking flour blend that contains xanthan gum. I’ve used Bob’s Red Mill with great results. The texture is slightly more tender, but the flavor is still spot on.
- Vegan Version: Use vegan butter (like Miyoko’s) and a flax egg (1 tablespoon ground flaxseed mixed with 3 tablespoons water, let sit for 5 minutes). The cookies won’t spread as much, so flatten them slightly before baking.
- Spice It Up: Add 1/4 teaspoon of cardamom or allspice for a more complex spice profile. I did this for a holiday party, and everyone raved about the “secret ingredient.”
- Add Mix-Ins: Fold in 1/2 cup of white chocolate chips or chopped pecans after the flour is incorporated. The white chocolate adds a creamy sweetness that pairs beautifully with the pumpkin, and the pecans add crunch.
- Pumpkin-Free Version: If you want a brown butter snickerdoodle without the pumpkin, just omit the pumpkin puree and increase the butter to 1 1/4 cups. The dough will be stiffer, and the cookies will be more traditional.
Serving & Storage Suggestions
These cookies are best served slightly warm, when the centers are still soft and the cinnamon-sugar coating is at its crunchiest. I like to serve them with a tall glass of cold milk or a hot cup of chai tea. For a more decadent treat, sandwich two cookies with a scoop of vanilla ice cream for the ultimate pumpkin ice cream sandwich.
Storage: Store the cookies in an airtight container at room temperature for up to 5 days. Place a slice of bread in the container to keep them soft—the bread absorbs excess air and releases moisture. Replace the bread every 2 days.
Freezing: These cookies freeze beautifully. You can freeze the baked cookies in a freezer-safe bag for up to 3 months. To thaw, let them sit at room temperature for about 30 minutes. You can also freeze the unbaked dough balls. Roll them, coat them in cinnamon-sugar, and place them on a baking sheet in the freezer for 1 hour. Once frozen solid, transfer them to a freezer bag. Bake from frozen, adding 2-3 minutes to the baking time.
Reheating: Pop a cookie in the microwave for 10 seconds to bring back that fresh-from-the-oven softness. Or warm them in a 300°F oven for 5 minutes.
The flavors actually deepen after a day or two. The brown butter becomes more pronounced, and the spices meld together. They’re good on day one, but they’re amazing on day three.
Nutritional Information & Benefits
Here’s the estimated nutritional breakdown for one cookie (based on 24 cookies):
- Calories: 145
- Fat: 8g
- Carbohydrates: 18g
- Protein: 2g
- Fiber: 1g
- Sugar: 10g
While these are still a treat, there are a few health benefits worth noting. Pumpkin is packed with vitamin A, which supports eye health and immune function. The brown butter provides a small amount of vitamin A and healthy fats. Cinnamon has been shown to help regulate blood sugar levels. And honestly, sometimes you just need a cookie that makes you feel good—both in your belly and in your soul.
If you’re watching your sugar intake, you can reduce the sugar in the coating or use a sugar substitute like monk fruit. But I’ll be honest—these are meant to be enjoyed as-is. Life’s too short for sad cookies.
Conclusion
These Brown Butter Pumpkin Snickerdoodle Cookies are the kind of recipe that makes you look forward to fall all year. They’re simple enough for a weekday baking session but impressive enough to bring to any gathering. The brown butter adds a depth of flavor that’s hard to beat, and the pumpkin keeps them soft and tender for days. Plus, that cinnamon-sugar coating? It’s pure nostalgia in every bite.
I really hope you give these a try. Don’t be afraid to make a mess, to lick the spatula, and to eat one (or three) straight off the cooling rack. That’s what baking is all about. If you make them, I’d love to hear how they turned out. Drop a comment below, tag me in your photos, or send me a message. And if you come up with a fun variation, definitely share that too. Happy baking, friend!
Frequently Asked Questions
Can I use pumpkin pie filling instead of pumpkin puree?
No, please don’t. Pumpkin pie filling is pre-sweetened and spiced, which will throw off the sugar and spice balance in this recipe. Stick with 100% pure pumpkin puree. If you have extra, you can use it in a batch of slow cooker honey garlic chicken meal prep bowls for a fun savory-sweet combo.
Why did my cookies turn out flat?
Flat cookies are usually caused by one of three things: the butter was too warm when you mixed the dough, you didn’t pat the pumpkin puree dry enough, or you skipped the chilling step. Make sure your brown butter has cooled to room temperature before adding the egg, and always pat the pumpkin puree with a paper towel to remove excess moisture.
Can I make the dough ahead of time?
Absolutely. You can prepare the dough up to 3 days in advance and keep it covered in the refrigerator. When you’re ready to bake, let the dough sit at room temperature for about 10 minutes to soften slightly, then roll and coat in the cinnamon-sugar mixture. You may need to add 1-2 minutes to the baking time if the dough is very cold.
How do I know when the cookies are done baking?
Look for set edges that are lightly golden, while the centers still look slightly soft and puffy. They will continue to set on the baking sheet as they cool. If you wait until the centers look fully set, they will be over-baked and dry. When in doubt, pull them out a minute early. A slightly under-baked cookie is always better than a dry one. Pair one with a refreshing cucumber mint green tea cooler for the ultimate fall treat.
Can I double this recipe?
Yes, this recipe doubles beautifully. Just make sure you have a large enough bowl to hold all the ingredients. If you’re browning a double batch of butter, use a larger skillet and keep a close eye on it—it can go from perfect to burnt faster than a single batch. I often double the recipe and freeze half the dough for later. It’s a great way to have fresh cookies on demand.
Pin This Recipe!
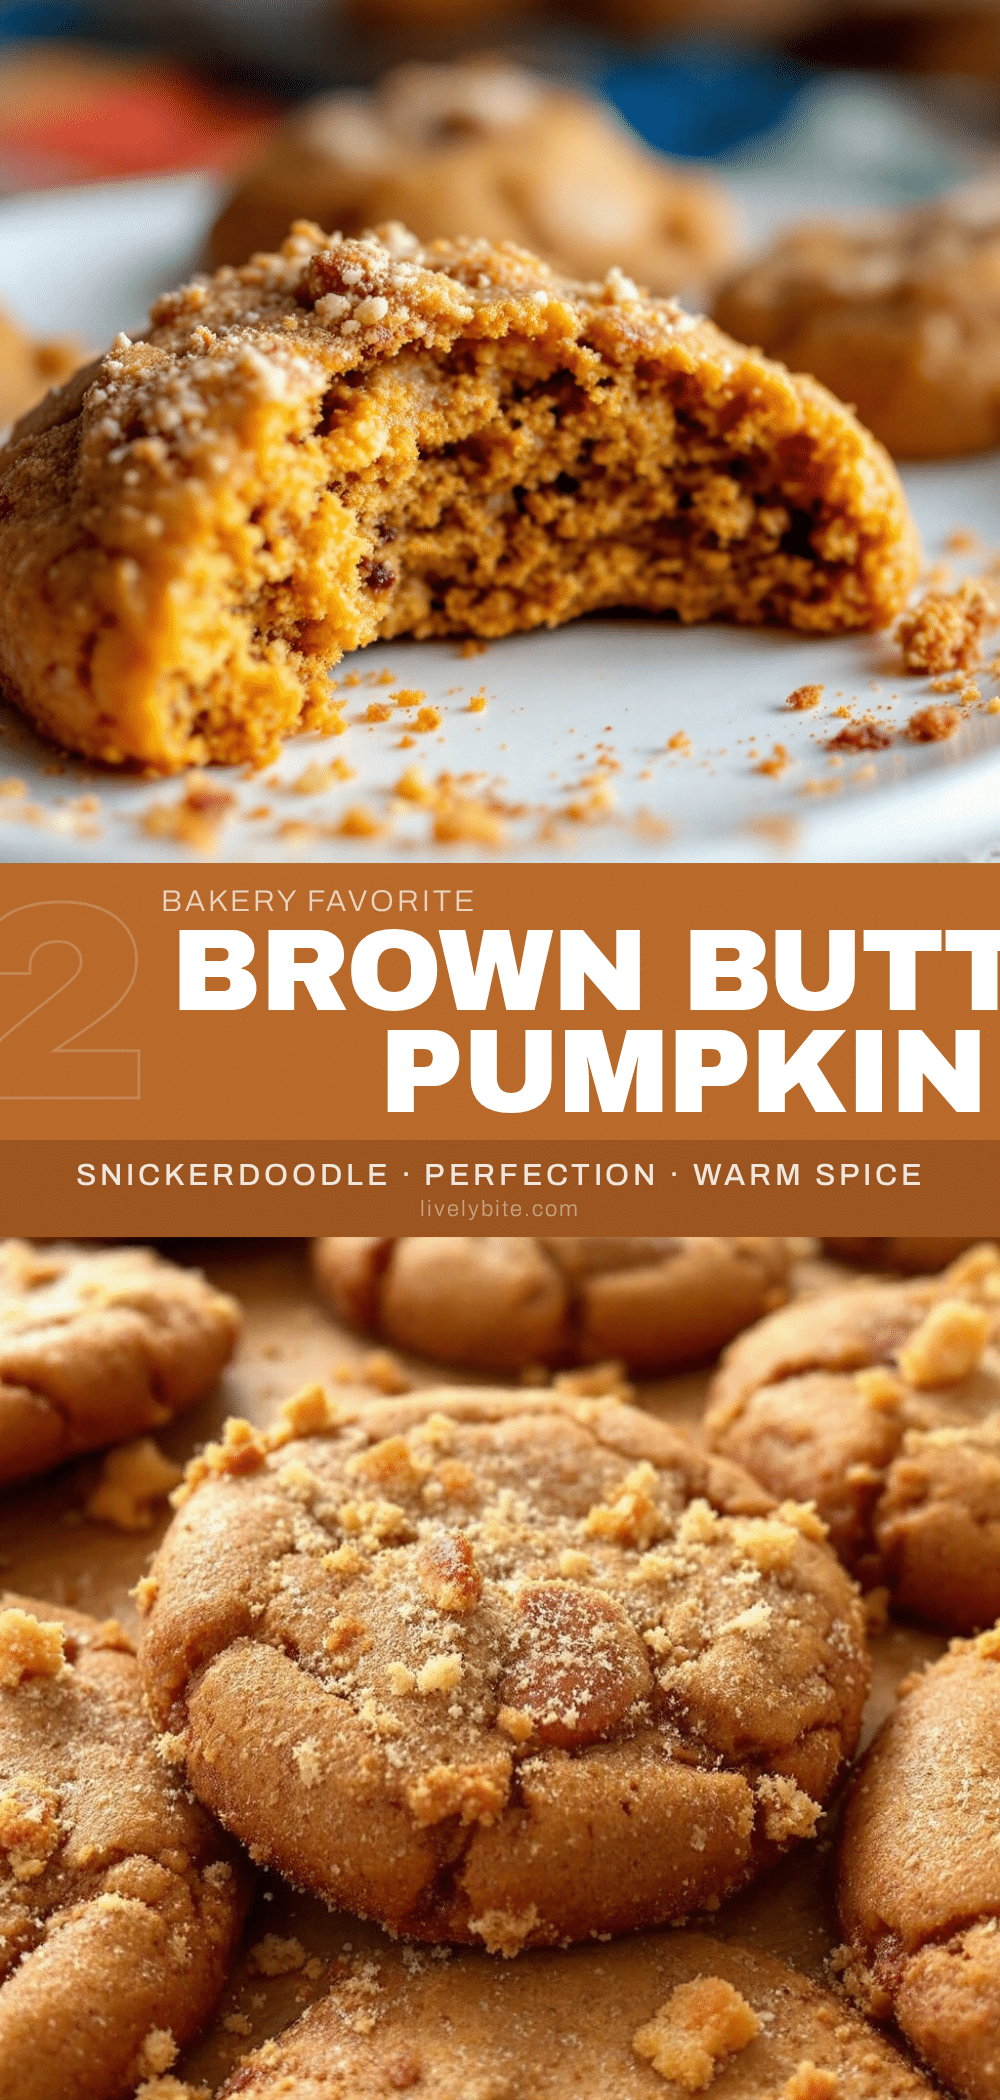
Best Brown Butter Pumpkin Snickerdoodles
These Brown Butter Pumpkin Snickerdoodle Cookies are soft, chewy, and packed with warm fall spices. The brown butter adds a nutty depth, while the pumpkin keeps them tender for days.
- Prep Time: 15 minutes
- Cook Time: 12 minutes
- Total Time: 27 minutes
- Yield: 24 servings 1x
- Category: Dessert
- Cuisine: American
Ingredients
- 1 cup (2 sticks) unsalted butter
- 1/2 cup granulated sugar
- 1/2 cup packed light brown sugar
- 1/2 cup pumpkin puree (100% pure, not pie filling)
- 1 large egg, room temperature
- 1 teaspoon vanilla extract
- 2 cups all-purpose flour
- 1 teaspoon cream of tartar
- 1/2 teaspoon baking soda
- 1 teaspoon ground cinnamon
- 1/2 teaspoon ground ginger
- 1/4 teaspoon ground nutmeg
- 1/4 teaspoon ground cloves
- 1/2 teaspoon salt
- 1/4 cup granulated sugar (for coating)
- 1 tablespoon ground cinnamon (for coating)
Instructions
- Brown the butter: Place the butter in a light-colored skillet over medium heat. Swirl occasionally as it melts. It will foam, then subside, and brown specks will form at the bottom (about 5-7 minutes). Once it smells nutty and the specks are deep amber, remove from heat and pour into a large mixing bowl. Let cool for 10 minutes.
- Mix the wet ingredients: Add granulated sugar and brown sugar to the cooled brown butter. Whisk vigorously until the mixture looks like wet sand and is slightly thickened (about 1 minute). Add pumpkin puree, room temperature egg, and vanilla extract. Whisk until smooth and glossy.
- Combine the dry ingredients: In a separate medium bowl, whisk together flour, cream of tartar, baking soda, cinnamon, ginger, nutmeg, cloves, and salt.
- Fold the dough together: Pour dry ingredients into wet ingredients. Use a rubber spatula to fold gently until just combined. Do not over-mix. The dough will be soft and slightly sticky.
- Chill the dough (optional but recommended): Cover the bowl with plastic wrap and refrigerate for 30 minutes.
- Preheat the oven to 350°F (175°C). Line two baking sheets with parchment paper or silicone mats.
- Make the cinnamon-sugar coating: In a small shallow bowl, whisk together 1/4 cup granulated sugar and 1 tablespoon cinnamon.
- Scoop and roll: Using a 1.5-tablespoon cookie scoop, portion out the dough. Roll each portion into a ball, then coat in the cinnamon-sugar mixture. Place on prepared baking sheets, spacing 2 inches apart.
- Bake: Bake one sheet at a time on the center rack for 10-12 minutes. Edges should be set and lightly golden, centers still slightly soft and puffy.
- Cool: Let cookies rest on the baking sheet for 5 minutes, then transfer to a wire cooling rack to cool completely.
Notes
Pat pumpkin puree dry with a paper towel to remove excess moisture for thicker cookies. Use room temperature egg to avoid shocking the brown butter. Chill dough for 30 minutes for best texture. Store in an airtight container at room temperature for up to 5 days; freeze baked cookies or unbaked dough balls for up to 3 months.
Nutrition
- Serving Size: 1 cookie
- Calories: 145
- Sugar: 10
- Sodium: 95
- Fat: 8
- Saturated Fat: 5
- Carbohydrates: 18
- Fiber: 1
- Protein: 2
Keywords: brown butter, pumpkin, snickerdoodles, fall cookies, cinnamon sugar, soft cookies


