I burned the crust on these apple cheesecake bars three times before I figured out what I was doing wrong.
Not the filling—that part I nailed on the first try. Creamy, tangy, perfectly set. But that buttery graham crust? It kept coming out either soggy or scorched, and honestly, I almost gave up on the whole thing. There was a week where my kitchen smelled like burnt butter and cinnamon every single night, and my family started eating dinner in the living room to avoid the smoke alarm.
Here’s the thing though—I couldn’t stop thinking about the combination. Tart apples, velvety cheesecake, that salty-sweet crumb. It felt like a dessert that deserved to exist, even if I kept messing up the foundation. So I kept tweaking. Pre-baked the crust longer. Lowered the temp. Added a secret step that changed everything.
These apple cheesecake bars finally came together on a random Tuesday afternoon when I wasn’t even trying to be impressive. I was just hungry, a little frustrated, and determined to use up the apples sitting in my fruit bowl before they went soft. And honestly? That’s when the best recipes happen—when you stop performing and start cooking for real.
The first bite stopped me mid-sentence. The crust was actually crunchy. The apples had softened into these little jammy pockets. And the cheesecake layer? Smooth as silk. I stood at my counter eating a second bar before I’d even finished the first one, and that’s when I knew this recipe was ready.
Why You’ll Love This Recipe
These aren’t your average apple bars. They’re the kind of dessert that makes people close their eyes after the first bite—and then reach for a second one before they’ve even swallowed.
- Quick & Easy: From start to table in about an hour, with only 20 minutes of active prep. Perfect for busy fall weeknights or last-minute holiday gatherings.
- Simple Ingredients: Nothing fancy here. Apples, cream cheese, graham crackers, butter, sugar, eggs, and cinnamon. You probably have most of it already.
- Perfect for Fall: Whether it’s Thanksgiving dessert, a Halloween party treat, or just a cozy Sunday baking project, these bars fit every autumn occasion.
- Crowd-Pleaser: Kids devour them. Adults sneak them from the pan when they think no one’s looking. I’ve watched people who “don’t like cheesecake” eat three in a row.
- Unbelievably Delicious: That first layer of buttery graham crust, the creamy cheesecake middle, and the tender, cinnamon-spiced apples on top? It’s comfort food in bar form.
What makes these bars different from every other apple cheesecake recipe out there? It’s the crust technique. Most recipes skip the pre-bake or don’t press it firmly enough, and you end up with a sad, crumbly mess. I pre-bake mine until it’s golden and set, then let it cool completely before adding the filling. That one extra step changes everything.
This is the recipe you make when you want to impress people without stressing yourself out. It looks fancy, tastes incredible, and honestly? It’s pretty hard to mess up once you know the tricks.
What Ingredients You Will Need
This recipe uses simple, wholesome ingredients to create layers of flavor and texture. Most are pantry staples, and the ones that aren’t (like fresh apples) are easy to find at any grocery store.
For the Buttery Graham Crust
- Graham cracker crumbs – 2 cups (about 16 full sheets, crushed finely). I prefer using a food processor for the most even texture, but a zip-top bag and rolling pin work too.
- Unsalted butter – ½ cup (1 stick), melted. Using unsalted lets you control the salt level. If you only have salted, reduce the added salt by half.
- Granulated sugar – ¼ cup. Adds just enough sweetness to balance the salty butter.
- Cinnamon – ½ teaspoon. Warm spice that complements the apples.
- Salt – ¼ teaspoon. Don’t skip this—it makes the crust taste buttery and complex, not flat.
For the Creamy Cheesecake Layer
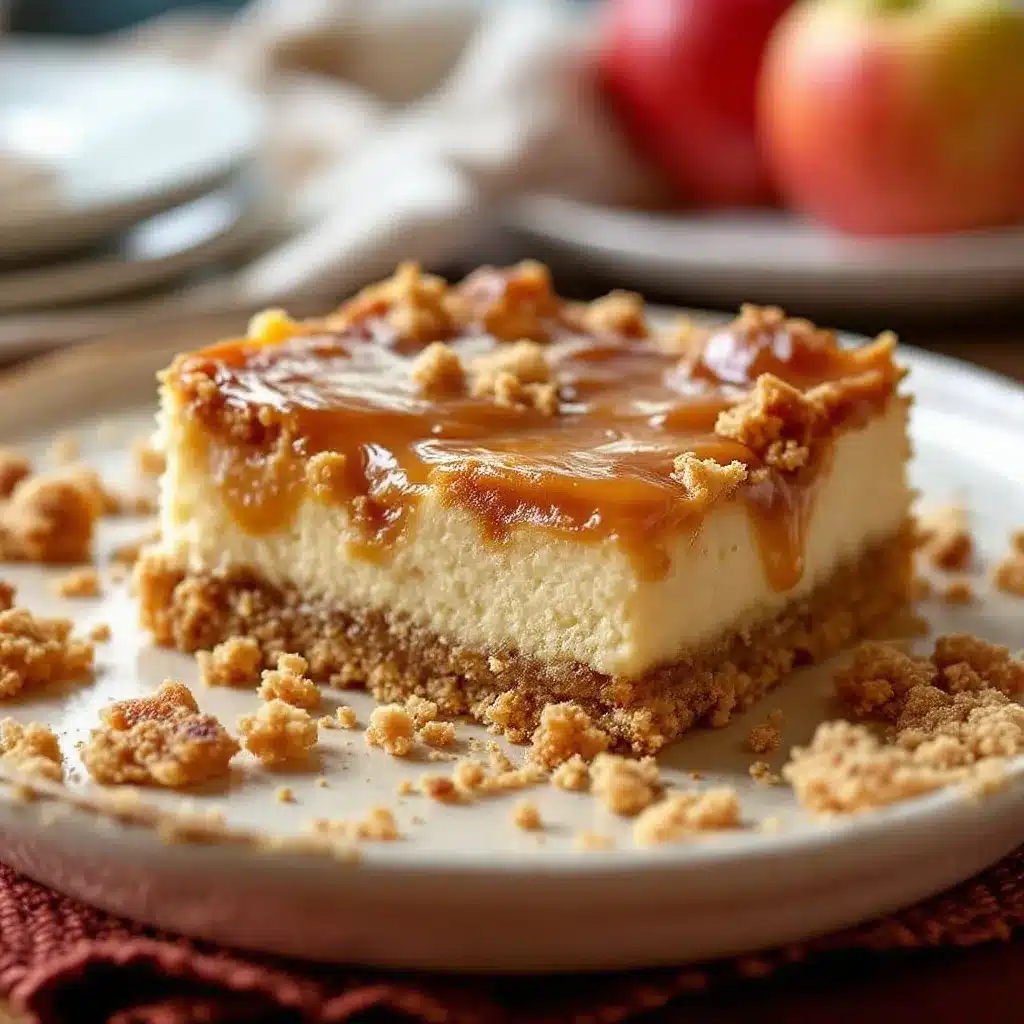
- Full-fat cream cheese – 16 ounces (two 8-ounce blocks), softened to room temperature. Low-fat versions work, but the texture won’t be as rich and luscious. I recommend Philadelphia brand for consistent results.
- Granulated sugar – ½ cup. Just enough sweetness without overwhelming the tanginess.
- Large eggs – 2, at room temperature. Cold eggs can cause the filling to curdle, so let them sit on the counter for 30 minutes first.
- Vanilla extract – 1 teaspoon. Pure vanilla, not imitation, for the best depth of flavor.
- Sour cream – ¼ cup, room temperature. This is my secret ingredient. It adds moisture and a subtle tang that makes the cheesecake taste extra creamy. (Greek yogurt works as a substitute.)
For the Apple Topping
- Apples – 3 medium (about 1½ pounds). I recommend a mix of sweet and tart varieties. Honeycrisp and Granny Smith are my go-to combo. The Honeycrisp adds natural sweetness, while the Granny Smith provides a tangy contrast.
- Brown sugar – ⅓ cup, packed. Light or dark both work. Dark brown sugar gives a deeper molasses flavor that pairs beautifully with cinnamon.
- Cinnamon – 1 teaspoon. Warming and aromatic.
- Nutmeg – ¼ teaspoon, freshly grated if possible. It adds a subtle earthiness that makes the apple flavor pop.
- Lemon juice – 1 tablespoon. Prevents the apples from browning and brightens the overall flavor.
- Cornstarch – 1 tablespoon. This thickens the apple juices so they don’t make the cheesecake layer watery.
Equipment Needed
You don’t need a professional kitchen to make these bars, but a few key tools make the process much smoother.
- 9×9-inch baking pan – This is the ideal size for thick, generous bars. An 8×8 works too, but your bars will be slightly taller and may need a few extra minutes of baking time.
- Parchment paper – Essential for easy removal. Leave an overhang on two opposite sides so you can lift the whole block out cleanly.
- Food processor – Great for crushing graham crackers into fine crumbs. If you don’t have one, place the crackers in a zip-top bag and crush them with a rolling pin. It’s a little more work, but it gets the job done.
- Electric hand mixer or stand mixer – For beating the cream cheese until smooth. A whisk and some serious elbow grease can work, but your filling won’t be as silky.
- Sharp knife and cutting board – For dicing the apples into even pieces. A dull knife will bruise the fruit and make the pieces uneven.
- Large mixing bowls – One for the crust, one for the cheesecake filling, and one for the apple topping.
- Spatula – A rubber spatula is perfect for scraping down the sides of the bowl and spreading the filling evenly.
Invest in a good-quality baking pan if you bake often. Cheap pans can warp at high temperatures, leading to uneven baking. I use a heavy-duty aluminum pan that distributes heat evenly and has never let me down.
Preparation Method
Follow these steps carefully, and you’ll have perfect apple cheesecake bars every time. I’ve included sensory cues and troubleshooting tips so you know exactly what to look for at each stage.
Step 1: Prepare the Crust
Preheat your oven to 350°F (175°C). Line your 9×9-inch baking pan with parchment paper, leaving an overhang on two opposite sides. This will make lifting the bars out later a breeze.
In a medium bowl, combine 2 cups of graham cracker crumbs, ¼ cup of granulated sugar, ½ teaspoon of cinnamon, and ¼ teaspoon of salt. Pour in ½ cup of melted unsalted butter and stir until the mixture looks like wet sand. Every crumb should be evenly coated.
Press the mixture firmly into the bottom of the prepared pan. Use the bottom of a measuring cup or a flat glass to really compact it—loose crust means crumbly bars. Bake for 10 minutes, until the crust is fragrant and just beginning to turn golden at the edges. Let it cool completely on a wire rack while you make the filling. This cooling step is non-negotiable; a hot crust will melt your cheesecake filling and create a soggy mess.
Step 2: Make the Cheesecake Filling
In a large mixing bowl, beat 16 ounces of softened cream cheese with an electric mixer on medium speed until smooth and creamy, about 2 minutes. Scrape down the sides of the bowl with a spatula. Add ½ cup of granulated sugar and beat for another minute until fluffy and well combined.
Add the 2 room-temperature eggs one at a time, beating on low speed after each addition just until incorporated. Overbeating at this stage can incorporate too much air, which may cause the cheesecake to crack during baking. Stir in 1 teaspoon of vanilla extract and ¼ cup of sour cream until smooth. The filling should look thick, glossy, and completely uniform in color.
Pour the filling over the cooled crust and spread it into an even layer using a spatula. Set aside while you prepare the apples.
Step 3: Prepare the Apple Topping
Peel, core, and dice 3 medium apples into ½-inch cubes. I like to keep the pieces uniform so they cook evenly. In a medium bowl, toss the diced apples with ⅓ cup of packed brown sugar, 1 teaspoon of cinnamon, ¼ teaspoon of nutmeg, 1 tablespoon of lemon juice, and 1 tablespoon of cornstarch. Stir until every piece of apple is coated.
The apples should look glossy and lightly coated in the spiced sugar mixture. If they seem dry, add another splash of lemon juice. If they’re swimming in liquid, you may have over-measured the lemon juice—just drain off the excess before adding them to the pan.
Step 4: Assemble and Bake
Spoon the apple mixture evenly over the cheesecake layer. Don’t press the apples in—just let them rest on top. Some will sink slightly during baking, and that’s fine. You want a rustic, layered look.
Bake at 350°F (175°C) for 35-40 minutes, or until the edges are set and the center is slightly jiggly (like Jell-O, not liquid). The apples should be tender when pierced with a fork. If the top is browning too quickly, tent the pan loosely with aluminum foil during the last 10 minutes.
Let the bars cool completely at room temperature on a wire rack, then refrigerate for at least 4 hours, preferably overnight. This chilling step is crucial—it allows the cheesecake to set fully and makes slicing much cleaner. I know it’s hard to wait, but trust me, it’s worth it.
Cooking Tips & Techniques
Over the years, I’ve learned a few things the hard way so you don’t have to. Here are my best tips for perfect apple cheesecake bars every single time.
Room temperature ingredients matter. Cold cream cheese creates lumpy filling. Cold eggs can cause the batter to separate. Let everything sit on the counter for 30-60 minutes before you start. If you’re in a rush, you can soften cream cheese in the microwave in 10-second bursts, but be careful not to melt it.
Don’t overmix the cheesecake filling. I learned this lesson after making a batch that cracked right down the middle. Overbeating incorporates too much air, which expands during baking and then collapses, causing cracks. Mix just until smooth, then stop.
Use a water bath (optional but helpful). If you’re worried about cracks, place your baking pan inside a larger roasting pan and pour hot water halfway up the sides. The steam creates a moist environment that prevents the cheesecake from drying out and cracking. I don’t always do this for bars, but it’s a good trick for special occasions.
Slice with a hot knife. For clean, restaurant-quality slices, run your knife under hot water, dry it off, and make one smooth cut. Wipe the blade clean between cuts. This prevents the cheesecake from sticking and dragging.
Patience is a virtue. I know you want to dig in immediately, but these bars truly taste better the next day. The flavors meld together, the texture firms up perfectly, and the apples soften into jammy little pockets. Make them a day ahead if you can.
Variations & Adaptations
One of the best things about this recipe is how adaptable it is. Here are some of my favorite variations.
Gluten-Free Version
Swap the graham cracker crumbs for gluten-free graham crackers or crushed gluten-free cookies. I’ve used gluten-free shortbread cookies with great results. The crust will be slightly more delicate, so press it firmly and chill it well before slicing.
Vegan Adaptation
Use dairy-free cream cheese (I like the brand Miyoko’s for the best texture) and a vegan butter substitute. Replace the eggs with ¼ cup of unsweetened applesauce or two flax eggs (2 tablespoons ground flaxseed mixed with 6 tablespoons water). The texture will be slightly less creamy, but still delicious. For a similar approach to creamy, plant-based desserts, you might enjoy my creamy vegan chocolate avocado pudding.
Caramel Apple Twist
Drizzle ¼ cup of salted caramel sauce over the apple topping before baking. The caramel sinks into the apples and creates gooey pockets of sweetness. I like to add a few flakes of sea salt on top after baking for that sweet-salty contrast.
Spiced Pear Variation
Swap the apples for ripe but firm pears (like Bosc or Anjou). Use the same amount and follow the same preparation. Pears are naturally sweeter, so you can reduce the brown sugar to ¼ cup. Add a pinch of ground ginger for extra warmth.
Individual Mini Bars
Use a muffin tin lined with paper liners for individual servings. Press about 2 tablespoons of crust into each cup, add 1 tablespoon of cheesecake filling, and top with a spoonful of apples. Bake for 18-22 minutes. These are perfect for parties or portion control.
Serving & Storage Suggestions
These bars are versatile enough for any occasion, from casual weeknight treats to holiday dessert tables.
Serving Temperature: I prefer these bars cold, straight from the refrigerator. The cheesecake layer is firm and creamy, and the apples have a nice, soft texture. If you prefer a softer texture, let them sit at room temperature for 15-20 minutes before serving.
Presentation: Lift the entire block of bars out of the pan using the parchment overhang. Place it on a cutting board and slice into 16 even squares (4 rows by 4 rows). For a cleaner look, trim the edges first. Dust with powdered sugar or a sprinkle of cinnamon before serving. A dollop of whipped cream or a scoop of vanilla ice cream takes it over the top.
Complementary Dishes: These bars pair beautifully with a cup of hot coffee, spiced chai, or a warm apple cider. If you’re serving them as part of a fall dessert spread, they go wonderfully with a refreshing cucumber mint green tea cooler for a light, palate-cleansing contrast.
Storage: Store leftover bars in an airtight container in the refrigerator for up to 5 days. Layer them with parchment paper between each row to prevent sticking. The flavors actually deepen after a day or two, so don’t be surprised if they taste even better on day three.
Freezing: These bars freeze beautifully. Wrap individual slices tightly in plastic wrap, then place them in a freezer-safe bag or container. Freeze for up to 3 months. To thaw, transfer a slice to the refrigerator overnight. I like to keep a stash in the freezer for unexpected guests or late-night cravings.
Reheating: If you prefer warm apples, microwave a single bar for 15-20 seconds. The cheesecake will soften slightly, but the apples will become fragrant and tender. Just be careful not to overheat, or the cheesecake can become runny.
Nutritional Information & Benefits
While these bars are definitely a treat, they do offer some nutritional benefits thanks to the wholesome ingredients.
| Nutrient | Per Serving (1 bar) |
|---|---|
| Calories | 285 |
| Total Fat | 16g |
| Saturated Fat | 10g |
| Cholesterol | 65mg |
| Sodium | 210mg |
| Total Carbohydrates | 32g |
| Dietary Fiber | 2g |
| Sugars | 22g |
| Protein | 4g |
Health Benefits of Key Ingredients: Apples are rich in fiber and vitamin C, and they contain antioxidants that support heart health. Cinnamon has anti-inflammatory properties and may help regulate blood sugar. Cream cheese provides calcium and protein, though it’s also high in saturated fat, so moderation is key.
Dietary Considerations: This recipe is vegetarian. For a gluten-free version, use gluten-free graham crackers. For a lower-sugar option, reduce the sugar in the cheesecake filling to ⅓ cup and use a sugar substitute like monk fruit sweetener in the apple topping. The texture will be slightly different, but still delicious.
Potential Allergens: This recipe contains dairy (cream cheese, butter, sour cream), gluten (graham crackers), and eggs. Always check your ingredient labels if cooking for someone with allergies.
I believe in balance. These bars are a special occasion dessert, not an everyday snack. Enjoy them mindfully, savor every bite, and don’t feel guilty about it. Life is too short to skip dessert.
Conclusion
These apple cheesecake bars are the kind of recipe that becomes a tradition. They’re the dessert you bring to Thanksgiving that everyone asks for the recipe. The treat you bake on a crisp fall Sunday just because it feels right. The sweet ending to a long week that makes everything feel a little better.
What I love most about this recipe is how forgiving it is. Even if your crust isn’t perfectly pressed or your apple pieces are a little uneven, the final result is still spectacular. It’s a recipe that rewards effort but doesn’t punish imperfection.
I’d love to hear how these turn out for you. Did you try a variation? Add a personal touch? Burn your first crust like I did? Drop a comment below and let me know. And if you’re looking for more easy, crowd-pleasing desserts, check out my full collection of recipes.
Happy baking, friends. May your crust be buttery, your cheesecake be creamy, and your apples be perfectly spiced.
Frequently Asked Questions
Can I use pre-made graham cracker crumbs?
Absolutely. Pre-made crumbs save time and work perfectly. Just measure 2 cups and proceed with the recipe. No need to adjust the butter amount.
Why did my cheesecake layer crack?
Cracking usually happens from overmixing or overbaking. Beat the filling just until smooth, and pull the bars out of the oven when the center is still slightly jiggly. Rapid temperature changes can also cause cracks, so let the bars cool gradually at room temperature before refrigerating.
Can I make these bars without a food processor?
Yes. Place graham crackers in a zip-top bag and crush them with a rolling pin or the bottom of a heavy pan. It takes a few extra minutes, but the results are the same. Just make sure the crumbs are fine and uniform.
What’s the best apple for baking in this recipe?
I recommend a mix of sweet and tart apples. Honeycrisp, Granny Smith, Fuji, and Braeburn are all excellent choices. Avoid Red Delicious, as they become mealy when baked. The combination of sweet and tart creates a more complex flavor.
How do I get clean, neat slices?
Chill the bars thoroughly (at least 4 hours, preferably overnight). Use a sharp knife and wipe it clean between each cut. For extra-clean slices, run the knife under hot water, dry it, and make one smooth cut per slice. Patience is key—don’t rush the chilling step.
Pin This Recipe!
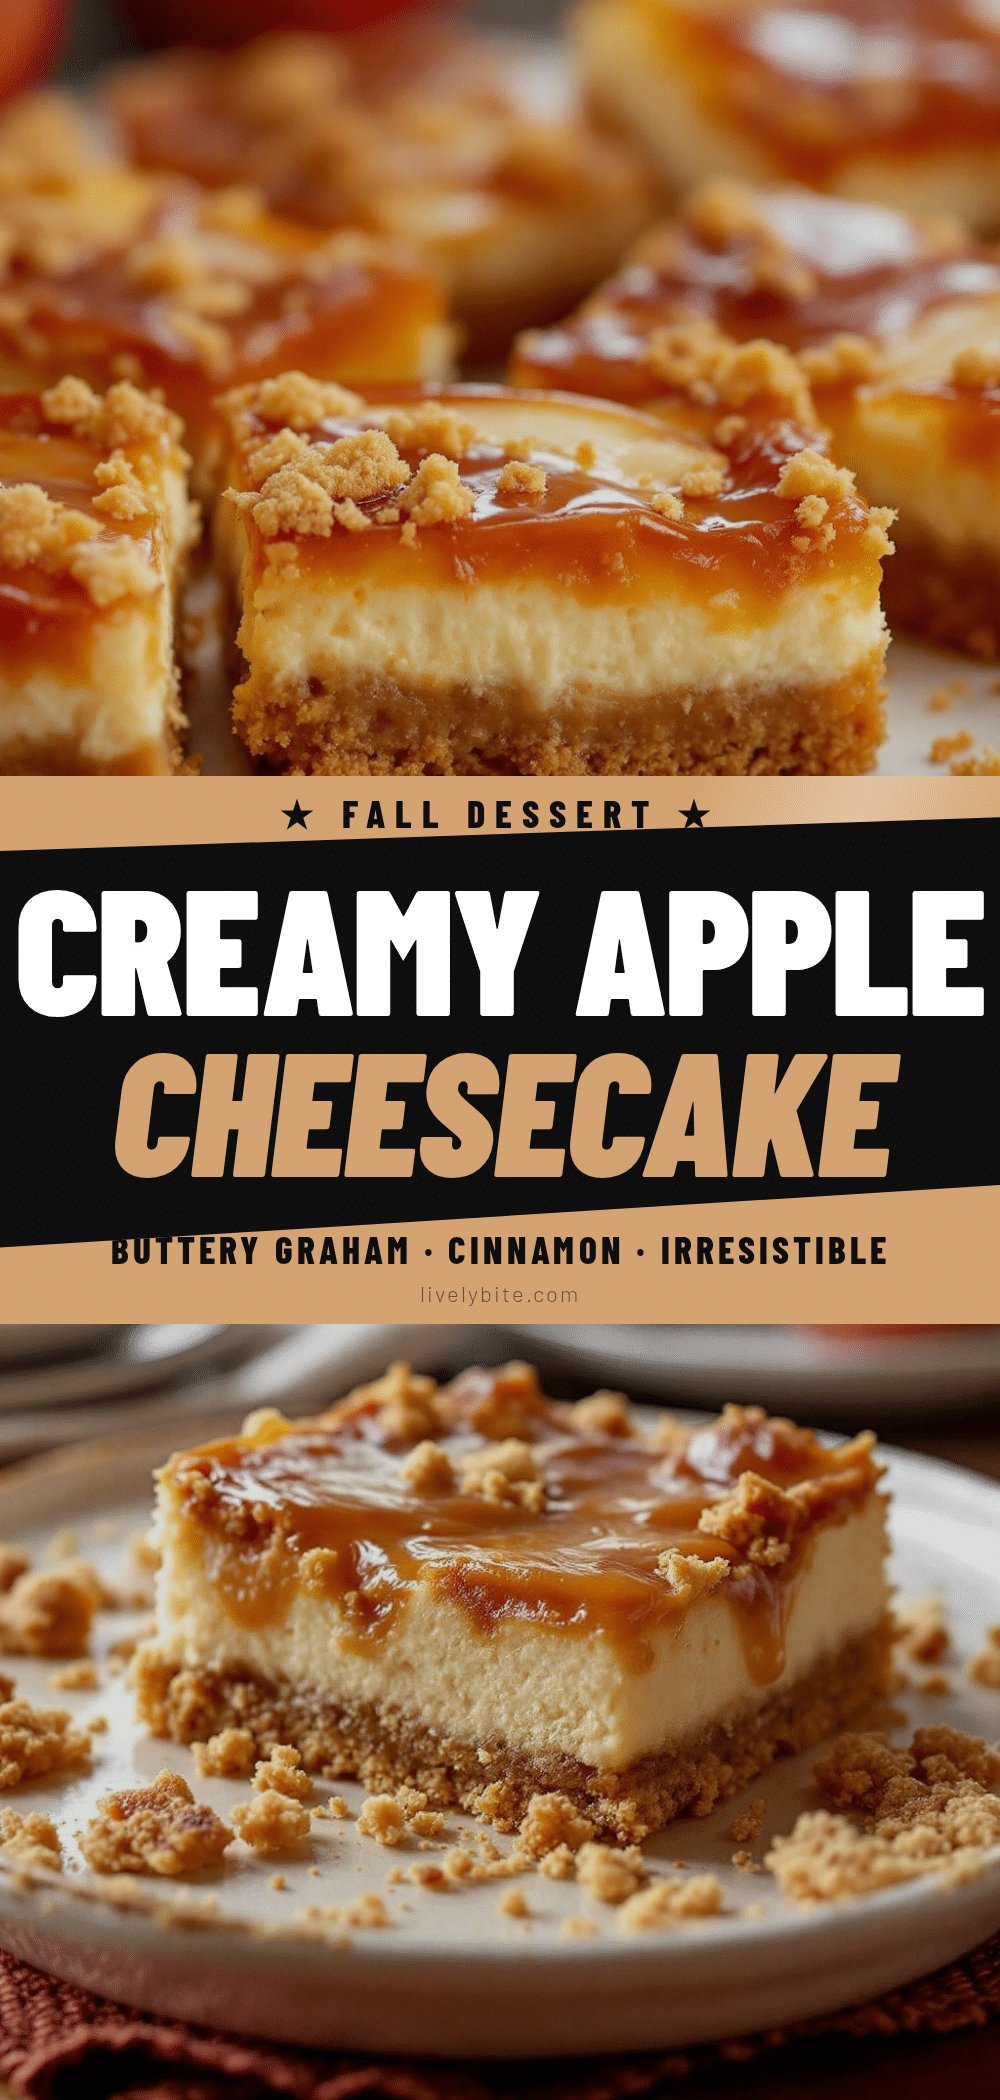
Best Apple Cheesecake Bars: Easy Fall Dessert Recipe
These apple cheesecake bars feature a buttery graham crust, creamy cheesecake filling, and tender cinnamon-spiced apples. A perfect fall dessert that’s quick to make and always a crowd-pleaser.
- Prep Time: 20 minutes
- Cook Time: 40 minutes
- Total Time: 1 hour (plus 4 hours chilling)
- Yield: 16 servings 1x
- Category: Dessert
- Cuisine: American
Ingredients
- 2 cups graham cracker crumbs (about 16 full sheets, crushed finely)
- ½ cup (1 stick) unsalted butter, melted
- ¼ cup granulated sugar
- ½ teaspoon cinnamon
- ¼ teaspoon salt
- 16 ounces full-fat cream cheese, softened to room temperature
- ½ cup granulated sugar
- 2 large eggs, at room temperature
- 1 teaspoon vanilla extract
- ¼ cup sour cream, room temperature
- 3 medium apples (about 1½ pounds), peeled, cored, and diced into ½-inch cubes
- ⅓ cup packed brown sugar (light or dark)
- 1 teaspoon cinnamon
- ¼ teaspoon nutmeg, freshly grated if possible
- 1 tablespoon lemon juice
- 1 tablespoon cornstarch
Instructions
- Preheat oven to 350°F (175°C). Line a 9×9-inch baking pan with parchment paper, leaving an overhang on two opposite sides.
- In a medium bowl, combine graham cracker crumbs, ¼ cup granulated sugar, ½ teaspoon cinnamon, and ¼ teaspoon salt. Pour in melted butter and stir until mixture resembles wet sand.
- Press the mixture firmly into the bottom of the prepared pan. Bake for 10 minutes, until fragrant and just beginning to turn golden at the edges. Let cool completely on a wire rack.
- In a large mixing bowl, beat cream cheese with an electric mixer on medium speed until smooth and creamy, about 2 minutes. Scrape down sides. Add ½ cup granulated sugar and beat for another minute until fluffy.
- Add eggs one at a time, beating on low speed just until incorporated. Stir in vanilla extract and sour cream until smooth.
- Pour the filling over the cooled crust and spread into an even layer.
- In a medium bowl, toss diced apples with brown sugar, 1 teaspoon cinnamon, nutmeg, lemon juice, and cornstarch until coated.
- Spoon the apple mixture evenly over the cheesecake layer.
- Bake at 350°F (175°C) for 35-40 minutes, until edges are set and center is slightly jiggly. If top browns too quickly, tent with foil during last 10 minutes.
- Let cool completely at room temperature on a wire rack, then refrigerate for at least 4 hours, preferably overnight.
- Lift bars out using parchment overhang, slice into 16 squares, and serve cold or at room temperature.
Notes
Room temperature ingredients are crucial for a smooth filling. Don’t overmix the cheesecake to avoid cracks. For clean slices, use a hot knife and wipe between cuts. Bars taste even better the next day.
Nutrition
- Serving Size: 1 bar
- Calories: 285
- Sugar: 22
- Sodium: 210
- Fat: 16
- Saturated Fat: 10
- Carbohydrates: 32
- Fiber: 2
- Protein: 4
Keywords: apple cheesecake bars, fall dessert, apple dessert, cheesecake bars, easy dessert, Thanksgiving dessert


