Half a cup of pan drippings sitting in the roasting pan and my hands were shaking so bad I nearly dropped the whisk. The turkey had just come out of the oven, resting under foil like a king on his throne, while the kitchen clock ticked louder than my heartbeat. I had promised my sister-in-law I’d make “from scratch” gravy, a promise I made while eating cereal for dinner the night before. Honestly, I didn’t even have a roux ready. No flour. No butter. Just panic and a sudden realization that I’d skipped the most important step of the holiday prep.
I rushed to the stove, dumping the gelatinous gold from the pan into a saucepan. It looked like amber jelly, scary and cold. My mom always said you have to “deglaze” the pan, but I had forgotten what that actually meant in the chaos of carving. I grabbed a bottle of white wine I’d been saving for a special occasion, which happened to be right now. The sizzle was violent, sending up a cloud of steam that fogged my glasses. I stirred frantically, scraping up the browned bits stuck to the bottom of the roasting pan. Those brown bits were the flavor bombs, the soul of the dish, but they were stubborn and stuck tight.
I added chicken stock from the carton because I hadn’t made homemade broth, and suddenly the mixture turned into a murky, lumpy mess. It looked like soup, not gravy. I felt like a fraud. A holiday fraud. But then I remembered the secret my chef friend told me years ago: cold butter at the end. I tossed in cubes of cold butter one by one, whisking like my life depended on it. The lumps vanished. The color deepened to a rich mahogany. The smell hit me then—herbs, savory depth, and pure comfort.
That night, we didn’t talk about the near-disaster. We just poured the Classic Herb Roasted Turkey Gravy over mashed potatoes and closed our eyes. It wasn’t perfect, but it was real. And that’s why I keep making it. Not because it’s fancy, but because it saves the day when things go wrong. It’s the safety net of the Thanksgiving table.
Why You’ll Love This Recipe
This isn’t just another gravy recipe you’ll find buried in a cookbook. This is the one that survives the holiday rush. I’ve tested this method through three thanksgivings and two christmases, and it holds up when the oven is full and the stress is high. Here is why this specific version stands out from the crowd:
- Quick & Easy: You can whip this up in under 20 minutes while the turkey rests. It doesn’t require hours of simmering or a separate hour of prep work. It fits into the chaotic window between carving and serving.
- Simple Ingredients: You likely already have everything in your kitchen. Chicken stock, butter, flour, and herbs. No fancy gadgets or obscure spices from a specialty store. It relies on pantry staples that actually taste good.
- Perfect for Holiday Gatherings: Whether it’s a small family dinner or a massive feast, this recipe scales well. It’s versatile enough to pour over roast beef or chicken if turkey isn’t on the menu.
- Crowd-Pleaser: Kids love the smooth texture, and adults love the deep savory flavor. It pairs perfectly with sides like my easy slow cooker honey garlic chicken, adding a rich contrast to the sweet glaze.
- Unbelievably Delicious: The combination of roasted pan drippings and fresh herbs creates a complexity that bottled gravy just can’t match. It’s the kind of gravy that makes people ask for the recipe before they’ve even finished their second plate.
What makes this different is the technique. Most recipes tell you to make a roux from scratch. I tell you to use the pan drippings. Those browned bits are flavor gold. By deglazing properly and finishing with cold butter, you get a glossy, restaurant-quality finish without the fuss. It’s comfort food reimagined for the busy cook. It’s reliable, robust, and deeply satisfying.
What Ingredients You Will Need
This recipe uses simple, wholesome ingredients to deliver bold flavor and satisfying texture without the fuss. The magic happens in the interaction between the fat from the turkey and the starch from the flour. Here is exactly what you need to make this Classic Herb Roasted Turkey Gravy shine.
For the Base:
- Turkey Pan Drippings: About 1/2 cup of fat from the roasting pan. This is the non-negotiable flavor source. If you didn’t roast a turkey, you can use butter or oil, but it won’t taste the same.
- Chicken Stock: 2 cups of low-sodium broth. I recommend using a good quality brand like Swanson or Kettle & Fire. Low sodium is crucial because the drippings are already salty.
- White Wine (Optional): 1/4 cup of dry white wine like Sauvignon Blanc. This adds acidity and brightness that cuts through the richness. If you don’t drink wine, use extra broth.
For the Thickener:
- All-Purpose Flour: 1/4 cup. This creates the roux with the fat. Don’t substitute with gluten-free flour unless you need to, as it changes the texture significantly.
- Unsalted Butter: 2 tablespoons, cold and cubed. This is added at the very end to emulsify the gravy and give it a shiny, velvety finish.
For the Herb Profile:
- Fresh Thyme: 1 tablespoon, leaves stripped from stems. Fresh herbs make a huge difference here. Dried thyme is too dusty.
- Fresh Sage: 1 teaspoon, finely chopped. Sage is the classic partner to turkey. It adds an earthy, pine-like note.
- Black Pepper: 1/2 teaspoon, freshly cracked. Always crack your own pepper. Pre-ground is dull.
- Salt: To taste. Taste before adding! The drippings and stock may already have enough salt.
Substitution Notes:
If you are watching your fat intake, you can skim most of the fat from the drippings and use a little butter instead, but the flavor will be lighter. For a gluten-free option, you can use a cornstarch slurry (1 tbsp cornstarch mixed with 1 tbsp cold water) added at the end, but the texture will be more gelatinous than creamy. I also like to add a splash of apple cider vinegar if the gravy tastes too heavy, which balances the palate nicely.
Equipment Needed
You don’t need a lot of fancy tools to make this gravy. In fact, the fewer gadgets you have out, the easier the cleanup will be. Here is what you actually need:
- Roasting Pan: Ideally, one with a lip to catch the drippings. If your pan is too deep, you might need to tilt it carefully to pour off the fat.
- Saucepan: A medium-sized saucepan (2-3 quart capacity) is perfect. It should be wide enough to allow for whisking.
- Whisk: A balloon whisk is essential. It breaks up lumps faster than a spoon. I have a stainless steel one that has survived many holiday disasters.
- Measuring Cups and Spoons: Basic prep tools. Accuracy matters here, especially with the flour.
- Fat Separator (Optional): If you are nervous about separating the fat from the juices, a fat separator is a lifesaver. It lets you pour off the clear fat layer while leaving the salty juices at the bottom. If you don’t have one, just let the drippings sit for a minute and skim the fat with a spoon.
I’ve tried using a blender to make gravy, and while it gets smooth, it can get aerated and foamy, which looks weird on the plate. A saucepan and whisk give you the most control over the texture. If your saucepan is scratched or non-stick, just be gentle with your whisk to avoid damaging the coating. Budget-friendly tip: A simple stainless steel whisk costs about $10 and will last forever. Don’t buy the fancy silicone ones; they don’t whisk well.
Preparation Method
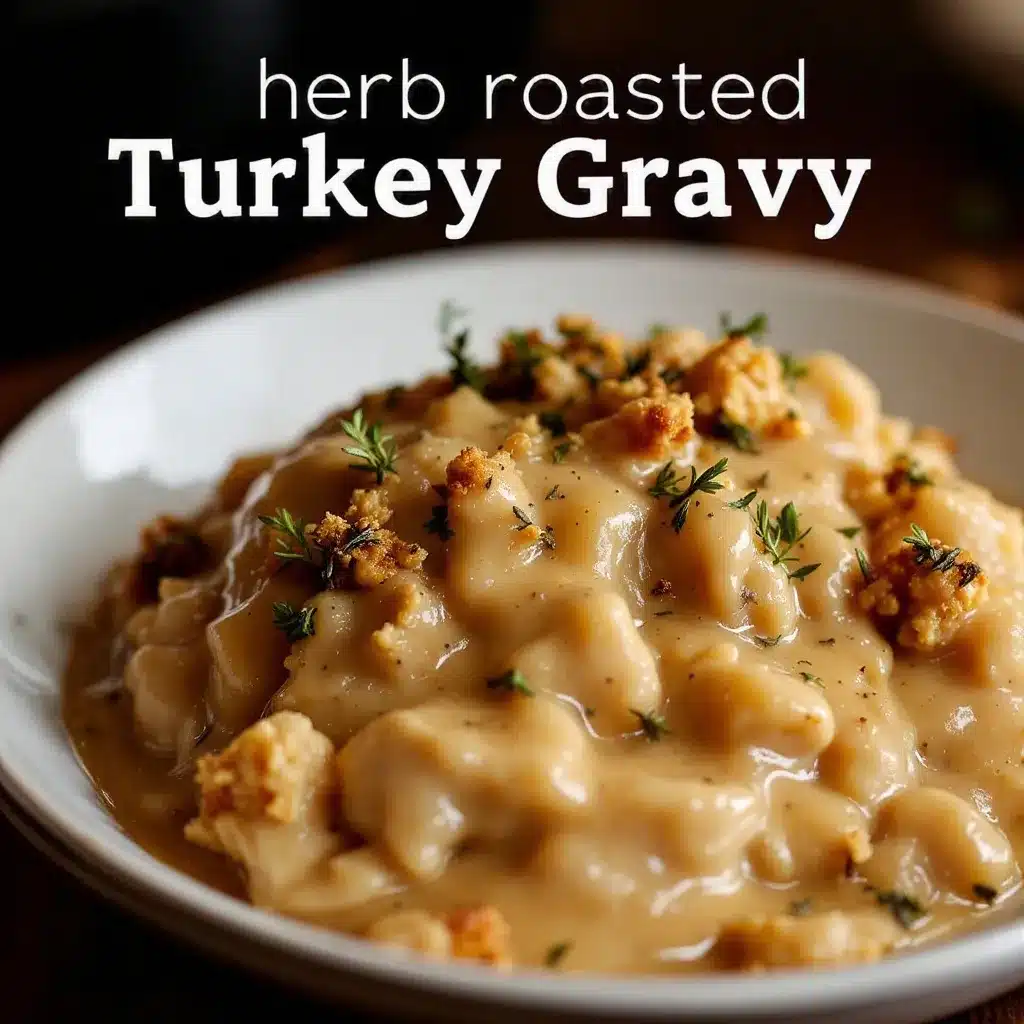
Making this Classic Herb Roasted Turkey Gravy is straightforward if you stay calm. Follow these steps carefully to avoid lumps and ensure a rich flavor.
- Collect the Drippings (5 minutes): Once your turkey is out of the oven and resting, place the roasting pan on the stovetop over low heat. Carefully pour the liquid from the pan into a fat separator or a bowl. Let it sit for 2-3 minutes so the fat rises to the top. You want about 1/2 cup of fat. If you don’t have enough fat, add butter to make up the difference. Discard the salty juices at the bottom if you want a less salty gravy, or save them for the stock later.
- Make the Roux (3 minutes): Pour the 1/2 cup of fat back into the roasting pan or a saucepan. Sprinkle the 1/4 cup of flour over the fat. Whisk constantly over medium heat. Cook this mixture for about 2-3 minutes. It should turn a light golden brown color and smell nutty. This cooks out the raw flour taste. Do not let it burn, or the gravy will taste bitter.
- Deglaze and Add Liquid (2 minutes): If you are using wine, pour it in now. It will bubble and steam vigorously. Scrape up any brown bits stuck to the bottom of the pan with your whisk. These bits are pure flavor. Then, slowly pour in the 2 cups of chicken stock while whisking continuously. Adding the liquid slowly prevents lumps from forming. If you add it all at once, you will end up with a bowl of flour paste.
- Simmer and Thicken (5-7 minutes): Bring the mixture to a gentle simmer. Reduce the heat to medium-low. Let it cook, stirring occasionally, until it thickens enough to coat the back of a spoon. This usually takes about 5-7 minutes. If it gets too thick, add a splash more stock. If it’s too thin, let it simmer a bit longer.
- Add Herbs and Finish (2 minutes): Stir in the fresh thyme, sage, and black pepper. Taste the gravy now. Add salt only if needed. Remove the pan from the heat. Immediately whisk in the 2 tablespoons of cold butter cubes one by one. The residual heat will melt the butter and emulsify it into the gravy, giving it a glossy shine. This is called “monter au beurre” in French cooking, and it’s the pro move.
- Strain (Optional): For a silky smooth gravy, pour it through a fine-mesh strainer into a serving jug. This catches any herb stems or small lumps. If you like a rustic look with visible herbs, skip this step.
Keep the gravy warm in a thermos or a bowl placed in a larger bowl of hot water while you carve the turkey. Do not let it sit on the stove on high heat, or it will scorch.
How do I fix lumpy gravy?
If you end up with lumps, don’t panic. You can use an immersion blender to blitz it smooth, or push it through a sieve. The sieve is the safest method because it removes the lumps without overworking the sauce.
Can I make this ahead of time?
You can make the roux and add the stock up to two days in advance. Store it in the fridge. When you are ready to serve, reheat it gently on the stove, adding a little extra stock if it has thickened too much in the fridge. Add the fresh herbs and butter right at the end.
Cooking Tips & Techniques
Gravy making is a skill that improves with practice. Here are some tips I’ve learned from burning batches and saving others.
Temperature Control is Key: The biggest mistake people make is turning the heat up too high. A roux can go from golden to burnt in seconds. Keep the heat at medium-low. If you are nervous, use a double boiler, though it takes longer. I prefer direct heat but watch it like a hawk.
Don’t Skip the Deglaze: Those brown bits in the roasting pan are called *fond* in French. They are packed with caramelized flavor. If you don’t deglaze the pan, you are wasting half the flavor of your turkey. Use a wooden spoon or whisk to scrape every bit off.
Cold Butter Matters: Adding cold butter at the end is not just for shine. It stabilizes the emulsion. If you add warm butter, it might separate. Cold butter melts slowly, allowing it to integrate smoothly into the liquid.
Taste as You Go: Salt levels vary wildly between stocks and roasting pans. Always taste before adding salt. If the gravy tastes flat, it might need acid. A tiny splash of lemon juice or vinegar can wake up the flavors without making it taste sour.
Multitasking Strategy: Start the gravy as soon as the turkey comes out of the oven. While the turkey rests for 30-45 minutes, you have plenty of time to make the gravy. This way, it’s ready when you are ready to serve. Don’t start the gravy while the turkey is still in the oven; the drippings will cool and congeal, making them hard to work with.
Avoid Over-Whisking: Once the gravy is thickened, you don’t need to whisk constantly. Stirring every minute is enough. Over-whisking can incorporate too much air, making the gravy look frothy instead of glossy.
Variations & Adaptations
This recipe is a great base that you can tweak to fit your tastes or dietary needs. Here are a few variations I love:
- Red Wine Gravy: Swap the white wine for a dry red wine like Cabernet or Merlot. This creates a deeper, richer color and a more robust flavor. It’s great for darker meats like lamb or beef, but also works beautifully with turkey if you like a bold taste.
- Herb-Forward Version: Double the herbs. Add fresh rosemary and parsley along with the thyme and sage. This makes the gravy taste more like a fresh garden. It pairs wonderfully with roasted vegetables.
- Gluten-Free Option: Instead of a flour roux, make a slurry with 1 tablespoon of cornstarch and 1 tablespoon of cold water. Whisk this into the simmering stock at the end. Cook for 1-2 minutes until thickened. The texture will be slightly more gelatinous, but it works well.
- Dairy-Free: Skip the butter finish. Instead, whisk in a tablespoon of olive oil or coconut oil at the end for richness. It won’t be as glossy, but it will still be creamy.
- Spicy Kick: Add a pinch of cayenne pepper or a dash of hot sauce. This adds a subtle heat that cuts through the richness of the fat. It’s a surprising but delicious twist.
I once tried making this with vegetable stock instead of chicken stock because I was cooking for a vegetarian guest. It was good, but it lacked the depth. I ended up adding a spoonful of soy sauce to boost the umami. It was a happy accident.
Serving & Storage Suggestions
Gravy is best served warm and fresh. Pour it into a gravy boat or a jug with a spout for easy pouring. If you are serving a large group, keep the gravy warm in a thermos or a insulated container. This prevents it from getting cold and congealing on the plate.
Complementary Dishes: This gravy is perfect with mashed potatoes, roast chicken, or even stuffed mini peppers for a lighter option. It also pairs well with bread rolls for sopping up every last drop.
Storage: Leftover gravy can be stored in an airtight container in the refrigerator for up to 3 days. It will thicken significantly in the fridge because the fat solidifies. This is normal.
Reheating: To reheat, place the gravy in a saucepan over low heat. Add a splash of water or stock to thin it out, as it will have thickened in the fridge. Whisk constantly until it is smooth and warm. Do not microwave it, as it can separate and become oily. Stovetop reheating gives you the best control.
Freezing: You can freeze gravy for up to 3 months. Let it cool completely, then transfer to a freezer-safe container. Leave some headspace for expansion. Thaw in the fridge overnight and reheat gently on the stove. The texture might be slightly different, but the flavor will still be great.
Flavors develop over time, so if you make it a day ahead, taste it before serving. It might need a fresh pinch of pepper or a squeeze of lemon to brighten it up.
Nutritional Information & Benefits
Gravy is indulgent, but it doesn’t have to be a guilt trip. This Classic Herb Roasted Turkey Gravy offers a balance of savory flavor and moderate richness. Here is what you can expect per serving (approx. 1/4 cup):
- Calories: Around 60-80 calories, depending on the fat content of the drippings.
- Fat: 5-7 grams. Most of this comes from the turkey fat and butter. If you skim the fat well, you can reduce this significantly.
- Carbohydrates: 2-3 grams from the flour.
- Protein: 1-2 grams.
- Sodium: Varies based on stock and drippings. Using low-sodium stock helps keep this in check.
The fresh herbs like thyme and sage add antioxidants and anti-inflammatory properties. While gravy isn’t a health food, enjoying it in moderation is part of a balanced diet. It provides comfort and satisfaction, which is important for mental well-being during stressful holidays. For those watching their carb intake, this recipe is relatively low-carb, especially if you use a cornstarch slurry instead of flour.
Conclusion
Making gravy doesn’t have to be a source of stress. With this Classic Herb Roasted Turkey Gravy, you have a reliable, delicious recipe that can save your holiday dinner. It’s simple, flexible, and deeply satisfying. I encourage you to try it, even if you’re a nervous cook. Start with the drippings, trust the process, and don’t be afraid to taste and adjust.
Feel free to customize the herbs or the liquid to suit your preferences. This recipe is a foundation, not a rulebook. Share your results with me in the comments! Did you add wine? Did you use a different herb? I love hearing how you make it your own. And if you loved this, don’t forget to share it with your friends who are still terrified of making gravy.
Happy cooking, and may your table be full and your heart be warm. This gravy is more than just a sauce; it’s a memory in the making.
FAQs
Can I use turkey necks or wings to make the drippings?
Yes! If you don’t have a whole turkey, you can roast turkey wings or necks in the oven. Roast them until they are deeply browned, then scrape the pan and follow the same steps. It’s a great way to get flavor without buying a whole bird.
Why is my gravy too salty?
If the gravy is too salty, you can dilute it by adding more unsalted stock. You can also add a peeled potato to the gravy while it simmers; the potato will absorb some of the salt. Remove the potato before serving.
Can I make this gravy in advance?
Yes, you can make the base (roux + stock) up to two days ahead. Store it in the fridge. When you are ready to serve, reheat it gently, add the fresh herbs, and finish with the cold butter. This actually helps the flavors meld together.
What if I don’t have fresh herbs?
You can use dried herbs, but use half the amount. Dried herbs are more potent. Add them when you add the stock, not at the end, so they have time to rehydrate and release their flavor.
How do I fix gravy that is too thin?
Let it simmer for a few more minutes to reduce. If it’s still too thin, make a slurry with 1 teaspoon of cornstarch and 1 teaspoon of cold water. Whisk this into the simmering gravy and cook for 1 minute until thickened.
Pin This Recipe!

Classic Herb Roasted Turkey Gravy

A reliable, restaurant-quality herb roasted turkey gravy made from pan drippings, deglazed with wine, and finished with cold butter for a glossy, savory finish.
- Prep Time: 5 minutes
- Cook Time: 15 minutes
- Total Time: 20 minutes
- Yield: 4 servings 1x
- Category: Side Dish
- Cuisine: American
Ingredients
- 1/2 cup turkey pan drippings (fat)
- 1/4 cup all-purpose flour
- 2 cups low-sodium chicken stock
- 1/4 cup dry white wine (optional)
- 2 tablespoons unsalted butter, cold and cubed
- 1 tablespoon fresh thyme leaves
- 1 teaspoon fresh sage, finely chopped
- 1/2 teaspoon freshly cracked black pepper
- Salt to taste
Instructions
- Collect the drippings: Pour liquid from the roasting pan into a fat separator or bowl. Let sit for 2-3 minutes to separate fat. Measure out 1/2 cup of fat.
- Make the roux: Pour the 1/2 cup fat into a saucepan over medium heat. Sprinkle in the flour and whisk constantly for 2-3 minutes until light golden brown and nutty.
- Deglaze and add liquid: Pour in the white wine (if using) and scrape up brown bits from the pan. Slowly whisk in the chicken stock to prevent lumps.
- Simmer: Bring to a gentle simmer over medium-low heat. Cook for 5-7 minutes, stirring occasionally, until the gravy coats the back of a spoon.
- Add herbs: Stir in fresh thyme, sage, and black pepper. Taste and add salt only if needed.
- Finish: Remove from heat and whisk in the cold butter cubes one by one until emulsified and glossy.
- Strain (Optional): Pour through a fine-mesh strainer for a silky smooth texture, or serve rustic with visible herbs.
Notes
If you don’t have enough turkey fat, add butter to make up the difference. For a gluten-free option, use a cornstarch slurry instead of flour. For dairy-free, use olive oil or coconut oil instead of butter. If the gravy is too salty, add a peeled potato while simmering to absorb salt. If too thin, simmer longer or use a cornstarch slurry.
Nutrition
- Serving Size: 1/4 cup
- Calories: 70
- Sodium: 150
- Fat: 6
- Saturated Fat: 3
- Carbohydrates: 2
- Protein: 1
Keywords: turkey gravy, holiday recipe, thanksgiving side, herb gravy, pan drippings, easy gravy, from scratch gravy


