My six-year-old niece took one bite, stopped mid-chew, and said, “Auntie, these taste like clouds that whisper.” And honestly? I couldn’t have described them better myself. That’s the thing about these ghost meringue cookies — they’re impossibly light, barely-there sweet, and somehow feel a little bit magical. I’d spent the afternoon testing a batch for Halloween, worried they’d crack or deflate or just look like sad little blobs. Instead, they came out of the oven all puffed up and perfect, their chocolate chip eyes staring back at me like tiny, edible ghosts waiting to be devoured.
I wasn’t planning to make meringues that day. I had a carton of egg whites sitting in my fridge from a batch of lemon herb salmon sheet pan dinner I’d made the night before, and I hate wasting food. So I thought, what the heck, let’s try something spooky. Three hours later, I had a plate of ghost cookies and a niece who wouldn’t stop asking for “just one more.”
These aren’t complicated cookies. They’re actually pretty simple — egg whites, sugar, a little vanilla, and some mini chocolate chips. But the way they melt on your tongue? That’s the kind of thing that makes you close your eyes for a second. It’s not about being fancy. It’s about turning a few basic ingredients into something that feels like a treat, without spending all day in the kitchen. And honestly, that’s my favorite kind of recipe.
Why You’ll Love This Recipe
Let me tell you why these ghost meringue cookies have earned a permanent spot in my Halloween rotation. I’ve tested this recipe more times than I care to admit — cracked ghosts, deflated ghosts, ghosts that looked more like sad potatoes — and this version is the one that finally worked every single time.
- Quick & Easy: From start to finish, you’re looking at about 15 minutes of active prep time. The oven does the rest of the work while you go carve pumpkins or answer the door for trick-or-treaters.
- Simple Ingredients: You probably have everything in your kitchen right now. Eggs, sugar, vanilla, chocolate chips. That’s it. No fancy extracts, no specialty flours, no trips to three different stores.
- Perfect for Halloween: These are the cutest little ghosts you’ll ever make. Kids go nuts for them, adults pretend they’re too grown-up to care but secretly eat four, and they look incredible on a dessert table.
- Naturally Gluten-Free & Low-Fat: Since meringues are made with egg whites and sugar, there’s no flour or butter involved. That makes them a great option for friends with dietary restrictions.
- Unbelievably Delicious: The texture is what gets everyone. Crispy on the outside, chewy on the inside, and those little chocolate chip eyes add just enough richness to balance the sweetness.
What makes these different from other ghost cookies? Most recipes use royal icing or fondant, which tastes fine but takes forever to decorate. These ghosts are one-bowl, pipe-and-bake simple. No decorating skills required. You just pipe little ghost shapes, press in chocolate chips for eyes, and let the oven work its magic. The result is a cookie that looks like you spent hours on it — but you didn’t. And that’s the kind of recipe I live for.
What Ingredients You Will Need
This recipe uses basic pantry staples to create something surprisingly special. The magic is in the technique, not the grocery list. Here’s everything you need:
For the Ghost Meringues
- 3 large egg whites, room temperature (cold eggs are harder to whip to stiff peaks; let them sit out for 30 minutes first)
- ¾ cup (150g) granulated sugar (regular white sugar works best; don’t substitute with brown sugar or powdered sugar)
- ¼ teaspoon cream of tartar (this stabilizes the meringue and helps prevent cracking)
- ½ teaspoon vanilla extract (pure vanilla extract gives the best flavor, but imitation works fine too)
- ⅓ cup mini chocolate chips (I prefer Ghirardelli mini chips because they’re small enough to look like eyes without being overwhelming; regular chocolate chips are too big and heavy)
- Pinch of salt (just a tiny one — it balances the sweetness)
Ingredient Tips & Substitutions
Let’s talk about egg whites for a second. Fresh eggs separate more easily than older ones, but older egg whites actually whip up better because they’ve lost some moisture. So if your eggs have been in the fridge for a week, you’re in luck. If they’re fresh, just let them sit at room temperature a little longer before whipping.
Can’t have eggs? Unfortunately, meringues are hard to replicate without them. Aquafaba (the liquid from a can of chickpeas) can work, but the texture is different and they don’t hold their shape as well. I’d recommend sticking with regular egg whites for this recipe.
For the sugar, stick with granulated. Powdered sugar contains cornstarch, which can make your meringues gummy. And brown sugar has too much moisture — your ghosts will come out flat and sticky instead of light and airy.
The cream of tartar is optional but highly recommended. If you don’t have it, you can substitute with ½ teaspoon of lemon juice or white vinegar. Both help stabilize the egg whites and give you a more reliable result.
And those chocolate chips? Mini chips are non-negotiable here. Regular chips are too heavy and will sink into your meringues as they bake. If you only have regular chips, chop them into smaller pieces before pressing them into the ghosts.
Equipment Needed
You don’t need much for this recipe, which is part of why I love it. Here’s what you’ll need:
- Electric mixer (hand mixer or stand mixer both work; I’ve made these with a hand mixer for years and they turn out great)
- Large mixing bowl (glass or metal is best; plastic bowls can retain grease, which prevents egg whites from whipping properly)
- Baking sheet (a standard half-sheet pan works perfectly)
- Parchment paper (don’t skip this — meringues stick to everything else)
- Piping bag (or a zip-top bag with the corner snipped off; I’ve used both and honestly, the zip-top bag is easier for beginners)
- Large round piping tip (optional; if you’re using a piping bag, a Wilton 1A tip gives nice ghost shapes)
- Cooling rack (for letting the ghosts cool completely)
If you don’t have a piping bag, don’t run out and buy one. Just spoon the meringue into a sturdy zip-top bag, squeeze out the air, seal it, and snip off about ½ inch from one corner. Works like a charm. I actually prefer this method because there’s less cleanup.
One more thing — make sure your mixing bowl is completely clean and dry. Any trace of grease or yolk will prevent your egg whites from whipping up. I wipe my bowl with a little lemon juice on a paper towel before I start, just to be safe.
Preparation Method
Alright, let’s make some ghosts! I’ll walk you through every step so you don’t end up with cracked, deflated, or sad-looking cookies. Trust me, I’ve made all the mistakes so you don’t have to.
Step 1: Preheat and Prep
Preheat your oven to 200°F (95°C). Yes, that’s low — we’re drying these ghosts out, not baking them. Line a baking sheet with parchment paper and set it aside. Make sure your oven rack is in the center position.
Step 2: Whip the Egg Whites
Place your room-temperature egg whites and cream of tartar in a clean, dry mixing bowl. Start beating on medium speed until the mixture becomes foamy and bubbly — about 1-2 minutes. You should see tiny bubbles throughout, but no stiff peaks yet.
Now, here’s the important part: with the mixer still running on medium speed, start adding the sugar one tablespoon at a time. I know it’s tedious, but adding it slowly prevents the meringue from deflating later. Each spoonful should be fully incorporated before you add the next. This whole process takes about 3-4 minutes.
Once all the sugar is in, add the vanilla and pinch of salt, then increase the speed to high. Beat until stiff, glossy peaks form. How do you know when it’s ready? Lift the beater out of the bowl — the meringue should stand up straight without drooping. Also, rub a tiny bit between your fingers. If it feels gritty, keep beating. If it’s smooth, you’re done. This usually takes 5-7 minutes total.
Step 3: Pipe the Ghosts
Transfer the meringue to your piping bag fitted with a large round tip (or your zip-top bag with the corner snipped). Hold the bag perpendicular to the baking sheet, about ½ inch above the parchment paper.
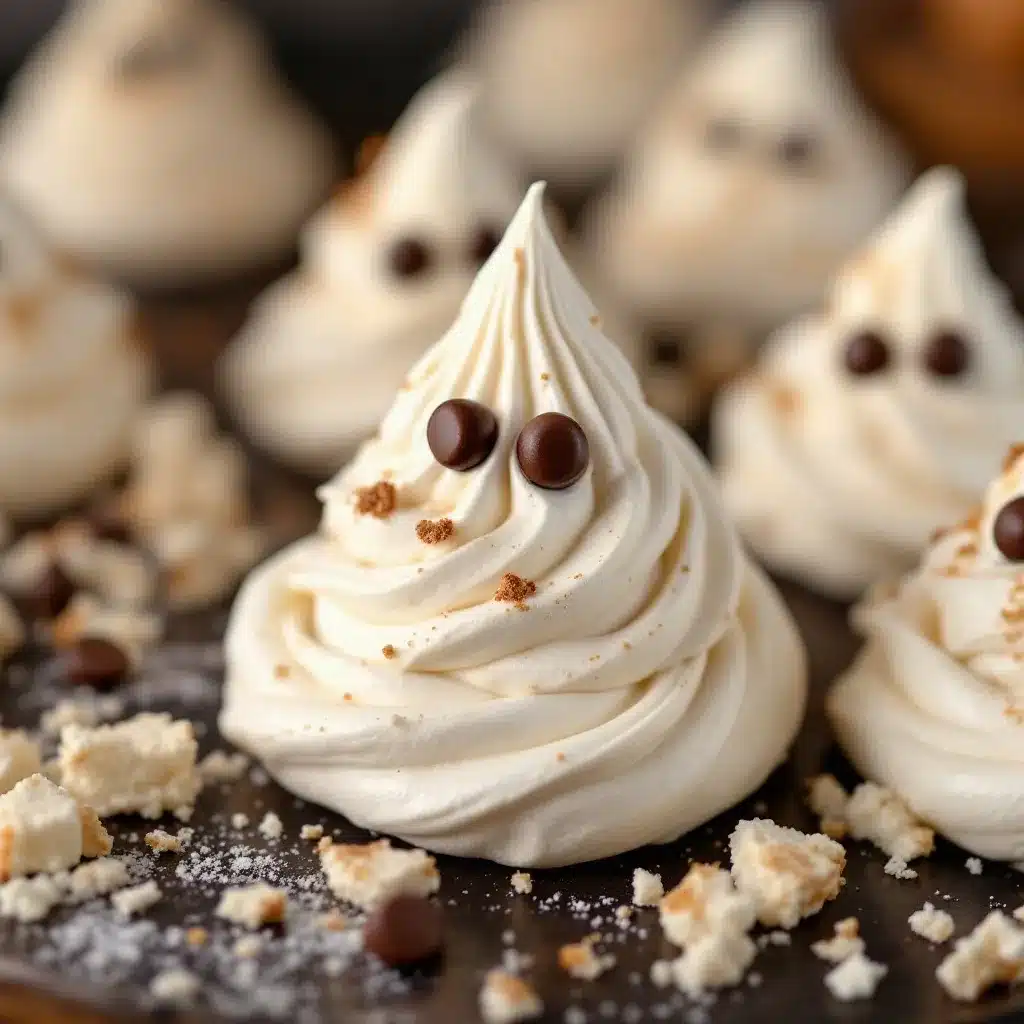
Pipe a tall, teardrop-shaped dollop of meringue — start with pressure, then gently lift the bag straight up and release. The meringue should form a little ghost body with a slight peak on top. Don’t worry if they look uneven; ghosts are supposed to be a little wonky. Space them about 1 inch apart — they won’t spread much, but you want some airflow around each one.
Step 4: Add the Eyes
This is the fun part. While the meringue is still wet, gently press two mini chocolate chips into each ghost for eyes. Don’t push them all the way in — just enough so they stick. If you push too deep, the chocolate chips will sink and disappear during baking.
You can also add a tiny smile with a third chip if you’re feeling creative, but I find the two-eye look is cuter and more ghost-like.
Step 5: Bake Low and Slow
Place the baking sheet in the preheated oven and bake for 60 minutes. Do NOT open the oven door during this time — the sudden temperature change can cause your ghosts to crack.
After 60 minutes, turn off the oven but leave the ghosts inside to cool completely. Let them sit in the closed oven for at least 1-2 hours, or overnight if you have time. This drying process gives them that perfect crispy texture.
Step 6: Cool and Enjoy
Once the oven is completely cool and the ghosts have been sitting for at least an hour, remove them from the oven. They should lift easily off the parchment paper. If they stick, they need more drying time — pop them back in the turned-off oven for another 30 minutes.
Let them cool completely on a wire rack before serving. And here’s a pro tip: don’t make these on a humid day. Meringues absorb moisture from the air and can turn sticky. A dry, cool day is ideal.
Cooking Tips & Techniques
I’ve made this recipe probably twenty times now, and I’ve learned a few things the hard way. Here’s what I wish someone had told me before my first attempt:
Humidity is your enemy. Meringues are basically sugar sponges. If you live in a humid climate, wait for a dry day to make these. I once tried making them during a rainstorm and ended up with sticky, chewy blobs instead of crispy ghosts. Not cute.
Don’t over-whip. I know I said to beat until stiff peaks form, but there’s a fine line. Over-whipped meringue looks grainy and dry, and it’ll deflate in the oven. Stop as soon as the peaks are stiff and glossy. If you see the mixture starting to separate or look curdled, you’ve gone too far.
Room temperature eggs matter. Cold eggs take forever to whip and never reach full volume. Set your eggs out on the counter for 30 minutes before you start. If you forget, place them in a bowl of warm water for 5 minutes — that works in a pinch.
No grease allowed. Even a tiny bit of yolk in your egg whites will ruin the whole batch. Separate your eggs carefully, and if any yolk breaks into the whites, start over. I learned this the hard way after trying to fish out a speck of yolk with a spoon. Spoiler: it didn’t work.
Let them cool in the oven. This is the most important tip. Don’t rush the cooling process. If you pull the ghosts out while they’re still warm, they’ll collapse into flat little pancakes. Patience is key here.
Variations & Adaptations
Once you’ve mastered the basic ghost, you can have some fun with variations. Here are a few I’ve tried:
Chocolate Ghosts
Swap 2 tablespoons of the granulated sugar with unsweetened cocoa powder. Sift it together with the sugar before adding it to the egg whites. You’ll get chocolate-flavored ghosts with a subtle brown tint — still cute, but with a richer flavor.
Pumpkin Spice Ghosts
Add ½ teaspoon pumpkin pie spice and ¼ teaspoon cinnamon to the sugar before whipping. The spices give the ghosts a warm, fall-inspired flavor that pairs perfectly with the chocolate chips. I made these for a Halloween party last year and they disappeared in minutes.
Peppermint Ghosts
Swap the vanilla extract for ¼ teaspoon peppermint extract. Add a drop of red food coloring to create a pink tint, or leave them white for a wintery look. These are great for Christmas too, not just Halloween.
Vegan Version
Replace the egg whites with aquafaba (the liquid from a can of chickpeas). Use 3 tablespoons of aquafaba per egg white. The texture is slightly different — more marshmallow-like — but they still puff up and get crispy. Just be sure to whip the aquafaba longer than you would egg whites, about 8-10 minutes.
Gluten-Free Note
These are naturally gluten-free since there’s no flour involved. Just double-check your chocolate chips — some brands process them on shared equipment with wheat. I use Enjoy Life mini chips for a guaranteed gluten-free option.
Serving & Storage Suggestions
These ghosts are best served the same day you make them, but they’ll keep for a few days if stored properly. Here’s what I’ve found works best:
Serving: Arrange the ghosts on a platter or cake stand for a spooky Halloween display. They look amazing next to a bowl of creamy chocolate avocado pudding — the contrast between light, crispy meringue and rich, smooth pudding is incredible. You can also serve them alongside a refreshing cucumber mint green tea cooler for a non-alcoholic Halloween party drink.
Storage: Store leftover ghosts in an airtight container at room temperature. Don’t refrigerate them — the moisture will make them sticky. They’ll stay crispy for 3-4 days if stored properly. If they start to soften, pop them back in a 200°F oven for 10 minutes to re-crisp.
Freezing: You can freeze these ghosts for up to 2 months. Place them in a single layer in a freezer-safe container with parchment paper between layers. Thaw at room temperature for about 30 minutes before serving. They won’t be quite as crispy as fresh ones, but they’re still delicious.
Reheating: If your ghosts lose their crunch, place them on a baking sheet in a 200°F oven for 5-10 minutes. Let them cool completely before serving. Don’t use the microwave — it’ll turn them into sticky, chewy messes.
Nutritional Information & Benefits
Let’s be real — these are cookies, not health food. But compared to most Halloween treats, they’re surprisingly light. Here’s the nutritional breakdown per ghost (based on making about 24 cookies):
| Nutrient | Amount per Ghost |
|---|---|
| Calories | 45 |
| Total Fat | 1g |
| Saturated Fat | 0.5g |
| Carbohydrates | 9g |
| Sugar | 8g |
| Protein | 1g |
| Sodium | 10mg |
These ghosts are naturally low in fat and contain no butter or oil. The main ingredient is egg whites, which are a good source of protein and contain no cholesterol. That said, they’re still sugary treats — enjoy them in moderation.
If you’re watching your sugar intake, you can reduce the sugar by 2 tablespoons, but the texture will be slightly less crispy. I wouldn’t recommend reducing it further than that, or the meringue won’t hold its shape.
For those with dietary restrictions: these are gluten-free, nut-free, and dairy-free. They do contain eggs, so they’re not suitable for vegans (unless you use the aquafaba variation). And as always, check your chocolate chip labels if you have specific allergy concerns.
Conclusion
These ghost meringue cookies have become a Halloween tradition in my house, and I hope they become one in yours too. They’re simple enough to make with kids, impressive enough to serve at parties, and delicious enough that you’ll find yourself sneaking one every time you walk through the kitchen.
The best part? They’re endlessly customizable. Add spices, change the extracts, experiment with different chip colors — there’s no wrong way to make these. I’ve seen versions with pink eyes for Valentine’s Day, green eyes for St. Patrick’s Day, and even rainbow sprinkles for birthday parties. Once you know the basic technique, the possibilities are endless.
I’d love to hear how yours turn out! Drop a comment below and let me know if you tried any variations, or tag me in your photos if you share them online. And if you’re looking for more Halloween inspiration, check out our full recipe collection for more spooky-season favorites.
Happy Halloween, and happy baking!
Frequently Asked Questions
Why did my meringue cookies crack?
Cracking is usually caused by sudden temperature changes. Make sure you’re not opening the oven door during baking, and let the ghosts cool completely in the turned-off oven. Humidity can also cause cracking, so avoid making these on rainy days.
Can I use liquid egg whites from a carton?
I don’t recommend it. Carton egg whites are pasteurized, which changes their protein structure and makes them harder to whip into stiff peaks. Fresh egg whites from whole eggs give you the best results.
How do I know when the meringue is whipped enough?
Lift the beater out of the bowl — the meringue should stand up in stiff, glossy peaks without drooping. You can also rub a tiny bit between your fingers. If it feels smooth and not gritty, it’s ready. If it feels grainy, keep beating.
Can I make these ahead of time?
Absolutely! These ghosts store well for 3-4 days in an airtight container at room temperature. You can also freeze them for up to 2 months. Just be sure they’re completely cool and dry before storing.
Why are my ghosts sticky?
Sticky meringues are usually a sign of humidity or under-baking. Make sure you’re baking them long enough at a low temperature, and let them cool completely in the oven. If you live in a humid climate, try adding an extra 15-20 minutes of drying time in the turned-off oven.
Pin This Recipe!
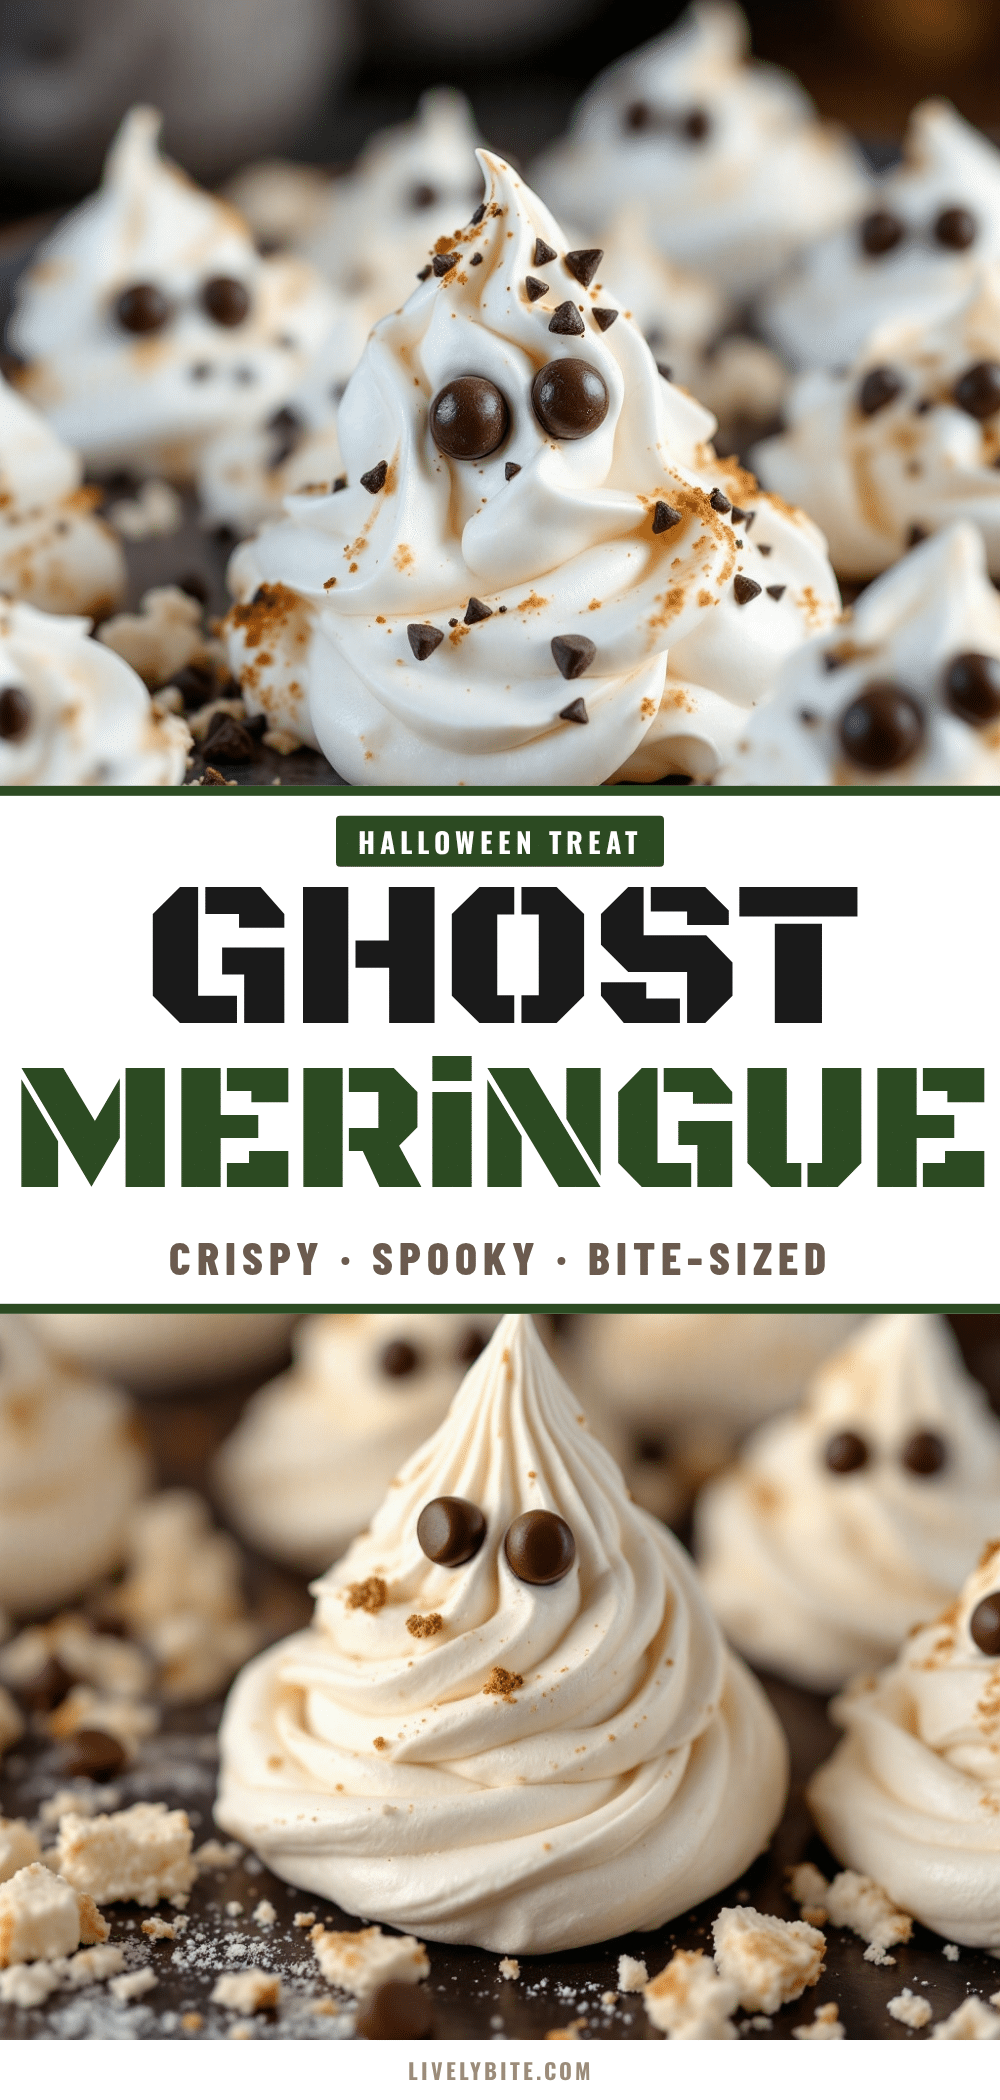
Easy Ghost Meringue Cookies with Chocolate Chip Eyes

These ghost meringue cookies are impossibly light, barely-there sweet, and perfect for Halloween. Made with simple ingredients like egg whites, sugar, and mini chocolate chips, they’re naturally gluten-free and low-fat.
- Prep Time: 15 minutes
- Cook Time: 60 minutes
- Total Time: 1 hour 15 minutes (plus cooling time)
- Yield: 24 cookies 1x
- Category: Dessert
- Cuisine: American
Ingredients
- 3 large egg whites, room temperature
- ¾ cup (150g) granulated sugar
- ¼ teaspoon cream of tartar
- ½ teaspoon vanilla extract
- ⅓ cup mini chocolate chips
- Pinch of salt
Instructions
- Preheat oven to 200°F (95°C). Line a baking sheet with parchment paper.
- Place room-temperature egg whites and cream of tartar in a clean, dry mixing bowl. Beat on medium speed until foamy and bubbly, about 1-2 minutes.
- With mixer running on medium speed, add sugar one tablespoon at a time, fully incorporating each addition before adding the next (about 3-4 minutes).
- Add vanilla and salt, then increase speed to high. Beat until stiff, glossy peaks form, about 5-7 minutes. The meringue should stand up straight without drooping and feel smooth between your fingers.
- Transfer meringue to a piping bag fitted with a large round tip (or a zip-top bag with a ½-inch corner snipped). Pipe tall, teardrop-shaped dollops onto the prepared baking sheet, spacing them about 1 inch apart.
- While meringue is still wet, gently press two mini chocolate chips into each ghost for eyes. Do not push them all the way in.
- Bake for 60 minutes without opening the oven door.
- Turn off the oven and leave ghosts inside to cool completely, at least 1-2 hours or overnight.
- Once oven is cool, remove ghosts from parchment paper. If they stick, return to turned-off oven for another 30 minutes. Cool completely on a wire rack before serving.
Notes
Do not make on humid days. Ensure bowl is completely clean and grease-free. Let eggs come to room temperature before whipping. Do not open oven door during baking. Let ghosts cool completely in turned-off oven to prevent cracking.
Nutrition
- Serving Size: 1 ghost cookie
- Calories: 45
- Sugar: 8
- Sodium: 10
- Fat: 1
- Saturated Fat: 0.5
- Carbohydrates: 9
- Protein: 1
Keywords: ghost meringue cookies, Halloween cookies, meringue cookies, gluten-free cookies, low-fat cookies, easy Halloween treats


