You know the type. The ones that melt in your mouth so fast you can barely register the flavor, or worse, the ones that are so airy they feel like eating sweetened air. I had been looking for a meringue that actually had some substance, some crunch, and a bit of personality before I found this ghost cookie recipe. It wasn’t about being frustrated, just persistent. I wanted something that felt like a treat, not just a dessert component.
The gap was real. Halloween decorations were everywhere, but the edible options were usually filled with artificial colors and preservatives. I wanted to make something that looked spooky but tasted like a high-end bakery item. Let’s face it, store-bought meringues are often too fragile for kids to handle and too dry for adults who want a bit of chew. I needed a cookie that could survive a lunchbox and a party platter.
So, I started experimenting with cornstarch and a slightly lower baking temperature. The goal was to create a shell that snapped when you bit into it but held its shape perfectly. It took a few batches. Some were too soft, some cracked too much. But then came the batch where the texture was just right—crispy on the outside, slightly tender inside, and sturdy enough to hold those chocolate eyes without sliding off.
I remember pulling the tray out of the oven and seeing them standing there, little white ghosts in the dim kitchen light. They didn’t look like failures. They looked like magic. That was the moment I knew this was the one. It stuck because it solved a problem I didn’t even know I had: the need for a Halloween treat that doesn’t compromise on quality or taste. Now, every October, this is the first recipe I pull out.
Why You’ll Love This Recipe
There is a specific kind of joy in making meringues that feels almost meditative. You whip the whites, you fold in the sugar, and you wait. But with these Crispy Ghost Meringue Cookies with Chocolate Eyes, the payoff is instant visual gratification. I’ve tested this recipe dozens of times, adjusting the humidity levels and oven temperatures, and this version is the most reliable one I’ve found. It’s not just about looking cute for Instagram, though they certainly do that. It’s about the texture and the simplicity.
- Quick & Easy: The active prep time is under 15 minutes. The rest is just waiting for the oven to do its work, which is perfect for busy weeknights or last-minute Halloween prep.
- Simple Ingredients: You likely already have egg whites, sugar, cornstarch, and cream of tartar in your kitchen. No fancy grocery trips needed for exotic flours or rare extracts.
- Perfect for Parties: These are great for Halloween potlucks, trick-or-treat favors, or cozy dinner parties where you want a light, non-heavy dessert option.
- Crowd-Pleaser: Always gets rave reviews from kids and adults alike. Kids love the spooky faces, and adults appreciate the sophisticated, non-sweet finish.
- Unbelievably Delicious: The texture and flavor combo is next-level comfort food. It’s crisp, airy, and slightly sweet without being cloying.
What makes this recipe different from the rest is the addition of cornstarch. Most traditional meringues skip it, but here it acts as a stabilizer that creates that signature “snap” when you bite into the ghost. It prevents the cookies from becoming too chewy, which is a common issue with meringues in humid climates. Whether it is a special technique like the double-bake method I’ll share, or just the perfectly balanced sweetness, this isn’t just another version—it’s your best version.
This recipe isn’t just good—it is the kind that makes you close your eyes after the first bite. It’s comfort food reimagined for the spooky season. It’s perfect for impressing guests without stress, or turning a simple meal into something memorable. You get the satisfaction of baking from scratch with the ease of a no-bake approach (once they’re in the oven, you’re free).
What Ingredients You Will Need
This recipe uses simple, wholesome ingredients to deliver bold flavor and satisfying texture without the fuss. The beauty of meringue lies in its purity; there are very few components, so each one plays a critical role. You don’t need expensive chocolate or exotic spices. The magic happens through technique and the right ratio of sugar to egg white.
- Egg Whites: 3 large egg whites, room temperature. Room temperature whites whip up faster and achieve greater volume. I prefer pastured eggs for their richer color, but standard large eggs work perfectly fine.
- Granulated Sugar: 3/4 cup (150g). Fine granulated sugar dissolves more easily into the egg whites than coarse sugar. Do not substitute with brown sugar, as the molasses will weigh down the whites and prevent them from stiffening.
- Cornstarch: 1 tablespoon. This is the secret weapon for crispiness. It absorbs excess moisture and helps create that brittle, candy-like shell. I recommend using a reputable brand like Argo for consistent results.
- Cream of Tartar: 1/4 teaspoon. This acid stabilizes the egg white proteins, allowing them to hold their shape better. It’s cheaper and more effective than lemon juice for this purpose.
- Vanilla Extract: 1/2 teaspoon. Use pure vanilla extract, not imitation. It adds a subtle warmth that balances the sweetness. If you are allergic to vanilla, you can skip it, but it adds depth.
- White Food Coloring Gel: A few drops. Gel coloring is essential here. Liquid food coloring adds too much water, which can ruin the meringue’s structure. Look for a concentrated white or ivory gel for that ghostly pallor.
- Mini Chocolate Chips or Melting Wafers: 1/4 cup. These are used to create the eyes. Semi-sweet or milk chocolate both work. I find that melting wafers are easier to work with because they have a higher fat content and melt smoothly without seizing.
- Optional: White Chocolate Drizzle: For extra detail, you can drizzle a tiny bit of melted white chocolate for a “sheet” effect, but plain chocolate eyes are classic and sufficient.
If you have guests with dietary restrictions, note that these are naturally gluten-free and can be made dairy-free by using dairy-free chocolate chips. However, they are not vegan due to the egg whites. For a vegan version, you would need to substitute with aquafaba, but the texture will be slightly different and softer.
Equipment Needed
You don’t need a lot of fancy gear to make these ghosts. A stand mixer or a hand mixer is highly recommended. Trying to whip egg whites by hand is exhausting and often results in inconsistent peaks. I’ve tried both, and the stand mixer saves my arms and ensures those stiff peaks.
- Baking Sheets: Two standard baking sheets. Line them with parchment paper or silicone baking mats. Parchment paper is my go-to because it’s cheap and easy to replace. Silicone mats are great for reusability but can sometimes cause meringues to spread slightly more.
- Piping Bags: Disposable or reusable piping bags. I prefer disposable ones for cleanup, but reusable ones are sturdier for thick mixtures. If you don’t have a bag, you can use a ziplock bag with the corner snipped off.
- Piping Tips: A large round tip (like Wilton 1A) or a star tip. A round tip gives a smoother ghost shape, while a star tip adds texture that looks like little ruffles or sheets.
- Microwave-Safe Bowl: For melting the chocolate. If you don’t have one, a glass measuring cup works well.
- Offset Spatula: Useful for smoothing out the parchment paper and scraping down the sides of the mixing bowl.
Budget-friendly tip: If you don’t have a mixer, a vigorous whisk and a lot of elbow grease will work, but it will take 10-15 minutes of continuous whipping. Also, ensure all your equipment is completely clean and free of any grease or yolk, as even a tiny drop of fat can prevent the egg whites from whipping up properly.
Preparation Method
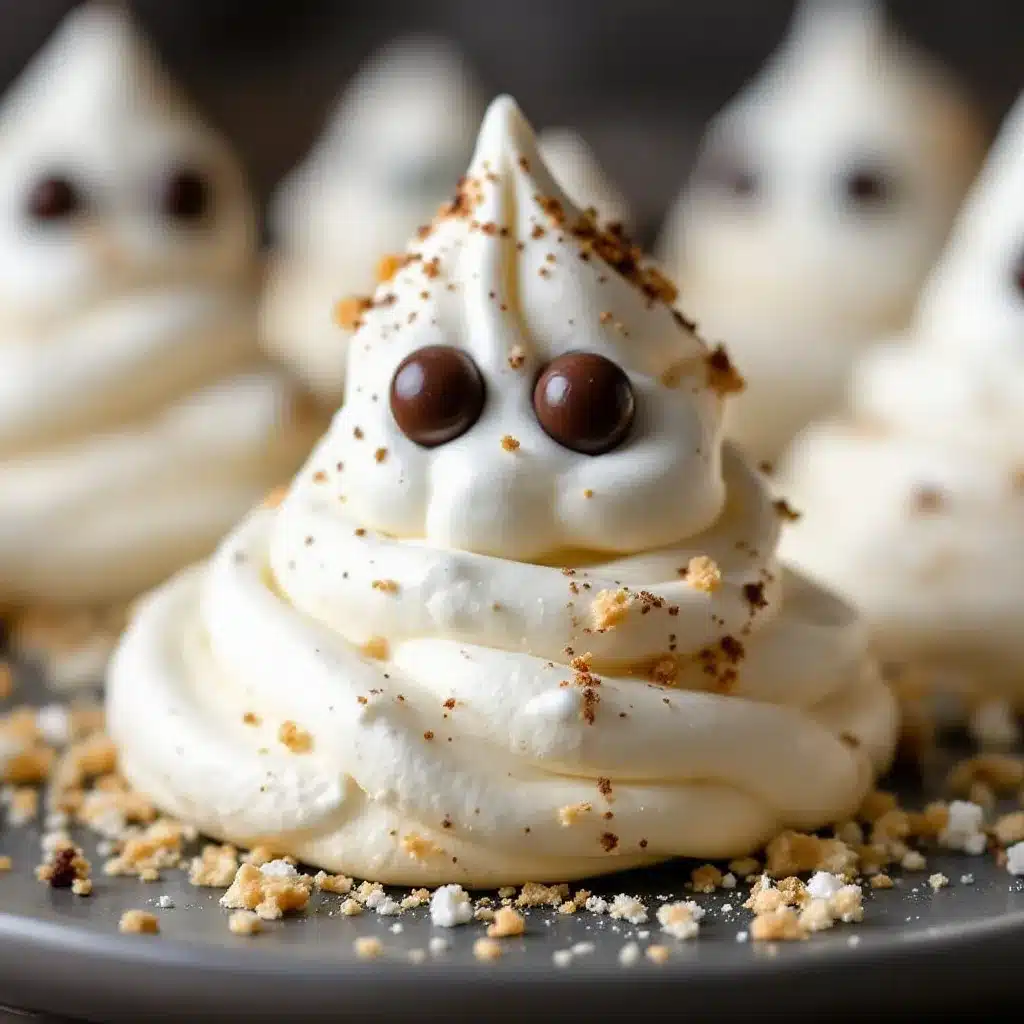
Making these cookies is straightforward, but precision matters. Here is how to get them right every time.
- Prepare the Oven and Sheets: Preheat your oven to 225°F (107°C). This low temperature is crucial. It dries out the meringues slowly without browning them. Line your baking sheets with parchment paper. Ensure the paper is flat and smooth; wrinkles can cause the cookies to stick or bake unevenly.
- Separate the Eggs: Separate 3 large egg whites from the yolks. Do this carefully. Even a tiny speck of yolk in the whites will stop them from whipping. Place the whites in the bowl of your stand mixer. If you are using a hand mixer, use a deep, narrow bowl to help contain the whites.
- Whip the Egg Whites: Add the cream of tartar to the egg whites. Start mixing on medium-low speed to break up the whites, then gradually increase to high speed. Whip until soft peaks form. This means when you lift the beaters, the peaks curl over slightly. This usually takes about 2-3 minutes.
- Add the Sugar Gradually: With the mixer still running on high, slowly add the granulated sugar, one tablespoon at a time. Wait until each addition is incorporated before adding the next. This process takes about 5-7 minutes. Do not rush this step. Adding sugar too quickly can result in a grainy texture.
- Check for Stiff Peaks: Continue whipping until stiff peaks form. This means when you lift the beaters, the peaks stand straight up without curling. The mixture should be glossy and smooth, not dull or grainy. Add the vanilla extract and a few drops of white gel food coloring. Mix briefly to combine. The color should be a subtle off-white, not bright white, for a more realistic ghost look.
- Prepare the Piping Bag: Fit your piping bag with your chosen tip. Scoop the meringue into the bag. If using a disposable bag, twist the top to secure the mixture. If using a reusable bag, fold the top over your hand for stability.
- Pipe the Ghosts: Hold the piping bag perpendicular to the baking sheet. Squeeze gently to release a mound of meringue. As you pull away, twist the bag slightly to create a tapered top, resembling a ghost’s head. Space them about 2 inches apart, as they won’t spread much but need room for air circulation. You can also pipe them in a more elongated shape if you prefer a classic sheet-ghost look.
- Bake: Place the sheets in the oven. Bake for 45-60 minutes. The cookies are done when they are dry to the touch and release easily from the parchment paper. They should not bend or feel soft in the center. If they feel slightly soft, bake for another 5-10 minutes. Turn off the oven and leave the cookies inside with the door slightly ajar (use a wooden spoon to prop it open) for another 30-60 minutes to cool completely. This residual heat helps dry them out further.
- Melt the Chocolate: While the cookies cool, melt the chocolate chips or wafers. Place them in a microwave-safe bowl and heat in 30-second intervals, stirring between each, until smooth. Alternatively, use a double boiler on the stove. Let the chocolate cool slightly so it thickens a bit, making it easier to pipe.
- Add the Eyes: Transfer the melted chocolate to a small piping bag or a ziplock bag with the corner snipped off. Pipe two small dots for eyes on each cooled ghost. For a spooky look, you can add a tiny dot of white chocolate or a second layer of dark chocolate inside the eyes for pupils, but simple black dots are classic. Let the chocolate set at room temperature or in the fridge for 10 minutes.
Troubleshooting tip: If your meringues weep (release liquid), it’s likely because the sugar wasn’t fully dissolved or the oven temperature was too high. Ensure you whip until the sugar is completely dissolved by rubbing a bit of the mixture between your fingers; it should feel smooth, not gritty.
Cooking Tips & Techniques
I’ve made my fair share of meringue disasters, so here are some lessons learned the hard way. First, humidity is your enemy. Meringues absorb moisture from the air, which makes them soft and sticky. If you live in a humid climate, try making these on a dry day, or keep your oven door closed as much as possible during baking. Adding the cornstarch helps, but it’s not a magic bullet against high humidity.
Another common mistake is under-whipping. People often stop when they see peaks, but meringue needs to be whipped until it’s glossy and holds its shape firmly. If it’s under-whipped, it will deflate in the oven and lose its ghostly shape. Over-whipping is rare with egg whites, but if you keep whipping after stiff peaks, the whites can start to look curdled. Stop as soon as you get those stiff, glossy peaks.
Timing is everything. Don’t open the oven door during the first 30 minutes of baking. The sudden drop in temperature can cause the cookies to crack or collapse. Use the oven light to check on them instead. Also, be patient with the cooling process. Removing them while they are still warm will result in breakage. Let them cool completely in the turned-off oven with the door ajar.
For consistency, weigh your ingredients. Volume measurements for sugar can vary significantly depending on how packed it is. Using a kitchen scale ensures you get the right ratio of sugar to egg white, which is critical for stability. I always weigh my sugar to 150g for three large whites. It’s a small step that makes a big difference in the final texture.
Variations & Adaptations
While the classic white ghost is iconic, there are fun ways to tweak this recipe. For a Halloween twist, try using orange gel food coloring for a “pumpkin” ghost, or purple for a more eerie vibe. You can also add a drop of red food coloring to the chocolate eyes to make them look bloody for a horror-themed party.
If you want a flavor variation, swap the vanilla extract for almond extract. Almond pairs beautifully with the sweetness of the meringue and adds a sophisticated, marzipan-like note. You can also add a pinch of cinnamon or nutmeg to the sugar for a spiced ghost, which is great for autumn themes.
For a gluten-free adaptation, this recipe is already gluten-free, but just double-check your cornstarch and chocolate chips to ensure they are certified gluten-free if you have celiac disease. For a dairy-free version, use dairy-free chocolate chips or melting wafers. Most dark chocolates are naturally dairy-free, but always check the label.
I once tried making these with stevia instead of sugar, but the texture was completely different—it was more like a foam than a crisp cookie. Sugar provides structure and crunch, so I don’t recommend substituting it with low-calorie sweeteners unless you are okay with a very different result. For a seasonal twist, you can dip the bottom of the ghost in melted white chocolate to look like it’s standing in snow, especially if you serve them in December as well.
Serving & Storage Suggestions
These cookies are best served at room temperature. Cold meringues can become chewy, so let them sit out for 10 minutes before serving. They make a beautiful addition to a Halloween dessert table, especially when arranged on a platter with other spooky treats. Pair them with a cup of hot tea or coffee to balance the light sweetness.
For storage, keep the cookies in an airtight container at room temperature. They will stay crisp for up to 2 weeks. If you live in a humid area, store them in the pantry with a packet of silica gel or a few sheets of dry paper towel to absorb excess moisture. Do not refrigerate them, as the fridge is a humid environment and will soften the cookies.
If you need to make them ahead, you can prepare the meringue and pipe them onto baking sheets up to 24 hours in advance. Cover them loosely with plastic wrap and leave them at room temperature. This actually helps them dry out a bit more before baking. Once baked and cooled, they can be stored for weeks, making them a great make-ahead treat for parties.
The flavors don’t develop significantly over time, as meringue is mostly sugar and air, but the texture remains stable if stored correctly. Avoid storing them near strong-smelling foods, as meringues can absorb odors. They are best enjoyed fresh, but they do hold up well if you need to prepare for a large gathering.
Nutritional Information & Benefits
These cookies are relatively low in calories compared to other desserts, primarily because they are mostly air and sugar. One ghost cookie contains approximately 30-40 calories, depending on the size. They are naturally gluten-free and can be made dairy-free, making them suitable for many dietary restrictions. However, they are high in sugar, so enjoy them in moderation.
The egg whites provide a small amount of protein, which is a nice bonus for a sweet treat. They are also low in fat, making them a lighter option for those watching their intake. While they aren’t a health food, they are a better alternative to heavy cakes or cookies with high butter content. I appreciate that they satisfy a sweet tooth without leaving you feeling overly full or sluggish.
For those with egg allergies, this recipe is not suitable. Egg whites are the primary structure, and there is no direct substitute that replicates the same texture. However, for most people, these cookies are a safe and delightful treat. They are free from nuts if you use nut-free chocolate, making them safer for school parties, though always check individual allergen labels.
From a wellness perspective, I like that these cookies allow for portion control. Because they are light and airy, you can enjoy a few without overindulging. They are a great way to introduce children to baking, as the process is fun and the results are visually rewarding. They encourage creativity and patience, which are valuable skills in the kitchen.
Conclusion
These Crispy Ghost Meringue Cookies with Chocolate Eyes are more than just a Halloween decoration; they are a delicious, crisp treat that brings joy to the spooky season. The combination of the airy meringue and the sharp chocolate eyes creates a perfect balance of textures and flavors. I love this recipe because it’s simple yet impressive, allowing you to create something magical with minimal effort.
I encourage you to customize them to fit your theme. Try different colors, shapes, or even add a drizzle of white chocolate for extra flair. These cookies are versatile and forgiving, so don’t be afraid to experiment. Whether you are a seasoned baker or a beginner, this recipe will give you confidence and delicious results.
Share your creations with me! I’d love to see your spooky ghosts. Leave a comment below with your tips or variations. If you make this recipe, tag me on social media so I can see your masterpieces. Don’t forget to share this post with your friends who love Halloween baking. Happy haunting!
Frequently Asked Questions
Why are my meringues soft and chewy instead of crispy?
This usually happens if the oven temperature is too high or if the cookies are removed before they are fully dry. Ensure your oven is calibrated correctly and bake them at a low temperature (225°F). Also, let them cool completely in the turned-off oven with the door ajar to ensure all moisture has evaporated.
Can I use liquid food coloring instead of gel?
It’s not recommended. Liquid food coloring adds extra water to the meringue, which can prevent it from whipping properly and result in a soft, weepy texture. Gel food coloring is concentrated and adds color without adding moisture, ensuring your ghosts stay crisp.
How long do these cookies last?
Stored in an airtight container at room temperature, these cookies will stay crisp for up to 2 weeks. If you live in a humid climate, they may soften faster, so store them in a dry place or add a desiccant packet to the container.
Can I make these ahead of time?
Yes, you can pipe the meringues and let them air dry for up to 24 hours before baking. This helps them form a skin, which can prevent cracking in the oven. Once baked and cooled, they can be stored for weeks, making them a great make-ahead treat.
What if I don’t have cream of tartar?
You can substitute cream of tartar with 1/2 teaspoon of lemon juice or white vinegar. However, cream of tartar is preferred because it stabilizes the egg whites without adding a distinct flavor. The acidity helps the proteins hold their shape, resulting in a more stable meringue.
Pin This Recipe!
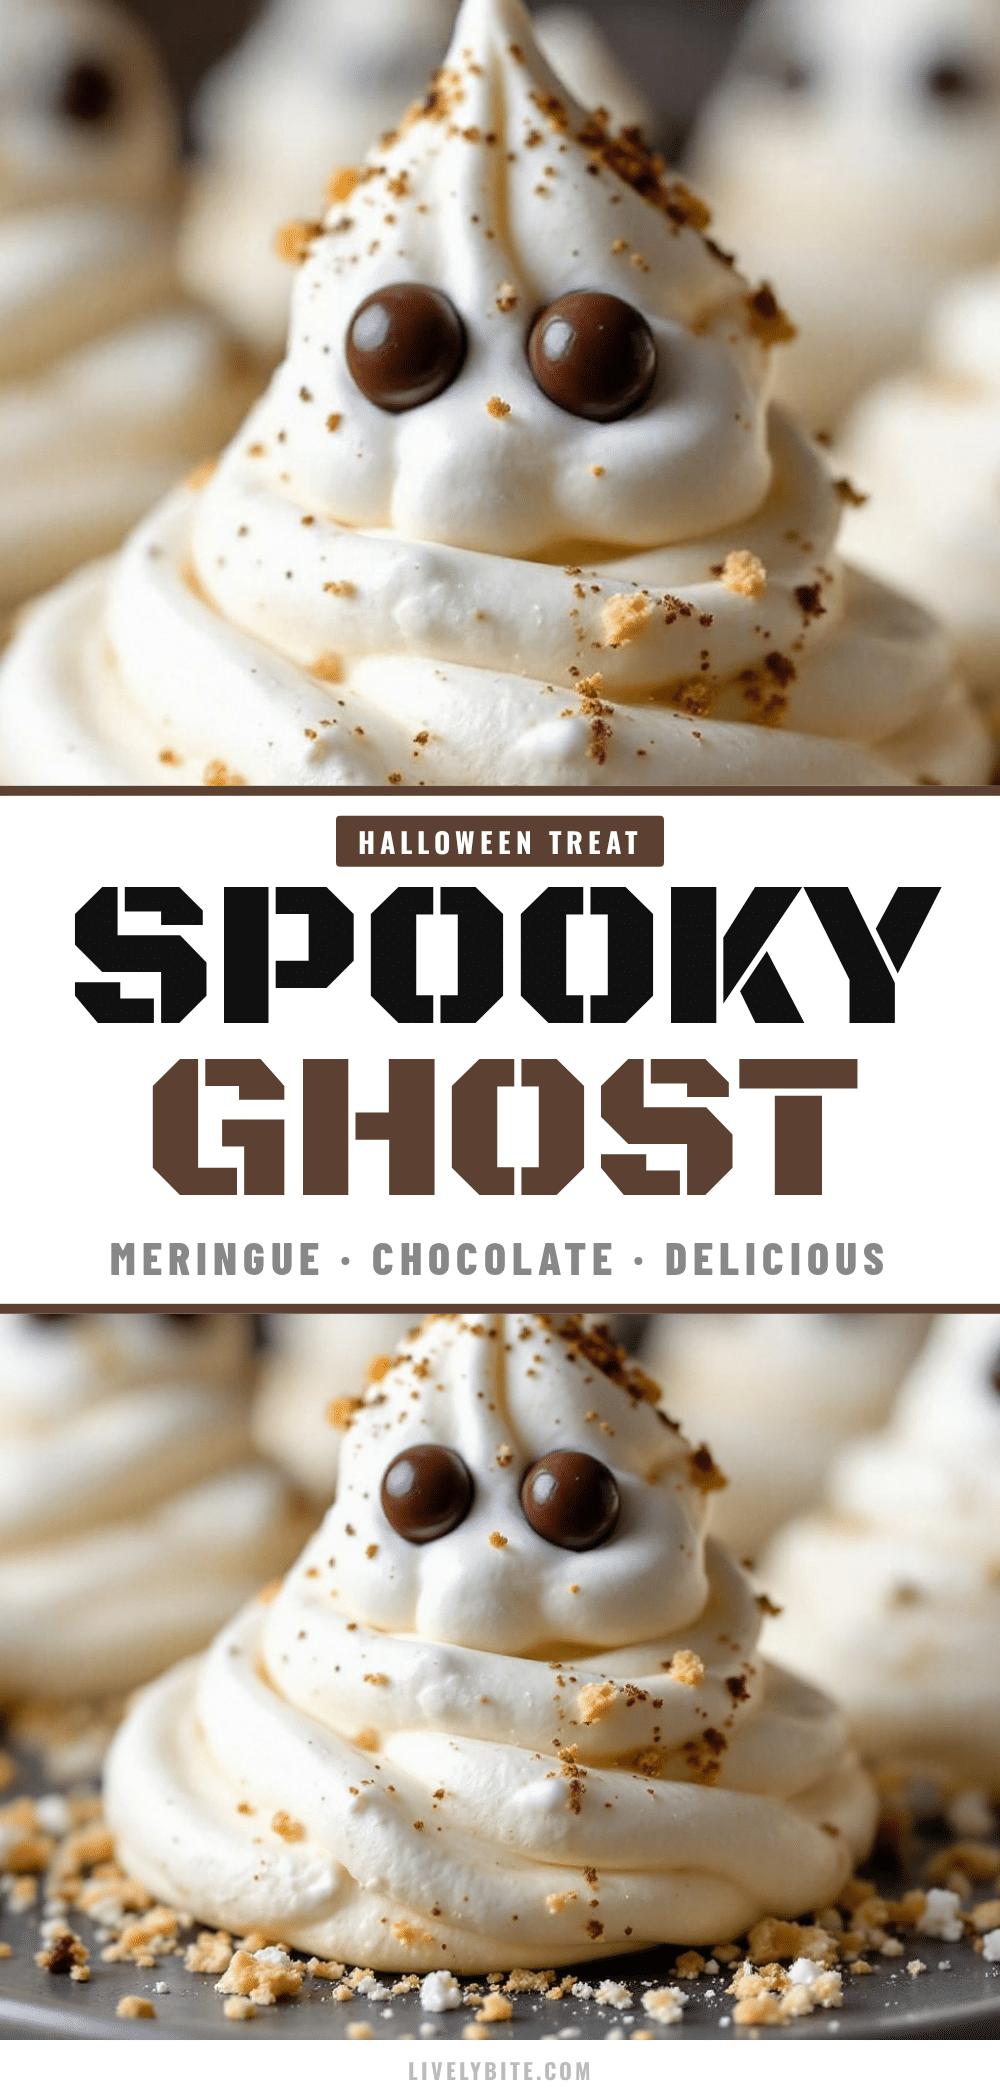
Crispy Ghost Meringue Cookies: Easy Halloween Treat
These crispy ghost meringue cookies feature a crunchy exterior and tender interior, stabilized with cornstarch for a perfect snap. They are decorated with chocolate eyes for a spooky, high-quality Halloween treat that is easy to make and naturally gluten-free.
- Prep Time: 15 minutes
- Cook Time: 45-60 minutes
- Total Time: 1 hour 15 minutes
- Yield: Approximately 12-15 cookies 1x
- Category: Dessert
- Cuisine: American
Ingredients
- 3 large egg whites, room temperature
- 3/4 cup (150g) granulated sugar
- 1 tablespoon cornstarch
- 1/4 teaspoon cream of tartar
- 1/2 teaspoon pure vanilla extract
- A few drops white food coloring gel
- 1/4 cup mini chocolate chips or melting wafers
Instructions
- Preheat oven to 225°F (107°C). Line two baking sheets with parchment paper.
- Separate 3 large egg whites into a stand mixer bowl, ensuring no yolk is present.
- Add cream of tartar to egg whites. Whip on medium-low, then increase to high speed until soft peaks form (about 2-3 minutes).
- With mixer on high, slowly add granulated sugar one tablespoon at a time, waiting for incorporation before adding the next (about 5-7 minutes).
- Whip until stiff, glossy peaks form. Add vanilla extract and white gel food coloring; mix briefly to combine.
- Fit a piping bag with a large round or star tip. Pipe ghost shapes onto prepared baking sheets, spacing them 2 inches apart.
- Bake for 45-60 minutes until dry to the touch and releasing easily from parchment.
- Turn off the oven and leave cookies inside with the door slightly ajar for 30-60 minutes to cool completely.
- Melt chocolate chips or wafers in 30-second intervals in a microwave-safe bowl, stirring until smooth.
- Transfer melted chocolate to a small piping bag and pipe two small dots for eyes on each cooled ghost.
- Let chocolate set at room temperature or in the fridge for 10 minutes.
Notes
Ensure all equipment is completely clean and free of grease or yolk. Do not open the oven door during the first 30 minutes of baking. If your meringues weep, ensure sugar is fully dissolved by rubbing mixture between fingers. Store in an airtight container at room temperature; do not refrigerate.
Nutrition
- Serving Size: 1 cookie
- Calories: 35
- Sugar: 7
- Sodium: 5
- Fat: 1
- Saturated Fat: 0.5
- Carbohydrates: 7
- Protein: 1
Keywords: Halloween, meringue, cookies, ghost, gluten-free, easy dessert, spooky treats, baking


