By the third time I made candy corn jello shots this month, I had stopped caring about the aesthetic and started caring about the chemistry. The first attempt was a vibrant disaster of orange and yellow that looked more like radioactive sludge than festive party food. The second batch was perfectly colored but had the structural integrity of wet sand because I rushed the cooling process. Honestly, I was ready to throw in the towel and just serve regular gelatin cups to my friends, but something kept pulling me back to the kitchen counter.
It wasn’t just about the alcohol content or the spooky season vibes, though those helped. It was the challenge of getting those distinct layers to stay sharp without bleeding into each other. You know that feeling when you’re staring at a mixing bowl at 11 PM, wondering if you’ve added too much vodka? That was me. But then, on the fourth try, I finally cracked the code. The layers set perfectly, the colors remained distinct, and the taste actually balanced the sweetness of the jello with a kick that didn’t make you gag.
I spent the next week refining the ratios, testing different liquors, and figuring out the exact timing needed for each pour. What started as a frantic attempt to save a Halloween party turned into a genuine obsession with getting this specific dessert perfect. It’s not just a party trick; it’s a test of patience and precision. And now that I’ve mastered it, I want to share exactly how to do it without losing your mind in the process.
Why You’ll Love This Recipe
Let’s be real for a second. Making layered gelatin shots can feel intimidating if you’ve never done it before. But once you get the hang of it, these candy corn jello shots become your secret weapon for any fall gathering. I’ve tested this recipe dozens of times, tweaking the alcohol-to-water ratio and the cooling intervals to ensure you get professional-looking results every single time. It’s not just about looking good; it’s about the flavor profile that surprises people.
- Quick & Easy Prep: While the setting time is passive, the actual hands-on work takes less than 30 minutes. You can mix everything up while watching a movie or prepping other party food. It’s perfect for busy weeknights or last-minute Halloween cravings.
- Simple Ingredients: You likely already have most of this in your pantry. Gelatin powder, sugar, water, and your choice of liquor are staples. No fancy grocery trips needed unless you want to splurge on a specific brand of vodka.
- Perfect for Halloween: These are the ultimate seasonal treat. They capture the spirit of the holiday without the mess of actual candy corn, which can be tricky to eat while drinking. They’re great for potlucks, spooky house parties, or just a cozy night in.
- Crowd-Pleaser: Kids and adults alike love the visual appeal. The bright orange, yellow, and white layers mimic the iconic candy, making them instantly recognizable and fun. Even if someone isn’t a big fan of alcoholic desserts, they’ll try one because they look so delicious.
- Unbelievably Delicious: The texture is smooth and jiggly, and the flavor is a sweet, boozy delight. It’s comfort food reimagined—playful, festive, and satisfying. The combination of sweet gelatin and sharp alcohol hits a note that’s hard to resist.
What makes this recipe different from the rest is the technique for layering. Most tutorials skip the crucial step of ensuring each layer is fully set before adding the next. My method guarantees sharp lines and no muddy colors. It’s the kind of recipe that makes you close your eyes after the first bite and smile. It’s festive without being over-the-top, and it’s easy enough for a novice cook to master.
What Ingredients You Will Need
This recipe relies on a few key components to create that perfect candy corn aesthetic and flavor profile. The beauty of this dish is that it uses simple, wholesome ingredients to deliver bold flavor and satisfying texture without the fuss. You don’t need exotic spices or hard-to-find items. Everything you need is likely already in your kitchen or easily available at any grocery store.
I recommend using a high-quality unflavored gelatin for the best set. Brands like Knox are reliable and widely available. For the alcohol, you have options depending on your taste preference. Vodka is the classic choice because it’s neutral and lets the sweet flavors shine. However, if you want a more complex flavor, you can experiment with other liquors.
- Unflavored Gelatin Powder: You’ll need about 2 packets (approximately 1 ounce or 28 grams total) for the base batch. Look for firm, small-curd gelatin if you can find it, as it often sets clearer.
- Boiling Water: You need 1 cup (240 ml) of freshly boiled water to dissolve the gelatin completely. Hot tap water won’t work; it needs to be at a rolling boil.
- Cold Water: Another 1 cup (240 ml) of cold water is required to bring the mixture down to a workable temperature and dilute the alcohol slightly.
- Clear Liquor: I prefer using a mid-shelf vodka, like Tito’s or Smirnoff, for a clean taste. You can use up to 1 cup (240 ml) of alcohol, but keep in mind that more alcohol can prevent the jello from setting properly. If you want non-alcoholic versions, substitute with extra cold water.
- Orange Jello Mix: For the bottom layer, use a small box (3 ounces or 85 grams) of orange gelatin. This provides the classic candy corn color and flavor.
- Yellow Jello Mix: For the middle layer, use a small box of yellow gelatin. If you can’t find yellow, you can mix orange and a tiny bit of white food coloring, but pre-made is easier.
- White Gelatin or Milk: For the top layer, you can use a white gelatin mix if available, or simply use unflavored gelatin mixed with a splash of milk or cream for opacity. Unflavored gelatin with a bit of sugar works too.
- Food Coloring (Optional): If your gelatin mixes aren’t vibrant enough, add a drop or two of gel-based food coloring. Gel coloring is better because it doesn’t thin out the mixture like liquid coloring does.
For the best results, I suggest buying the gelatin mixes in advance and checking their expiration dates. Old gelatin loses its setting power, which leads to runny shots. Also, consider using a good quality vodka; since the alcohol is a primary flavor component, cheap vodka can leave a harsh aftertaste that ruins the sweetness.
Equipment Needed
You don’t need a fancy kitchen to make these shots. In fact, simplicity is key. The most important piece of equipment is a set of shot glasses. I recommend using standard 2-ounce shot glasses, but you can also use larger dessert cups if you want a more substantial serving. Glass is better than plastic because it sets faster and looks more elegant.
You’ll also need a few heat-proof measuring cups or pitchers. One for the boiling water and one for the cold water/alcohol mixture. I use a liquid measuring cup with a spout because it makes pouring the layers much easier and reduces spills. A whisk is essential for ensuring the gelatin powder dissolves completely. Any lump of undissolved gelatin will result in a lumpy shot, and nobody wants that.
A refrigerator is, obviously, crucial. But not all fridges are created equal. If your fridge runs cold, you might be able to speed up the setting process by putting the shots in the freezer for short intervals. However, be careful not to freeze them solid, or they’ll become icy and unappetizing. A wire cooling rack can be helpful if you’re making a large batch, as it allows air to circulate around the glasses.
If you’re worried about spills, place your shot glasses on a baking sheet before pouring. This contains any mess if a glass tips over. I also recommend having paper towels handy. I’ve learned the hard way that gelatin is sticky and difficult to clean once it dries. Keep a damp cloth nearby for quick wipes.
For budget-friendly options, you can reuse plastic shot cups, but they tend to retain odors from previous uses. Glass is worth the investment if you plan to make these often. Alternatively, you can use small mason jars or ramekins for a rustic look.
Preparation Method
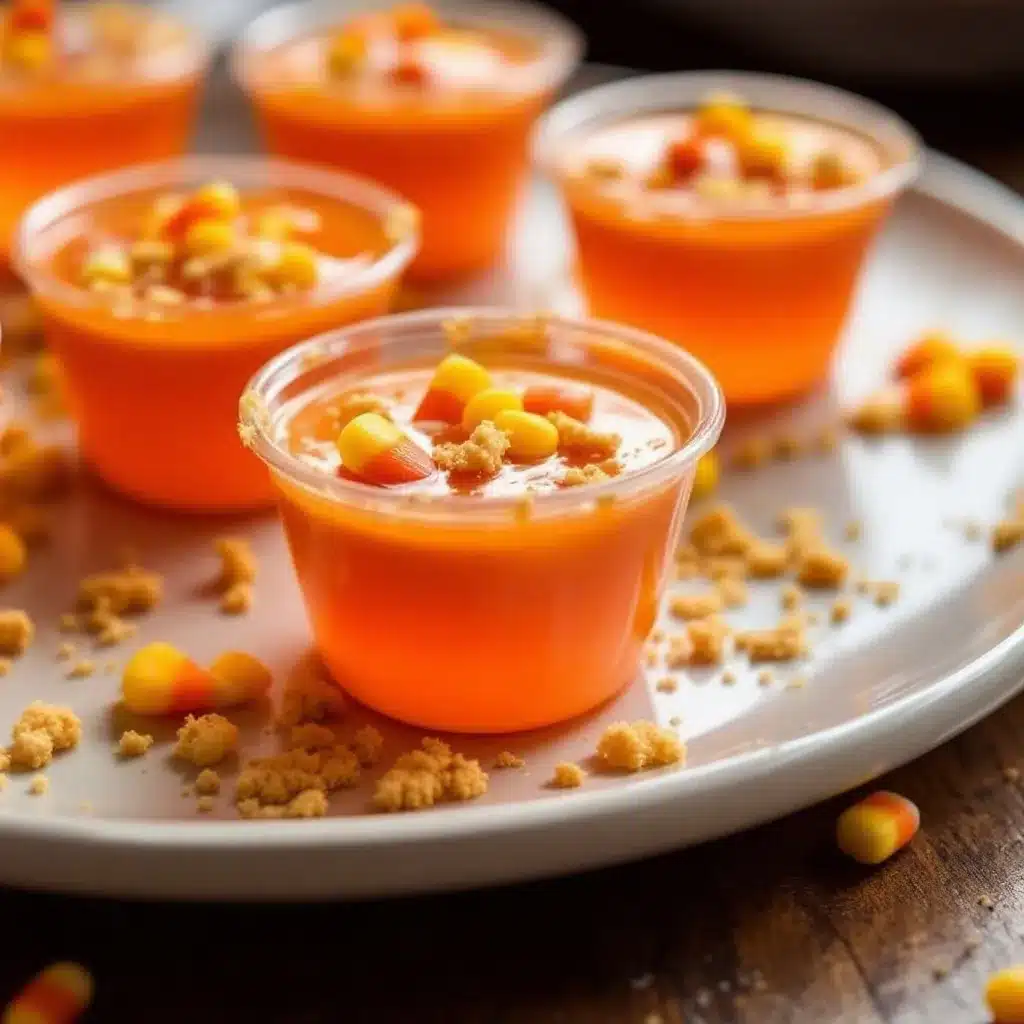
Let’s walk through the process step-by-step. This method is designed to prevent the colors from bleeding and ensure a firm set. Pay close attention to the timing, as that is where most people go wrong.
Step 1: Prepare the Orange Layer
Start by dissolving the orange gelatin mix. In a heat-proof bowl, combine the orange gelatin powder with 1/2 cup (120 ml) of boiling water. Whisk vigorously for about 2 minutes until the powder is completely dissolved and the liquid is clear. This is crucial; any undissolved granules will ruin the texture. Once dissolved, stir in 1/2 cup (120 ml) of cold water and 1/4 cup (60 ml) of vodka. Mix well.
Time Estimate: 5 minutes
Let the mixture cool to room temperature. This takes about 15-20 minutes. You can speed this up by placing the bowl in an ice bath, stirring occasionally. Do not skip this step; pouring hot liquid into the glasses will melt previous layers if you’re doing multiple batches, and it can crack the glass.
Step 2: Pour the First Layer
Once the orange mixture is cool, carefully pour it into your shot glasses, filling them about one-third full. Use a spoon to stop the flow if you’re worried about spills. Place the glasses in the refrigerator immediately. You need to let this layer set completely before adding the next one. This usually takes 2-3 hours, but you can test it by gently tapping the side of the glass. If it jiggles, it needs more time.
Time Estimate: 2-3 hours (passive)
Personal Tip: If you’re in a hurry, you can place the glasses in the freezer for 20-30 minutes to speed up the setting. Just watch them closely so they don’t freeze.
Step 3: Prepare the Yellow Layer
While the orange layer is setting, prepare the yellow gelatin. Dissolve the yellow gelatin mix in 1/2 cup (120 ml) of boiling water, whisking until clear. Stir in 1/2 cup (120 ml) of cold water and 1/4 cup (60 ml) of vodka. Let this mixture cool to room temperature as well. You want both layers to be at a similar temperature to prevent thermal shock to the set gelatin.
Time Estimate: 5 minutes active, 15-20 minutes cooling
Step 4: Pour the Second Layer
Check the orange layer again. It should be firm to the touch. If it is, carefully pour the yellow mixture on top. To prevent disturbing the orange layer, pour the liquid slowly over the back of a spoon held just above the surface of the orange gelatin. This cushions the pour and prevents the layers from mixing. Fill the glasses to about two-thirds full. Return the glasses to the refrigerator.
Time Estimate: 2-3 hours (passive)
Again, ensure this layer is completely set before adding the white layer. This patience is what gives you those sharp, distinct lines.
Step 5: Prepare and Pour the White Layer
For the white layer, you can use a white gelatin mix, or make a simple unflavored gelatin top. If using unflavored gelatin, dissolve 1 packet (about 1/4 ounce) in 1/2 cup (120 ml) of boiling water. Stir in 1/2 cup (120 ml) of cold water and 1/4 cup (60 ml) of vodka. For opacity, you can add a splash of milk or cream, but keep in mind this might add a dairy flavor. If you prefer a clear top, skip the milk. Let it cool to room temperature.
Time Estimate: 5 minutes active, 15-20 minutes cooling
Step 6: Final Set
Carefully pour the white mixture on top of the yellow layer, using the spoon technique again. Fill the glasses to the brim. Place the glasses back in the refrigerator for at least 4 hours, or ideally overnight. This final set ensures the entire shot is firm and stable. Once set, they are ready to serve.
Time Estimate: 4+ hours (passive)
Cooking Tips & Techniques
There are a few professional tricks to ensure your jello shots turn out perfectly. First, always use gel-based food coloring if you need to boost the vibrancy. Liquid food coloring adds extra water to the mix, which can weaken the gelatin structure. Gel coloring is more potent and doesn’t alter the consistency.
Another common mistake is not letting the layers cool enough before pouring. If you pour a warm layer on top of a set layer, it will melt the top of the previous layer, creating a muddy boundary. Always let each mixture cool to room temperature. You can test the temperature by touching the bottom of the bowl; if it’s not warm, it’s ready.
When pouring, always go slow. Use a spoon to diffuse the flow. I once rushed this step and ended up with a beautiful swirl of colors instead of distinct layers. It looked pretty, but it wasn’t the candy corn effect I wanted. Patience is key. If you spill some on the side of the glass, wipe it off immediately with a damp paper towel. Dried gelatin is a nightmare to remove.
Consider the alcohol content. If you want stronger shots, you can increase the alcohol, but remember that alcohol lowers the freezing point of water, which can prevent the gelatin from setting. A good rule of thumb is to keep the alcohol to water ratio at no more than 1:1. If you want stronger shots, use a higher proof alcohol, like 80-proof vodka, rather than increasing the volume.
For consistency, make sure your shot glasses are all the same size. Variations in glass size can lead to uneven filling and wasted mixture. I usually measure the capacity of my glasses beforehand to know exactly how much mixture I need per layer.
Finally, don’t be afraid to experiment with flavors. While orange, yellow, and white are classic, you can try different combinations. For example, a green, yellow, and white layer could mimic a ghost or a pumpkin. The technique remains the same, but the visual impact changes.
Variations & Adaptations
One of the best things about this recipe is its flexibility. You can adapt it to suit different dietary needs or flavor preferences. Here are a few variations I’ve tried and loved.
Non-Alcoholic Version: Simply substitute the vodka with extra cold water or a flavored syrup. For a kid-friendly version, use fruit juice instead of water for the gelatin mix. This adds extra flavor and sweetness. Just remember that juice has sugar, so you might want to reduce any added sugar.
Flavor Twists: Instead of orange gelatin, try using cherry or strawberry for a red base. For the yellow layer, use lemon or pineapple. For the white layer, use cream cheese flavoring or just unflavored gelatin with a bit of vanilla extract. This creates a totally different flavor profile while keeping the same visual appeal.
Dairy-Free Option: If you’re avoiding dairy, simply skip the milk in the white layer. Use unflavored gelatin with a splash of coconut cream for richness. Coconut cream adds a subtle tropical flavor that pairs well with the sweet gelatin.
Gluten-Free: Gelatin is naturally gluten-free, so this recipe is safe for those with celiac disease or gluten sensitivity. Just double-check the labels on your gelatin mixes and alcohol to ensure they are processed in a gluten-free facility.
I once tried making these with rum instead of vodka for a darker, richer flavor. It worked well, but the rum’s strong flavor overpowered the sweet gelatin. If you use strong spirits, consider reducing the amount slightly or balancing it with a sweet mixer like simple syrup.
Serving & Storage Suggestions
When it’s time to serve, these jello shots are best kept chilled. Remove them from the refrigerator just before serving. They can sit out at room temperature for about 30 minutes without melting, but after that, they start to lose their shape. Serve them on a platter with a small spoon for each guest.
For presentation, you can garnish the top with a small piece of actual candy corn or a dusting of powdered sugar. This adds a nice touch of realism and flavor. Pair these shots with savory snacks like chips and dip or nuts to balance the sweetness. They go particularly well with spicy foods, as the sweet and cold jello helps cool the palate.
For storage, keep the jello shots in the refrigerator in an airtight container or covered with plastic wrap. They will last for up to 5 days. After that, they start to weep and lose their texture. Do not freeze them for long periods, as freezing can alter the texture and make them icy. If you must freeze them, thaw them in the refrigerator slowly before serving.
Over time, the flavors meld together, and the sweetness becomes more pronounced. Some people prefer them fresh, while others like them after a day or two when the alcohol has fully infused the gelatin. Experiment to find your preferred timing.
Nutritional Information & Benefits
While these jello shots are a treat, it’s important to be mindful of their nutritional content. Each shot contains approximately 100-150 calories, depending on the amount of alcohol and sugar used. The primary sources of calories are the sugar in the gelatin mix and the alcohol. Gelatin itself is a source of protein, though the amount in these shots is minimal.
For those watching their sugar intake, you can use sugar-free gelatin mixes. This significantly reduces the calorie count but may result in a slightly different texture. Sugar-free gelatin can sometimes be softer, so you may need to chill them longer.
These shots are naturally gluten-free and dairy-free (if you skip the milk garnish). However, they do contain alcohol, so they are not suitable for children, pregnant women, or those avoiding alcohol for religious or personal reasons. Always label them clearly if serving at a party to avoid any confusion.
From a wellness perspective, these are best enjoyed in moderation. They are a fun, festive treat rather than a health food. Enjoy them as part of a balanced diet, and don’t hesitate to offer non-alcoholic alternatives for designated drivers or those who prefer not to drink.
Conclusion
Making candy corn jello shots is a rewarding process that results in a visually stunning and delicious treat. It’s a recipe that challenges your patience but rewards you with a party favorite that will impress your guests. Whether you’re a seasoned home cook or a beginner, this recipe is approachable and fun to make.
I encourage you to experiment with different flavors and colors to make it your own. Try adding a hint of spice to the orange layer or using a unique liquor for a twist. The possibilities are endless. And if you try this recipe, I’d love to hear how it turns out. Share your photos and tips in the comments below.
Don’t forget to check out my other party-friendly recipes, like my creamy vegan chocolate avocado pudding for a non-alcoholic dessert option. Or if you need a main course to balance the sweets, try my easy lemon herb salmon sheet pan dinner. Both are easy to make and perfect for gatherings.
Happy Halloween, and cheers to a spooky season filled with good food and great friends!
FAQs
Can I make these jello shots ahead of time?
Yes, you can make them up to 5 days in advance. In fact, making them a day ahead allows the flavors to meld better. Just keep them refrigerated until serving.
Why did my jello shots not set?
This usually happens if there is too much alcohol or if the gelatin wasn’t fully dissolved. Ensure you use the correct ratio of alcohol to water and whisk the gelatin thoroughly in boiling water.
Can I use flavored gelatin for all layers?
Yes, you can use flavored gelatin for all layers, but be aware that the flavors will mix. For the white layer, unflavored gelatin is best to maintain a neutral taste and color.
How do I prevent the layers from mixing?
The key is to let each layer set completely before adding the next. Also, pour the new layer slowly over the back of a spoon to minimize disturbance.
Can I freeze jello shots?
You can freeze them, but the texture may become icy. It’s better to store them in the refrigerator. If you do freeze them, thaw them slowly in the fridge before serving.
Pin This Recipe!
Fun Candy Corn Jello Shots: 5 Easy Halloween Party Ideas
Master the art of layered gelatin shots with this easy Halloween recipe. Achieve sharp, distinct orange, yellow, and white layers with a balanced vodka kick using simple pantry ingredients.
- Prep Time: 30 minutes
- Cook Time: 0 minutes
- Total Time: 4 hours 30 minutes
- Yield: 12 servings 1x
- Category: Dessert
- Cuisine: American
Ingredients
- 2 packets (approx. 1 oz/28g) unflavored gelatin powder
- 1 cup (240 ml) boiling water
- 1 cup (240 ml) cold water
- 1 cup (240 ml) clear liquor (vodka recommended)
- 1 small box (3 oz/85g) orange gelatin mix
- 1 small box yellow gelatin mix
- 1 packet (approx. 1/4 oz) unflavored gelatin for white layer
- Splash of milk or cream (optional, for white layer opacity)
- Gel-based food coloring (optional, for vibrancy)
Instructions
- Dissolve orange gelatin mix in 1/2 cup boiling water, whisking until clear. Stir in 1/2 cup cold water and 1/4 cup vodka. Cool to room temperature.
- Pour orange mixture into shot glasses, filling one-third full. Refrigerate for 2-3 hours until completely set.
- Dissolve yellow gelatin mix in 1/2 cup boiling water. Stir in 1/2 cup cold water and 1/4 cup vodka. Cool to room temperature.
- Check that orange layer is firm. Pour yellow mixture slowly over the back of a spoon to prevent mixing. Fill to two-thirds full. Refrigerate for 2-3 hours until set.
- Dissolve unflavored gelatin in 1/2 cup boiling water. Stir in 1/2 cup cold water, 1/4 cup vodka, and optional milk/cream. Cool to room temperature.
- Pour white mixture on top of the set yellow layer using the spoon technique. Fill to the brim.
- Refrigerate for at least 4 hours or overnight until fully set. Serve chilled.
Notes
Ensure each layer is completely set before adding the next to prevent colors from bleeding. Use gel-based food coloring if needed, as liquid coloring can weaken the gelatin structure. Keep alcohol-to-water ratio at no more than 1:1 to ensure proper setting. Store in the refrigerator for up to 5 days.
Nutrition
- Serving Size: 1 shot glass
- Calories: 125
- Sugar: 12
- Sodium: 10
- Carbohydrates: 15
- Protein: 2
Keywords: Halloween, Jello Shots, Candy Corn, Party Food, Alcohol, Gelatin, Layered Dessert, Easy Recipes


