The plate was empty before the last guest even finished their second slice. It was a quiet victory, really, because I had expected to have leftovers for my morning coffee. Instead, there was just a dusting of cocoa powder and a few scattered crumbs that I quickly swept into my mouth. My niece looked at me with wide eyes and asked if I could make them for her school party next week. Honestly, I was almost offended that she thought I’d say no.
It started as a way to use up some leftover Halloween candy, but it turned into something else entirely. I wasn’t trying to create a masterpiece. I was just trying to keep the kids entertained while I finished decorating the porch. The kitchen smelled like burnt sugar and chocolate, which is my favorite smell in the world. People always ask me for the recipe, but I never really planned for it to be this popular.
There is something satisfying about watching people try to figure out how the web got on top. They think it’s magic. It’s not magic. It’s just patience and a toothpick. You know how it is when you’re trying to be creative but you’re also exhausted? This recipe is that sweet spot. It looks complicated, but it’s actually quite simple if you know what you’re doing.
I’ve made these every October for the last five years. The first time, I rushed the cooling process and the web collapsed. I learned my lesson. Now, I make them with a kind of quiet pride. I don’t brag about them. I just let the results speak for themselves. That’s why I keep coming back to this method. It works every single time, and it always leaves people smiling.
Why You’ll Love This Recipe
Let’s be honest for a second. Making desserts that look like they came from a high-end bakery usually takes hours of work. You know how it is. You spend all day measuring, mixing, and worrying about temperatures. With these fudgy Halloween spiderweb brownies, you get that professional look without the stress. I’ve tested this recipe dozens of times, and it is forgiving. If you mess up the swirl a little, no one will know. In fact, it might even look more organic.
- Quick & Easy: The whole process takes less than 45 minutes from start to finish. This is perfect for busy weeknights or last-minute party planning when you realize you forgot to buy dessert.
- Simple Ingredients: You likely already have everything in your kitchen. Flour, sugar, cocoa powder, eggs, butter. No fancy grocery trips needed. It’s pantry-friendly cooking at its best.
- Perfect for Halloween: These are great for trick-or-treaters, classroom parties, or cozy dinners. The spooky theme is fun without being scary for the little ones.
- Crowd-Pleaser: Always gets rave reviews from kids and adults alike. The contrast between the fudgy brownie and the delicate white web is a hit every time.
- Unbelievably Delicious: The texture is next-level comfort food. Dense, chewy, and rich, but not too heavy. It’s the kind of brownie that makes you close your eyes after the first bite.
What makes this different from other spiderweb brownies is the technique for the web. Most recipes tell you to just drizzle batter on top. This method uses a specific swirling pattern that creates a realistic arachnid design. It’s not just another version; it’s your best version. It’s comfort food reimagined with a bit of spooky flair. It’s perfect for impressing guests without stress, or turning a simple meal into something memorable.
What Ingredients You Will Need
This recipe uses simple, wholesome ingredients to deliver bold flavor and satisfying texture without the fuss. The beauty of brownies is that they rely on a few key components to create that signature fudgy consistency. You don’t need exotic spices or hard-to-find items. Just good quality basics and a little bit of patience.
- Unsalted Butter: 1 cup (2 sticks), melted. Using unsalted butter allows you to control the saltiness. I recommend using a high-quality European-style butter if you can find it, as it adds a richer flavor.
- Granulated Sugar: 1 ½ cups. This provides the sweetness and the slight crunch on the top. Don’t reduce the sugar too much, or you’ll lose that crinkly crust.
- Eggs: 3 large eggs, room temperature. Room temperature eggs incorporate better into the batter, creating a smoother mixture. This is crucial for the web part later.
- Vanilla Extract: 2 teaspoons. Pure vanilla makes a huge difference. Avoid the imitation stuff if you want that authentic chocolate flavor.
- All-Purpose Flour: 1 cup. This gives the brownies their structure. Don’t use self-rising flour unless you adjust the salt.
- Cocoa Powder: ½ cup unsweetened cocoa powder. Use Dutch-processed cocoa for a darker, richer color and smoother taste. This is the main flavor driver.
- Salt: ½ teaspoon. Salt balances the sweetness and enhances the chocolate flavor. It’s non-negotiable.
- White Chocolate Chips: 1 cup. These are used to create the spiderweb. Look for chips that melt smoothly. Ghirardelli or Guittard are my go-to brands for consistent melting.
- Vegetable Oil: 1 tablespoon. This is added to the white chocolate to help it flow better when drizzling. It prevents the web from being too thick or chunky.
If you need to make substitutions, you can use dairy-free butter and white chocolate chips to make this vegan-friendly. For a gluten-free option, swap the all-purpose flour for a 1-to-1 gluten-free baking blend. The texture might be slightly denser, but it will still be delicious.
Equipment Needed
You don’t need a lot of fancy tools to make these brownies. A few basic items will get the job done. The most important piece of equipment is an 8×8 inch baking pan. Glass pans work well because they distribute heat evenly, but metal pans are fine too. Just grease the pan thoroughly with butter or cooking spray to prevent sticking.
You’ll need a large mixing bowl for the brownie batter. A medium bowl is needed for the white chocolate mixture. Whiskes are essential here. A wire whisk helps incorporate air into the eggs and sugar, which helps with the rise. If you don’t have a whisk, a fork works, but it takes more effort.
A toothpick or a thin skewer is the secret weapon for the spiderweb design. You can use a fork, but a toothpick gives you more precision. If you lose toothpicks in the oven (which happens), make sure they are clean before using them. Also, have a microwave-safe bowl ready for melting the white chocolate. A microwave is faster than a double boiler for this step, but be careful not to burn the chocolate.
Preparation Method
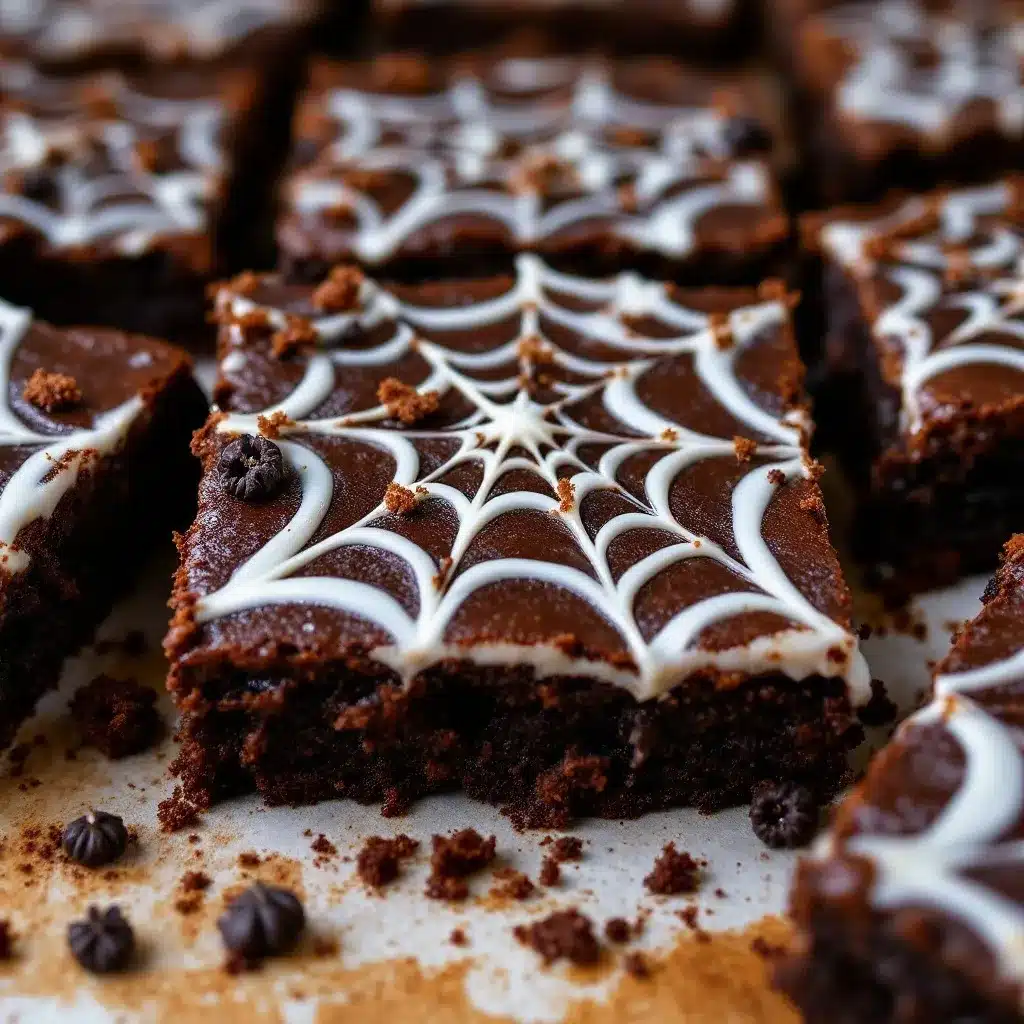
- Preheat and Prep (5 minutes): Start by preheating your oven to 350°F (175°C). Grease your 8×8 inch baking pan. Line it with parchment paper if you want easy removal, but greasing is sufficient. This step ensures your brownies don’t stick and are easy to lift out later.
- Melt the Butter (2 minutes): In a large microwave-safe bowl or a small saucepan, melt the 1 cup of unsalted butter. If using the microwave, heat in 30-second intervals, stirring in between, until fully liquid. Let it cool for a minute so it doesn’t cook the eggs when you add them.
- Mix Sugar and Eggs (3 minutes): Add the 1 ½ cups of granulated sugar to the melted butter. Whisk vigorously until the mixture is smooth and combined. Then, add the 3 large eggs and 2 teaspoons of vanilla extract. Whisk again until the mixture is glossy and slightly pale. This step is important for the texture.
- Add Dry Ingredients (2 minutes): Sift in the 1 cup of all-purpose flour, ½ cup of cocoa powder, and ½ teaspoon of salt. Fold these into the wet ingredients using a spatula. Mix until just combined. Do not overmix, or the brownies will become cakey instead of fudgy. You want a thick, dense batter.
- Spread the Base (2 minutes): Pour the brownie batter into the prepared pan. Spread it out evenly with a spatula. It should be a thick layer. This is your foundation. Make sure the edges are covered.
- Melt White Chocolate (2 minutes): While the brownies bake, prepare the web. In a small microwave-safe bowl, combine the 1 cup of white chocolate chips and 1 tablespoon of vegetable oil. Microwave in 30-second intervals, stirring well between each interval, until smooth. The oil helps thin the chocolate so it flows easily.
- Bake (25-30 minutes): Place the pan in the oven and bake for 25 to 30 minutes. Check at 25 minutes. The edges should be set, but the center should still look slightly underdone. A toothpick inserted into the center should come out with moist crumbs, not wet batter. If it’s clean, they might be too dry. Remove from the oven.
- Create the Web (5 minutes): This is the fun part. While the brownies are still warm (not hot, but warm enough to be soft), drizzle the melted white chocolate mixture in random lines across the top. Then, take a toothpick and drag it from the center outward in a spiral pattern, or from edge to center. Alternate directions to create a web effect. Don’t overdo it; simple lines work best.
- Set and Cool (30 minutes): Let the brownies cool completely in the pan. The white chocolate web will harden as it cools. This takes about 30 minutes. If you cut them too soon, the web will smear.
- Slice and Serve: Once cool, lift the brownies out of the pan and slice into squares. Enjoy your spooky treat.
Cooking Tips & Techniques
Getting the fudgy texture right is all about not overbaking. Brownies continue to cook in the pan after you take them out of the oven. If you wait until the center is fully set, they will be dry by the time they cool. I learned this the hard way on my first attempt. I pulled them out when they looked perfect, and by the time they were done, they were more like cake.
Another common mistake is using cold eggs. Cold eggs can cause the melted butter to seize up, creating lumps. Always let your eggs sit on the counter for 30 minutes before baking. It makes a noticeable difference in the smoothness of the batter.
For the spiderweb, the temperature of the brownie is key. If the brownie is too hot, the white chocolate will melt into it, and you’ll lose the design. If it’s too cold, the chocolate won’t stick. Aim for warm, about 10 minutes after taking them out of the oven. Practice makes perfect. If your first web looks messy, just embrace it. It still tastes good.
Use a sharp knife to cut the brownies. A dull knife will crush the web and make a mess. Wipe the knife clean between cuts for neat squares. This attention to detail makes a big difference in presentation.
Variations & Adaptations
While the classic spiderweb is delicious, there are plenty of ways to tweak this recipe. For a nutty twist, sprinkle chopped pecans or walnuts on top of the batter before baking. The nuts add a nice crunch that contrasts with the soft brownie.
If you want to make these gluten-free, use a 1-to-1 gluten-free flour blend. The texture might be slightly more crumbly, but the flavor remains the same. For a dairy-free version, use vegan butter and dairy-free white chocolate chips. Many brands now make excellent vegan white chocolate that melts smoothly.
You can also change the colors for different holidays. For Christmas, use green and red white chocolate chips. For Valentine’s Day, use pink or red. The technique stays the same, but the theme changes. I once made these with blue and silver for a winter wonderland party, and they were a huge hit.
For a healthier option, you can substitute half the butter with unsweetened applesauce. This reduces the fat content, but it will make the brownies less fudgy. It’s a trade-off between health and texture. I prefer the full-fat version for special occasions.
Serving & Storage Suggestions
These brownies are best served at room temperature. The fudgy texture is at its peak when they aren’t too cold. If you serve them warm, the white chocolate might be too soft. Let them cool completely for the best experience.
Pair these brownies with a glass of cold milk or a cup of coffee. The bitterness of the coffee complements the sweetness of the chocolate. For a spooky presentation, serve them on a black plate with a few fake plastic spiders around the edges. It adds to the Halloween fun.
Store leftover brownies in an airtight container at room temperature for up to 3 days. They can also be refrigerated for up to a week, but they will firm up. If you refrigerate them, let them sit at room temperature for 15 minutes before eating to soften them up.
For longer storage, freeze the brownies. Wrap them tightly in plastic wrap and then in aluminum foil. They will keep for up to 3 months. Thaw them in the refrigerator overnight before serving. The web might crack slightly when thawing, but the taste will still be great.
Nutritional Information & Benefits
These brownies are a rich treat, so they are best enjoyed in moderation. Each square contains approximately 250 calories, with a good balance of carbohydrates and fats. The cocoa powder provides antioxidants, which is a small benefit to enjoy your dessert guilt-free.
The eggs provide protein, and the butter offers essential fatty acids. However, they are high in sugar, so keep an eye on portion sizes. For those with dietary restrictions, the substitutions mentioned earlier can make this recipe accessible to more people.
I always try to balance rich desserts with lighter sides or activities. These brownies are perfect for a party where people are moving around and burning off the sugar. It’s all about balance and enjoying the moment.
Conclusion
Making fudgy Halloween spiderweb brownies is a fun and rewarding experience. They look impressive, taste amazing, and are surprisingly easy to make. I love how they bring people together, whether it’s for a party or just a cozy night in. The spiderweb design is a unique touch that sets them apart from regular brownies.
I encourage you to try this recipe and make it your own. Add nuts, change the colors, or experiment with different chocolate chips. The base recipe is flexible enough to handle your creativity. I can’t wait to see what you come up with.
If you make these, please share your results in the comments below. I love reading about your experiences and seeing your photos. It motivates me to keep sharing recipes that bring joy to your kitchen.
Happy baking, and enjoy your spooky treats! These brownies are sure to be a hit at your next gathering. Don’t forget to check out my creamy vegan chocolate avocado pudding if you want another delicious dessert option.
FAQs
Can I use dark chocolate chips for the web?
Yes, you can use dark chocolate chips, but they won’t show up as well against the dark brownie. White chocolate provides the best contrast for the spiderweb effect. If you prefer dark chocolate, consider using a lighter brownie base or adding a layer of cream cheese frosting.
Why did my spiderweb crack?
The web might crack if the brownies were too cold when you drizzled the chocolate, or if you dragged the toothpick too hard. Make sure the brownies are warm but not hot. Use gentle strokes when creating the web pattern.
Can I make these brownies ahead of time?
Yes, you can make the brownies up to 2 days in advance. Store them in an airtight container at room temperature. The web will stay intact if handled carefully. Avoid freezing if you want to keep the web perfectly intact, as thawing can cause cracking.
What size pan should I use?
An 8×8 inch square pan is ideal for this recipe. If you use a 9×13 inch pan, the brownies will be thinner, and the baking time will be shorter. Adjust the baking time accordingly, checking for doneness 5-10 minutes earlier.
How do I fix a messy spiderweb?
If the web looks messy, don’t worry. It’s still delicious. You can try to salvage it by adding a few more lines of white chocolate to fill in gaps. Or, embrace the chaos. It still looks like a web, just a more abstract one.
Pin This Recipe!
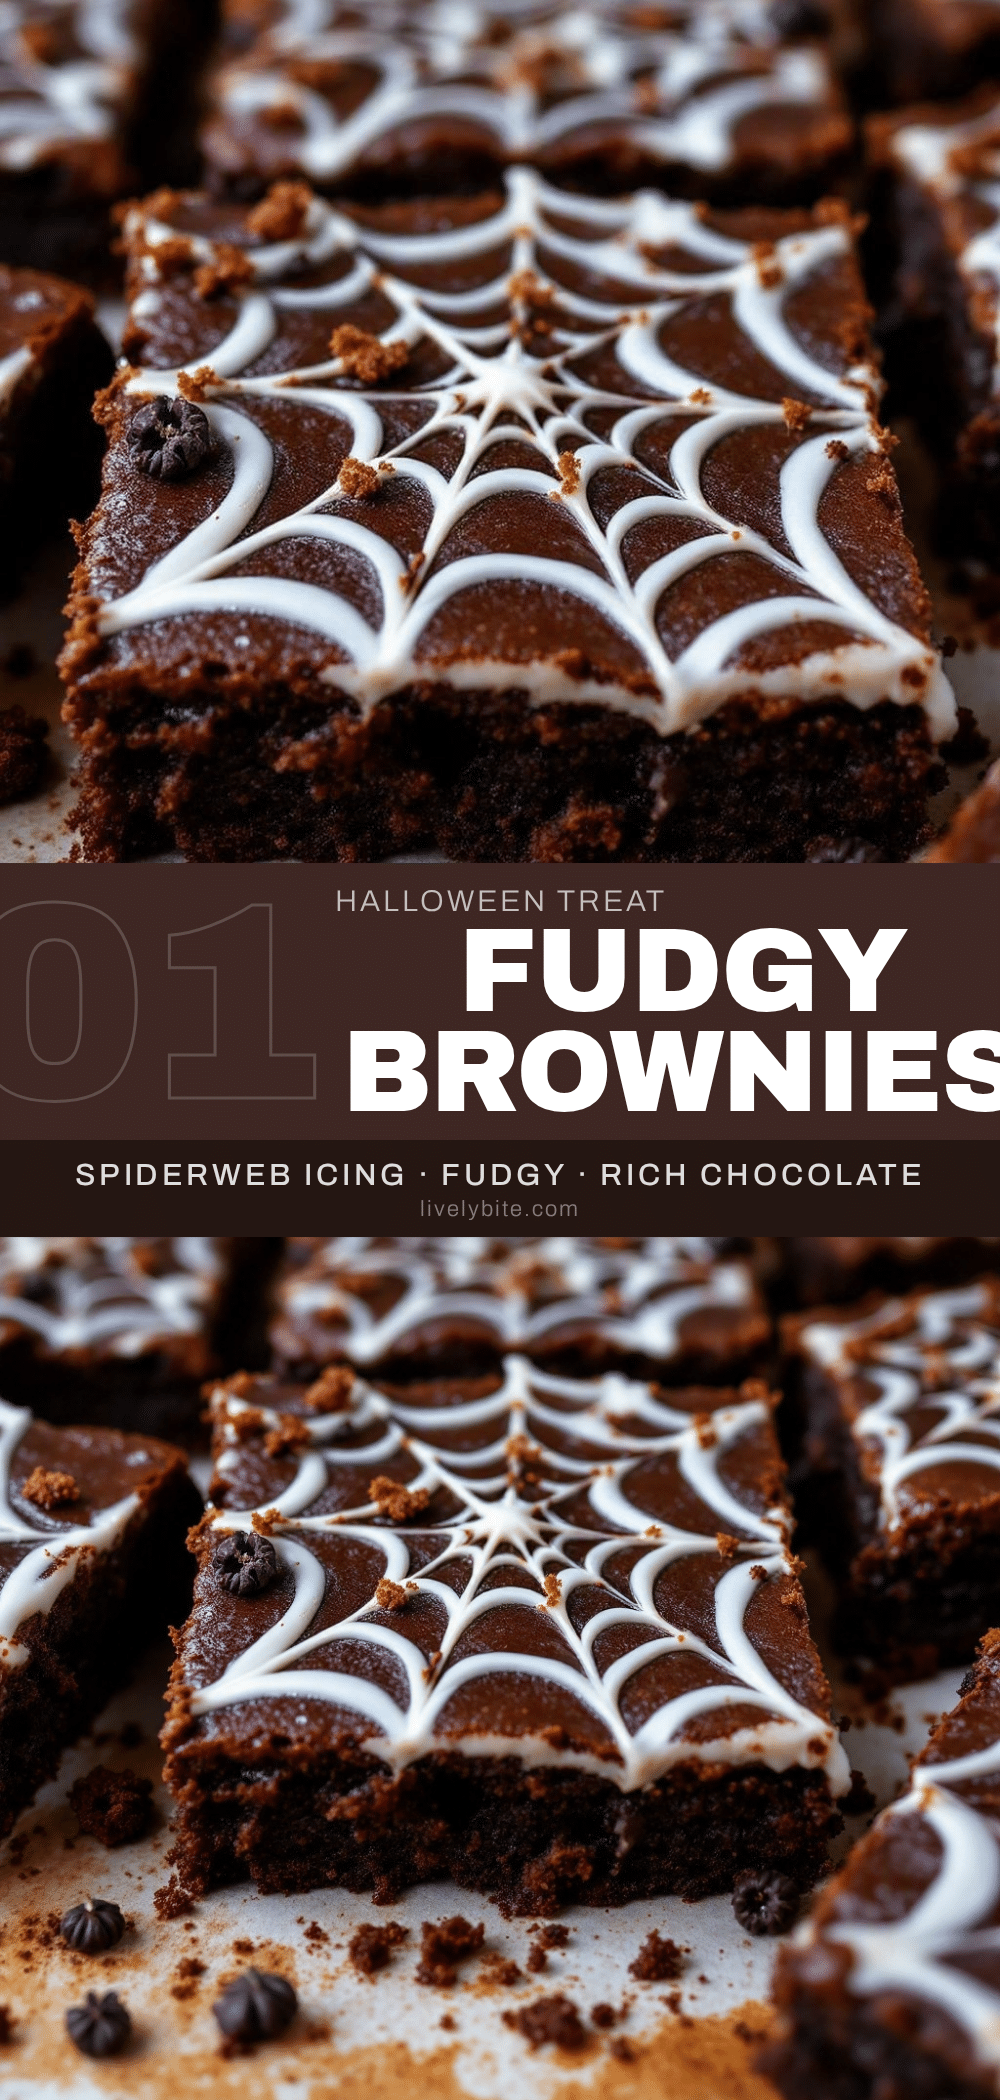
Fudgy Halloween Spiderweb Brownies
These fudgy Halloween spiderweb brownies offer a professional, spooky look without the stress. They are dense, chewy, and rich, featuring a delicate white chocolate web design that is easy to create with just a toothpick.
- Prep Time: 15 minutes
- Cook Time: 30 minutes
- Total Time: 45 minutes
- Yield: 16 servings 1x
- Category: Dessert
- Cuisine: American
Ingredients
- 1 cup (2 sticks) unsalted butter, melted
- 1 ½ cups granulated sugar
- 3 large eggs, room temperature
- 2 teaspoons vanilla extract
- 1 cup all-purpose flour
- ½ cup unsweetened cocoa powder
- ½ teaspoon salt
- 1 cup white chocolate chips
- 1 tablespoon vegetable oil
Instructions
- Preheat oven to 350°F (175°C). Grease an 8×8 inch baking pan.
- Melt the butter in a microwave-safe bowl or saucepan. Let it cool slightly.
- Whisk the melted butter and sugar until smooth. Add eggs and vanilla, whisking until glossy and pale.
- Sift in flour, cocoa powder, and salt. Fold into wet ingredients until just combined. Do not overmix.
- Pour batter into the prepared pan and spread evenly.
- While brownies bake, combine white chocolate chips and vegetable oil. Microwave in 30-second intervals, stirring until smooth.
- Bake brownies for 25-30 minutes until edges are set but center is slightly underdone.
- While brownies are still warm (not hot), drizzle melted white chocolate in random lines across the top.
- Use a toothpick to drag from the center outward or edge to center in a spiral pattern to create a web effect.
- Let brownies cool completely in the pan (about 30 minutes) to set the web before slicing.
Notes
Ensure eggs are at room temperature to prevent butter from seizing. Do not overbake to maintain fudgy texture. The brownies must be warm, not hot, when applying the white chocolate web to prevent melting or smearing. Use a sharp knife to cut for clean squares.
Nutrition
- Serving Size: 1 square
- Calories: 250
- Sugar: 24
- Sodium: 120
- Fat: 14
- Saturated Fat: 8
- Carbohydrates: 32
- Fiber: 2
- Protein: 3
Keywords: Halloween, brownies, spiderweb, chocolate, dessert, easy recipe, fudgy brownies, white chocolate