My roommate, Sarah, stood in the doorway of our tiny kitchen holding a fork like it was a weapon. It was 6:30 AM on a Tuesday, the kind of gray, drizzly morning that makes you question all your life choices. She had just pulled a loaf pan out of the oven, and the smell of cinnamon and burnt sugar was thick enough to chew. We had been arguing about the last slice of leftover pizza for twenty minutes, but now the tension was entirely focused on this small-batch banana bread.
It wasn’t even supposed to be a test. I was just trying to use up three overripe bananas that were looking suspiciously like they were about to give up on life. I threw them in a bowl, added some flour, butter, and those walnuts I’d been meaning to chop for weeks. No scale, no fancy mixer, just a spoon and a hope that it wouldn’t taste like cardboard. Sarah watched me with that skeptical squint she reserves for my cooking experiments. She took a bite before it was even cool. Her eyes went wide. She didn’t say “good.” She said, “Wait. How?”
That moment stuck with me. Not because it was perfect—honestly, the edges were a bit too dark—but because it solved a problem I didn’t know I had. I hate wasting food, and I really hate baking huge loaves that sit in the fridge for ten days while I slowly forget they exist. This moist small-batch banana bread with walnuts changed the game. It’s just enough for two people, or one very hungry person with a guilty conscience. The texture is dense but tender, and the walnuts add a crunch that keeps you coming back.
I’ve made this recipe probably fifty times since that Tuesday morning. Some days I add chocolate chips, other days I swap the walnuts for pecans. But the core remains the same: simple ingredients, minimal cleanup, and a result that actually tastes like comfort. It’s not about being a pastry chef. It’s about making something warm when the world feels cold. And honestly? It’s the best way to start a day.
Why You’ll Love This Recipe
Let’s be real for a second. Most banana bread recipes are written for people who have industrial mixers and a pantry full of organic, fair-trade spices. This one is for the rest of us. I’ve spent years testing different ratios of wet to dry ingredients, and I’ve learned that the secret isn’t fancy technique; it’s patience and the right bananas. When you mash those spotty fruits properly, you release natural sugars that caramelize in the oven, creating that deep, rich flavor without needing extra refined sugar.
Here is why this specific version stands out from the crowd:
- Quick & Easy: You can have this mixed and in the oven in under 15 minutes. It’s perfect for those random weekends when you want to feel productive without actually doing much work.
- Simple Ingredients: No fancy grocery trips needed. You likely already have bananas, flour, butter, and eggs in your house. If you have a bag of walnuts in the back of the cupboard, you’re golden.
- Perfect for Single Life or Couples: Forget the giant loaf that lasts forever. This small batch makes exactly one standard loaf, which is the perfect size for immediate consumption. No leftovers haunting your fridge.
- Crowd-Pleaser: Even people who claim they “don’t like sweet bread” will ask for seconds. The balance of savory walnut and sweet banana is universally liked.
- Unbelievably Delicious: The texture is moist but not soggy. It holds together well but melts in your mouth. It’s the kind of bread that makes you close your eyes after the first bite.
What makes this recipe different is the attention to the “wet” ingredients. Many recipes fail because they use cold eggs or melted butter that doesn’t emulsify well. I’ve found that letting your ingredients sit out for thirty minutes makes a huge difference. It’s a small step, but it ensures a uniform crumb. This isn’t just another version; it’s the one I keep coming back to because it never fails.
What Ingredients You Will Need
This recipe relies on the humble banana to do the heavy lifting for both sweetness and moisture. You don’t need a lot of added sugar because the fruit provides plenty. The walnuts add a necessary earthy contrast to the sweetness, preventing the bread from being one-note. I like to use unsalted butter because it gives you better control over the salt level, but if you only have salted, just reduce the added salt in the recipe.
Here is what you need to gather:
- Ripe Bananas (3 medium): Look for bananas with lots of brown spots on the peel. The darker they are, the sweeter and more flavorful they will be. If they are green, they won’t work. (Mashed, about 1.5 cups)
- All-Purpose Flour (1 cup): Standard flour works best here for structure. I prefer King Arthur brand because it has a consistent protein content that helps the bread rise evenly. (120g)
- Unsalted Butter (1/4 cup): Melted. Using melted butter instead of creamed butter makes the texture denser and more moist, which is exactly what we want. (56g)
- Granulated Sugar (1/3 cup): You can use brown sugar for a deeper molasses flavor, but white sugar keeps the crumb lighter. I stick to white for consistency. (70g)
- Egg (1 large): Room temperature eggs mix better into the batter. Cold eggs can cause the melted butter to seize up. (50g without shell)
- Walnuts (1/2 cup): Chopped. Toasting them first is optional but highly recommended for better flavor. (50g)
- Baking Soda (1/2 teaspoon): This is the leavening agent. Make sure it’s not expired, or your bread will be a flat brick. (3g)
- Salt (1/4 teaspoon): Enhances the flavor. Don’t skip it. (1.5g)
- Vanilla Extract (1 teaspoon): Pure vanilla, not imitation. It adds that warm, cozy background note. (5ml)
If you are out of walnuts, pecans or hazelnuts work just as well. For a gluten-free option, you can swap the all-purpose flour for a 1:1 gluten-free flour blend, though the texture might be slightly crumblier. I also recommend using organic eggs if you can find them, as they often have richer yolks which contribute to a better color.
Equipment Needed
You don’t need much for this recipe, which is part of its charm. The most important piece of equipment is a standard 4×2 inch mini loaf pan or a regular 8×4 inch loaf pan if you want to double the batch. I personally use a glass loaf pan because it browns the bottom evenly, but metal pans work too—just keep an eye on the top so it doesn’t burn.
You will also need a medium mixing bowl and a small saucepan (or microwave-safe bowl) for melting the butter. A fork or potato masher is essential for the bananas. I prefer a fork because it gives you a bit more control over the texture, leaving some small chunks for interest. A pastry brush is helpful for greasing the pan, but a paper towel with oil works fine if you are in a hurry. Avoid non-stick spray if you can; it can sometimes leave a residue that prevents the crust from forming properly. Just use a little extra butter or oil with your brush.
Preparation Method
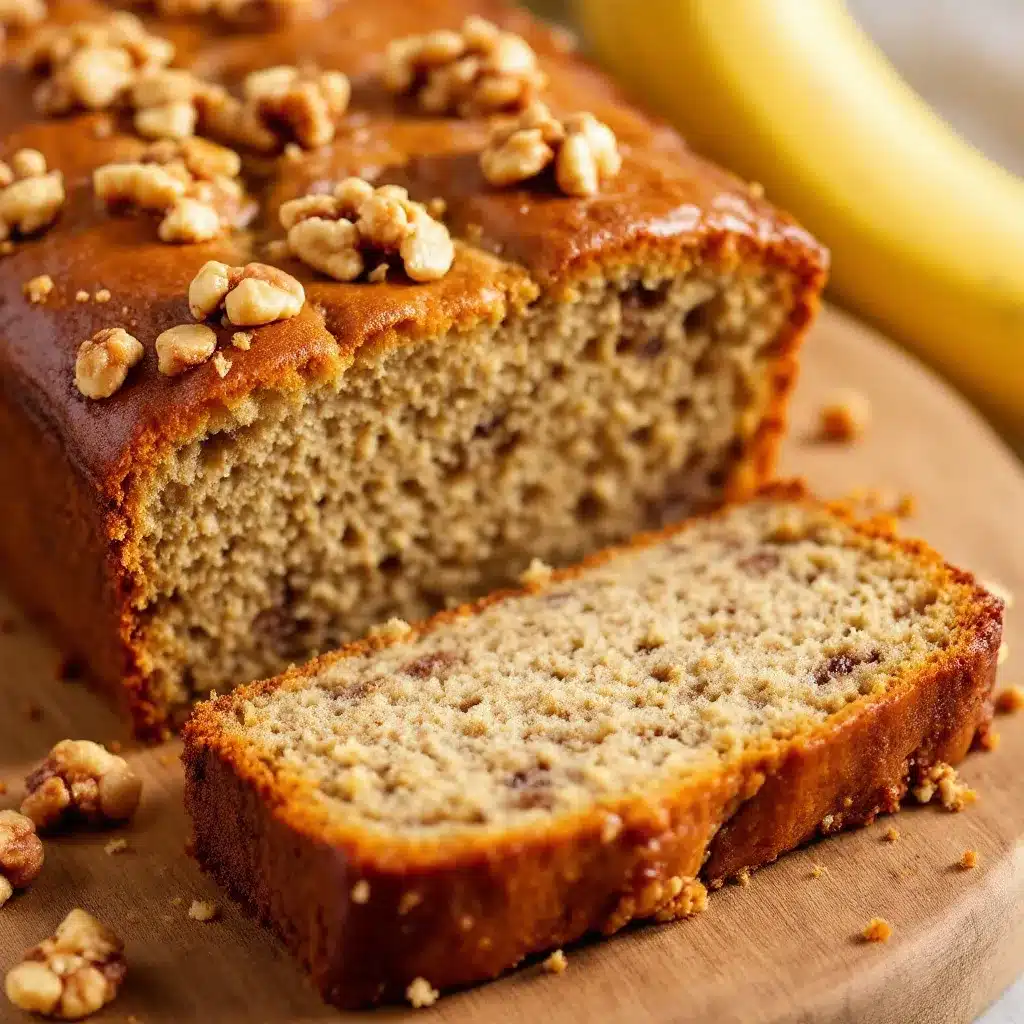
Getting this banana bread right is straightforward, but timing matters. Here is exactly how to do it, step by step.
- Preheat and Prep: Preheat your oven to 350°F (175°C). This is crucial. If the oven isn’t hot enough, the bread will spread too much before it sets. Grease your loaf pan thoroughly with butter or oil. Dust it with a little flour if you want extra insurance against sticking, tapping out the excess. (Time: 2 minutes)
- Melt the Butter: Melt the 1/4 cup of butter in a saucepan over low heat or in the microwave. Let it cool for a minute so it’s warm but not hot. Hot butter will cook the egg if you add it immediately. (Time: 1 minute)
- Mash the Bananas: Peel the three ripe bananas and put them in your mixing bowl. Mash them with a fork until they are mostly smooth but still have a few small lumps. You want about 1.5 cups of mash. (Time: 3 minutes)
- Mix Wet Ingredients: To the mashed bananas, add the melted butter, sugar, egg, and vanilla extract. Whisk everything together vigorously with a fork or spatula. The mixture should look like a thick, glossy paste. Make sure the sugar is mostly dissolved. (Time: 2 minutes)
- Add Dry Ingredients: Sprinkle the baking soda and salt over the wet mixture. Then, add the flour. (Time: 1 minute)
- Combine Carefully: Stir the dry ingredients into the wet ingredients using a spatula. Stop mixing as soon as the white streaks of flour disappear. Overmixing is the enemy of moist banana bread. It develops gluten and makes the bread tough. (Time: 1 minute)
- Fold in Walnuts: Gently fold in the chopped walnuts. Reserve a small handful to sprinkle on top for presentation. (Time: 1 minute)
- Bake: Pour the batter into the prepared loaf pan. Smooth the top with your spatula. Bake for 45-55 minutes if using a standard loaf pan, or 30-35 minutes for a mini loaf. The bread is done when a toothpick inserted into the center comes out clean or with just a few moist crumbs. (Time: 30-55 minutes)
- Cool: Let the bread cool in the pan for 10 minutes, then transfer it to a wire rack to cool completely. This step is hard, but slicing it hot can make it gummy. (Time: 30 minutes)
Cooking Tips & Techniques
I learned the hard way that banana bread is a lesson in humility. My first attempt was a dense, pale brick that tasted like raw flour. Here is how to avoid those pitfalls.
The Banana Rule: Never use yellow bananas. They lack the sweetness and moisture needed. Wait until they are almost black. The peels should be spotted or fully brown. If you can’t wait, you can bake ripe bananas in their skins at 300°F for 15 minutes to speed up the process.
Don’t Overmix: This is the most common mistake. Once you add the flour, mix gently. A few streaks of flour are better than a tough loaf. The batter should be thick and heavy, not runny like cake batter.
Check Early: Ovens vary. Start checking your bread 5 minutes before the recommended time. If the top is browning too fast, loosely tent it with aluminum foil. This allows the center to cook without burning the crust.
Room Temperature Matters: While not as critical as in cake baking, having room temperature eggs helps the emulsion. If you forget, just drop the eggs into a bowl of warm water for 5 minutes.
Toasting Walnuts: If you have an extra minute, toast your walnuts in a dry pan over medium heat for 3-4 minutes until fragrant. This brings out their oils and makes the flavor pop. It’s a small detail that makes a big difference.
Variations & Adaptations
One of the best things about this recipe is how forgiving it is. You can tweak it to fit your tastes or what you have on hand.
- Chocolate Chip Banana Bread: Swap the walnuts for semi-sweet chocolate chips. You can use half nuts and half chips for the best of both worlds. The chocolate melts into pockets of gooey goodness.
- Spiced Version: Add 1/2 teaspoon of cinnamon and a pinch of nutmeg to the dry ingredients. This gives it a cozy, autumnal vibe that pairs well with coffee.
- Dairy-Free Option: Swap the butter for coconut oil or a plant-based butter. Use a flax egg (1 tbsp ground flaxseed mixed with 3 tbsp water) instead of the regular egg if you need it vegan.
- Gluten-Free: As mentioned, use a 1:1 gluten-free flour blend. Add 1/4 teaspoon of xanthan gum if your blend doesn’t already contain it, to help with structure.
- My Personal Twist: I sometimes add a tablespoon of maple syrup along with the sugar for a deeper flavor profile. It complements the walnuts beautifully.
These variations keep the recipe fresh and allow you to experiment without starting from scratch. I often rotate between the chocolate chip and spiced versions depending on my mood.
Serving & Storage Suggestions
This banana bread is best served warm, straight from the oven or lightly toasted the next day. I like to serve it with a dollop of whipped cream or a slice of sharp cheddar cheese. The contrast of sweet and savory is incredible.
For storage, wrap the cooled loaf tightly in plastic wrap or aluminum foil. It will keep at room temperature for up to 3 days. If you want it to last longer, store it in the refrigerator for up to a week. You can also freeze it for up to 3 months. Just wrap it well to prevent freezer burn.
To reheat, wrap the slice in foil and warm it in the oven at 300°F for 10 minutes, or microwave it for 20 seconds. The flavors actually develop and meld together over the first day, making it even better on day two. I usually find that day two is the peak flavor day.
Nutritional Information & Benefits
While this is a treat, it does have some nutritional merits. Bananas are a great source of potassium and vitamin B6, which support heart health and energy levels. Walnuts provide healthy omega-3 fatty acids and protein, which help keep you feeling full.
Each slice (assuming 8 slices) contains approximately 180 calories, 8g of fat, 25g of carbohydrates, and 3g of protein. It is not a low-calorie food, but it is nutrient-dense compared to other baked goods. If you are watching your sugar intake, you can reduce the sugar to 1/4 cup, though the bread will be less sweet.
For those with dietary restrictions, this recipe is easily adaptable. It is naturally nut-free if you omit the walnuts, though cross-contamination should be considered if you have severe allergies. It is dairy-free if you use oil or vegan butter. Overall, it’s a balanced indulgence that satisfies a craving without making you feel terrible.
Conclusion
This moist small-batch banana bread with walnuts is more than just a recipe; it’s a solution for busy mornings and a way to use up overripe fruit. It’s simple, reliable, and delicious. I hope you try it and find it as comforting as I do. Don’t be afraid to experiment with the variations—make it yours.
Once you try this, you might also enjoy my creamy vegan chocolate avocado pudding for a similar quick, healthy-ish dessert vibe. Or, if you need a savory counterpoint, check out my easy lemon herb salmon sheet pan dinner for a complete meal.
Please let me know how it turns out in the comments below. Did you add chocolate chips? Did you use brown sugar? I love hearing about your adaptations. Share your photos on social media and tag me—I always look for them. Happy baking!
FAQs
Can I use frozen bananas?
Yes, frozen bananas work great. Just thaw them completely and drain any excess liquid before mashing. They tend to be softer, so you might need slightly less liquid in the recipe.
Why is my banana bread soggy in the middle?
This usually means it wasn’t baked long enough. Check with a toothpick. If it comes out wet, bake for another 5-10 minutes. Also, ensure your oven temperature is accurate.
Can I double the recipe?
Absolutely. Just use a standard 8×4 inch loaf pan. The baking time will increase to about 55-65 minutes. Keep an eye on the top to prevent burning.
How do I know when the bananas are ripe enough?
Look for bananas that are mostly brown or black on the peel. They should feel soft to the touch. The darker the peel, the sweeter the bread.
Can I make this in an air fryer?
It’s tricky because the loaf pan might not fit. You can try making mini muffins instead. Bake at 320°F (160°C) for 15-18 minutes. The cooking time will be significantly shorter.
Pin This Recipe!
Moist Small-Batch Banana Bread with Walnuts
A simple, moist small-batch banana bread made in just two bowls with minimal cleanup. Perfect for using up overripe bananas, this recipe yields one standard loaf with a dense, tender crumb and crunchy walnuts.
- Prep Time: 15 minutes
- Cook Time: 45-55 minutes
- Total Time: 1 hour 10 minutes
- Yield: 8 servings 1x
- Category: Dessert
- Cuisine: American
Ingredients
- 3 medium ripe bananas (mashed, about 1.5 cups)
- 1 cup all-purpose flour
- 1/4 cup unsalted butter (melted)
- 1/3 cup granulated sugar
- 1 large egg (room temperature)
- 1/2 cup walnuts (chopped)
- 1/2 teaspoon baking soda
- 1/4 teaspoon salt
- 1 teaspoon vanilla extract
Instructions
- Preheat oven to 350°F (175°C). Grease a standard 8×4 inch loaf pan (or mini loaf pan) thoroughly with butter or oil.
- Melt the butter in a saucepan or microwave and let it cool slightly so it is warm but not hot.
- Mash the ripe bananas in a mixing bowl until mostly smooth with a few small lumps.
- Add the melted butter, sugar, egg, and vanilla extract to the bananas. Whisk vigorously until the mixture is a thick, glossy paste and sugar is mostly dissolved.
- Sprinkle baking soda and salt over the wet mixture, then add the flour.
- Stir gently with a spatula until the white streaks of flour disappear. Do not overmix.
- Gently fold in the chopped walnuts, reserving a small handful for topping.
- Pour batter into the prepared pan and smooth the top. Sprinkle reserved walnuts on top.
- Bake for 45-55 minutes for a standard loaf (or 30-35 minutes for a mini loaf) until a toothpick inserted in the center comes out clean.
- Let the bread cool in the pan for 10 minutes, then transfer to a wire rack to cool completely before slicing.
Notes
Use bananas with dark brown or black spots for maximum sweetness. Do not overmix the batter to avoid a tough texture. For best flavor, let the bread cool completely before slicing, though it is delicious warm. Day two often has the best flavor. Can be stored at room temperature for 3 days, refrigerated for 1 week, or frozen for 3 months.
Nutrition
- Serving Size: 1 slice
- Calories: 180
- Sugar: 14
- Sodium: 150
- Fat: 8
- Saturated Fat: 3
- Carbohydrates: 25
- Fiber: 2
- Protein: 3
Keywords: banana bread, small batch, walnuts, easy baking, quick bread, overripe bananas, moist banana bread


