For the longest time, chicken pot pie was one of those things I ordered at diners and never tried to make at home. The filling was always a little too salty, the vegetables a little too soft, and the top crust—well, it was usually a sad, soggy biscuit situation. I just accepted that a truly great version wasn’t going to happen in my own kitchen. It felt like one of those recipes that belonged to someone else’s grandmother, not something I could pull off on a random Tuesday night.
The problem was, I wanted the real thing. I wanted that thick, creamy filling packed with tender chicken and vegetables that still had some bite. I wanted a crust that shattered when you cut into it, sending steam curling up into the air. The kind of pot pie that makes you pause mid-bite and just sit there for a second. So I started paying attention—ordering it everywhere, jotting down notes about what worked and what didn’t, and testing versions at home until I stopped settling for less.
This classic chicken pot pie with flaky puff pastry crust is the result of all that quiet persistence. It is not fussy or complicated, but it does ask for a little patience and a few good techniques. The puff pastry gets golden and shatteringly crisp. The filling is rich without being heavy, and the vegetables are cooked just enough to stay bright. It is the kind of dinner that feels like a hug on a plate, and honestly, once I figured out how to make it this way, I stopped looking for it anywhere else.
Why You’ll Love This Recipe
This isn’t just another chicken pot pie recipe. It is the one that finally worked for me after plenty of trial and error, and I think it will work for you too.
- Quick & Easy: The filling comes together in about 20 minutes on the stove. Once it is in the dish and topped with puff pastry, the oven does the rest. Perfect for a weeknight when you want something cozy without slaving away for hours.
- Simple Ingredients: No fancy grocery store trips here. Chicken, frozen peas and carrots, some basic pantry spices, and a sheet of store-bought puff pastry. You probably have most of this stuff already.
- Perfect for Any Occasion: This works for a regular Tuesday dinner, a Sunday meal prep session, or even a holiday table when you need something that feels special but isn’t stressful. It travels well too, so it is great for potlucks or bringing to a friend who needs a good meal.
- Crowd-Pleaser: I have made this for picky kids, skeptical in-laws, and hungry dinner guests. Every single time, people go back for seconds. It is one of those rare dishes that everyone seems to love without exception.
- Unbelievably Delicious: The combination of the creamy, savory filling and the flaky, buttery puff pastry is next-level comfort food. The texture contrast alone is worth the effort.
What makes this version different from all the others? It is the little things: using a mix of chicken breast and thigh for better flavor, cooking the aromatics until they are actually soft (not just translucent), and letting the filling simmer long enough to thicken properly. The puff pastry gets an egg wash and a quick chill before baking, which makes all the difference in how it rises. This isn’t just a good recipe—it is the kind that makes you close your eyes after the first bite and forget about everything else for a minute.
What Ingredients You Will Need
This recipe uses straightforward ingredients that work together to create something greater than the sum of their parts. Here is what you will need and why each one matters.
- 2 tablespoons unsalted butter (adds richness to the base; I prefer Kerrygold for its flavor)
- 1 medium yellow onion, diced (provides the aromatic foundation; sweet onions work too)
- 2 medium carrots, peeled and diced (adds natural sweetness and color)
- 2 celery stalks, diced (brings a subtle savory note; do not skip it)
- 3 cloves garlic, minced (fresh garlic is non-negotiable here; jarred stuff tastes flat)
- 1/3 cup all-purpose flour (thickens the filling; you can use gluten-free flour blend if needed)
- 2 cups chicken broth (low-sodium is best so you control the salt; homemade is lovely if you have it)
- 1 cup whole milk (adds creaminess; 2% works fine but avoid skim)
- 1/2 cup heavy cream (gives the filling that luscious texture; you can sub with half-and-half)
- 2 cups cooked chicken, shredded or diced (rotisserie chicken is a great shortcut; I use a mix of breast and thigh for best flavor)
- 1 cup frozen peas (adds sweetness and color; no need to thaw them first)
- 1 teaspoon dried thyme (earthy and slightly floral; fresh thyme works too, use 1 tablespoon)
- 1/2 teaspoon dried rosemary (piney and aromatic; crush it between your fingers before adding)
- 1/2 teaspoon salt (adjust to taste; remember the broth adds salt too)
- 1/4 teaspoon black pepper (freshly ground is worth the extra five seconds)
- 1 sheet frozen puff pastry, thawed (Pepperidge Farm is my go-to; it is reliable and widely available)
- 1 large egg, beaten (for the egg wash; gives the pastry that gorgeous golden sheen)
Ingredient Selection Tips: For the chicken, I recommend using a mix of white and dark meat. Breast meat alone can get dry, while thigh meat stays juicy and adds more flavor. If you are using a rotisserie chicken, pick one that isn’t too heavily seasoned so the flavors don’t compete. For the puff pastry, look for one made with real butter if you can find it—it makes a noticeable difference in the flakiness. And please, for the love of good food, do not use margarine-based puff pastry. It won’t rise properly and the texture will be sad.
Substitution Guidance: You can swap the milk and cream for a dairy-free alternative like oat milk and coconut cream, but the filling will be slightly less rich. For a gluten-free version, use a gluten-free flour blend in the filling and a gluten-free puff pastry (yes, it exists). If you do not have fresh thyme and rosemary, dried Italian seasoning works in a pinch—just use about 1 1/2 teaspoons.
Equipment Needed
You do not need a ton of fancy equipment for this recipe, which is part of why I love it. Here is what you will need:
- Large skillet or Dutch oven (I use a 5-quart Dutch oven; it holds everything comfortably and distributes heat evenly)
- Wooden spoon or silicone spatula (for stirring the filling without scratching your pan)
- Chef’s knife and cutting board (a sharp knife makes dicing the vegetables so much easier)
- 9-inch pie dish or 8×8-inch baking dish (both work; a pie dish gives you more surface area for pastry)
- Baking sheet (place the dish on it to catch any drips; trust me on this one)
- Pastry brush (for the egg wash; a silicone one is easiest to clean)
- Rolling pin (optional, but helpful if you need to roll the puff pastry to fit your dish)
- Measuring cups and spoons (accuracy matters here, especially for the flour and liquid)
Alternative Options: If you do not have a Dutch oven, a deep skillet works fine—just make sure it has high sides to hold all the filling. No pastry brush? Use a paper towel dipped in the egg wash. No rolling pin? A wine bottle works surprisingly well. And if you do not have a pie dish, you can use individual ramekins for cute single-serving pot pies—just adjust the baking time down by about 5 minutes.
Maintenance Tip: If you are using a cast iron Dutch oven, make sure it is well-seasoned so the filling doesn’t stick. And always let your puff pastry thaw in the fridge overnight, not on the counter. A cold pastry is a flaky pastry.
Preparation Method
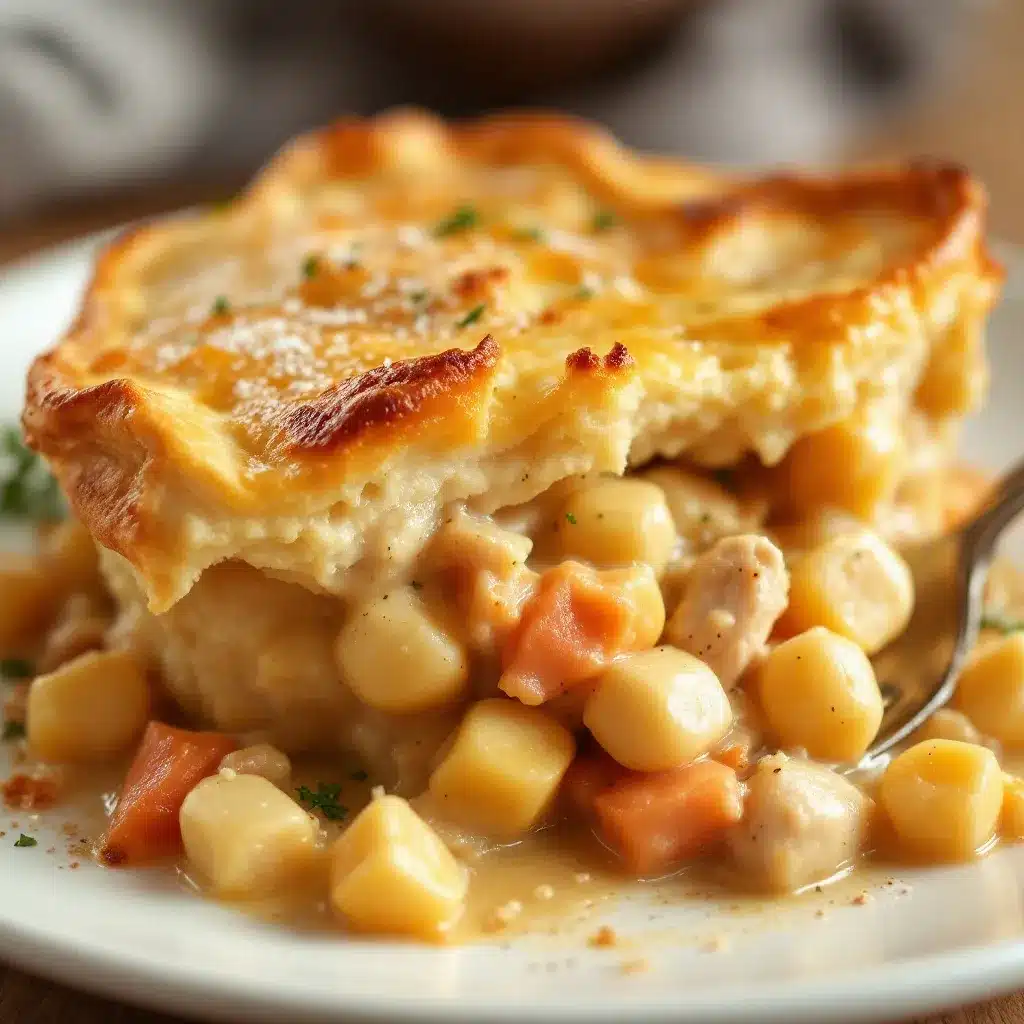
Here is how to make this classic chicken pot pie with flaky puff pastry crust. Take your time with each step—the results are worth it.
- Preheat your oven to 400°F (200°C). Place a baking sheet on the middle rack to preheat as well—this helps the bottom of the pie get nice and golden.
- Melt the butter in a large skillet or Dutch oven over medium heat. Once it is bubbling, add the diced onion, carrots, and celery. Cook for about 6-8 minutes, stirring occasionally, until the vegetables are softened but not browned. The onions should look translucent and the carrots should be tender when pierced with a fork.
- Add the minced garlic and cook for another 30 seconds until fragrant. Do not let it burn—garlic turns bitter in a hurry. Stir constantly during this step.
- Sprinkle the flour over the vegetables and stir well to coat everything evenly. Cook for 1-2 minutes, stirring constantly. This step cooks out the raw flour taste and helps thicken the filling later. The mixture will look dry and pasty—that is exactly what you want.
- Slowly pour in the chicken broth while whisking continuously to prevent lumps. Once the broth is incorporated, add the milk and heavy cream in the same way. Keep whisking until the mixture is smooth and starts to thicken, about 2-3 minutes.
- Add the dried thyme, rosemary, salt, and pepper. Stir to combine. Let the mixture simmer gently for 2-3 minutes, stirring occasionally. It should be thick enough to coat the back of a spoon but still pourable.
- Fold in the cooked chicken and frozen peas. Stir until everything is evenly distributed. Remove the pan from the heat and taste the filling. Adjust the seasoning if needed—this is your last chance before it goes into the oven.
- Pour the filling into your pie dish or baking dish. Spread it into an even layer. Set it aside while you prepare the pastry.
- On a lightly floured surface, roll out the thawed puff pastry sheet to about 1/8-inch thickness. You want it to be about an inch larger than your dish on all sides. If the pastry feels too soft, pop it in the fridge for 10 minutes.
- Carefully place the puff pastry over the filling, letting the edges hang over the sides. Tuck the overhang under itself and crimp the edges with a fork or your fingers to seal. Cut 3-4 small slits in the top of the pastry to let steam escape—otherwise, you will end up with a soggy mess.
- Brush the top of the pastry with the beaten egg. Be generous but do not let it pool in the slits. This gives the crust that beautiful golden color and extra flakiness.
- Place the dish on the preheated baking sheet and bake for 25-30 minutes, until the pastry is puffed and deep golden brown. The filling should be bubbling up through the slits. If the edges of the pastry are browning too fast, tent them loosely with foil for the last 5 minutes.
- Let the pot pie rest for 10 minutes before serving. This is crucial—the filling needs time to set so it doesn’t run all over your plate. I know it is hard to wait, but trust me on this.
Sensory Cues: When the filling is ready, it should look like a thick gravy that clings to the chicken and vegetables. The puff pastry should be golden brown and feel firm to the touch when you tap it gently. You should see steam rising from the slits, carrying that incredible aroma of thyme and butter. When you cut into it, the pastry should shatter with a satisfying crunch, revealing the creamy filling underneath.
Cooking Tips & Techniques
Over the years, I have made this recipe more times than I can count, and I have learned a few things the hard way. Here are the tips that make the difference between a good pot pie and a great one.
Do not skip the flour cooking step. I know it feels like you are just stirring flour into butter for no reason, but that 1-2 minute cook time is what prevents that raw, pasty taste. I have made the mistake of rushing this step, and the filling ended up tasting like a flour bomb. Not cute.
Keep the puff pastry cold. This is the single most important rule for flaky pastry. If the pastry gets too warm, the butter melts before it hits the oven, and you end up with a dense, sad crust instead of those beautiful, shatteringly flaky layers. If your kitchen is warm, pop the assembled pie in the fridge for 15 minutes before baking.
Use a mix of chicken cuts. I used to use only chicken breast, thinking it was healthier. But the filling was always a little dry and bland. Now I use a 50-50 mix of breast and thigh, and the difference is night and day. The thigh meat stays juicy and adds so much more flavor. If you are using rotisserie chicken, just shred a mix of white and dark meat.
Let the filling cool slightly before adding the pastry. This is a tip I learned after a few disastrous attempts where the pastry sank into the filling. If the filling is too hot, it will melt the butter in the pastry before it has a chance to puff. Let it sit for 5-10 minutes at room temperature before topping with the pastry.
Do not overfill the dish. I know it is tempting to pile in as much filling as possible, but leave about 1/2 inch of space at the top. Otherwise, the filling will bubble over and make a mess on your baking sheet—and more importantly, it will prevent the pastry from getting crispy on the bottom.
One mistake I still make sometimes: Not checking the seasoning before baking. The filling tastes different after it bakes, so make sure it is slightly more seasoned than you think it should be. A little extra salt and pepper goes a long way.
Variations & Adaptations
This recipe is wonderfully adaptable. Here are some variations I have tried and loved.
Vegetarian Version: Swap the chicken for 2 cups of diced mushrooms and an extra cup of mixed vegetables like corn, green beans, or diced potatoes. Sauté the mushrooms with the onions until they release their liquid and start to brown. Use vegetable broth instead of chicken broth. I have made this for vegetarian friends, and they always ask for the recipe.
Herb and Mushroom Twist: Add 8 ounces of sliced cremini mushrooms along with the vegetables, and swap the thyme and rosemary for fresh tarragon and parsley. The tarragon adds a subtle anise-like flavor that pairs beautifully with the creamy filling. This version feels a little more elegant, perfect for a dinner party.
Spicy Southwest Style: Add 1 diced jalapeño (seeds removed unless you want heat) with the onions, and swap the thyme and rosemary for 1 teaspoon of cumin and 1/2 teaspoon of smoked paprika. Use black beans and corn instead of peas, and top with a sprinkle of shredded cheddar before adding the pastry. This one is a crowd-pleaser for sure.
Dairy-Free Adaptation: Use olive oil instead of butter, and swap the milk and cream for full-fat oat milk and canned coconut cream. The filling will be slightly less rich, but still creamy and delicious. Make sure your puff pastry is dairy-free—most store-bought brands are, but check the label.
Gluten-Free Option: Use a gluten-free all-purpose flour blend in the filling (I like Bob’s Red Mill 1-to-1), and use a gluten-free puff pastry. The texture will be slightly different, but the flavor is still spot on. I have tested this with celiac friends, and they gave it a thumbs up.
Personal Variation: My favorite twist is adding a handful of fresh spinach at the end of cooking the filling, letting it wilt into the sauce. It adds a pop of color and a little extra nutrition without changing the flavor much. I also like to sprinkle a little freshly grated nutmeg into the filling—just a pinch—because it brings out the creaminess in a way that is hard to describe but impossible to ignore.
Serving & Storage Suggestions
Serving Temperature and Presentation: Serve this pot pie hot, straight from the oven. Let it rest for 10 minutes before cutting into it, then scoop out generous portions onto plates. The puff pastry should be golden and puffed, and the filling should be bubbling and creamy. I like to garnish with a sprinkle of fresh parsley or thyme leaves for a pop of color. A side salad with a simple vinaigrette is the perfect accompaniment—the acidity cuts through the richness beautifully.
Complementary Dishes: This pot pie pairs wonderfully with a crisp green salad, roasted asparagus, or steamed green beans. For a heartier meal, serve it with mashed potatoes or crusty bread to soak up every last bit of the creamy filling. A glass of crisp white wine like Sauvignon Blanc or a light Pinot Noir works well too.
Storage Instructions: Leftover pot pie can be stored in an airtight container in the refrigerator for up to 3 days. The puff pastry will lose some of its crispness, but the filling stays delicious. To reheat, place individual portions in a 350°F (175°C) oven for about 10-15 minutes, or until heated through. The microwave works in a pinch, but the pastry will be soft, not crispy.
Freezing Instructions: This pot pie freezes beautifully. Assemble the pie completely but do not bake it. Wrap the dish tightly in plastic wrap, then in a layer of aluminum foil. Freeze for up to 3 months. To bake from frozen, remove the plastic wrap and foil, place the frozen pie on a baking sheet, and bake at 400°F (200°C) for 45-50 minutes, until the pastry is golden and the filling is bubbling. You may need to tent the edges with foil if they brown too quickly.
Flavor Development: Honestly, this pot pie tastes even better the next day. The flavors meld together overnight, and the filling becomes even more rich and savory. I have been known to make it a day ahead on purpose, just so I can enjoy it at its peak. If you are meal prepping, make the filling and refrigerate it separately from the pastry, then assemble and bake when you are ready to eat.
Nutritional Information & Benefits
Here is the estimated nutritional breakdown for one serving (based on 6 servings per recipe). Please note that these values are approximate and can vary based on specific ingredients used.
| Nutrient | Amount per Serving |
|---|---|
| Calories | 485 |
| Total Fat | 28g |
| Saturated Fat | 14g |
| Cholesterol | 115mg |
| Sodium | 680mg |
| Total Carbohydrates | 32g |
| Dietary Fiber | 3g |
| Sugars | 6g |
| Protein | 24g |
Health Benefits: This recipe provides a good amount of protein from the chicken, which supports muscle health and keeps you feeling full. The carrots and peas add fiber, vitamin A, and antioxidants. The celery contributes vitamin K and a satisfying crunch. While this is not a low-calorie dish, it is a balanced meal that provides sustained energy and real nourishment. If you are watching your sodium, use low-sodium broth and reduce the added salt.
Dietary Considerations: This recipe contains gluten and dairy. For gluten-free and dairy-free options, see the variations section above. It is not suitable for a vegan diet, but the vegetarian version can be adapted with plant-based milk and cream.
Personal Wellness Perspective: I believe in enjoying food without guilt, and this pot pie is one of those dishes that feeds both the body and the soul. It is comfort food at its finest—hearty, satisfying, and made with real ingredients. If you are looking for a lighter option, serve it with a generous side of steamed greens and go easy on the pastry. But honestly, life is too short to skip the puff pastry.
Conclusion
This classic chicken pot pie with flaky puff pastry crust is everything I ever wanted from a comfort food recipe. It is rich without being heavy, creamy without being gloopy, and the puff pastry is genuinely flaky and golden. It is the kind of dinner that makes you want to curl up on the couch with a blanket and a good book, and it is simple enough to pull off on a busy weeknight.
I hope you give this recipe a try and make it your own. Swap in your favorite vegetables, experiment with different herbs, or try the vegetarian version if that is more your speed. The beauty of this recipe is that it is forgiving and adaptable—it works with whatever you have on hand.
If you make it, I would love to hear how it turned out. Drop a comment below and let me know what you think, or tag me in your photos if you share them online. And if you are looking for more cozy dinner ideas, check out the slow cooker honey garlic chicken meal prep bowls or the lemon herb salmon sheet pan dinner for more weeknight inspiration. Happy cooking, friends!
Frequently Asked Questions
Can I use store-bought pie crust instead of puff pastry?
Absolutely. A traditional pie crust will work perfectly, and it will give you a more classic, homestyle pot pie. The texture will be different—denser and more tender—but still delicious. If you use a pie crust, you can also add a bottom crust for a double-crust pie. Just blind bake the bottom crust for about 10 minutes before adding the filling to prevent sogginess.
How do I prevent the puff pastry from getting soggy?
The key is to make sure the filling is thickened properly before adding the pastry. The flour and cream should create a thick, gravy-like consistency that won’t soak into the pastry. Also, make sure the filling has cooled slightly before topping with the pastry, and always cut slits in the top to let steam escape. Baking on a preheated sheet pan also helps crisp the bottom.
Can I make this recipe ahead of time?
Yes, you can make the filling up to 2 days in advance and store it in the refrigerator. When you are ready to bake, reheat the filling gently on the stove, pour it into the dish, top with the puff pastry, and bake as directed. You can also assemble the entire pie (without baking) and refrigerate it for up to 24 hours before baking. Just add an extra 5-10 minutes to the baking time if the filling is cold.
What can I use instead of puff pastry?
If you do not have puff pastry, you can use refrigerated pie crust, canned biscuits (flattened slightly), or even a simple drop biscuit topping. For a low-carb option, try a topping made with almond flour and cheese. Puff pastry gives the flakiest result, but these alternatives all work well in a pinch.
How do I know when the pot pie is fully cooked?
The puff pastry should be deep golden brown and puffed up. You should see the filling bubbling through the slits in the pastry. If you insert a knife into the center, it should come out hot. The internal temperature of the filling should be at least 165°F (74°C) if you want to be precise. Let it rest for 10 minutes before serving so the filling sets properly.
Pin This Recipe!
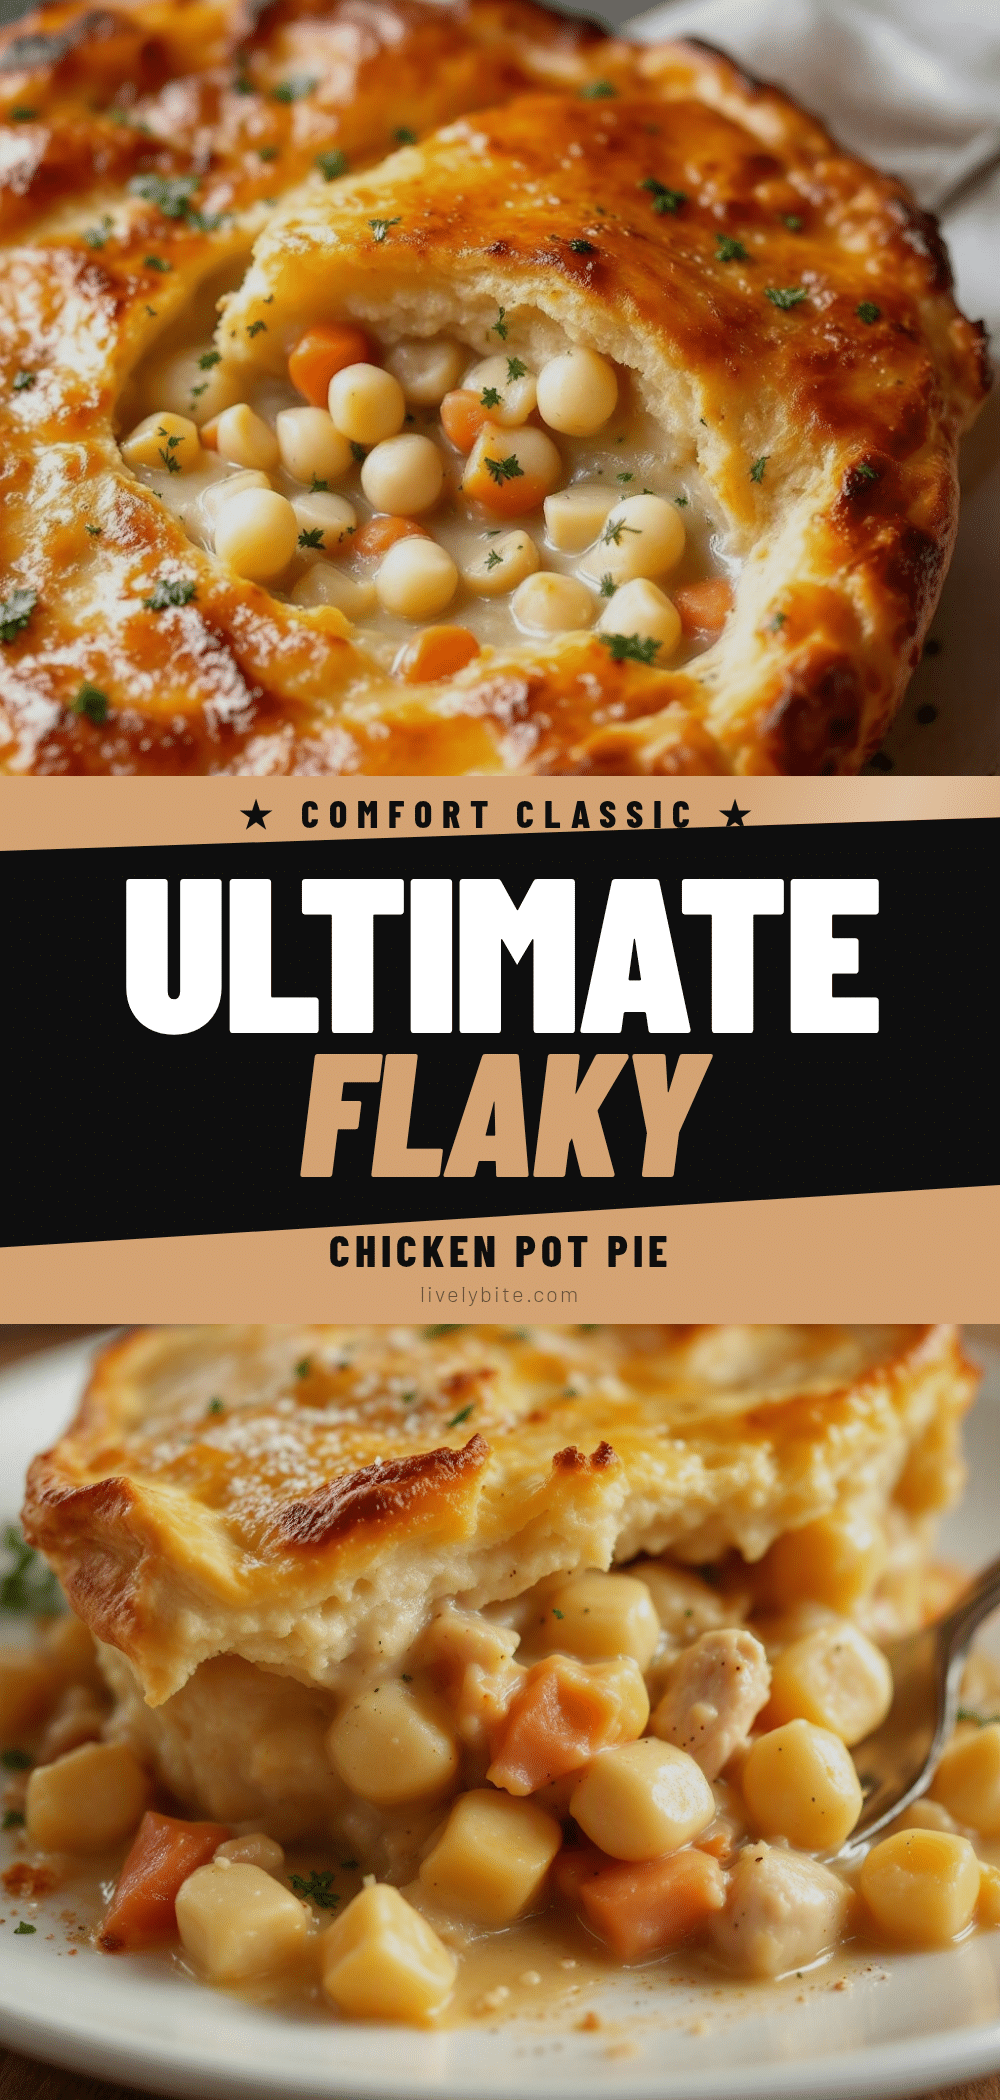
Classic Chicken Pot Pie with Flaky Puff Pastry
A rich, creamy chicken pot pie with tender chicken, bright vegetables, and a shatteringly flaky puff pastry crust. This comforting dish comes together in about 20 minutes on the stove and bakes to golden perfection.
- Prep Time: 20 minutes
- Cook Time: 30 minutes
- Total Time: 50 minutes
- Yield: 6 servings 1x
- Category: Main Course
- Cuisine: American
Ingredients
- 2 tablespoons unsalted butter
- 1 medium yellow onion, diced
- 2 medium carrots, peeled and diced
- 2 celery stalks, diced
- 3 cloves garlic, minced
- 1/3 cup all-purpose flour
- 2 cups chicken broth, low-sodium
- 1 cup whole milk
- 1/2 cup heavy cream
- 2 cups cooked chicken, shredded or diced
- 1 cup frozen peas
- 1 teaspoon dried thyme
- 1/2 teaspoon dried rosemary
- 1/2 teaspoon salt
- 1/4 teaspoon black pepper
- 1 sheet frozen puff pastry, thawed
- 1 large egg, beaten
Instructions
- Preheat your oven to 400°F (200°C). Place a baking sheet on the middle rack to preheat as well.
- Melt the butter in a large skillet or Dutch oven over medium heat. Add the diced onion, carrots, and celery. Cook for about 6-8 minutes, stirring occasionally, until the vegetables are softened but not browned.
- Add the minced garlic and cook for another 30 seconds until fragrant.
- Sprinkle the flour over the vegetables and stir well to coat everything evenly. Cook for 1-2 minutes, stirring constantly.
- Slowly pour in the chicken broth while whisking continuously to prevent lumps. Once the broth is incorporated, add the milk and heavy cream in the same way. Keep whisking until the mixture is smooth and starts to thicken, about 2-3 minutes.
- Add the dried thyme, rosemary, salt, and pepper. Stir to combine. Let the mixture simmer gently for 2-3 minutes, stirring occasionally.
- Fold in the cooked chicken and frozen peas. Stir until everything is evenly distributed. Remove the pan from the heat and taste the filling. Adjust the seasoning if needed.
- Pour the filling into your pie dish or baking dish. Spread it into an even layer. Set it aside while you prepare the pastry.
- On a lightly floured surface, roll out the thawed puff pastry sheet to about 1/8-inch thickness. You want it to be about an inch larger than your dish on all sides.
- Carefully place the puff pastry over the filling, letting the edges hang over the sides. Tuck the overhang under itself and crimp the edges with a fork or your fingers to seal. Cut 3-4 small slits in the top of the pastry to let steam escape.
- Brush the top of the pastry with the beaten egg. Be generous but do not let it pool in the slits.
- Place the dish on the preheated baking sheet and bake for 25-30 minutes, until the pastry is puffed and deep golden brown. The filling should be bubbling up through the slits.
- Let the pot pie rest for 10 minutes before serving.
Notes
For best results, use a mix of chicken breast and thigh. Keep puff pastry cold until ready to bake. Let filling cool slightly before adding pastry to prevent sogginess. The pot pie tastes even better the next day.
Nutrition
- Serving Size: 1 serving
- Calories: 485
- Sugar: 6
- Sodium: 680
- Fat: 28
- Saturated Fat: 14
- Carbohydrates: 32
- Fiber: 3
- Protein: 24
Keywords: chicken pot pie, puff pastry, comfort food, chicken dinner, easy weeknight meal


