The bag of cookies sat untouched on the counter for exactly six minutes. I’d set them out to cool, walked away to wipe down the mixer, and when I turned back, my husband was standing there with a guilty look and a half-eaten cookie in each hand. “These are different,” he said, mouth full. “These are the ones.”
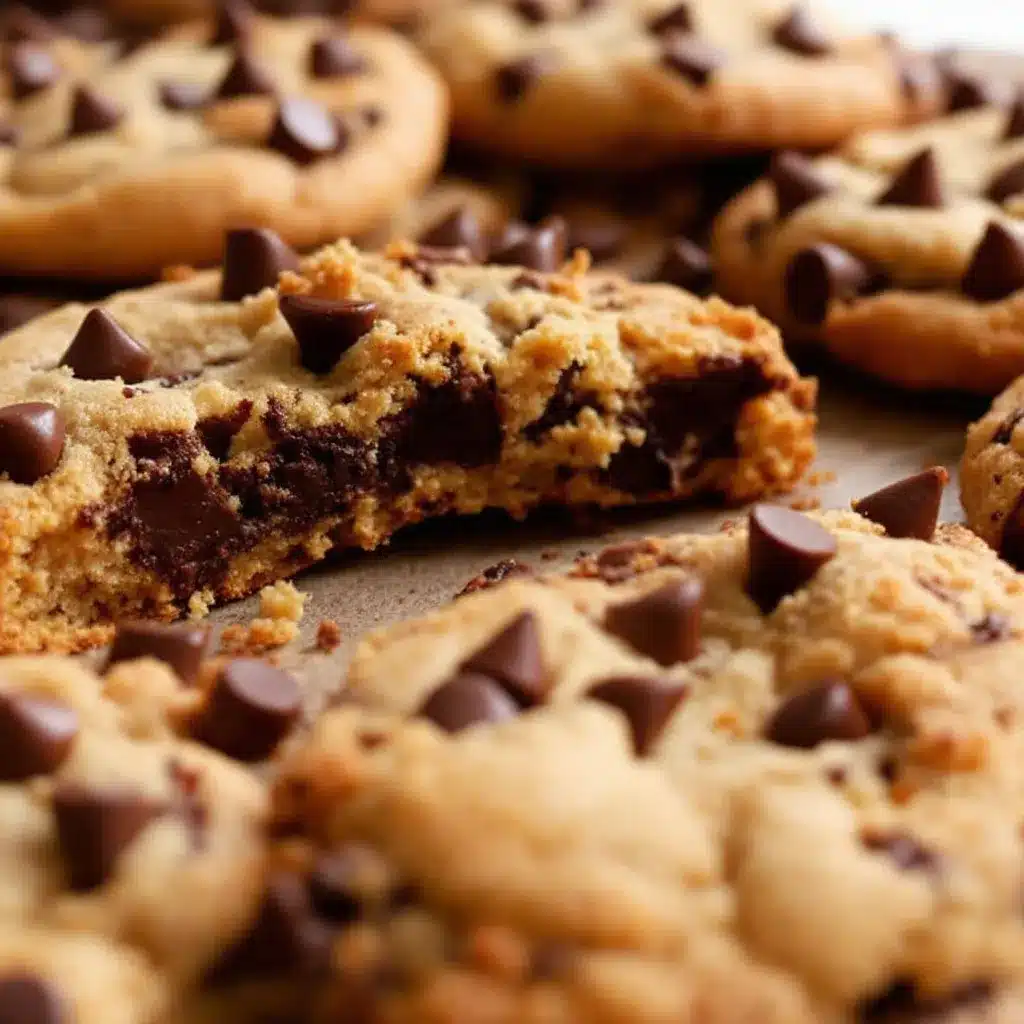
He wasn’t wrong. After years of trying—and honestly, failing—to recreate that bakery-style chocolate chip cookie experience at home, I’d finally cracked the code. Not the thin, crispy kind that shatters when you bite into it. Not the cakey, puffy ones that feel more like a muffin top. I wanted the cookie. The one with the golden, slightly crisp edges, a center so soft and chewy it practically bends before it breaks, and those pools of melted chocolate that stay soft even after the cookie has cooled completely.
It took me twelve batches over three months to get there. Twelve batches of dough that spread too much, or not enough. Cookies that were hard the next day, or greasy, or just… fine. But this recipe? This one hits every single note. The texture is spot-on—chewy without being tough, soft without being raw. The flavor has that deep, buttery-caramel undertone you only get from properly creamed butter and the right ratio of sugars.
The best part? You don’t need a pastry degree or a commercial kitchen. You just need patience, a good baking sheet, and a recipe that actually works. This is that recipe.
Why You’ll Love This Recipe
Let me be real with you for a second. There are about a million chocolate chip cookie recipes on the internet. I know because I’ve tried a solid hundred of them. So what makes these cookies different? I’m glad you asked.
- Bakery texture without the bakery markup: These cookies have that signature thick, soft, chewy center with slightly crisped edges. You know the one—the cookie that costs $4 at a fancy bakery and is worth every penny. Now you can make a dozen for pocket change.
- Simple ingredients, smart technique: Nothing weird here. No cream cheese, no pudding mix, no chilling for 24 hours (though you can if you want). Just butter, sugar, flour, eggs, and chocolate. The magic is in how you handle them.
- Perfect for any occasion: Birthday parties, cookie swaps, late-night cravings, or just a Tuesday that needs saving. These cookies show up and deliver every single time.
- Kid-approved and adult-obsessed: My niece told me these are “better than the ones from the mall.” I’m not going to argue with that kind of review.
- Consistently perfect: No more guessing games. This recipe works the same way every time, whether you’re a beginner baker or someone who’s been making cookies for decades.
This isn’t just another cookie recipe. It’s the one that made me stop looking. The one my friends text me for. The one that disappears from the cooling rack before it’s even fully cool. And honestly? That’s the highest compliment a cookie can get.
What Ingredients You Will Need
This recipe relies on simple, everyday ingredients to create something truly special. The key is using good-quality components and treating them right. Here’s what you’ll need and why each one matters.
- 2 ¼ cups (280g) all-purpose flour – Spoon and level your flour. Scooping directly from the bag packs in too much flour and gives you dry, crumbly cookies. Use a spoon to fluff the flour, then spoon it into your measuring cup and level it off with a knife.
- 1 teaspoon baking soda – Make sure your baking soda is fresh. Test it by dropping a little into vinegar—if it fizzes vigorously, you’re good. Old baking soda = flat cookies.
- ½ teaspoon salt – Don’t skip this. Salt balances the sweetness and enhances the chocolate flavor. I use fine sea salt for baking.
- 1 cup (226g) unsalted butter, softened – This is crucial. The butter needs to be at genuine room temperature—soft enough that your finger leaves an indent when you press it, but not melted. If you microwave it, you risk melting it, which changes the cookie texture completely. (Ask me how I learned this one.)
- ¾ cup (150g) granulated sugar – White sugar helps create those crispy edges. It caramelizes as the cookies bake, giving you that golden-brown color and slightly crunchy rim.
- ¾ cup (160g) packed light brown sugar – Brown sugar is the secret to chewiness. It contains molasses, which adds moisture and that deep, almost caramel flavor. Pack it firmly into your measuring cup.
- 2 large eggs – Use room temperature eggs. Cold eggs can seize the butter and create a lumpy dough. If you forgot to take them out ahead of time, place them in a bowl of warm water for 5 minutes.
- 2 teaspoons vanilla extract – Pure vanilla extract makes a real difference here. Imitation vanilla works in a pinch, but pure vanilla gives a richer, more complex flavor.
- 2 cups (340g) semi-sweet chocolate chips or chunks – I prefer chocolate chunks or a mix of chips and chunks for those glorious pools of melted chocolate. Ghirardelli or Guittard are my go-to brands. You can also chop up a good-quality chocolate bar for an even more bakery-style look.
- Flaky sea salt for finishing (optional but highly recommended) – A tiny sprinkle of flaky salt on top right when the cookies come out of the oven transforms them. It’s that sweet-and-salty magic that makes bakery cookies so addictive.
Equipment Needed
You don’t need fancy equipment to make amazing cookies, but having the right tools makes the process smoother and the results more consistent.
- Stand mixer or hand mixer: A stand mixer with the paddle attachment is ideal for creaming butter and sugar properly, but a hand mixer works perfectly too. You can even do it by hand with a wooden spoon—it’s just a good arm workout.
- Large mixing bowls: You’ll need at least two—one for dry ingredients and one for wet ingredients.
- Rubber spatula: Essential for scraping down the bowl and folding in chocolate chips without overmixing.
- 2 baking sheets: Light-colored aluminum baking sheets are best. Dark sheets absorb more heat and can cause the bottoms of your cookies to burn before the centers are done. If you only have dark sheets, reduce your oven temperature by 25°F.
- Parchment paper or silicone baking mats: Parchment paper is my preference—it’s non-stick, easy to clean, and helps cookies bake evenly. Silicone mats work too, but cookies might spread slightly more.
- Cookie scoop (2-tablespoon size): This is a game-changer. It gives you evenly sized cookies that bake at the same rate. A 1.5-tablespoon scoop works too for slightly smaller cookies.
- Cooling rack: Letting cookies cool on the baking sheet for a few minutes before transferring them to a rack is key for that perfect texture.
- Kitchen scale (optional but helpful): Weighing your ingredients, especially flour, gives you the most consistent results. I resisted for years, and now I wish I’d started sooner.
Preparation Method
Alright, let’s make some cookies. Take your time with each step—rushing is the number one reason cookies don’t turn out right.
- Preheat your oven to 375°F (190°C). Line two baking sheets with parchment paper. Getting the oven fully preheated before you start baking is important—don’t rush this step.
- Whisk the dry ingredients together. In a medium bowl, whisk together the flour, baking soda, and salt. Set this aside. Whisking aerates the flour and ensures the leavening and salt are evenly distributed.
- Cream the butter and sugars. In the bowl of your stand mixer (or a large bowl if using a hand mixer), beat the softened butter, granulated sugar, and brown sugar together on medium speed for 2-3 minutes. You’re looking for a light, fluffy, pale-colored mixture. Scrape down the sides and bottom of the bowl with a spatula halfway through. Don’t shortcut this step—proper creaming is essential for texture.
- Add the eggs and vanilla. Add the eggs one at a time, beating well after each addition. Then add the vanilla extract and beat until combined. The mixture should look smooth and glossy. Scrape the bowl again.
- Combine wet and dry ingredients. With the mixer on low speed, gradually add the flour mixture. Mix just until you no longer see streaks of flour. Overmixing at this stage develops gluten, which can make your cookies tough. Stop the mixer as soon as the dough comes together.
- Fold in the chocolate chips. Remove the bowl from the mixer and use a rubber spatula to gently fold in the chocolate chips. Make sure they’re evenly distributed throughout the dough. If you’re using a mix of chips and chunks, this is where the magic happens.
- Chill the dough (optional but recommended). For the absolute best texture, cover the bowl and refrigerate the dough for at least 30 minutes, or up to 72 hours. Chilling solidifies the butter, which means less spreading in the oven and a thicker, chewier cookie. If you’re short on time, you can skip this, but your cookies will spread more and be slightly thinner.
- Scoop the dough. Use your cookie scoop to portion out rounded tablespoons of dough (about 2 tablespoons each). Place them on the prepared baking sheets, spacing them about 2 inches apart. For bakery-style cookies, I like to press a few extra chocolate chips onto the tops of the dough balls—it makes them look gorgeous.
- Bake one sheet at a time. Place one baking sheet on the center rack of your preheated oven. Bake for 9-11 minutes, rotating the sheet halfway through. The cookies are done when the edges are golden brown and the centers still look slightly underdone and puffy. They will continue to set as they cool. For softer, chewier cookies, pull them at the 9-minute mark. For slightly crisper edges, go to 11 minutes.
- Cool on the baking sheet. Let the cookies rest on the baking sheet for 5 minutes. This is critical—if you try to move them too soon, they’ll fall apart. After 5 minutes, transfer them to a wire cooling rack to cool completely. If using flaky sea salt, sprinkle it on top immediately after pulling them from the oven.
- Repeat with remaining dough. Let your baking sheet cool completely between batches, or use a second sheet. Placing dough on a hot sheet will cause it to spread immediately and give you flat cookies.
Cooking Tips & Techniques
I’ve made every mistake you can imagine with chocolate chip cookies. Here’s what I learned so you don’t have to make the same ones.
The butter temperature is non-negotiable. I cannot stress this enough. Softened butter should feel like room-temperature cream cheese—firm but spreadable. If your butter is too cold, it won’t cream properly and you’ll get dense cookies. If it’s melted or even too soft, your cookies will spread into thin, greasy puddles. I’ve done both, and neither is pretty.
Don’t overmix after adding flour. Once flour hits the wet ingredients, gluten starts developing. Mix just until you can’t see any more dry flour. A few streaks are fine—you’ll finish incorporating them when you fold in the chocolate chips. Overmixed dough gives you tough, cakey cookies instead of tender, chewy ones.
Use a cookie scoop for consistent sizing. This isn’t just about looks—evenly sized cookies bake at the same rate. If some are bigger than others, you’ll end up with a batch where half are overdone and half are underdone. A 2-tablespoon scoop is my favorite for that perfect bakery size.
The chilling debate is real. I’ve tested this extensively. Chilled dough (30 minutes minimum) produces thicker, chewier cookies with better flavor development. If you chill for 24-72 hours, the flavors deepen even more as the ingredients meld. But if you’re in a hurry, you can bake immediately—just expect slightly thinner cookies. Neither version is bad, but chilling takes good cookies to great cookies.
Watch your oven like a hawk. Oven temperatures vary wildly. Your oven might run hot or cold. The first time you make these, check the cookies at 8 minutes. Look for golden edges and pale, slightly puffy centers. Every oven is different, and knowing yours is half the battle in baking.
Let them rest on the sheet. Those 5 minutes on the hot baking sheet are doing important work. The residual heat continues to cook the centers gently while the edges firm up. Moving them too early is the fastest way to ruin a perfect batch.
Variations & Adaptations
One of the best things about this recipe is how adaptable it is. Here are some of my favorite variations.
Double Chocolate Chip Cookies: Replace ¼ cup of the all-purpose flour with ¼ cup of unsweetened cocoa powder. Use white chocolate chips or a mix of semi-sweet and white chocolate for a stunning contrast. These are dangerously good.
Gluten-Free Version: Substitute the all-purpose flour with a high-quality 1:1 gluten-free baking flour blend (I like King Arthur Measure for Measure or Bob’s Red Mill). Add an extra tablespoon of milk or water if the dough seems dry. The texture will be slightly different—a bit more tender and crumbly—but still deliciously chewy.
Nutty Brown Butter Cookies: Brown the butter before using it. Melt the butter in a saucepan over medium heat, swirling occasionally, until it turns golden brown and smells nutty (about 5-7 minutes). Pour it into a bowl and let it cool completely until it’s solid again before creaming with the sugars. This adds an incredible, almost toffee-like depth of flavor.
Mix-In Swaps: Feel free to swap the semi-sweet chips for milk chocolate, dark chocolate, or even butterscotch chips. Add ½ cup of chopped toasted nuts (walnuts or pecans work beautifully) or ½ cup of shredded coconut. My personal favorite twist? Use 1 cup of semi-sweet chips and 1 cup of chopped dark chocolate bar for those dramatic chocolate pools.
Vegan Adaptation: Use vegan butter (like Miyoko’s or Earth Balance) and replace each egg with a flax egg (1 tablespoon ground flaxseed + 3 tablespoons water, mixed and rested for 5 minutes). The texture will be slightly less chewy, but they’re still incredibly satisfying.
Serving & Storage Suggestions
These cookies are best served slightly warm, when the chocolate is still soft and gooey. If you can resist eating them all straight from the cooling rack, here’s how to handle the leftovers.
Serving: Serve at room temperature or slightly warm. For that fresh-from-the-oven experience, pop a cookie in the microwave for 10-15 seconds. Pair with a cold glass of milk, a hot coffee, or a scoop of vanilla ice cream for an indulgent dessert. They’re also amazing crumbled over yogurt or ice cream sundaes.
Storage: Store baked cookies in an airtight container at room temperature for up to 5 days. Place a slice of bread in the container—it absorbs excess moisture and keeps the cookies soft. Replace the bread every couple of days. For longer storage, freeze the baked cookies in a single layer on a baking sheet, then transfer them to a freezer-safe bag. They’ll keep for up to 3 months.
Freezing the Dough: This is my favorite trick. Scoop the dough into balls and place them on a parchment-lined baking sheet. Freeze until solid (about 1 hour), then transfer the frozen dough balls to a freezer bag. You can bake them straight from frozen—just add 2-3 minutes to the baking time. Fresh cookies on demand, anytime you want them.
Reheating: To revive day-old cookies, place them on a baking sheet in a 300°F oven for 3-5 minutes. They’ll crisp up the edges and soften the centers beautifully. The microwave works in a pinch, but the oven method gives you that bakery-fresh texture.
Flavor Development: Here’s something interesting—these cookies actually taste better the next day. The flavors meld and deepen overnight. If you can manage to save a few, try one on day two. You’ll notice a richer, more complex flavor.
Nutritional Information & Benefits
Let’s be honest—chocolate chip cookies are a treat, not a health food. But knowing what’s in them helps you enjoy them mindfully.
Estimated nutrition per cookie (based on 24 cookies):
- Calories: 220
- Fat: 12g
- Saturated Fat: 7g
- Carbohydrates: 28g
- Sugar: 18g
- Protein: 3g
- Fiber: 1g
- Sodium: 120mg
Dietary considerations: This recipe contains gluten, dairy, and eggs. For gluten-free and vegan options, see the variations section above. The cookies are nut-free as written, but check your chocolate chip labels if allergies are a concern.
Health highlights: Dark chocolate (if you use it) contains antioxidants and minerals like iron and magnesium. The butter provides vitamin A, and eggs offer protein and choline. That said, these are an occasional indulgence—and that’s perfectly okay. Life is too short for bad cookies, and sometimes you just need a really, really good one.
Conclusion
These soft chewy chocolate chip cookies have become my signature bake, and for good reason. They deliver that elusive bakery-style texture—crispy edges, soft centers, melty chocolate—without any complicated techniques or hard-to-find ingredients. They’re the cookies I bring to every potluck, the ones I make for stressed-out friends, the ones that make people close their eyes and say “mmm” on the first bite.
I’d love for you to try them. Make a batch this weekend. Share them with someone you love. Or keep them all for yourself—I won’t tell. And when you do make them, come back and let me know how they turned out. Did you add extra chocolate chips? Did you try the brown butter version? Did you manage to save any for the next day? Drop a comment below—I read every single one, and your feedback helps me create even better recipes.
Happy baking, friend. You’ve got this.
Frequently Asked Questions
Can I use margarine instead of butter?
I don’t recommend it. Butter provides the flavor and texture that makes these cookies special. Margarine has a higher water content, which can lead to spreading and flat cookies. Stick with real butter for the best results.
Why did my cookies turn out flat?
Flat cookies usually happen for one of three reasons: the butter was too soft or melted, the dough wasn’t chilled, or the baking soda is old. Make sure your butter is softened but not melted, chill the dough for at least 30 minutes, and check that your baking soda is fresh.
Can I reduce the sugar in this recipe?
You can reduce the sugar slightly (by about ¼ cup total), but be aware that sugar does more than sweeten—it affects texture, browning, and moisture. Reducing sugar too much will result in drier, less chewy cookies. If you want to experiment, try reducing the granulated sugar first.
How do I make my cookies look bakery-style?
Two tricks: First, press a few extra chocolate chips onto the tops of the dough balls before baking—this gives them that studded, professional look. Second, sprinkle a pinch of flaky sea salt on top right when they come out of the oven. It makes them look (and taste) like they came from a fancy bakery.
Can I make the dough ahead of time?
Absolutely. You can refrigerate the dough for up to 72 hours. In fact, the flavor improves over time. You can also freeze the dough balls for up to 3 months. Bake frozen dough straight from the freezer, adding 2-3 minutes to the baking time. Fresh cookies whenever you want them—it’s the ultimate life hack.
Pin This Recipe!

Perfect Soft Chewy Chocolate Chip Cookies – Best Bakery Recipe

After years of trying to recreate that bakery-style chocolate chip cookie experience at home, this recipe finally cracked the code. These cookies have golden, slightly crisp edges, a center so soft and chewy it practically bends before it breaks, and pools of melted chocolate that stay soft even after the cookie has cooled completely.
- Prep Time: 15 minutes
- Cook Time: 10 minutes
- Total Time: 25 minutes (plus optional 30 minutes chilling)
- Yield: 24 cookies 1x
- Category: Dessert
- Cuisine: American
Ingredients
- 2 ¼ cups (280g) all-purpose flour
- 1 teaspoon baking soda
- ½ teaspoon salt
- 1 cup (226g) unsalted butter, softened
- ¾ cup (150g) granulated sugar
- ¾ cup (160g) packed light brown sugar
- 2 large eggs, room temperature
- 2 teaspoons vanilla extract
- 2 cups (340g) semi-sweet chocolate chips or chunks
- Flaky sea salt for finishing (optional)
Instructions
- Preheat your oven to 375°F (190°C). Line two baking sheets with parchment paper.
- Whisk the dry ingredients together: In a medium bowl, whisk together the flour, baking soda, and salt. Set aside.
- Cream the butter and sugars: In the bowl of a stand mixer (or large bowl with hand mixer), beat the softened butter, granulated sugar, and brown sugar together on medium speed for 2-3 minutes until light, fluffy, and pale-colored. Scrape down the sides and bottom of the bowl halfway through.
- Add the eggs and vanilla: Add the eggs one at a time, beating well after each addition. Add the vanilla extract and beat until combined. The mixture should look smooth and glossy. Scrape the bowl again.
- Combine wet and dry ingredients: With the mixer on low speed, gradually add the flour mixture. Mix just until no streaks of flour remain. Do not overmix.
- Fold in the chocolate chips: Remove the bowl from the mixer and use a rubber spatula to gently fold in the chocolate chips until evenly distributed.
- Chill the dough (optional but recommended): Cover the bowl and refrigerate the dough for at least 30 minutes, or up to 72 hours for best texture.
- Scoop the dough: Use a cookie scoop to portion out rounded tablespoons of dough (about 2 tablespoons each). Place on prepared baking sheets, spacing about 2 inches apart. Press a few extra chocolate chips onto the tops if desired.
- Bake one sheet at a time: Place one baking sheet on the center rack. Bake for 9-11 minutes, rotating the sheet halfway through. Cookies are done when edges are golden brown and centers still look slightly underdone and puffy.
- Cool on the baking sheet: Let cookies rest on the baking sheet for 5 minutes. If using flaky sea salt, sprinkle on top immediately after pulling from the oven. Then transfer to a wire cooling rack to cool completely.
- Repeat with remaining dough: Let the baking sheet cool completely between batches.
Notes
Butter temperature is crucial – softened but not melted. Chilling dough for at least 30 minutes produces thicker, chewier cookies. For softer cookies, bake at 9 minutes; for crisper edges, bake at 11 minutes. Let cookies rest on baking sheet for 5 minutes before moving. Cookies taste even better the next day as flavors meld.
Nutrition
- Serving Size: 1 cookie
- Calories: 220
- Sugar: 18
- Sodium: 120
- Fat: 12
- Saturated Fat: 7
- Carbohydrates: 28
- Fiber: 1
- Protein: 3
Keywords: chocolate chip cookies, soft chewy cookies, bakery style cookies, homemade cookies, easy cookie recipe


