For a while, I just accepted that pumpkin cheesecake wasn’t going to happen without turning on the oven. Every fall, I’d scroll past gorgeous layered dessert photos, bookmark them, and then close the tab the second I remembered my kitchen stayed warm until November. The craving for that tangy cream cheese meeting sweet, spiced pumpkin—it was real. But so was my stubborn refusal to heat up the house for it.
I tried a few no-bake shortcuts over the years, and honestly, most of them were a letdown. Either the filling never set firm enough to slice cleanly, or the crust turned into a crumbly mess the second you looked at it. There was one version that tasted alright but slid apart on the plate like it had somewhere better to be. Not exactly the kind of dessert you bring to a Friendsgiving without apologizing first.
So I went back to the drawing board (or, you know, my tiny kitchen counter). I wanted a bar that actually held its shape, had that classic cheesecake tang, and let the pumpkin shine without being too heavy. It took a few rounds of tweaking—more cream cheese here, less sugar there, a better trick for the crust—before I landed on something that felt right.
These easy no-bake pumpkin cheesecake bars are the result of that quiet persistence. No oven required, no complicated steps, and they slice like a dream. They’re the kind of dessert that makes you wonder why you ever bothered with the complicated stuff in the first place.
Why You’ll Love This Recipe
These bars aren’t just another no-bake dessert that looks good on paper but falls apart in practice. They’re tested, tweaked, and honestly, a little bit perfected.
- No Oven Needed: Seriously. Your oven stays off, your kitchen stays cool, and you still get that layered pumpkin cheesecake experience. Perfect for those warm fall days or when you’re just too tired to bake.
- Simple Ingredients: You probably already have most of these in your pantry. Graham crackers, cream cheese, pumpkin puree—no fancy grocery store scavenger hunts required.
- Set and Slice Cleanly: This was my biggest hurdle, and I’m proud of the fix. The filling firms up beautifully in the fridge, so you get those sharp, clean edges every time.
- Crowd-Pleaser: I’ve brought these to potlucks and family dinners, and they disappear fast. Kids love the creamy texture, adults love the balanced spice—everyone wins.
- Make-Ahead Friendly: You can prep these a day or two in advance, which is a lifesaver when you’re hosting. Just pull them out, slice, and serve.
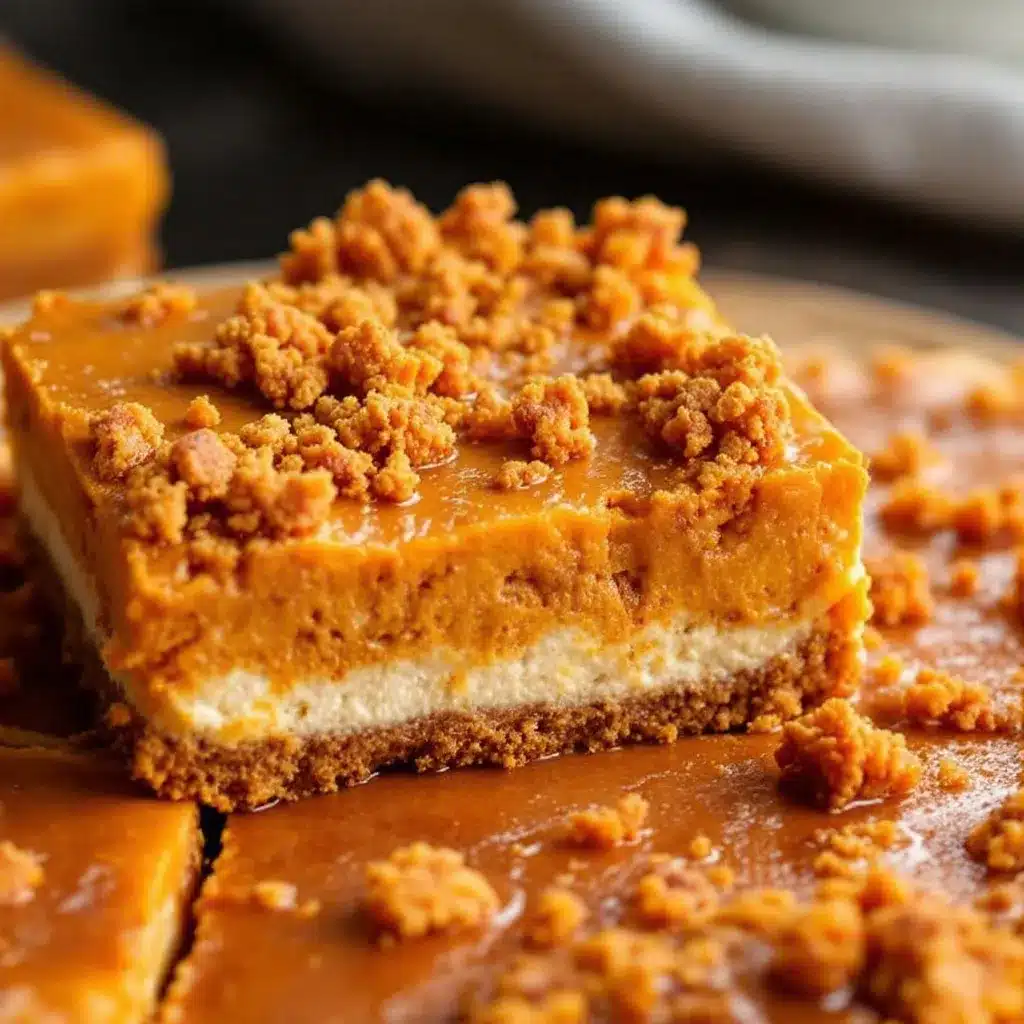
What makes these different from other no-bake pumpkin desserts is the texture. The filling is dense enough to feel like real cheesecake, but light enough that you don’t feel weighed down after a slice. It’s comfort food you can actually enjoy without regret.
What Ingredients You Will Need
This recipe relies on a short list of pantry-friendly ingredients, each playing a specific role in building that creamy, spiced, and satisfying bar. No surprises, just good, honest components.
For the Crust
- 2 cups (200g) graham cracker crumbs (about 14-16 full sheets) — I prefer the classic Honey Maid brand for consistent texture, but any plain graham cracker works. You can pulse them in a food processor or crush them in a bag with a rolling pin.
- 1/2 cup (115g) unsalted butter, melted — This binds the crumbs and adds richness. If you only have salted butter, just reduce the added salt in the filling by a pinch.
- 1/4 cup (50g) granulated sugar — Adds a touch of sweetness to balance the buttery, toasty crust.
- 1/4 teaspoon salt — Enhances all the flavors and prevents the crust from tasting flat.
For the Pumpkin Layer
- 1 1/2 cups (340g) pumpkin puree — Make sure it’s pure pumpkin, not pumpkin pie filling. Libby’s is my go-to brand for consistent moisture and flavor.
- 1/2 cup (100g) packed light brown sugar — Adds depth and a subtle molasses note that pairs beautifully with the spices.
- 1 teaspoon vanilla extract — Pure vanilla extract is always better, but imitation works in a pinch.
- 1 1/2 teaspoons pumpkin pie spice — If you don’t have a pre-mixed blend, use 3/4 teaspoon cinnamon, 1/4 teaspoon nutmeg, 1/4 teaspoon ginger, and 1/8 teaspoon cloves.
- 1/4 teaspoon salt — Balances the sweetness and brightens the pumpkin flavor.
For the Cheesecake Layer
- 16 oz (450g) cream cheese, softened to room temperature — Full-fat Philadelphia is my favorite for the creamiest, most stable filling. Low-fat works but the texture will be slightly less rich.
- 1/2 cup (100g) granulated sugar — Just enough to sweeten without overwhelming the tangy cream cheese.
- 1 teaspoon vanilla extract — Again, pure is best.
- 1 cup (240ml) heavy cream, cold — This is the secret to a light, airy cheesecake layer that still holds its shape. Don’t substitute with milk or half-and-half; the fat content is crucial for structure.
For the Topping (Optional but Recommended)
- 1/2 cup (120ml) heavy cream, cold — For whipping into a soft, billowy topping.
- 1 tablespoon powdered sugar — Sweetens the whipped cream without making it grainy.
- 1/4 teaspoon vanilla extract — For flavor.
- Ground cinnamon or pumpkin pie spice, for dusting — A little sprinkle on top makes it look (and smell) extra special.
Equipment Needed
You don’t need a fancy kitchen to pull these off. Here’s what I use:
- 9×9-inch baking pan — This is the perfect size for bars with a nice thickness. An 8×8-inch pan works too, but your bars will be slightly taller. I love my metal baking pan for even cooling.
- Parchment paper — Lining the pan makes lifting the bars out a breeze. Don’t skip this step.
- Food processor or zip-top bag and rolling pin — For crushing the graham crackers. I use my food processor because it’s faster and gives a more even crumb.
- Electric hand mixer or stand mixer — You’ll need this for whipping the cream and beating the cream cheese until smooth. A whisk and a strong arm could work, but it’s a workout.
- Medium and large mixing bowls — For the crust, pumpkin layer, and cheesecake layer separately.
- Spatula — For spreading the layers evenly.
- Measuring cups and spoons — Accuracy matters, especially with the cream cheese and heavy cream.
If you don’t have a food processor, no worries. I’ve crushed graham crackers in a bag with a rolling pin more times than I can count. It’s a little messy but totally doable.
Preparation Method
Let’s get to it. Follow these steps, and you’ll have a beautiful pan of pumpkin cheesecake bars chilling in the fridge before you know it.
Step 1: Prepare the Crust
Line your 9×9-inch baking pan with parchment paper, leaving a little overhang on two opposite sides. This will act as handles later. In a medium bowl, combine the graham cracker crumbs, 1/4 cup granulated sugar, and 1/4 teaspoon salt. Pour in the melted butter and stir with a fork until every crumb is moistened. The mixture should look like wet sand.
Press the mixture firmly into the bottom of the prepared pan. I use the bottom of a flat measuring cup to really pack it down—this prevents the crust from crumbling when you slice the bars later. Pop the pan in the refrigerator while you make the fillings.
Step 2: Make the Pumpkin Layer
In a medium bowl, whisk together the pumpkin puree, brown sugar, vanilla extract, pumpkin pie spice, and 1/4 teaspoon salt. Set this aside for now. It should be smooth and fragrant—if it smells like fall, you’re on the right track.
Step 3: Whip the Cream
In a large mixing bowl, pour in the cold heavy cream. Using an electric hand mixer or a stand mixer fitted with the whisk attachment, beat the cream on medium-high speed until stiff peaks form. This usually takes about 2-3 minutes. You’ll know it’s ready when you lift the beaters and the cream holds its shape without drooping. Be careful not to over-whip, or you’ll end up with butter. Set the whipped cream aside in the refrigerator for a moment.
Step 4: Make the Cheesecake Layer
In another large bowl, beat the softened cream cheese with an electric mixer on medium speed until it’s completely smooth and lump-free. This is important—lumpy cream cheese makes for a lumpy cheesecake. Add the 1/2 cup granulated sugar and 1 teaspoon vanilla extract, and beat until well combined, about 1 minute.
Now, gently fold the whipped cream into the cream cheese mixture. Use a spatula and a gentle hand—fold until just combined. You want to keep as much air in the whipped cream as possible. This is what gives the cheesecake layer its light, mousse-like texture while still being firm enough to slice.
Step 5: Assemble the Layers
Take the crust out of the refrigerator. Spread about half of the cheesecake mixture evenly over the crust. You’ll use about 1 1/2 cups. Then, dollop the pumpkin mixture over the cheesecake layer and spread it gently. Finally, top with the remaining cheesecake mixture. Use your spatula to smooth the top as evenly as possible.
Here’s a little trick: if you want those beautiful, distinct layers, you can pipe the cheesecake mixture instead of spreading it. But honestly, for bars, a simple spread works perfectly and is way less fuss.
Step 6: Chill and Set
Cover the pan with plastic wrap and refrigerate for at least 6 hours, but overnight is best. This is the hardest part—waiting. The longer it chills, the cleaner your slices will be. Don’t rush this step. If you try to slice too early, you’ll get a delicious but messy pile of filling.
Step 7: Slice and Serve
Once fully set, use the parchment paper overhangs to lift the entire block out of the pan. Place it on a cutting board. Use a sharp knife to slice into 9 or 16 bars, depending on how big you want them. For the cleanest cuts, wipe the knife clean between each slice. If you’re making the whipped cream topping, whip the cream with the powdered sugar and vanilla until soft peaks form, then dollop or pipe it onto each bar. Finish with a light dusting of cinnamon or pumpkin pie spice.
Cooking Tips & Techniques
I’ve made these bars more times than I can count, and I’ve learned a few things along the way. Here are the tips that make a real difference.
- Room Temperature Cream Cheese is Non-Negotiable: Cold cream cheese will leave you with lumpy filling. Take it out of the fridge at least 30 minutes before you start. If you’re in a hurry, cut it into small cubes and let it sit for 15 minutes.
- Don’t Over-Whip the Cream: Stiff peaks are perfect. If you go too far, the cream will start to separate and look grainy. Stop as soon as the peaks hold their shape.
- Press the Crust Firmly: This is the number one reason crumbly crusts happen. Use a flat-bottomed glass or measuring cup to really pack it down. The more pressure, the better the crust holds together.
- Chill Overnight for Best Results: I know it’s tempting to rush, but 6 hours is the absolute minimum. Overnight gives the layers time to fully set and meld together. The slices will be cleaner and the texture will be creamier.
- Use a Sharp Knife: A dull knife will drag through the filling and ruin those clean edges. Run the knife under hot water, dry it, then slice. Repeat for each cut.
One time, I was in a rush and only chilled the bars for 4 hours. They tasted fine, but they were a mess on the plate. Lesson learned: patience pays off with this recipe.
Variations & Adaptations
This recipe is a great base for customization. Here are a few ways to make it your own.
- Gluten-Free Version: Swap the graham cracker crumbs for gluten-free graham crackers or crushed gluten-free cookies. Everything else in the recipe is naturally gluten-free, so it’s an easy switch.
- Dairy-Free Adaptation: Use dairy-free cream cheese (like Kite Hill or Tofutti) and a dairy-free heavy cream alternative (coconut cream works well). The texture will be slightly different, but still delicious. Just make sure your dairy-free cream cheese is softened.
- Spice It Up: If you love a stronger spice kick, add a pinch of cayenne pepper or extra ginger to the pumpkin layer. It adds a subtle warmth that’s really nice.
- Chocolate Twist: Drizzle melted dark chocolate over the top after the bars have set. The bitterness of the chocolate pairs beautifully with the sweet, spiced pumpkin and tangy cream cheese.
- Individual Servings: Instead of a pan, make these in small jars or glasses. Layer the crust, pumpkin, and cheesecake mixture in each jar, then chill. Perfect for grab-and-go desserts or parties.
I once tried a version with a gingersnap crust instead of graham crackers. It was incredible—the spicy ginger cookie added a whole new layer of flavor. If you’re feeling adventurous, give it a shot.
Serving & Storage Suggestions
These bars are best served cold, straight from the fridge. The texture is firm and creamy, and the flavors are more pronounced when they’re chilled. I like to let them sit at room temperature for about 5 minutes before serving—just enough to take the chill off without losing the structure.
For presentation, arrange the bars on a platter with a dollop of whipped cream and a light dusting of cinnamon. They look beautiful on a dessert table next to a warm apple cider or a cup of coffee. If you’re serving them for a holiday dinner, they pair wonderfully with a refreshing cucumber mint green tea cooler for a surprising contrast.
Storage: Keep leftover bars in an airtight container in the refrigerator. They’ll stay fresh for up to 5 days. The crust might soften slightly over time, but the flavor only gets better.
Freezing: These bars freeze beautifully. Wrap the entire block (or individual slices) tightly in plastic wrap, then in foil. Freeze for up to 3 months. To serve, thaw in the refrigerator overnight. I’ve done this for holiday prep, and it’s a game-changer.
Reheating: There’s no need to reheat these. They’re meant to be enjoyed cold. If you want a slightly softer texture, let them sit at room temperature for 10-15 minutes before eating.
Nutritional Information & Benefits
Here’s a rough estimate for one bar (based on 16 servings):
- Calories: 280
- Fat: 20g
- Carbohydrates: 24g
- Protein: 4g
- Sugar: 18g
These numbers will vary based on your specific ingredients and portion sizes. The cream cheese and heavy cream are the main sources of fat, which is what gives the bars that rich, satisfying texture. Pumpkin is a fantastic source of vitamin A and fiber, so there’s a little nutritional bonus hidden in there.
If you’re watching your sugar intake, you can reduce the sugar in the cheesecake layer to 1/3 cup without affecting the texture too much. The pumpkin layer needs the brown sugar for flavor and structure, so I wouldn’t recommend cutting that.
This dessert is not low-calorie, but it’s a treat worth savoring. I believe in balance—enjoy a slice, share it with friends, and don’t overthink it.
Frequently Asked Questions
Can I use canned pumpkin pie filling instead of pumpkin puree?
No, I wouldn’t recommend it. Pumpkin pie filling is already sweetened and spiced, which will throw off the balance of the recipe. Stick with pure pumpkin puree for the best results.
My cheesecake layer is lumpy. What went wrong?
Most likely, the cream cheese wasn’t softened enough. Make sure it’s at room temperature before you start. If you still get lumps, you can try beating it a little longer, but starting with softened cream cheese is the best prevention.
Can I make these bars vegan?
Yes, with some adjustments. Use dairy-free cream cheese and a dairy-free heavy cream alternative like coconut cream. The texture will be slightly different, but still delicious. Make sure your graham crackers are also vegan-friendly.
How long do these bars need to chill?
At least 6 hours, but overnight is best. The longer they chill, the cleaner your slices will be. Don’t rush this step.
Can I use a different crust?
Absolutely. Gingersnap cookies, vanilla wafers, or even crushed shortbread cookies all work beautifully. Just adjust the sugar in the crust if you’re using a sweeter cookie.
Conclusion
These easy no-bake pumpkin cheesecake bars are exactly what a fall dessert should be: comforting, flavorful, and surprisingly simple. No oven required, no complicated techniques, just a few ingredients and a little patience. They’ve become my go-to for potlucks, holiday dinners, and even just a quiet weekend treat.
What I love most about this recipe is how forgiving it is. You can tweak the spices, swap the crust, or adjust the sweetness to your liking. It’s a recipe that works with you, not against you. And when you pull that pan out of the fridge and slice into a perfectly layered bar, you’ll feel a little proud of what you made.
I’d love to hear how yours turn out. Did you try a variation? Did you add a special topping? Drop a comment below and share your version. And if you’re looking for more easy desserts, check out my creamy vegan chocolate avocado pudding or this easy slow cooker honey garlic chicken meal prep for a savory option. Happy fall baking—or, you know, no-baking!
Pin This Recipe!
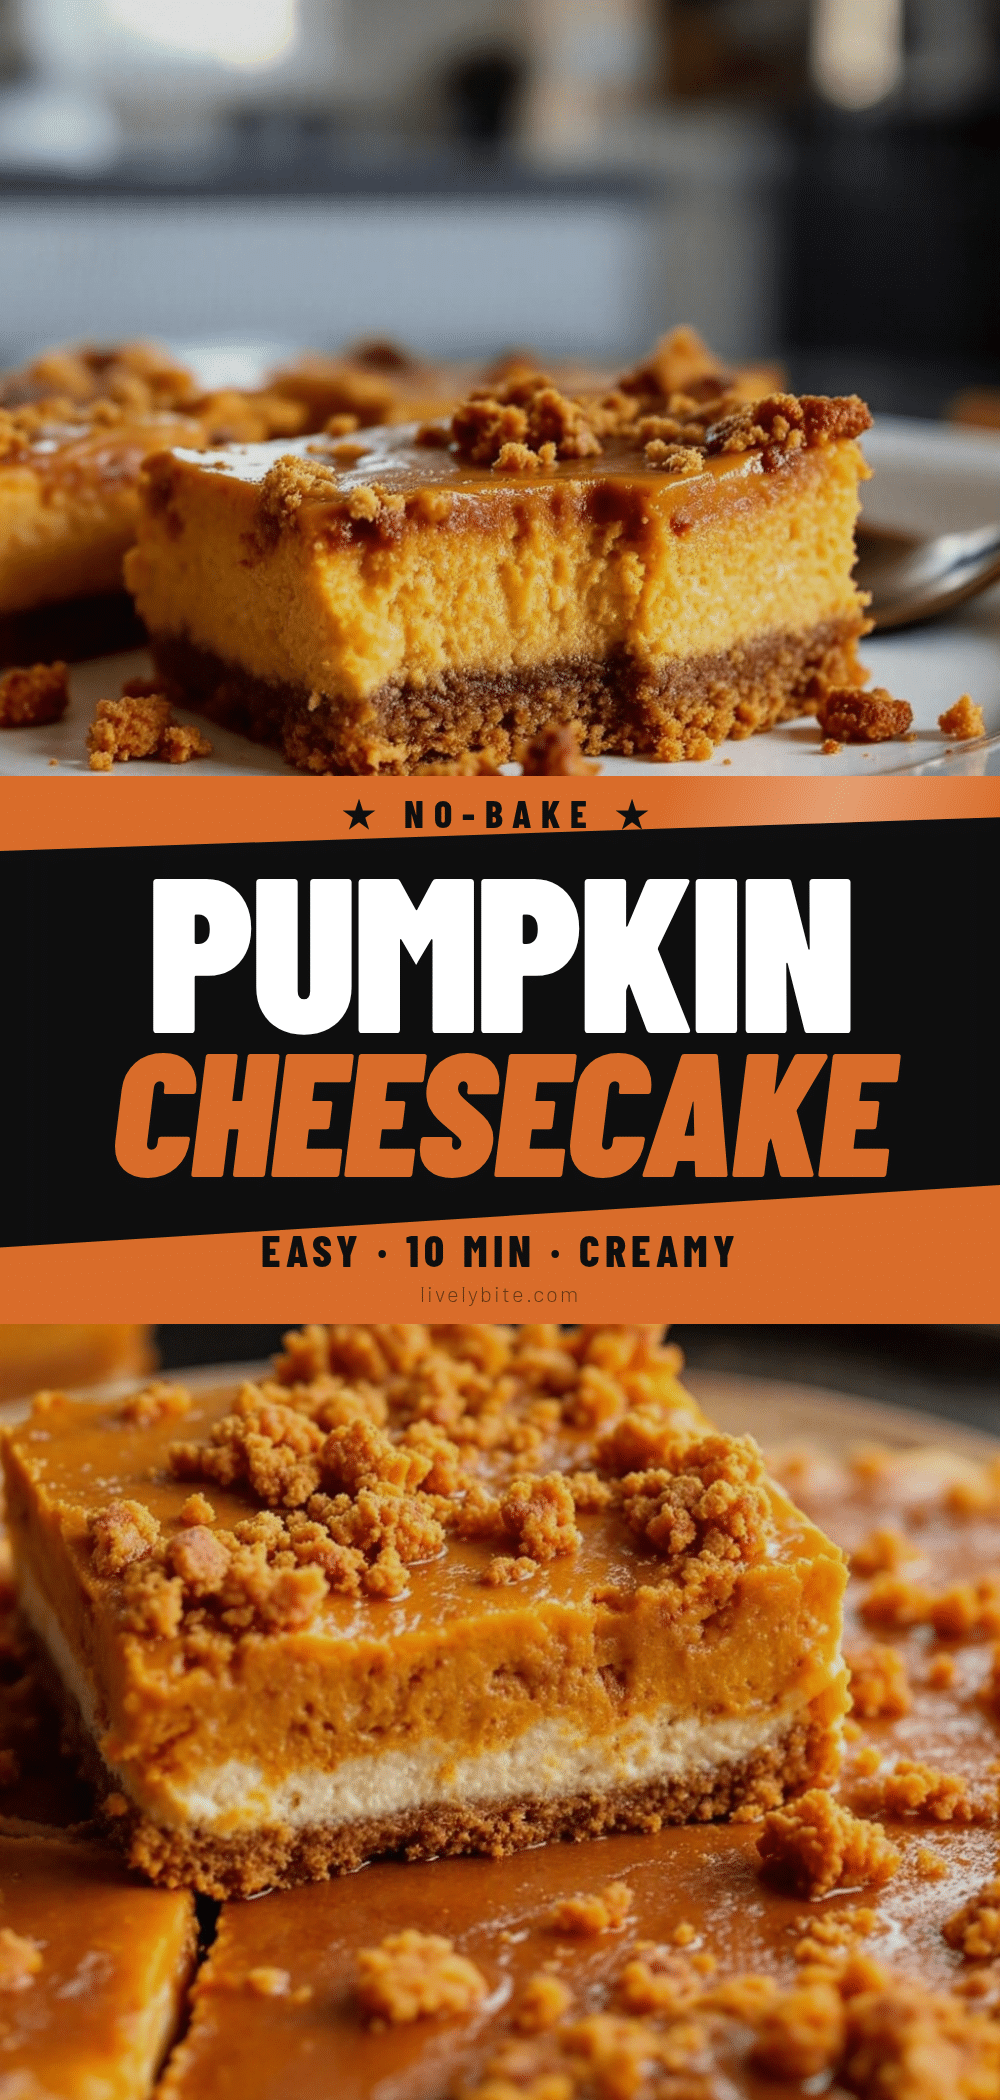
Easy No-Bake Pumpkin Cheesecake Bars: The Best Fall Dessert
These easy no-bake pumpkin cheesecake bars are the perfect fall dessert. No oven required, simple ingredients, and they slice cleanly for a beautiful, creamy treat that’s a crowd-pleaser.
- Prep Time: 30 minutes
- Cook Time: 0 minutes
- Total Time: 6 hours 30 minutes (includes chilling)
- Yield: 16 servings 1x
- Category: Dessert
- Cuisine: American
Ingredients
- 2 cups (200g) graham cracker crumbs (about 14–16 full sheets)
- 1/2 cup (115g) unsalted butter, melted
- 1/4 cup (50g) granulated sugar
- 1/4 teaspoon salt
- 1 1/2 cups (340g) pumpkin puree
- 1/2 cup (100g) packed light brown sugar
- 1 teaspoon vanilla extract
- 1 1/2 teaspoons pumpkin pie spice
- 1/4 teaspoon salt
- 16 oz (450g) cream cheese, softened to room temperature
- 1/2 cup (100g) granulated sugar
- 1 teaspoon vanilla extract
- 1 cup (240ml) heavy cream, cold
- 1/2 cup (120ml) heavy cream, cold (for topping)
- 1 tablespoon powdered sugar (for topping)
- 1/4 teaspoon vanilla extract (for topping)
- Ground cinnamon or pumpkin pie spice, for dusting (for topping)
Instructions
- Line a 9×9-inch baking pan with parchment paper, leaving overhang on two opposite sides.
- In a medium bowl, combine graham cracker crumbs, 1/4 cup granulated sugar, and 1/4 teaspoon salt. Pour in melted butter and stir until moistened. Press firmly into the bottom of the prepared pan. Refrigerate while making fillings.
- In a medium bowl, whisk together pumpkin puree, brown sugar, 1 teaspoon vanilla extract, pumpkin pie spice, and 1/4 teaspoon salt. Set aside.
- In a large bowl, beat cold heavy cream with an electric mixer until stiff peaks form. Refrigerate.
- In another large bowl, beat softened cream cheese until smooth. Add 1/2 cup granulated sugar and 1 teaspoon vanilla extract; beat until combined. Gently fold in whipped cream until just combined.
- Remove crust from refrigerator. Spread half of the cheesecake mixture over the crust. Dollop pumpkin mixture over cheesecake layer and spread gently. Top with remaining cheesecake mixture and smooth the top.
- Cover with plastic wrap and refrigerate for at least 6 hours, preferably overnight.
- Once set, lift the block out using parchment overhangs. Slice into 9 or 16 bars with a sharp knife, wiping clean between cuts.
- For topping: whip 1/2 cup heavy cream with powdered sugar and 1/4 teaspoon vanilla until soft peaks form. Dollop or pipe onto bars and dust with cinnamon or pumpkin pie spice.
Notes
For best results, chill overnight. Use room temperature cream cheese to avoid lumps. Press crust firmly for clean slices. Can be frozen for up to 3 months.
Nutrition
- Serving Size: 1 bar
- Calories: 280
- Sugar: 18
- Sodium: 200
- Fat: 20
- Saturated Fat: 12
- Carbohydrates: 24
- Fiber: 1
- Protein: 4
Keywords: no-bake pumpkin cheesecake bars, easy fall dessert, pumpkin cheesecake, no-bake dessert, pumpkin bars


