The way the candy corn catches the light—those little orange and yellow triangles almost glowing against the dark wood of the board—is honestly why I make this every October. I know, I know, candy corn gets a bad rap. People either love it or act like it’s some kind of crime against confectionery. But let me tell you, when you arrange it right, alongside deep purple grapes and sharp cheddar, it stops being just candy. It becomes a whole vibe.
I didn’t set out to create a Halloween charcuterie board, not really. It was one of those nights where I’d promised the kids a movie and snacks, but I was too tired for anything complicated. I grabbed a block of cheese, some crackers, and that bag of candy corn I’d been hiding from myself. Then I saw the grapes in the fridge, and something clicked. I started arranging things on a board, not thinking, just moving pieces around until it looked like something you’d see on Pinterest (but messier, because real life).
My youngest took one look at it and said, “Mom, it’s a Halloween board!” And that was it. The name stuck. Now it’s our go-to for every spooky season gathering, from school parties to casual get-togethers with friends. It’s not fancy, and that’s the whole point. This is the kind of snack board you throw together when you want something festive but you don’t want to spend all day in the kitchen. It’s forgiving, flexible, and honestly, it makes people smile. That’s really why I keep coming back to it.
Why You’ll Love This Recipe
Look, I’ve tested a lot of charcuterie boards in my time. Some were gorgeous but took hours. Others were quick but looked like a pile of groceries. This one hits the sweet spot—it’s fast, it’s fun, and it actually tastes good together. Here’s why it works:
- Ready in 15 Minutes: No joke. You can assemble this board while your kids are fighting over costumes or while you’re waiting for your Halloween party guests to arrive. No cooking required.
- Simple Ingredients: You probably have most of this stuff already. Cheese, crackers, grapes, nuts, and that bag of candy corn you bought on impulse. No fancy grocery runs needed.
- Perfect for Parties: Whether it’s a classroom treat, a pre-trick-or-treat snack, or a low-key Halloween movie night, this board fits right in. It’s shareable, it’s festive, and everyone can grab what they like.
- Crowd-Pleaser: I’ve served this to kids, adults, picky eaters, and cheese snobs. Everyone finds something they love. The combination of sweet, salty, creamy, and crunchy just works.
- Unbelievably Customizable: Don’t like candy corn? Swap it out. Allergic to nuts? Leave them off. This board is a template, not a strict recipe. You make it your own.
What makes this different from every other charcuterie board out there? It’s the candy corn, honestly. That pop of orange and yellow against the dark grapes and the white cheese is visually striking in a way that feels intentional, not accidental. Plus, the sweet-salty-savory combo is genuinely addictive. I’ve had guests tell me they didn’t like candy corn until they tried it with sharp cheddar. That’s the kind of magic a well-built board can do.
What Ingredients You Will Need
This recipe uses simple, everyday ingredients to create something that feels special. The key is contrast—sweet against salty, crunchy against creamy, bright against dark. Here’s what you’ll need to build your board:
For the Cheese
- Sharp cheddar cheese: 8 ounces, cut into cubes or slices. The sharpness cuts through the sweetness of the candy corn and grapes beautifully. I prefer a good aged cheddar for this.
- Brie or Camembert: 4-6 ounces. The creamy, buttery texture adds a luxurious element. Leave it whole or cut into wedges.
- Gouda or Edam: 4 ounces, sliced. The mild, nutty flavor bridges the sweet and savory elements. Smoked gouda works great too if you want a deeper flavor.
For the Fruits
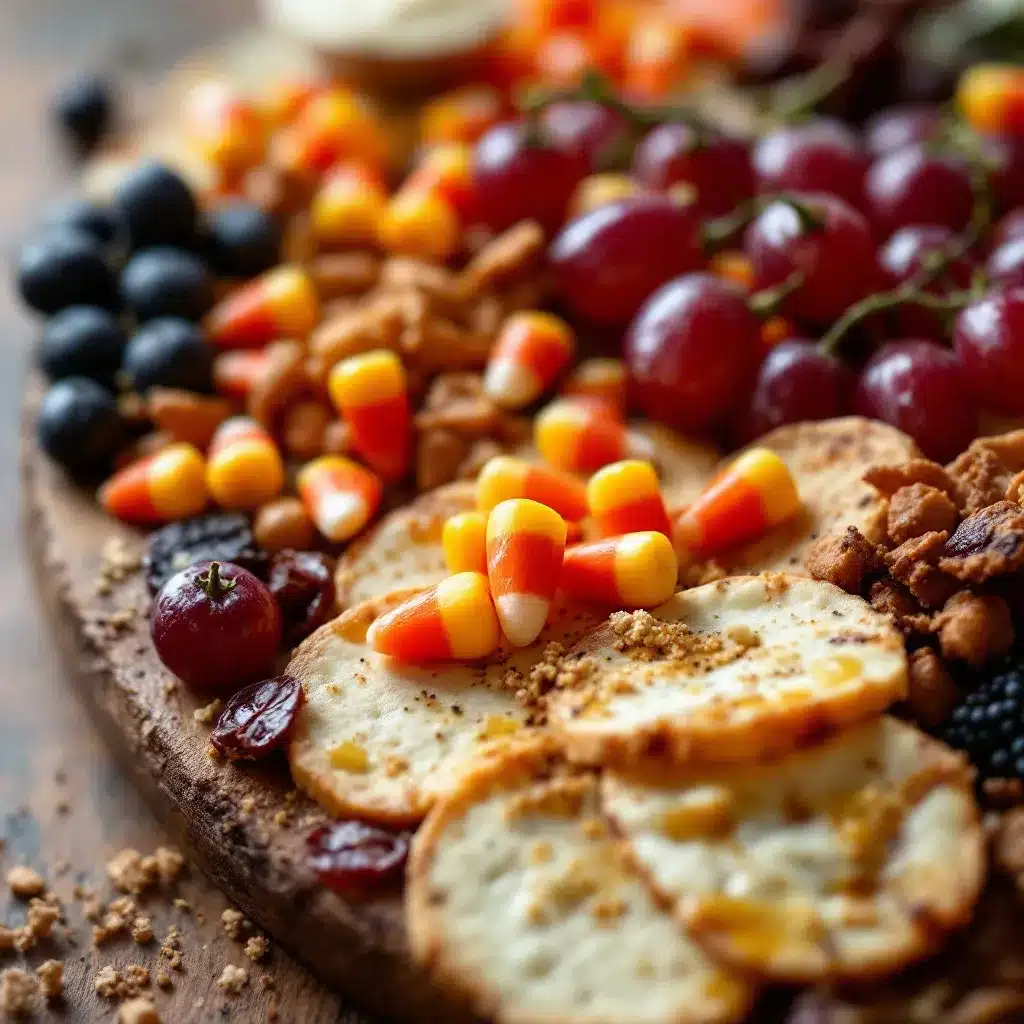
- Red and green grapes: 1 cup each, washed and dried. The grapes add juiciness and a natural sweetness that balances the candy. Plus, the dark purple looks amazing against the orange candy corn.
- Apple slices: 1 apple, thinly sliced. Toss with a little lemon juice to prevent browning. They add crunch and a tart note.
- Dried apricots or figs: ½ cup. Their chewy texture and concentrated sweetness are perfect for fall boards.
For the Candy & Treats
- Candy corn: 1 cup. Yes, really. This is the star of the show. Use classic candy corn or the autumn mix with the little pumpkins.
- Chocolate-covered pretzels: ½ cup. The salty-sweet combo is irresistible. I like the ones from Trader Joe’s, but any brand works.
- Mini peanut butter cups or Reese’s Pieces: ½ cup. For extra Halloween flavor. They add a nice pop of orange and brown.
For the Savory Elements
- Salami or prosciutto: 4-6 ounces, thinly sliced. Roll them up or fold them into ribbons for visual interest. The saltiness balances the sweet candy.
- Mixed nuts: ½ cup. Roasted, salted almonds or pecans add crunch and a savory note. I use a mix of almonds and cashews.
- Olives: ¼ cup, pitted. Green or black, your choice. They add a briny pop that cuts through the richness.
For the Crackers & Dippers
- Assorted crackers: About 2 cups. Go for a mix of textures—water crackers, buttery rounds, and something seedy or whole wheat. I like using a mix of plain and flavored crackers.
- Breadsticks or grissini: A handful. They’re great for dipping and add height to the board.
- Pita chips or tortilla chips: 1 cup. For a more casual, kid-friendly option.
For the Dips & Spreads
- Honey or maple syrup: A small bowl for drizzling over the brie or cheese. It’s optional but adds a lovely touch.
- Whole grain mustard or fig jam: 2-3 tablespoons. The tanginess or sweetness pairs perfectly with the cheese and salami.
Substitution Tips: If you’re dairy-free, use vegan cheese alternatives or skip the cheese entirely and load up on fruits, nuts, and crackers. For a nut-free version, omit the nuts and use seeds like pumpkin seeds or sunflower seeds instead. And if you really can’t stand candy corn (I get it), swap it for candy pumpkins, gummy worms, or even caramel popcorn for a different sweet-salty vibe.
Equipment Needed
You don’t need much for this board, and that’s part of its charm. Here’s what I use:
- A large wooden board or serving platter: At least 12×16 inches. A wooden cutting board works beautifully, but a large ceramic platter or even a baking sheet lined with parchment paper will do the job. I’ve used a clean pizza pan in a pinch—it worked fine.
- Small bowls or ramekins: For dips, honey, or loose items like olives and nuts. I use 3-4 small bowls. They keep the board organized and prevent things from rolling around.
- Cheese knives: At least two—one for soft cheese and one for hard cheese. If you don’t have dedicated cheese knives, a butter knife and a paring knife will work.
- Tongs or small spoons: For serving items like olives or nuts. It keeps things tidy.
- Parchment paper (optional): If you’re using a board that might stain (like an unfinished wooden board), lining it with parchment paper makes cleanup easier. Plus, it adds a rustic look.
Budget-Friendly Tip: You don’t need an expensive charcuterie board. Thrift stores often have beautiful wooden platters or large ceramic dishes for a few dollars. I found my favorite board at a garage sale for $3, and it’s got more character than anything I could buy new.
Preparation Method
This is where the magic happens. The key to a great charcuterie board is layering and visual balance. Here’s how I do it, step by step.
- Start with the bowls and spreads. Place your small bowls of honey, mustard, olives, and any loose items like nuts or dried fruit on the board first. This anchors the board and gives you a framework to work around. I usually place them in a triangle or scattered pattern, not in a straight line. It looks more natural that way.
- Add the cheese. Place your cheese blocks or wedges in different spots around the board. Don’t cluster them together—spread them out so there’s a cheese option in every section. I put the brie in the center-left, the cheddar cubes on the right, and the gouda slices near the top. Leave a little space between each cheese for cutting and grabbing.
- Layer the meats. Fold or roll your salami slices and place them near the cheese. I like to create little piles or ribbons rather than laying them flat. It adds height and texture. If you’re using prosciutto, drape it loosely—don’t press it down.
- Add the fruits. Scatter the grapes and apple slices around the board, filling in the gaps. I like to group the red grapes together and the green grapes together for visual contrast. The dark purple grapes look amazing next to the orange candy corn, so I keep them close to each other.
- Place the candy corn and sweets. Here’s where you get to have fun. Create little clusters of candy corn in a few spots—don’t just dump them all in one place. I like to make a small pile near the grapes and another near the chocolate pretzels. The candy corn adds that pop of Halloween color that makes the board special. Add the chocolate-covered pretzels and peanut butter cups in small groups.
- Fill in with crackers and chips. Use the crackers to fill any remaining empty spaces. I fan them out in small groups around the cheese and meats. Don’t cover the entire board with crackers—leave some board showing for visual breathing room. Pita chips and breadsticks can go in the corners or along the edges.
- Add the nuts and dried fruit. Sprinkle the nuts and dried apricots in the remaining gaps. They add texture and fill in any awkward spaces. A few scattered almonds here and there make the board look abundant and intentional.
- Garnish and finish. This is optional but makes a big difference. Add a few fresh rosemary sprigs or small sage leaves around the board for a touch of green. You can also sprinkle a little flaky sea salt over the cheese or add a drizzle of honey over the brie. It’s those little finishing touches that make the board look professional.
- Step back and adjust. Take a look at your board from above. Is there a big empty spot? Fill it with more crackers or a few extra grapes. Is everything too crowded? Move a bowl or spread things out. The goal is a board that looks abundant but not cluttered. You want people to feel like they can reach in and grab something without knocking everything over.
Time-Saving Tip: If you’re short on time, you can prep everything ahead and assemble the board just before serving. Wash and dry the grapes, slice the cheese, and portion out the candy into bags. When you’re ready, it takes less than 10 minutes to arrange everything.
Cooking Tips & Techniques
I’ve made this board more times than I can count, and I’ve learned a few things the hard way. Here are my best tips:
- Dry your grapes thoroughly. Wet grapes make the board soggy and can cause the crackers to get soft. Pat them dry with a paper towel before adding them to the board. Trust me on this—I learned after a sad, mushy cracker incident.
- Cut cheese at room temperature. Cold cheese doesn’t have the same flavor or texture. Take your cheese out of the fridge about 30 minutes before you start assembling. It’ll be creamier and taste better.
- Don’t overcrowd the board. It’s tempting to pile everything on, but a crowded board is hard to eat from. Leave a little space between items so people can grab what they want without disturbing everything else. You can always add more later if needed.
- Think about color contrast. The visual appeal of this board comes from the contrast between the bright orange candy corn and the deep purple grapes, the white brie, and the dark salami. Arrange colors intentionally—don’t just dump everything in the middle.
- Use height to your advantage. Fold the salami, stack the cheese, and use bowls to create different levels. A flat board is boring. Adding height makes it look more dynamic and professional.
- Keep the candy corn separate from moist items. Candy corn will get sticky if it touches wet grapes or cheese. Place it in a small pile away from anything damp. I learned this after a batch of candy corn turned into a sticky mess next to some apple slices.
My Biggest Failure: The first time I made this board for a party, I put the candy corn directly on top of the brie. It looked cute for about five minutes, and then the candy corn started melting into the cheese. It was a sticky, orange mess. Now I always keep the candy corn in its own little zone, away from anything soft or warm. Live and learn, right?
Variations & Adaptations
This board is endlessly adaptable. Here are some of my favorite variations:
- Savory-Spooky Board: Skip the candy corn and focus on savory Halloween treats. Add ghost-shaped cheese slices (use a cookie cutter), black olives, and roasted pumpkin seeds. Use dark crackers and add a small bowl of spicy mustard for dipping.
- Kid-Friendly Board: Replace the salami with turkey roll-ups or ham cubes. Use more candy options like gummy worms, candy pumpkins, and chocolate coins. Add some fun-shaped crackers or pretzel sticks. My kids love this version because it feels like a treat board.
- Healthy-ish Board: Swap the crackers for cucumber rounds and bell pepper strips. Use low-fat cheese or skip the cheese entirely and add more fruits and veggies. Use dark chocolate-covered almonds instead of candy corn. It’s still festive but a little lighter.
- Vegan Board: Use vegan cheese alternatives (cashew-based brie is amazing), add more nuts and seeds, and use plant-based crackers. Replace the honey with agave or maple syrup. Load up on fruits and veggies. I’ve made this for vegan friends and it was a hit.
- Sweet Board: Go all-in on sweets. Skip the cheese and meat entirely and fill the board with candy corn, chocolate-covered pretzels, brownie bites, marshmallows, and fruit. Add a bowl of chocolate sauce for dipping. This is perfect for a Halloween dessert table.
My Personal Favorite Variation: I once made a “monster mash” board with green grapes, green apple slices, and green candy (think lime-flavored things). I added some edible googly eyes from the baking section and called it a monster board. The kids lost their minds over it. It’s silly, but sometimes the silly ideas are the best ones.
Serving & Storage Suggestions
This board is best served at room temperature, so take it out of the fridge about 20 minutes before you plan to serve. The cheese will be creamier, and the flavors will be more pronounced. I usually set it out right before guests arrive and let it sit while everyone gets settled.
What to Serve With It: This board is a meal in itself, but if you’re serving it as an appetizer, it pairs beautifully with a crisp white wine like Sauvignon Blanc or a light red like Pinot Noir. For a non-alcoholic option, try a sparkling apple cider or a refreshing cucumber mint green tea cooler—the clean flavors balance the richness of the cheese and the sweetness of the candy. If you’re making this for a Halloween party, a batch of easy slow cooker honey garlic chicken on the side turns it into a full meal.
Storage: This board is best eaten the day it’s made, but leftovers can be stored separately. Remove any candy corn (it gets stale quickly) and store it in a sealed container. Wrap the cheese in wax paper or plastic wrap and refrigerate. Grapes and apple slices should be stored in airtight containers. Crackers can be kept in a ziplock bag at room temperature. Assemble leftovers into a smaller board the next day, or use them as snack components throughout the week.
Reheating: You don’t really reheat a charcuterie board, but if you have leftover brie, you can pop it in the oven at 350°F for 5-7 minutes to warm it up. Serve it with the leftover crackers for a quick snack. The candy corn won’t improve with time, honestly—just eat it straight from the bag if you’re craving something sweet.
How Flavors Develop: The cheese and meats actually taste better after sitting out for a bit. The flavors mellow and meld together. If you’re making this for a party, I recommend assembling it about 30 minutes before guests arrive so everything has time to come to room temperature. The candy corn stays crunchy, the grapes stay juicy, and the whole board just comes together beautifully.
Nutritional Information & Benefits
Let’s be real—this is a treat board, not a health food. But that doesn’t mean it’s all empty calories. Here’s a rough estimate for a serving (about ¼ of the board):
- Calories: Approximately 450-550 calories per serving, depending on the cheeses and meats you choose.
- Protein: 15-20 grams from the cheese, salami, and nuts. Not bad for a snack board.
- Carbohydrates: 35-45 grams, mostly from the crackers, candy, and fruit. The grapes and apples add natural sugars and fiber.
- Fat: 25-35 grams, primarily from the cheese and nuts. Some of it is saturated fat from the cheese, but nuts provide healthy unsaturated fats.
Health Benefits: The grapes are packed with antioxidants and vitamin C. The nuts provide healthy fats and protein that keep you full. Cheese offers calcium and protein. Even the candy corn, in moderation, can satisfy a sweet craving without derailing your entire day. The key is balance—this board is meant to be shared, so you’re naturally eating smaller portions.
Dietary Considerations: This recipe contains dairy, gluten (from crackers), and nuts. For a gluten-free version, use gluten-free crackers and check the candy corn label (most are gluten-free but it’s worth verifying). For a dairy-free version, use vegan cheese and skip the cheese-based dips. The candy corn is typically vegan, but check the brand to be sure.
My Take: I don’t believe in making every meal a “health food.” This board is about celebration and enjoyment. It’s the kind of food you eat with friends while laughing and telling stories. That has its own kind of nutritional value, if you ask me. Balance is about including treats, not cutting them out entirely.
Conclusion
This easy Halloween charcuterie board with candy corn and grapes is the kind of recipe that proves you don’t need to be a professional chef to create something memorable. It’s simple, it’s forgiving, and it brings people together. Whether you’re making it for a Halloween party, a family movie night, or just because you want to eat candy corn with cheese (no judgment here), this board delivers.
I love this recipe because it’s a reminder that cooking—or in this case, assembling—doesn’t have to be complicated to be special. It’s about the little moments: the way the candy corn catches the light, the first bite of sharp cheddar followed by a sweet grape, the laughter that comes when someone discovers the hidden chocolate pretzels. That’s what I want you to take away from this.
So go ahead, grab a board, raid your pantry, and make this your own. Swap out the candy corn for something you love. Add your favorite cheese. Make it ugly or make it beautiful—it doesn’t matter. What matters is that you’re making something to share.
If you try this recipe, I’d love to hear about it. Drop a comment below or tag me in your photos. Tell me what variations you tried, or if you discovered a new favorite combination. And if you’re looking for more easy, crowd-pleasing recipes, check out my full collection of recipes for more inspiration. Happy Halloween, and happy snacking!
Frequently Asked Questions
Can I make this board ahead of time?
Yes, you can prep everything ahead, but I recommend assembling the board no more than an hour before serving. Wash and dry the grapes, slice the cheese, and portion out the candy into bags. When you’re ready to serve, it takes just a few minutes to arrange everything. The crackers and candy corn will stay fresher if you add them right before serving.
How do I keep the candy corn from getting sticky?
Keep the candy corn in a dry area of the board, away from moist ingredients like grapes, apple slices, or soft cheese. I like to put it in a small pile in a corner or use a small bowl for it. If the candy corn gets wet, it will become sticky and lose its crunch. A little separation goes a long way.
What can I use instead of candy corn?
If candy corn isn’t your thing, you have plenty of options. Try candy pumpkins, gummy worms, caramel popcorn, chocolate-covered raisins, or even small cookies like Oreos. The key is to keep the Halloween theme going with orange, black, and purple colors. Any candy that adds a pop of color and sweetness will work.
How many people does this board serve?
This board serves about 6-8 people as a snack or appetizer. If you’re serving it as a main meal, it’s more like 4-6 people. I usually double the recipe for larger parties—just use a bigger board or two smaller boards. People tend to eat more than you think, so it’s better to have too much than too little.
Can I add hot items to the board?
Absolutely! I’ve added warm caramel dip, melted chocolate, or even small meatballs to this board before. Just make sure to keep hot items in a separate bowl or ramekin so they don’t make the crackers or candy soggy. A warm element can be a nice surprise, especially on a cold October night. For a heartier option, pair it with easy lemon herb salmon sheet pan dinner for a complete meal that feels special.
Pin This Recipe!
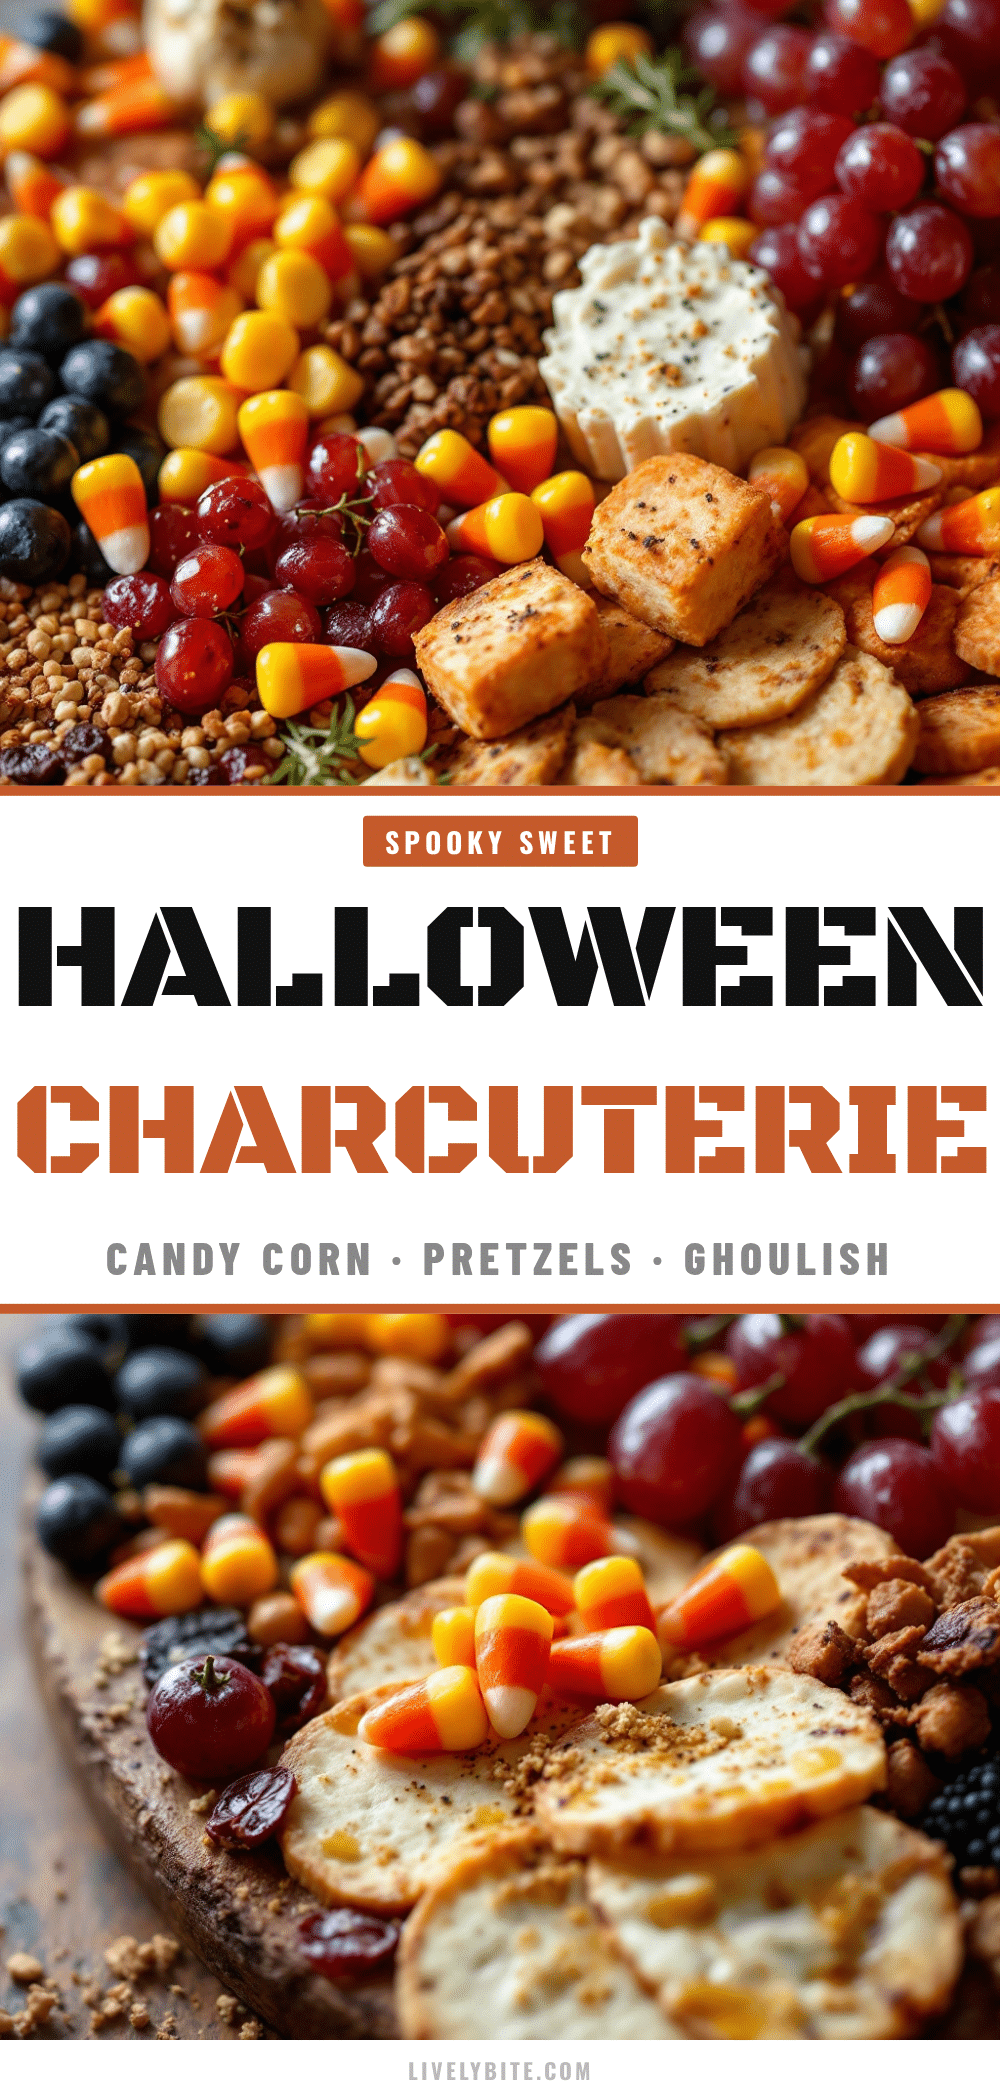
Easy Halloween Charcuterie Board with Candy Corn & Grapes
A quick and festive snack board featuring candy corn, grapes, cheese, and savory bites, perfect for Halloween parties or movie nights. Ready in 15 minutes with simple ingredients.
- Prep Time: 15 minutes
- Cook Time: 0 minutes
- Total Time: 15 minutes
- Yield: 6-8 servings 1x
- Category: Appetizer
- Cuisine: American
Ingredients
- 8 ounces sharp cheddar cheese, cut into cubes or slices
- 4–6 ounces Brie or Camembert
- 4 ounces Gouda or Edam, sliced
- 1 cup red grapes, washed and dried
- 1 cup green grapes, washed and dried
- 1 apple, thinly sliced (tossed with lemon juice)
- ½ cup dried apricots or figs
- 1 cup candy corn
- ½ cup chocolate-covered pretzels
- ½ cup mini peanut butter cups or Reese’s Pieces
- 4–6 ounces salami or prosciutto, thinly sliced
- ½ cup mixed nuts (roasted, salted almonds or pecans)
- ¼ cup pitted olives (green or black)
- 2 cups assorted crackers
- 1 handful breadsticks or grissini
- 1 cup pita chips or tortilla chips
- 2–3 tablespoons honey or maple syrup (optional)
- 2–3 tablespoons whole grain mustard or fig jam (optional)
Instructions
- Place small bowls of honey, mustard, olives, nuts, and dried fruit on the board first to anchor the layout.
- Add cheese blocks or wedges in different spots around the board, spaced apart.
- Fold or roll salami slices and place near the cheese.
- Scatter grapes and apple slices around the board, filling gaps.
- Create small clusters of candy corn in a few spots, away from moist items.
- Add chocolate-covered pretzels and peanut butter cups in small groups.
- Fill remaining empty spaces with crackers, fanned out in small groups.
- Sprinkle nuts and dried apricots in remaining gaps.
- Garnish with fresh rosemary sprigs or sage leaves, and drizzle honey over brie if desired.
- Step back and adjust for visual balance—fill empty spots or spread items as needed.
Notes
Keep candy corn away from moist ingredients to prevent stickiness. Serve at room temperature for best flavor. Customize with your favorite cheeses, meats, and candies.
Nutrition
- Serving Size: ¼ of the board
- Calories: 450550
- Sugar: 2030
- Sodium: 600800
- Fat: 2535
- Saturated Fat: 1015
- Carbohydrates: 3545
- Fiber: 35
- Protein: 1520
Keywords: Halloween charcuterie board, candy corn board, easy snack board, festive appetizer, Halloween party food


