I had been looking for a Halloween treat that actually looked festive without requiring a piping bag, a candy thermometer, or a trip to three different stores. For a while, I just accepted that holiday-themed desserts meant elaborate layer cakes or fussy decorated cookies. Not that there’s anything wrong with those—but sometimes you want the visual payoff without the all-day project.
These easy candy corn fudge bars came about on a random Tuesday afternoon in late September. I was staring at a bag of candy corn (purchased impulsively, as one does) and a block of white almond bark I’d stashed after a failed attempt at something else entirely. The third ingredient—sweetened condensed milk—was just sitting in the pantry, because honestly, when isn’t it?
I figured I’d either create something brilliant or waste twenty minutes. (Spoiler: it wasn’t the latter.) The first batch came out of the fridge looking exactly like a candy corn in bar form—clean white layer, bright orange middle, yellow base—and I actually laughed out loud. It felt like cheating, using three ingredients to get that effect. But here’s the thing: sometimes the best recipes aren’t the ones you slave over. They’re the ones that just work. And these bars? They work.
Why You’ll Love This Recipe
Let’s be real for a second. Most Halloween desserts are either adorable but impossible to execute, or easy but look like a toddler assembled them. These candy corn fudge bars hit that sweet spot where they look impressive but take almost no effort. Here’s what makes them stand out:
- Three Ingredients Only: White almond bark, sweetened condensed milk, and candy corn. That’s it. No heavy cream, no butter, no weird stabilizers.
- No Baking Required: This is a no-bake recipe from start to finish. You melt, you layer, you chill. Your oven stays cold.
- Perfect for Halloween Parties: They slice cleanly, stack beautifully on platters, and instantly read as festive without being over-the-top.
- Kid-Friendly to Make: My seven-year-old niece helped me layer the colored sections, and she didn’t mess up once. (The sprinkles she added afterward were another story.)
- Surprisingly Addictive: The texture is dense and creamy, not grainy like some fudge recipes. The candy corn softens slightly as it sets, creating little pockets of chewy sweetness.
What makes this different from other fudge recipes I’ve tried is the layering technique. Most three-ingredient fudge is just one flavor poured into a pan and called done. Here, you’re creating a visual effect that looks like you spent an hour on it. And honestly? It tastes better than the stuff that requires a candy thermometer. I’ve tested this recipe four times now—once with regular white chocolate chips (worked fine), once with vanilla candy melts (also fine), and twice with almond bark (best results). The almond bark gives the cleanest layers and the smoothest texture.
These bars are the kind of treat that makes people say, “Wait, you made these?” and you get to shrug and say, “Yeah, it’s no big deal.” But secretly, you know it’s kind of a big deal because they taste amazing and took fifteen minutes of active work.
What Ingredients You Will Need
This recipe keeps things refreshingly simple. You don’t need to hunt down specialty baking supplies or read ingredient labels for ten minutes at the store. Here’s what you’ll grab:
- 24 ounces white almond bark (about 2 standard blocks): This is the base of your fudge. Almond bark melts smoothly and sets firmly, which is exactly what you want for clean slicing. I’ve tested this with CandiQuik brand and generic store brands—both work, but the generic tends to set a little softer. If you can’t find almond bark, use 24 ounces of high-quality white chocolate chips or white candy melts. Avoid white chocolate morsels labeled “baking chips” because they contain stabilizers that prevent smooth melting.
- 1 can (14 ounces) sweetened condensed milk: This adds richness and helps the fudge set with that signature dense, creamy texture. Don’t substitute evaporated milk—they’re not the same thing. Sweetened condensed milk is thick, sticky, and sweet. Evaporated milk is thin and unsweetened. Using the wrong one will give you a runny mess.
- 1 ½ cups candy corn: You’ll use about ½ cup for each colored layer. Regular candy corn works best—the seasonal variations like harvest corn or pumpkin-shaped ones don’t melt as evenly. I’ve tried using the pumpkin candy corn and ended up with lumpy orange bits that didn’t fully incorporate. Stick with classic candy corn for the smoothest results.
- Yellow and orange food coloring (gel-based preferred): This is technically optional if you want a more muted look, but the whole point of these bars is the candy corn aesthetic. Gel food coloring gives you vibrant colors without thinning the fudge. Liquid food coloring works in a pinch but use it sparingly—just a drop or two—because too much liquid can affect how the fudge sets.
A quick note on candy corn: you don’t need the expensive gourmet stuff. The standard Brach’s candy corn from the grocery store works perfectly. I’ve tested with both the classic and the “autumn mix” (which has brown and green pieces), and while the autumn mix looks interesting, the colors don’t layer as cleanly. Stick with classic yellow, orange, and white candy corn for the most recognizable candy corn look.
Equipment Needed
You don’t need a fancy kitchen setup for this recipe. Here’s what you’ll actually use:
- 8×8-inch square baking pan: This is the ideal size for getting thick, satisfying bars. A 9×9-inch pan works too, but your layers will be thinner and the bars might be a bit more fragile.
- Parchment paper: Line your pan with parchment, leaving overhang on two sides. This creates “handles” that let you lift the entire block of fudge out cleanly. Trust me on this—trying to pry fudge out of an unlined pan is a losing battle.
- Microwave-safe bowls: You’ll need three separate bowls for melting each color layer. Glass or ceramic works best. I use my Pyrex measuring cups because they’re easy to pour from.
- Rubber spatula: For stirring and spreading. A silicone spatula is ideal because it won’t scratch your bowls and it scrapes every last bit of fudge out.
- Small offset spatula: Optional but helpful for spreading the fudge into even layers. A butter knife works in a pinch.
- Measuring cups and spoons: For portioning out the candy corn and food coloring.
If you don’t have an offset spatula, don’t stress. I’ve made these bars using the back of a spoon and they turned out just fine. The key is patience, not fancy tools.
Preparation Method
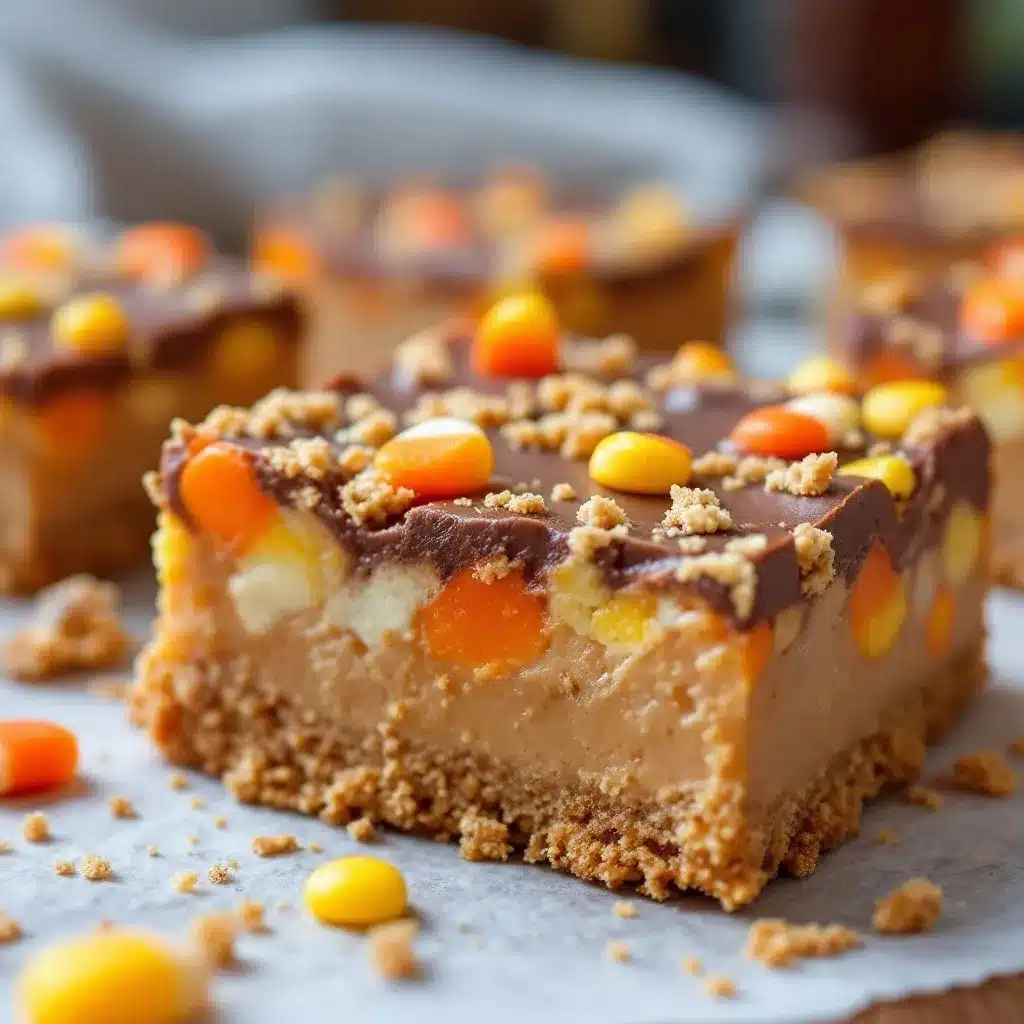
This is where the magic happens. Follow these steps carefully, and you’ll end up with perfectly layered candy corn fudge bars that look like they came from a bakery.
Step 1: Prepare Your Pan
Line an 8×8-inch square baking pan with parchment paper, leaving about 2 inches of overhang on two opposite sides. This creates handles for lifting the fudge out later. Lightly spray the parchment with nonstick cooking spray—this extra step prevents sticking and makes cleanup easier.
Step 2: Separate and Chop the Candy Corn
Divide your 1 ½ cups of candy corn into three separate bowls: ½ cup for the white layer, ½ cup for the orange layer, and ½ cup for the yellow layer. Give each portion a rough chop—just a few quick passes with a knife—so the pieces are smaller and will distribute evenly through the fudge. You don’t need to pulverize them; just break each piece into two or three smaller bits.
Step 3: Melt the Base Fudge Mixture
Break the white almond bark into pieces and place it in a large microwave-safe bowl. Pour the entire can of sweetened condensed milk over the top. Microwave in 30-second intervals, stirring well after each interval, until the mixture is completely smooth and fully combined. This usually takes about 2 to 2 ½ minutes total. Don’t rush this step—overheating can cause the almond bark to seize up and turn grainy. If you see lumps forming, stop microwaving and stir vigorously; sometimes the residual heat is enough to smooth things out.
Step 4: Divide the Fudge Base
Once the base is smooth, divide it evenly into three separate bowls. You should have roughly 1 cup of fudge base in each bowl. Eyeballing it is fine—perfection isn’t required here. Work quickly, because the fudge starts to set as it cools.
Step 5: Color and Mix Each Layer
For the white layer: Leave one bowl plain. Stir in the chopped white candy corn. Set aside.
For the yellow layer: Add 2 to 3 drops of yellow gel food coloring to the second bowl. Stir until the color is uniform and vibrant. Fold in the chopped yellow candy corn.
For the orange layer: Add 1 drop of yellow and 1 drop of red (or use orange gel coloring if you have it) to the third bowl. Mix until you get a bright, true orange. Stir in the chopped orange candy corn.
Step 6: Layer the Fudge
Start with the white layer. Pour it into the prepared pan and spread it evenly with your spatula. Tap the pan gently on the counter to level the surface. Place the pan in the refrigerator for 10 to 12 minutes, or until the white layer is firm to the touch but not completely hard. You want it set enough that the next layer won’t sink in, but still tacky so the layers bond.
Remove the pan from the fridge and carefully spoon the orange layer over the white layer. Spread it gently—don’t press too hard or you’ll disturb the white layer underneath. Return to the fridge for another 10 to 12 minutes.
Repeat with the yellow layer, spreading it evenly over the orange layer. Refrigerate for at least 2 hours, or until the fudge is completely firm.
Step 7: Slice and Serve
Lift the fudge out of the pan using the parchment overhang. Place it on a cutting board and use a sharp knife to slice into bars. For clean cuts, wipe the knife clean between slices. I like to cut them into 16 squares (4 rows by 4 rows), but you can go bigger or smaller depending on your crowd.
Cooking Tips & Techniques
I’ve made this recipe enough times to know exactly where things can go sideways. Here’s what I’ve learned the hard way so you don’t have to.
Don’t Overheat the Almond Bark. This is the number one mistake people make. Almond bark is sensitive to high heat. If you microwave it too long, it turns into a grainy, clumpy mess that won’t set properly. Always microwave in short bursts and stir between each one. If you see it starting to look thick and lumpy, stop immediately and stir vigorously—sometimes it just needs a good whisk to come back together.
Chill Between Layers. I know it’s tempting to dump all three layers in at once and hope for the best. Don’t. The layers will bleed into each other and you’ll end up with a muddy brownish-orange mess instead of distinct candy corn stripes. The 10-minute chill between layers is non-negotiable if you want that clean look.
Use Gel Food Coloring. Liquid food coloring adds extra moisture to the fudge, which can make it set softer and look streaky. Gel coloring gives you vibrant, opaque colors without changing the texture. If you only have liquid, use it sparingly—just one drop at a time—and stir thoroughly.
Let It Set Fully. Two hours in the fridge is the minimum, but overnight is better. The fudge continues to firm up over time, and it slices much cleaner after a full chill. I’ve made the mistake of slicing after only an hour, and the layers squished together. Patience pays off here.
Room Temperature Is Your Friend for Serving. These bars taste best when they’ve sat at room temperature for 5 to 10 minutes after coming out of the fridge. The texture softens just slightly, making them creamy instead of rock hard. If you serve them straight from the fridge, they’ll be firm and dense—still good, but not as luscious.
Variations & Adaptations
Once you’ve mastered the basic recipe, feel free to play around. Here are some variations I’ve tried and loved:
Chocolate Swirl Version: After pouring the white layer, drizzle 2 tablespoons of melted dark chocolate over the top and swirl it gently with a toothpick before adding the orange layer. The chocolate adds a nice contrast to the sweetness of the candy corn. I did this for a Halloween party and people went crazy for it.
Peanut Butter Twist: Stir ¼ cup of creamy peanut butter into the yellow layer before spreading. The salty peanut flavor balances the sweetness beautifully. This works especially well if you’re using honey-roasted candy corn.
Vegan Adaptation: Use vegan white chocolate chips or vegan almond bark, and substitute the sweetened condensed milk with a can of coconut sweetened condensed milk (like Nature’s Charm brand). The texture will be slightly softer, but the flavor is still fantastic. I tested this version for a friend who’s dairy-free, and she couldn’t tell the difference.
Layered Cupcakes: Instead of making bars, spoon the fudge into mini cupcake liners (about 1 tablespoon per layer) and chill. These make adorable single-serving treats for Halloween goodie bags. Just be sure to use mini liners—standard ones will be too big and the layers will be too thin.
Spiced Version: Add ½ teaspoon of pumpkin pie spice to the orange layer for a subtle autumn warmth. The spice doesn’t overpower the candy corn flavor; it just adds a cozy background note that makes these feel even more seasonal.
Serving & Storage Suggestions
These candy corn fudge bars are best served chilled or at cool room temperature. If you’re setting them out for a party, arrange them on a platter and let them sit for about 10 minutes before serving. This softens them just enough to be creamy without getting messy.
They pair beautifully with a hot drink—think spiced apple cider, pumpkin spice latte, or even a simple cup of coffee. The sweetness of the fudge balances the bitterness of coffee perfectly. For a fun Halloween dessert board, arrange the bars alongside savory stuffed mini peppers (yes, it sounds weird, but the contrast works) and some fresh fruit.
Storage: Keep the bars in an airtight container in the refrigerator for up to 2 weeks. Layer them between sheets of parchment paper to prevent sticking. If you’re stacking them, don’t press down—just let them rest gently on top of each other.
Freezing: These freeze beautifully. Wrap individual bars in plastic wrap, then place them in a freezer-safe bag or container. They’ll keep for up to 3 months. To thaw, transfer them to the refrigerator overnight. Don’t thaw at room temperature, or they might get too soft and lose their shape.
One thing I’ve noticed: the flavor actually improves after a day or two in the fridge. The candy corn softens and melds with the fudge base, creating a more cohesive texture. So if you can resist eating them all immediately, they’re even better on day two.
Nutritional Information & Benefits
Let’s be honest—this is a treat, not a health food. But here’s what you’re working with per bar (based on 16 servings):
- Calories: Approximately 210-230 calories per bar
- Fat: 8-10 grams
- Carbohydrates: 32-36 grams
- Sugar: 28-30 grams
- Protein: 2-3 grams
The main nutritional takeaway here is portion control. These bars are rich and sweet, so a small square goes a long way. I usually cut mine into 16 pieces, but if you’re serving a crowd, you can easily get 20 to 24 smaller bars out of the same pan.
On the plus side, this recipe is gluten-free as written (always check your candy corn label, but most brands are gluten-free). It’s also egg-free and nut-free if you use almond bark that doesn’t contain actual almonds (most don’t). If you’re looking for a treat that’s safe for school parties or shared office snacks, these bars are a solid choice.
For a slightly lighter option, you can reduce the candy corn by ¼ cup total, but honestly? The candy corn is what gives these bars their signature look and texture. I’d rather eat one small bar and enjoy it fully than try to make a “healthier” version that misses the mark.
Conclusion
These easy candy corn fudge bars are proof that you don’t need a dozen ingredients or hours in the kitchen to create something that looks and tastes special. They’re the kind of recipe that makes you feel like a baking genius even though you barely tried. And honestly? That’s exactly the energy I want to bring to Halloween baking.
I love that these bars capture the spirit of candy corn—that silly, polarizing, nostalgic Halloween candy—in a form that feels more grown-up and shareable. They’re not trying to be fancy or complicated. They’re just unapologetically fun, sweet, and satisfying. That’s the kind of recipe I keep coming back to.
If you make these (and I really hope you do), let me know how they turn out. Did you stick with the classic three layers, or did you try one of the variations? Drop a comment below—I genuinely read every single one. And if you’re looking for more easy, no-fuss dessert ideas, check out our full recipe collection for more treats that deliver big flavor without the stress.
Happy Halloween, and happy fudge-making!
Frequently Asked Questions
Can I use white chocolate chips instead of almond bark?
Yes, but the texture will be slightly different. White chocolate chips contain stabilizers that can make the fudge a bit softer and more prone to sticking. If using white chocolate chips, add 1 tablespoon of coconut oil or vegetable shortening to help them melt smoothly and set firmly.
Why did my layers blend together?
This usually happens when the bottom layer isn’t chilled long enough before adding the next one. Make sure each layer is firm to the touch (about 10 to 12 minutes in the fridge) before adding the next. Also, pour the next layer gently—don’t dump it in all at once, or the weight can push through the bottom layer.
Can I make these without food coloring?
You can, but they won’t look like candy corn. Without coloring, you’ll have three layers of white fudge with candy corn pieces mixed in. The flavor will still be great, but the visual effect will be lost. If you want a natural color alternative, try adding a pinch of turmeric for yellow and a bit of paprika for orange—though the colors will be more muted.
How do I get clean, sharp slices?
Use a sharp knife and wipe it clean between each cut. For the cleanest slices, let the fudge sit at room temperature for 5 minutes after coming out of the fridge, then slice immediately. If the fudge is too cold, it can crack. If it’s too warm, it will squish. That Goldilocks zone of 5 minutes at room temperature is your sweet spot.
Can I double this recipe for a larger pan?
Absolutely. Double all ingredients and use a 9×13-inch pan. The layers will be slightly thinner, so reduce the chill time between layers to about 8 minutes. You’ll get about 24 to 30 bars from a doubled batch. Just be sure to line the pan with parchment paper that overhangs on all four sides for easy removal.
Pin This Recipe!
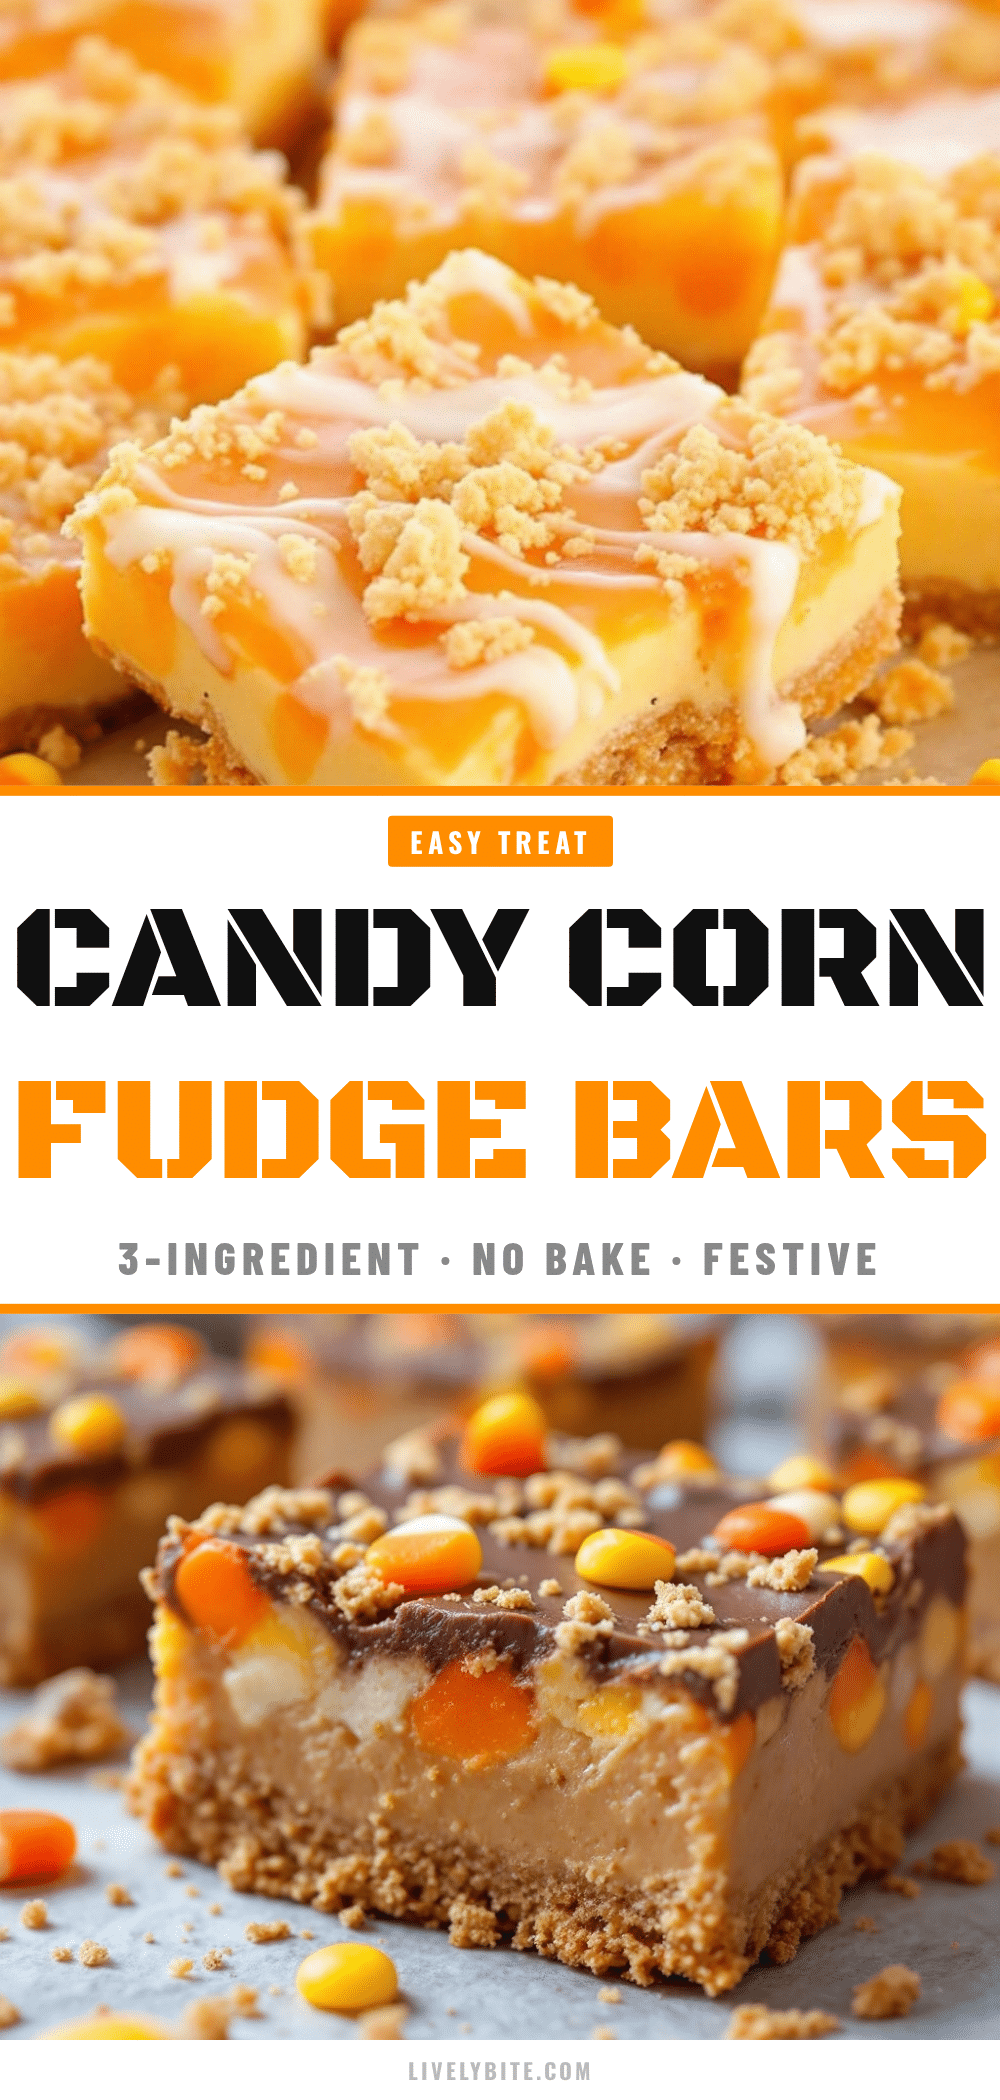
3-Ingredient Easy Candy Corn Fudge Bars
These easy candy corn fudge bars require only three ingredients and no baking. They look festive and impressive with clean white, orange, and yellow layers, perfect for Halloween parties.
- Prep Time: 15 minutes
- Cook Time: 0 minutes
- Total Time: 2 hours 15 minutes (includes chilling time)
- Yield: 16 servings 1x
- Category: Dessert
- Cuisine: American
Ingredients
- 24 ounces white almond bark (about 2 standard blocks)
- 1 can (14 ounces) sweetened condensed milk
- 1 ½ cups candy corn
- Yellow and orange food coloring (gel-based preferred)
Instructions
- Line an 8×8-inch square baking pan with parchment paper, leaving about 2 inches of overhang on two opposite sides. Lightly spray the parchment with nonstick cooking spray.
- Divide 1 ½ cups of candy corn into three separate bowls: ½ cup for the white layer, ½ cup for the orange layer, and ½ cup for the yellow layer. Roughly chop each portion.
- Break the white almond bark into pieces and place in a large microwave-safe bowl. Pour the entire can of sweetened condensed milk over the top. Microwave in 30-second intervals, stirring well after each, until completely smooth (about 2 to 2 ½ minutes total).
- Divide the smooth fudge base evenly into three separate bowls (about 1 cup each).
- For the white layer: Leave one bowl plain. Stir in the chopped white candy corn. For the yellow layer: Add 2 to 3 drops of yellow gel food coloring to the second bowl, stir, then fold in the chopped yellow candy corn. For the orange layer: Add 1 drop yellow and 1 drop red (or orange gel coloring) to the third bowl, mix, then stir in the chopped orange candy corn.
- Pour the white layer into the prepared pan and spread evenly. Tap the pan gently on the counter. Refrigerate for 10 to 12 minutes until firm to the touch but not hard.
- Remove from fridge and carefully spoon the orange layer over the white layer, spreading gently. Refrigerate for another 10 to 12 minutes.
- Repeat with the yellow layer, spreading evenly over the orange layer. Refrigerate for at least 2 hours, or until completely firm.
- Lift the fudge out using the parchment overhang. Place on a cutting board and slice into bars with a sharp knife, wiping the knife clean between cuts. Cut into 16 squares (4 rows by 4 rows).
Notes
Don’t overheat the almond bark; microwave in short bursts. Chill between layers to prevent colors from bleeding. Use gel food coloring for best results. Let fudge set fully (overnight is ideal) for clean slicing. Serve at room temperature for 5-10 minutes after chilling for best texture. Store in an airtight container in the refrigerator for up to 2 weeks. Freeze individual bars wrapped in plastic wrap for up to 3 months.
Nutrition
- Serving Size: 1 bar (1/16 of recip
- Calories: 210230
- Sugar: 2830
- Fat: 810
- Carbohydrates: 3236
- Protein: 23
Keywords: candy corn fudge, Halloween dessert, no-bake fudge, 3-ingredient fudge, easy fudge bars, festive Halloween treat


