I pulled the cake out of the oven and tilted the pan. The whole thing lifted cleanly from the parchment in one smooth sheet. I actually whispered, “No way.”
I’d been chasing that feeling for years. The perfect no-crack pumpkin roll had become this quiet obsession of mine. Every fall, I’d mix the batter, spread it thin, roll it while it was still warm, and hold my breath during the unrolling. Some years it cracked. Some years it stuck. One year it just crumbled into pieces on the counter and I ate the filling with a spoon while staring at the mess.
This year was different. I found the rhythm. I learned the exact moment when the cake is ready to roll. I stopped rushing. And honestly? I stopped being so scared of messing it up. That’s when it all came together.
The cream cheese filling is the real star here. It’s tangy enough to cut through the warm pumpkin spices, but sweet enough to feel like a treat. The cake stays soft and flexible, even after a night in the fridge. It rolls up like a dream.
I brought this to a Friendsgiving dinner last month. Someone asked for the recipe before they even finished their slice. That’s when you know you’ve got something good. Something worth sharing.
So here it is. The method I trust. The filling I love. The roll that finally didn’t crack.
Why You’ll Love This Recipe
I tested this pumpkin roll six times before I got it right. Six times. My kitchen smelled like a pumpkin spice factory, and my family was politely tired of eating test slices. But each attempt taught me something. Now I know exactly what works.
- No cracks, no stress : The method here is built around preventing cracks before they happen. You’re not hoping for the best. You’re following steps that actually work.
- Simple ingredients : You probably have most of this in your pantry right now. No weird extracts or hard-to-find flours.
- Perfect for fall gatherings : Thanksgiving, Friendsgiving, cozy dinners. This roll shows up and makes people happy.
- Make-ahead friendly : You can make this a day ahead and it actually tastes better. The flavors settle in overnight.
- That cream cheese filling : It’s smooth, tangy, and not too sweet. It balances the spiced cake perfectly.
This isn’t just another pumpkin roll recipe. It’s the one where I stopped guessing and started paying attention to the little things. The texture of the flour, the temperature of the eggs, the way the cake feels when it’s ready to roll. These details matter. And they make the difference between a roll that cracks and a roll that rolls like it’s nothing.
The first time I made this version, I closed my eyes after the first bite. Not because it was fancy. Because it was exactly what I wanted. Soft, spiced, creamy, and completely whole.
What Ingredients You Will Need
This recipe uses simple, everyday ingredients. Nothing complicated. Nothing expensive. Just good basics that work together beautifully.
For the Pumpkin Cake
- ¾ cup all-purpose flour (spooned and leveled, not scooped)
- 1 teaspoon baking powder
- ½ teaspoon baking soda
- 1 teaspoon ground cinnamon
- ½ teaspoon ground ginger
- ½ teaspoon ground nutmeg
- ¼ teaspoon ground cloves
- ¼ teaspoon salt
- 3 large eggs (room temperature is important here)
- ¾ cup granulated sugar
- ⅔ cup pumpkin puree (not pumpkin pie filling)
- 1 teaspoon vanilla extract
- Powdered sugar for dusting (you’ll use a lot of this)
For the Cream Cheese Filling
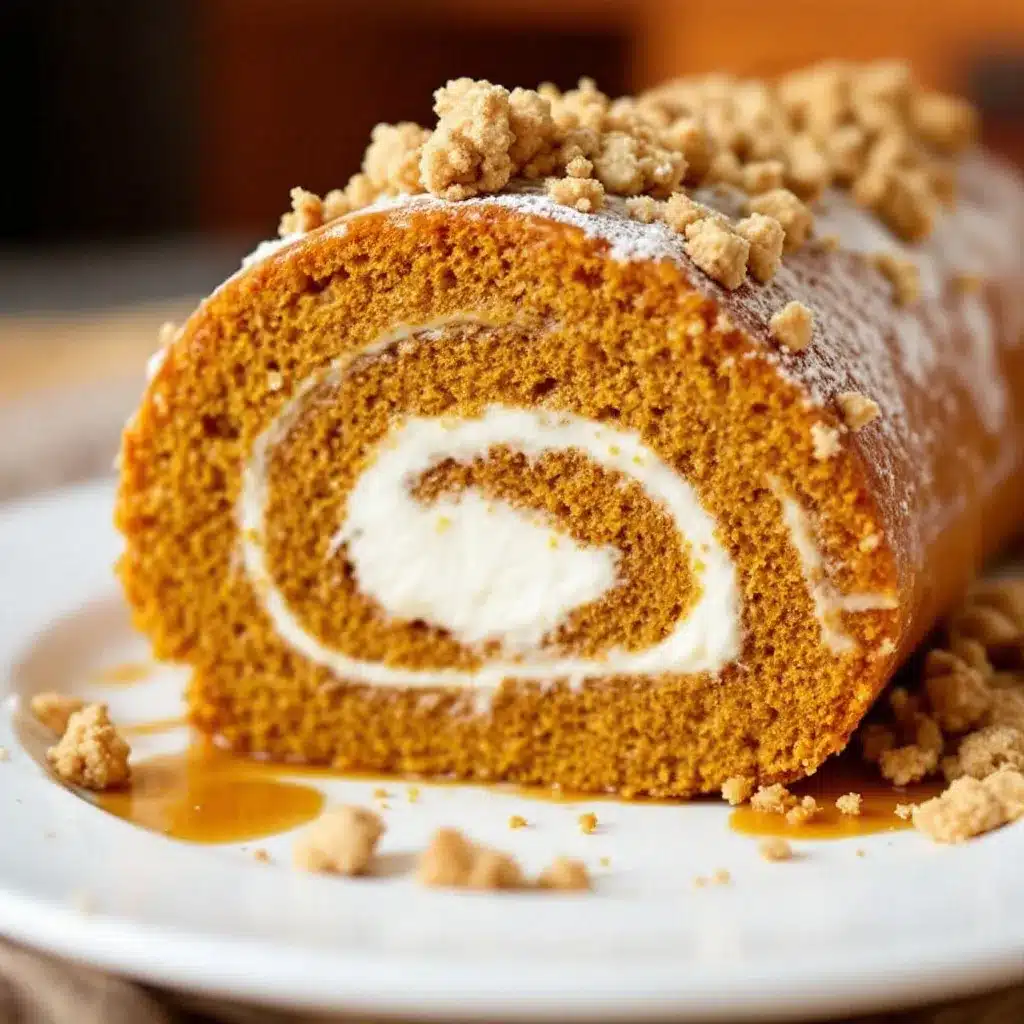
- 8 ounces cream cheese (full-fat, softened to room temperature)
- 4 tablespoons unsalted butter (softened)
- 1 cup powdered sugar (sifted if you want it extra smooth)
- 1 teaspoon vanilla extract
A few notes on ingredients. Use canned pumpkin puree, not pumpkin pie filling. They’re different. The pie filling has sugar and spices already added, and it’ll throw off the texture. I use Libby’s pumpkin puree and it works perfectly every time.
The cream cheese needs to be fully softened. Cold cream cheese creates lumps in the filling, and you’ll be fighting with it the whole time. Leave it on the counter for at least an hour before you start. If you’re in a hurry, cut it into small cubes and let it sit for 20 minutes.
For the spices, feel free to adjust. I like a bold spice profile, but if you prefer a milder pumpkin flavor, cut the ginger and cloves in half. The cinnamon can stay. It’s the backbone here.
If you need a dairy-free option, use a high-quality dairy-free cream cheese and vegan butter. The texture will be slightly different, but it still works. I’ve tested it with Kite Hill cream cheese and it rolled fine.
Equipment Needed
You don’t need much for this. That’s part of why I love making it.
- 15×10-inch jelly roll pan (this size matters. A different size changes the thickness of the cake)
- Parchment paper (don’t skip this. It’s essential for rolling)
- Electric mixer (hand mixer or stand mixer both work)
- Large mixing bowls
- Spatula or offset spatula (for spreading the batter evenly)
- Clean kitchen towel (a thin one, not a thick fluffy towel)
- Wire cooling rack
- Sifter or fine mesh strainer (for dusting powdered sugar)
- Sharp knife (for slicing clean pieces)
If you don’t have a jelly roll pan, you can use a half-sheet pan. The cake will be slightly thinner, so reduce the baking time by a minute or two. Keep an eye on it. You want the top to spring back when lightly touched.
I use a cheap jelly roll pan from the grocery store. It works fine. You don’t need expensive equipment for this recipe. Just good technique and patience.
Preparation Method
Take your time here. Each step matters. Rushing is what causes cracks.
- Preheat your oven to 350°F (175°C). Line your jelly roll pan with parchment paper. Leave some overhang on the long sides. Lightly spray the parchment with cooking spray.
- Whisk the dry ingredients together. In a medium bowl, combine the flour, baking powder, baking soda, cinnamon, ginger, nutmeg, cloves, and salt. Whisk until evenly distributed. Set aside.
- Beat the eggs and sugar. In a large bowl, beat the eggs and granulated sugar with an electric mixer on medium-high speed for about 2 minutes. The mixture should be thick, pale, and slightly doubled in volume. This step adds air to the cake, which helps it stay flexible.
- Add the pumpkin and vanilla. Beat in the pumpkin puree and vanilla extract until just combined. Don’t overmix here. You want it smooth, not frothy.
- Fold in the dry ingredients. Add the flour mixture to the wet ingredients. Fold gently with a spatula until no streaks of flour remain. A few lumps are okay. Overmixing will make the cake tough and more likely to crack.
- Spread the batter in the pan. Pour the batter into the prepared pan. Use an offset spatula to spread it evenly to all corners. The batter layer should be thin and even. Take your time here. Uneven thickness leads to uneven baking and cracks.
- Bake for 12 to 14 minutes. The cake is done when the top springs back when lightly touched and the edges start pulling away from the pan. Don’t overbake. Overbaking dries out the cake and guarantees cracks.
- Prepare your rolling station. While the cake bakes, lay a clean kitchen towel on the counter. Dust it generously with powdered sugar. You want a thick, even layer. The sugar prevents sticking and adds sweetness to the outside of the roll.
- Turn the cake out immediately. As soon as the cake comes out of the oven, run a knife around the edges. Invert the pan onto the sugared towel. Peel off the parchment paper carefully. If any cake sticks to the paper, it means it wasn’t baked long enough. That’s rare, but it happens.
- Roll the cake while it’s hot. Starting at a short end, roll the cake and towel together into a tight log. Roll it gently but firmly. Let it cool completely in this rolled position. This takes about 45 minutes to 1 hour. This step teaches the cake its shape and prevents cracks later.
- Make the filling. While the cake cools, beat the softened cream cheese and butter together until smooth and fluffy. Add the powdered sugar and vanilla. Beat until creamy. Don’t overbeat or the filling will become too thin.
- Unroll and fill. When the cake is completely cool, gently unroll it. It might want to curl back a little. That’s fine. Spread the cream cheese filling evenly over the cake, leaving a ½-inch border on all sides. The border prevents filling from squeezing out when you roll it again.
- Roll it back up. Roll the cake tightly again, this time without the towel. Use the parchment paper to help you roll if needed. Wrap the finished roll tightly in plastic wrap.
- Chill for at least 2 hours. Refrigerate the wrapped roll for at least 2 hours before slicing. Overnight is even better. Chilling sets the filling and makes slicing much easier.
Cooking Tips & Techniques
I’ve made this recipe enough times to know where things go wrong. Here’s what I’ve learned.
Don’t skip the room temperature eggs. Cold eggs don’t incorporate as well. They make the batter denser. Set your eggs on the counter an hour before you start. If you forget, place them in a bowl of warm water for 5 minutes.
The rolling technique matters more than you think. Roll the cake while it’s hot. I know it feels wrong. You’re afraid it’ll crack. But rolling it warm teaches it to bend. If you wait until it’s cool, it’ll be stiff and brittle. That’s when cracks happen. Trust the process.
Use enough powdered sugar on the towel. I learned this the hard way. I was being conservative with the sugar, trying to be healthy. The cake stuck to the towel and tore. Now I go heavy with the sugar. It creates a non-stick surface and adds a lovely sweetness to the outside.
Let it cool completely before filling. This is non-negotiable. If the cake is even slightly warm, the cream cheese filling will melt and turn into a runny mess. Your roll will be a disaster. Let it cool fully. Go watch a show. Do the dishes. Be patient.
Slice with a sharp knife. A dull knife squishes the roll and smears the filling. Use a sharp serrated knife and wipe it clean between slices. You’ll get clean, beautiful pieces every time.
I once forgot to add the baking powder. The cake came out flat and dense. It cracked when I tried to roll it. I ate the pieces with a fork and called it a pumpkin crumble. Sometimes failures turn into happy accidents. But it’s better to just add the baking powder.
Variations & Adaptations
This recipe is flexible. Here are some ways to make it your own.
Gluten-free version: Substitute the all-purpose flour with a 1:1 gluten-free baking flour. I use Bob’s Red Mill. The texture is slightly more delicate, so be extra gentle when rolling. It still works beautifully.
Dairy-free version: Use dairy-free cream cheese and vegan butter. The filling will be a bit softer, so chill the roll for at least 4 hours before slicing. I’ve tested this with Miyoko’s cream cheese and it held up well.
Spice variation: Swap the ginger, nutmeg, and cloves for pumpkin pie spice. Use 2 teaspoons total. It’s simpler and still delicious. I do this when I’m feeling lazy or out of individual spices.
Chocolate pumpkin roll: Replace 2 tablespoons of flour with unsweetened cocoa powder. The chocolate and pumpkin combination is surprisingly good. My sister requests this version every year.
Nutty twist: Sprinkle ¼ cup of finely chopped pecans or walnuts over the filling before rolling. The crunch adds a nice contrast to the soft cake and creamy filling.
I tried a maple cream cheese filling once. I swapped half the powdered sugar for maple syrup. It was delicious but the filling was too soft. The roll didn’t hold its shape well. Stick with the powdered sugar version. It’s tried and true.
Serving & Storage Suggestions
This pumpkin roll tastes best when it’s thoroughly chilled. The filling firms up and the flavors meld together. Slice it straight from the fridge for the cleanest cuts.
Serving temperature: I like it cold. Some people prefer it at room temperature. If you want room temp, let the sliced pieces sit out for 10 minutes before serving. Don’t let the whole roll sit out. It gets soft.
Presentation: Dust the top with a light sprinkle of powdered sugar just before serving. Add a few fresh cranberries or a cinnamon stick for a festive look. It’s not necessary, but it’s pretty.
Storage: Wrap the roll tightly in plastic wrap and store it in the refrigerator. It stays good for up to 5 days. The flavors actually improve after the first day. The spices settle in and the filling becomes more cohesive.
Freezing: You can freeze the unbaked pumpkin roll for up to 3 months. Wrap it tightly in plastic wrap, then foil. Thaw it in the refrigerator overnight before filling and rolling. Or freeze the finished roll for up to 2 months. Thaw in the fridge overnight before slicing.
Reheating: I don’t recommend reheating this. It’s meant to be served cold or at room temperature. If you really want it warm, microwave a single slice for 10 seconds. The cake will be soft and the filling will be slightly melted. It’s not traditional, but it’s still good.
This roll also pairs beautifully with a warm drink. I love serving it alongside a refreshing cucumber mint green tea cooler for a light, balanced dessert experience. The cool, herbal notes of the tea contrast nicely with the warm pumpkin spice.
Nutritional Information & Benefits
Here’s the estimated nutritional breakdown for one slice (based on 10 slices per roll):
| Nutrient | Amount per slice |
|---|---|
| Calories | 285 |
| Total Fat | 14g |
| Saturated Fat | 8g |
| Cholesterol | 85mg |
| Sodium | 220mg |
| Total Carbohydrates | 36g |
| Dietary Fiber | 1g |
| Sugars | 26g |
| Protein | 5g |
| Vitamin A | 120% DV |
Pumpkin is packed with vitamin A, which supports eye health and immune function. It’s also a good source of fiber and antioxidants. The cream cheese adds calcium and protein, though it’s not exactly a health food. This is a treat. Enjoy it as such.
If you’re watching your sugar intake, you can reduce the sugar in the cake to ½ cup. The filling needs the full amount for structure. The cake will be less sweet, but the filling will still carry the sweetness.
This recipe contains gluten, dairy, and eggs. For allergen-friendly options, check the variations section above.
Frequently Asked Questions
Why did my pumpkin roll crack?
Cracks usually happen from overbaking or rolling the cake when it’s too cool. Bake it for exactly 12 to 14 minutes and roll it while it’s still warm. If it’s already cracked, dust it with powdered sugar and call it rustic. It still tastes great.
Can I make this pumpkin roll ahead of time?
Yes. Make it a day ahead and keep it wrapped in the fridge. The flavors develop overnight and it slices more cleanly. I actually prefer it the next day.
How do I get clean slices without squishing the roll?
Use a sharp serrated knife. Wipe the blade clean between each slice. Slice gently with a sawing motion. Don’t press down. Clean knife, clean cuts.
Can I use fresh pumpkin puree instead of canned?
You can, but fresh pumpkin puree has more water content. It can make the cake soggy. If you use fresh, drain it in a cheesecloth-lined strainer for an hour first. Canned is more consistent and reliable.
Why did my cream cheese filling turn out runny?
The cream cheese or butter was too soft, or you overbeat the mixture. Use room temperature ingredients but don’t let them get greasy. Beat until just smooth and fluffy. If it’s too runny, chill it for 15 minutes before spreading.
Conclusion
This pumpkin roll is the one I’ve been chasing for years. It rolls without cracking. It fills without leaking. It tastes like everything good about fall. The warm spices, the creamy tang, the soft pumpkin cake that holds together perfectly.
I love this recipe because it taught me patience. I learned to trust the process, to wait for the cake to cool, to roll it while it’s warm even though it feels scary. And every time I pull a perfect roll out of the fridge and slice into it, I smile.
Try it this weekend. Make it for Thanksgiving. Make it just because you want something cozy. And when someone asks for the recipe, send them my way.
If you give this recipe a try, I’d love to hear how it goes. Leave a comment below or tag me in your photos. Your cracked rolls, your perfect rolls, your happy accidents. All of it. Happy baking.
And if you’re looking for more easy, crowd-pleasing desserts, check out my full recipe collection for more inspiration. You might also enjoy this creamy vegan chocolate avocado pudding for a quick, healthier chocolate fix.
Pin This Recipe!
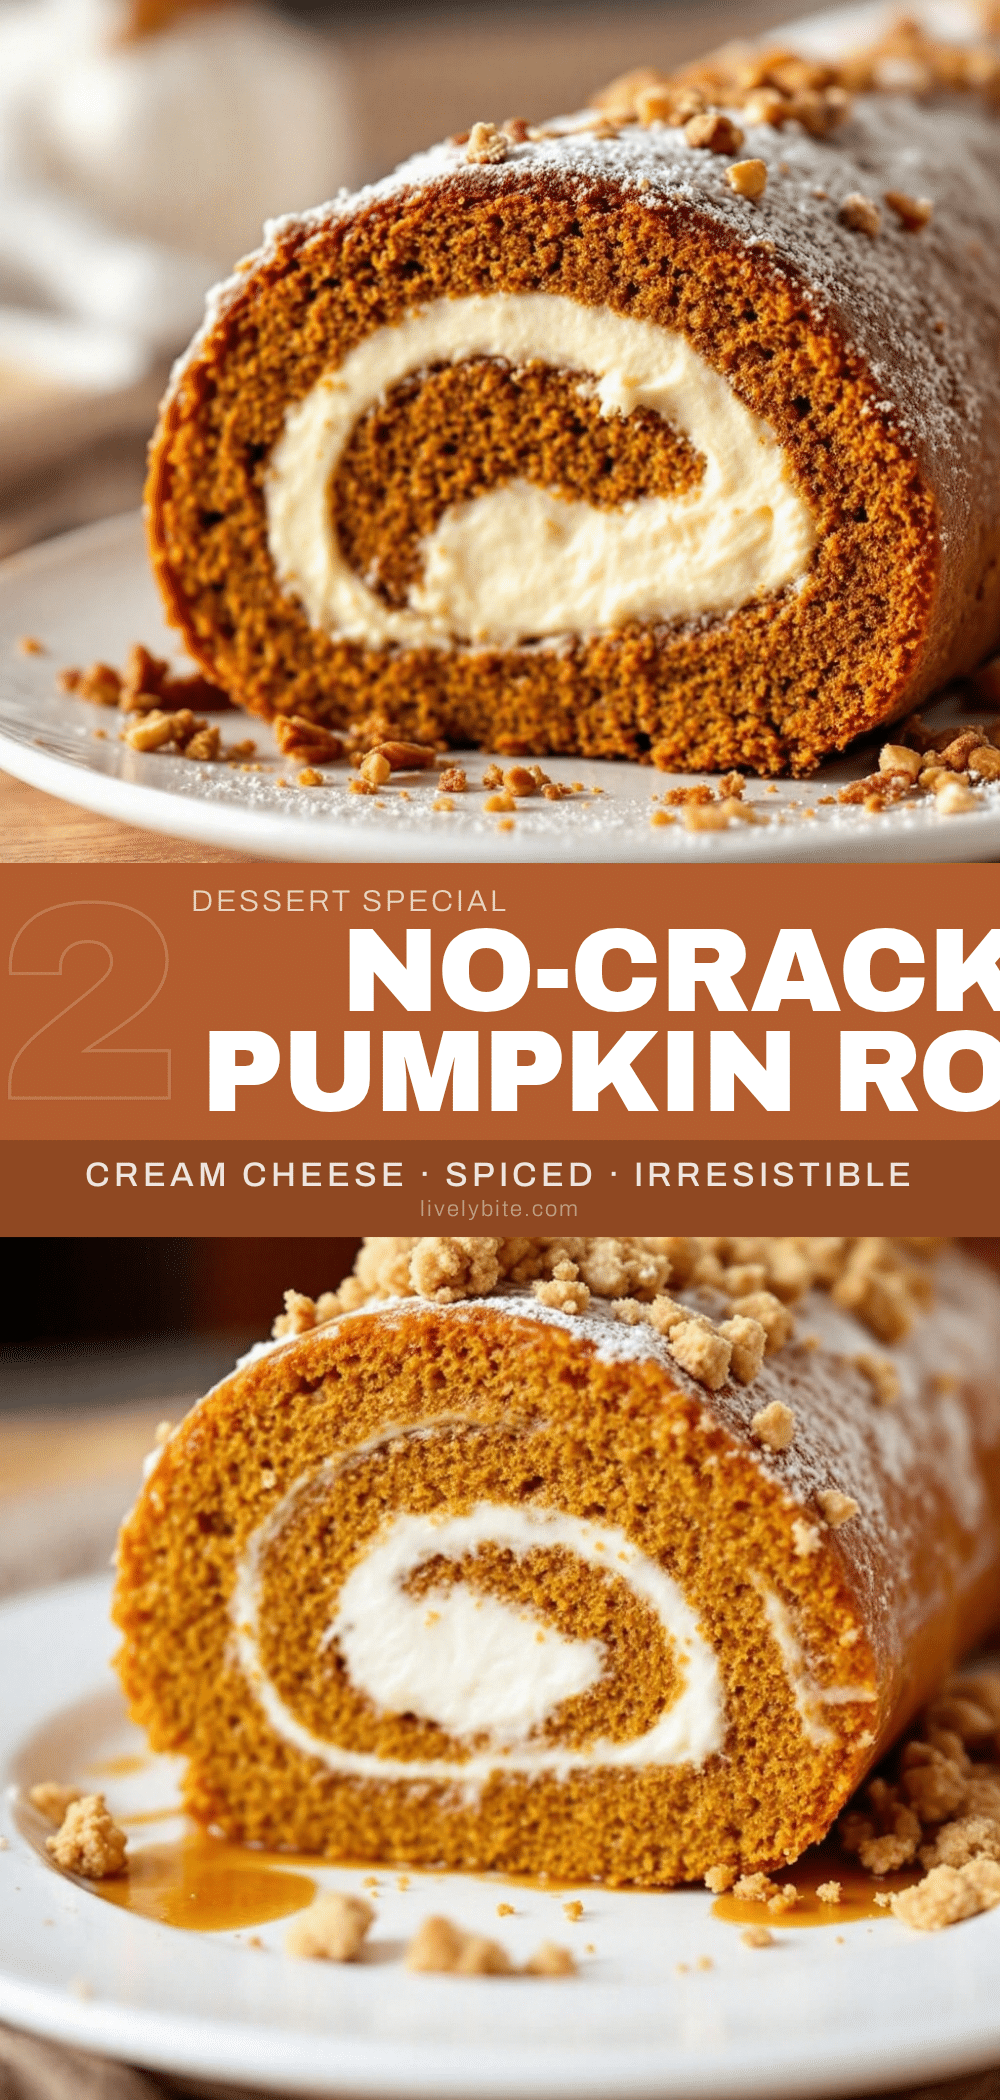
Perfect No-Crack Pumpkin Roll with Cream Cheese Filling

A foolproof pumpkin roll recipe that delivers a soft, flexible cake wrapped around a tangy cream cheese filling. No cracks, no stress—just a beautiful, crowd-pleasing fall dessert.
- Prep Time: 20 minutes
- Cook Time: 14 minutes
- Total Time: 3 hours 34 minutes (includes cooling and chilling)
- Yield: 10 servings 1x
- Category: Dessert
- Cuisine: American
Ingredients
- ¾ cup all-purpose flour (spooned and leveled)
- 1 teaspoon baking powder
- ½ teaspoon baking soda
- 1 teaspoon ground cinnamon
- ½ teaspoon ground ginger
- ½ teaspoon ground nutmeg
- ¼ teaspoon ground cloves
- ¼ teaspoon salt
- 3 large eggs (room temperature)
- ¾ cup granulated sugar
- ⅔ cup pumpkin puree (not pumpkin pie filling)
- 1 teaspoon vanilla extract
- Powdered sugar (for dusting)
- 8 ounces cream cheese (full-fat, softened)
- 4 tablespoons unsalted butter (softened)
- 1 cup powdered sugar (sifted if desired)
- 1 teaspoon vanilla extract
Instructions
- Preheat oven to 350°F (175°C). Line a 15×10-inch jelly roll pan with parchment paper, leaving overhang on long sides. Lightly spray parchment with cooking spray.
- In a medium bowl, whisk together flour, baking powder, baking soda, cinnamon, ginger, nutmeg, cloves, and salt. Set aside.
- In a large bowl, beat eggs and granulated sugar with an electric mixer on medium-high speed for about 2 minutes until thick, pale, and slightly doubled in volume.
- Beat in pumpkin puree and vanilla extract until just combined. Do not overmix.
- Fold in the flour mixture gently with a spatula until no streaks remain. A few lumps are okay.
- Pour batter into prepared pan and spread evenly with an offset spatula to all corners.
- Bake for 12 to 14 minutes, until top springs back when lightly touched and edges pull away from pan. Do not overbake.
- While cake bakes, lay a clean kitchen towel on the counter and dust generously with powdered sugar.
- Immediately after baking, run a knife around edges of pan. Invert cake onto sugared towel. Carefully peel off parchment paper.
- Starting at a short end, roll cake and towel together into a tight log. Let cool completely in rolled position (about 45 minutes to 1 hour).
- While cake cools, beat softened cream cheese and butter together until smooth and fluffy. Add powdered sugar and vanilla; beat until creamy. Do not overbeat.
- When cake is completely cool, gently unroll. Spread cream cheese filling evenly over cake, leaving a ½-inch border on all sides.
- Roll cake tightly again without the towel, using parchment paper to help if needed. Wrap tightly in plastic wrap.
- Refrigerate for at least 2 hours (overnight is best) before slicing.
Notes
Roll the cake while it’s still hot to prevent cracks. Use room temperature eggs and fully softened cream cheese. Chill the finished roll for at least 2 hours before slicing for clean cuts. For gluten-free, use a 1:1 gluten-free baking flour. For dairy-free, use dairy-free cream cheese and vegan butter.
Nutrition
- Serving Size: 1 slice
- Calories: 285
- Sugar: 26
- Sodium: 220
- Fat: 14
- Saturated Fat: 8
- Carbohydrates: 36
- Fiber: 1
- Protein: 5
Keywords: pumpkin roll, pumpkin dessert, cream cheese filling, fall dessert, Thanksgiving dessert, no-crack pumpkin roll


