That first hit of browned butter hitting the pan — the kind that smells like toasted nuts and caramel all at once — still takes me straight back to my tiny apartment kitchen three autumns ago. I had a bag of pumpkin puree I didn’t know what to do with, a container of cinnamon that was about to expire, and this desperate need to make something that actually tasted like fall instead of just looking like it.
I wasn’t trying to reinvent anything. I was just standing there, stirring butter in a skillet, watching it turn that perfect amber color, and thinking, what if I just threw this into my regular snickerdoodle dough? Honestly, I didn’t expect much. I figured it would taste fine, maybe a little nutty, and that would be that.
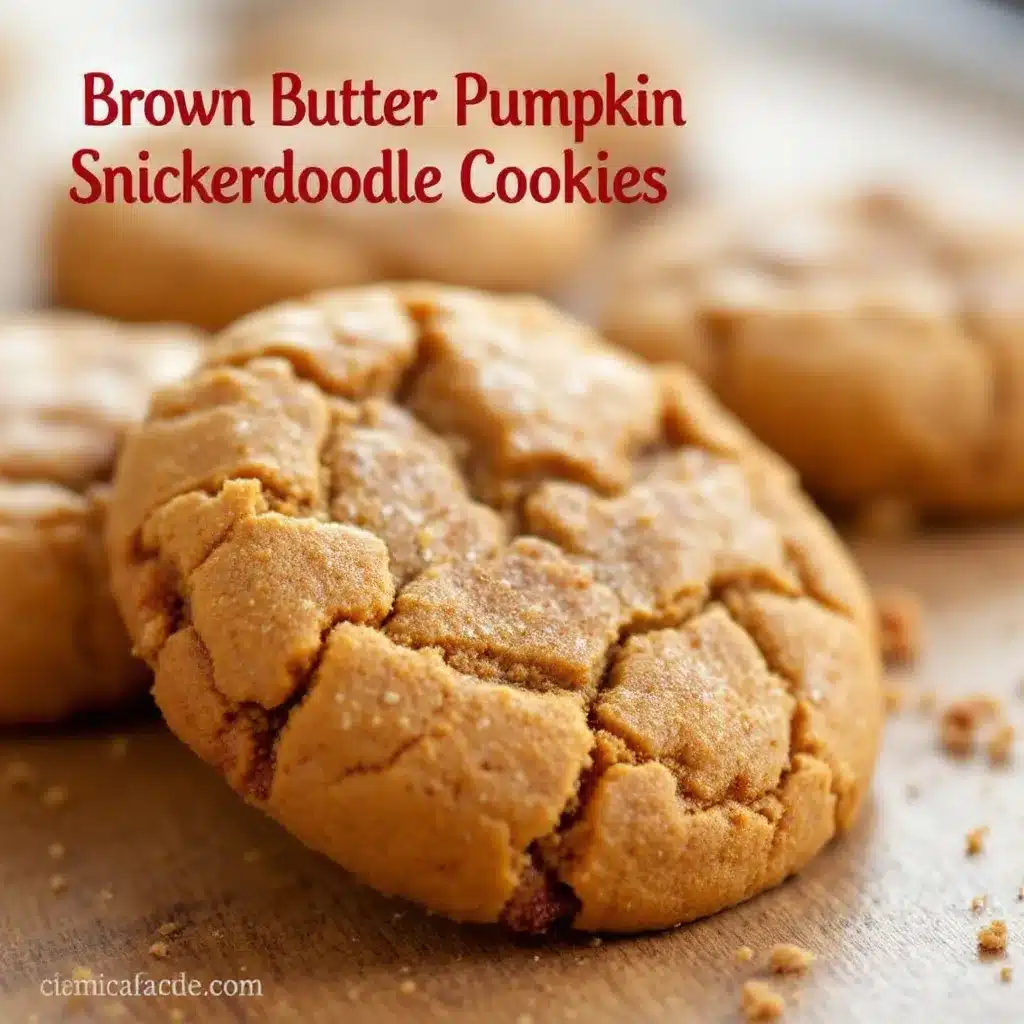
But then I pulled the first batch out of the oven, and the whole apartment smelled like a bakery that only existed in my dreams. The edges were crisp, the centers were soft, and that brown butter flavor had somehow wrapped itself around the pumpkin and cinnamon like they were old friends. I ate three before they even cooled down. No regrets.
These Best Brown Butter Pumpkin Snickerdoodle Cookies are the ones I keep coming back to. They’re the ones that make people stop mid-conversation and ask, “What is that smell?” They’re not complicated. They’re just exactly right.
Why You’ll Love This Recipe
Let me be real with you — I’ve tested a lot of pumpkin cookie recipes over the years. Some were too cakey. Some barely tasted like pumpkin. Some turned into sad, flat discs that looked nothing like the picture. These cookies? They’re different, and here’s why you’ll actually want to make them.
- That Brown Butter Magic — Browning the butter adds this deep, nutty, almost toffee-like flavor that regular butter just can’t pull off. It transforms the whole cookie into something that tastes way more complex than the ingredient list suggests.
- Perfect Texture — These cookies have crispy, crackly edges with soft, tender centers. No cakey pumpkin bread texture here. They actually chew like a snickerdoodle should.
- Real Pumpkin Flavor — Not that faint, “is there even pumpkin in here?” taste. The pumpkin puree adds moisture and a subtle earthiness that plays beautifully with the warm spices.
- Simple Ingredients — You probably already have most of this in your pantry. No weird extracts or hard-to-find flours. Just good, honest ingredients that work together.
- Perfect for Fall Baking — Whether you’re bringing them to a Friendsgiving, a cozy weekend gathering, or just baking for yourself with a cup of coffee, these cookies deliver that warm, nostalgic feeling every single time.
I’ve made these for neighbors, coworkers, and my very picky sister-in-law. Every single person has asked for the recipe. That’s not me bragging — that’s just the brown butter doing its thing.
What Ingredients You Will Need
This recipe uses simple, everyday ingredients, but each one plays a specific role in creating that perfect snickerdoodle texture and flavor. Here’s what you’ll need and why each ingredient matters.
For the Brown Butter
- 1 cup (2 sticks) unsalted butter — Use unsalted so you can control the salt level. I prefer Kerrygold for its richer flavor, but any good-quality unsalted butter works fine.
For the Cookie Dough
- 2 ½ cups (315g) all-purpose flour — Spoon and level your flour for the most accurate measurement. Scooping directly from the bag packs in too much flour and makes cookies dry.
- 1 teaspoon baking soda — Helps the cookies spread just enough while staying soft in the middle.
- ½ teaspoon cream of tartar — This is the secret to that classic snickerdoodle tang. Don’t skip it! You can substitute with 1 teaspoon lemon juice or white vinegar if you’re in a pinch.
- 1 teaspoon ground cinnamon — Warm, sweet spice that defines snickerdoodles.
- ½ teaspoon ground nutmeg — Freshly grated is best if you have it. It makes a noticeable difference.
- ¼ teaspoon ground cloves — Just a pinch for depth. Too much can overpower everything.
- ½ teaspoon salt — Balances the sweetness and enhances the brown butter flavor.
- 1 cup (200g) packed light brown sugar — Brown sugar adds moisture and a subtle molasses note that pairs beautifully with pumpkin and brown butter.
- ¼ cup (50g) granulated sugar — Adds structure and helps with spreading.
- 1 large egg, room temperature — Room temperature eggs incorporate more evenly into the butter mixture. Let yours sit out for 30 minutes before starting.
- 1 teaspoon vanilla extract — Pure vanilla, not imitation. It really does make a difference here.
- ½ cup (120g) pumpkin puree — Not pumpkin pie filling! Make sure you’re getting 100% pure pumpkin puree. I like Libby’s for its consistent thickness.
For the Cinnamon Sugar Coating
- ¼ cup (50g) granulated sugar
- 1 tablespoon ground cinnamon
Equipment Needed
You don’t need a fancy kitchen to pull these off. Here’s what I use every time I make these cookies.
- Light-colored skillet or saucepan — A light-colored pan makes it much easier to see when your butter has reached that perfect amber color. Dark pans can hide the color change and lead to burnt butter.
- Stand mixer or hand mixer — I’ve used both. A stand mixer is easier for creaming, but a hand mixer works perfectly fine. You can even do it by hand if your arm is up for it.
- Large mixing bowls — One for dry ingredients, one for wet. Nothing fancy needed.
- Whisk — For combining dry ingredients evenly.
- Rubber spatula — For scraping down the bowl and folding in the flour.
- Baking sheets — I recommend light-colored baking sheets for even browning. Dark sheets can cause the bottoms to brown too quickly.
- Parchment paper or silicone baking mats — Non-negotiable. These cookies spread, and parchment paper makes cleanup a breeze.
- Cookie scoop (1.5 tablespoon size) — For consistent cookie sizes. I use a #40 scoop, and it’s perfect every time.
- Cooling rack — Essential for letting cookies cool evenly without getting soggy bottoms.
Preparation Method
Alright, let’s get baking. I’ll walk you through every step so you know exactly what to look for.
- Brown the butter. Place the 1 cup unsalted butter in a light-colored skillet or saucepan over medium heat. Let it melt completely, then continue cooking, swirling the pan occasionally. The butter will foam up, then subside, then start to turn golden. Watch carefully — once you see brown specks forming at the bottom and smell that nutty aroma, remove it from the heat immediately. This usually takes about 5-7 minutes. Pour the browned butter into a heatproof bowl (including all those brown bits!) and let it cool for 15-20 minutes. It should be warm but not hot when you add it to the sugars.
- Preheat your oven. Set your oven to 350°F (175°C) and line two baking sheets with parchment paper or silicone mats.
- Mix the dry ingredients. In a medium bowl, whisk together the 2 ½ cups all-purpose flour, 1 teaspoon baking soda, ½ teaspoon cream of tartar, 1 teaspoon cinnamon, ½ teaspoon nutmeg, ¼ teaspoon cloves, and ½ teaspoon salt. Set aside.
- Cream the butter and sugars. In a large mixing bowl, combine the cooled browned butter, 1 cup brown sugar, and ¼ cup granulated sugar. Beat with a hand mixer or stand mixer fitted with the paddle attachment on medium speed for 2-3 minutes until the mixture looks smooth and slightly lighter in color. It won’t get fluffy like room-temperature butter would, but it should be well combined.
- Add the wet ingredients. Beat in the 1 large egg, 1 teaspoon vanilla extract, and ½ cup pumpkin puree. Mix until everything is fully incorporated, scraping down the sides of the bowl as needed. The mixture might look a little separated at first — that’s totally normal. Keep mixing until it comes together into a smooth, glossy batter.
- Fold in the dry ingredients. Add the flour mixture to the wet ingredients in two additions, mixing on low speed or folding with a rubber spatula until just combined. Do not overmix! Overmixing develops gluten and makes cookies tough. Stop as soon as you no longer see streaks of flour. The dough will be soft and slightly sticky — that’s exactly what you want.
- Chill the dough (important!). Cover the bowl with plastic wrap and refrigerate for at least 30 minutes, or up to 24 hours. Chilling solidifies the browned butter and prevents the cookies from spreading too much in the oven. I know it’s tempting to skip this step, but don’t. Your cookies will thank you.
- Prepare the cinnamon sugar coating. In a small bowl, mix the ¼ cup granulated sugar and 1 tablespoon cinnamon together.
- Scoop and coat. Using a 1.5-tablespoon cookie scoop, portion out the chilled dough. Roll each portion into a ball between your palms, then roll generously in the cinnamon sugar mixture. Place on the prepared baking sheets, spacing them about 2 inches apart. They will spread, so give them room.
- Bake. Bake one sheet at a time for 10-12 minutes. The cookies should look set around the edges but still slightly soft and puffy in the center. They will continue to bake on the hot sheet after you pull them out. For softer cookies, bake on the shorter end. For crispier edges, go a little longer.
- Cool. Let the cookies rest on the baking sheet for 5 minutes. This allows them to set up properly. Then transfer them to a wire cooling rack to cool completely. Try not to eat them all before they cool — I dare you.
Cooking Tips & Techniques
I’ve made these cookies more times than I care to count, and I’ve definitely learned a few things the hard way. Here’s what I wish someone had told me.
Don’t rush the brown butter. The first time I tried this, I cranked up the heat to speed things up. Big mistake. The butter went from melted to burnt in about 30 seconds. Low and slow is the way to go. Medium heat, constant attention, and pull it off the second you see those brown specks.
Watch for the foam. Brown butter goes through stages: melt, foam, subside, then brown. The moment the foam subsides and you can see the bottom of the pan clearly, you’re close. Keep swirling and watching.
Room temperature ingredients matter. I know it sounds fussy, but a cold egg straight from the fridge can seize up your brown butter mixture and create lumps. Let your egg sit out for 30 minutes, or place it in a bowl of warm water for 5 minutes.
Chill, chill, chill. I cannot stress this enough. The first batch I made without chilling turned into flat, greasy pucks. The browned butter is softer than regular butter at room temperature, so the dough needs that cold rest to firm up. Thirty minutes is the minimum. Overnight is even better for deeper flavor.
Use a cookie scoop for consistency. Eyeballing cookie sizes leads to uneven baking. Some will be done, some will be raw, and you’ll be standing there frustrated. A scoop gives you identical cookies that all bake at the same rate.
Bake one sheet at a time. If you crowd both sheets in the oven, the heat doesn’t circulate properly, and you’ll end up with unevenly baked cookies. I know it takes longer, but the results are worth it.
Variations & Adaptations
One of the best things about this recipe is how flexible it is. Here are some variations I’ve tried and loved.
Gluten-Free Version: Substitute the all-purpose flour with a 1:1 gluten-free baking flour blend that contains xanthan gum. I’ve used Bob’s Red Mill 1-to-1 Baking Flour with great results. The texture is slightly more delicate, but the flavor is still amazing.
Dairy-Free Option: Use vegan butter for the brown butter step. I’ve tried this with Miyoko’s European Style Cultured Vegan Butter, and it browns beautifully. Just keep in mind that vegan butter can behave a little differently, so you might need an extra tablespoon of flour if the dough feels too soft.
Spice It Up: If you love a stronger spice kick, add ¼ teaspoon ground ginger and a pinch of cardamom to the dry ingredients. I did this for a holiday party once, and people went crazy for it.
Pumpkin Spice Coating: Instead of plain cinnamon sugar, mix 2 tablespoons cinnamon, 1 teaspoon nutmeg, ½ teaspoon ginger, and ½ teaspoon cloves into the sugar coating. It gives the cookies a more complex, pumpkin-pie-like finish.
Stuffed Cookies: For an extra indulgent version, flatten a scoop of dough, place a small piece of cream cheese or a caramel candy in the center, then wrap the dough around it before rolling in cinnamon sugar. Bake as directed. The melty center is next-level good.
Make Them Smaller: Use a 1-tablespoon scoop and bake for 8-10 minutes for bite-sized cookies. Perfect for cookie platters or lunchbox treats.
Serving & Storage Suggestions
These cookies are best enjoyed warm, but they’re pretty incredible at room temperature too. Here’s how to serve and store them so they stay delicious.
Serving Temperature: Serve these cookies slightly warm or at room temperature. If you want that fresh-from-the-oven experience, pop them in a 300°F oven for 3-4 minutes before serving. They’ll soften up and that brown butter aroma will fill your kitchen all over again.
What to Serve With Them: A cold glass of milk is the classic pairing, and it works beautifully here. For a more grown-up option, try them with a warm chai latte or a spiced hot apple cider. They also make an amazing base for ice cream sandwiches — just sandwich a scoop of vanilla or caramel ice cream between two cookies and freeze for 30 minutes.
Storage: Store baked cookies in an airtight container at room temperature for up to 5 days. Place a slice of bread in the container to keep them soft — the bread absorbs excess air and releases moisture. Swap the bread slice every other day.
Freezing Instructions: These cookies freeze beautifully. You have two options: freeze the baked cookies in a single layer on a baking sheet, then transfer to a freezer-safe bag for up to 3 months. Or freeze the unbaked dough balls (without the cinnamon sugar coating) on a baking sheet, then transfer to a freezer bag. When ready to bake, roll the frozen dough balls in cinnamon sugar and bake straight from frozen, adding 2-3 minutes to the baking time.
Flavor Development: Here’s a little secret — these cookies actually taste better the next day. The brown butter flavor deepens and the spices meld together overnight. If you can resist eating them all on day one, you’re in for a treat on day two.
Nutritional Information & Benefits
I’m not going to pretend these are health food, but I do believe in knowing what you’re eating. Here’s a rough estimate per cookie (based on 24 cookies).
| Nutrient | Amount Per Cookie |
|---|---|
| Calories | 165 |
| Total Fat | 9g |
| Saturated Fat | 5g |
| Cholesterol | 30mg |
| Sodium | 95mg |
| Total Carbohydrates | 21g |
| Dietary Fiber | 1g |
| Sugars | 12g |
| Protein | 2g |
Health Highlights: Pumpkin puree is packed with vitamin A and fiber, so you’re getting a tiny nutritional boost with every cookie. The brown butter adds a small amount of vitamin A and healthy fats. And let’s be honest — sometimes a cookie is exactly what your soul needs, and that counts for something too.
Dietary Considerations: This recipe contains dairy, eggs, and gluten. For dairy-free or gluten-free options, check the variations section above. These cookies are vegetarian-friendly as written.
Conclusion
These Best Brown Butter Pumpkin Snickerdoodle Cookies are the kind of recipe that makes you look forward to fall all year long. They’re warm, spiced, nutty, and just the right amount of sweet — everything a good cookie should be.
I’ve made these for cozy nights in, holiday cookie exchanges, and lazy Sunday afternoons when I just needed something comforting to bake. Every single time, they deliver. The brown butter adds that little something extra that makes people stop and ask, “What’s in these?” And honestly, I love watching their faces when I tell them it’s just butter — browned, patient, and full of flavor.
If you make these (and I really hope you do), let me know how they turn out. Leave a comment below, tag me in your photos, or tell me about your own favorite fall cookie. I’m always looking for new ideas, and this community is full of the best bakers. Happy baking, friend. You’ve got this.
Frequently Asked Questions
Can I use pumpkin pie filling instead of pumpkin puree?
No, please don’t. Pumpkin pie filling has added sugar and spices that will throw off the balance of this recipe. Stick with 100% pure pumpkin puree for the best results.
Why did my cookies turn out flat?
Flat cookies usually mean the dough wasn’t chilled long enough, or the butter was too warm when you mixed it. Make sure your browned butter has cooled to room temperature and chill the dough for at least 30 minutes before baking.
Can I make the dough ahead of time?
Absolutely! You can refrigerate the dough for up to 24 hours before baking. The flavor actually gets better as the spices and brown butter have time to meld. You can also freeze the dough balls for up to 3 months.
Do I have to brown the butter?
Technically, no. But honestly, browning the butter is what makes these cookies special. It adds a deep, nutty flavor that regular butter just can’t replicate. If you’re short on time, you can use melted butter, but the cookies won’t have the same magic.
How do I know when the cookies are done baking?
Look for set edges and slightly puffy, soft centers. The cookies will look underdone in the middle when you pull them out — that’s perfect. They’ll continue baking on the hot sheet for the 5-minute rest on the pan.
Pin This Recipe!
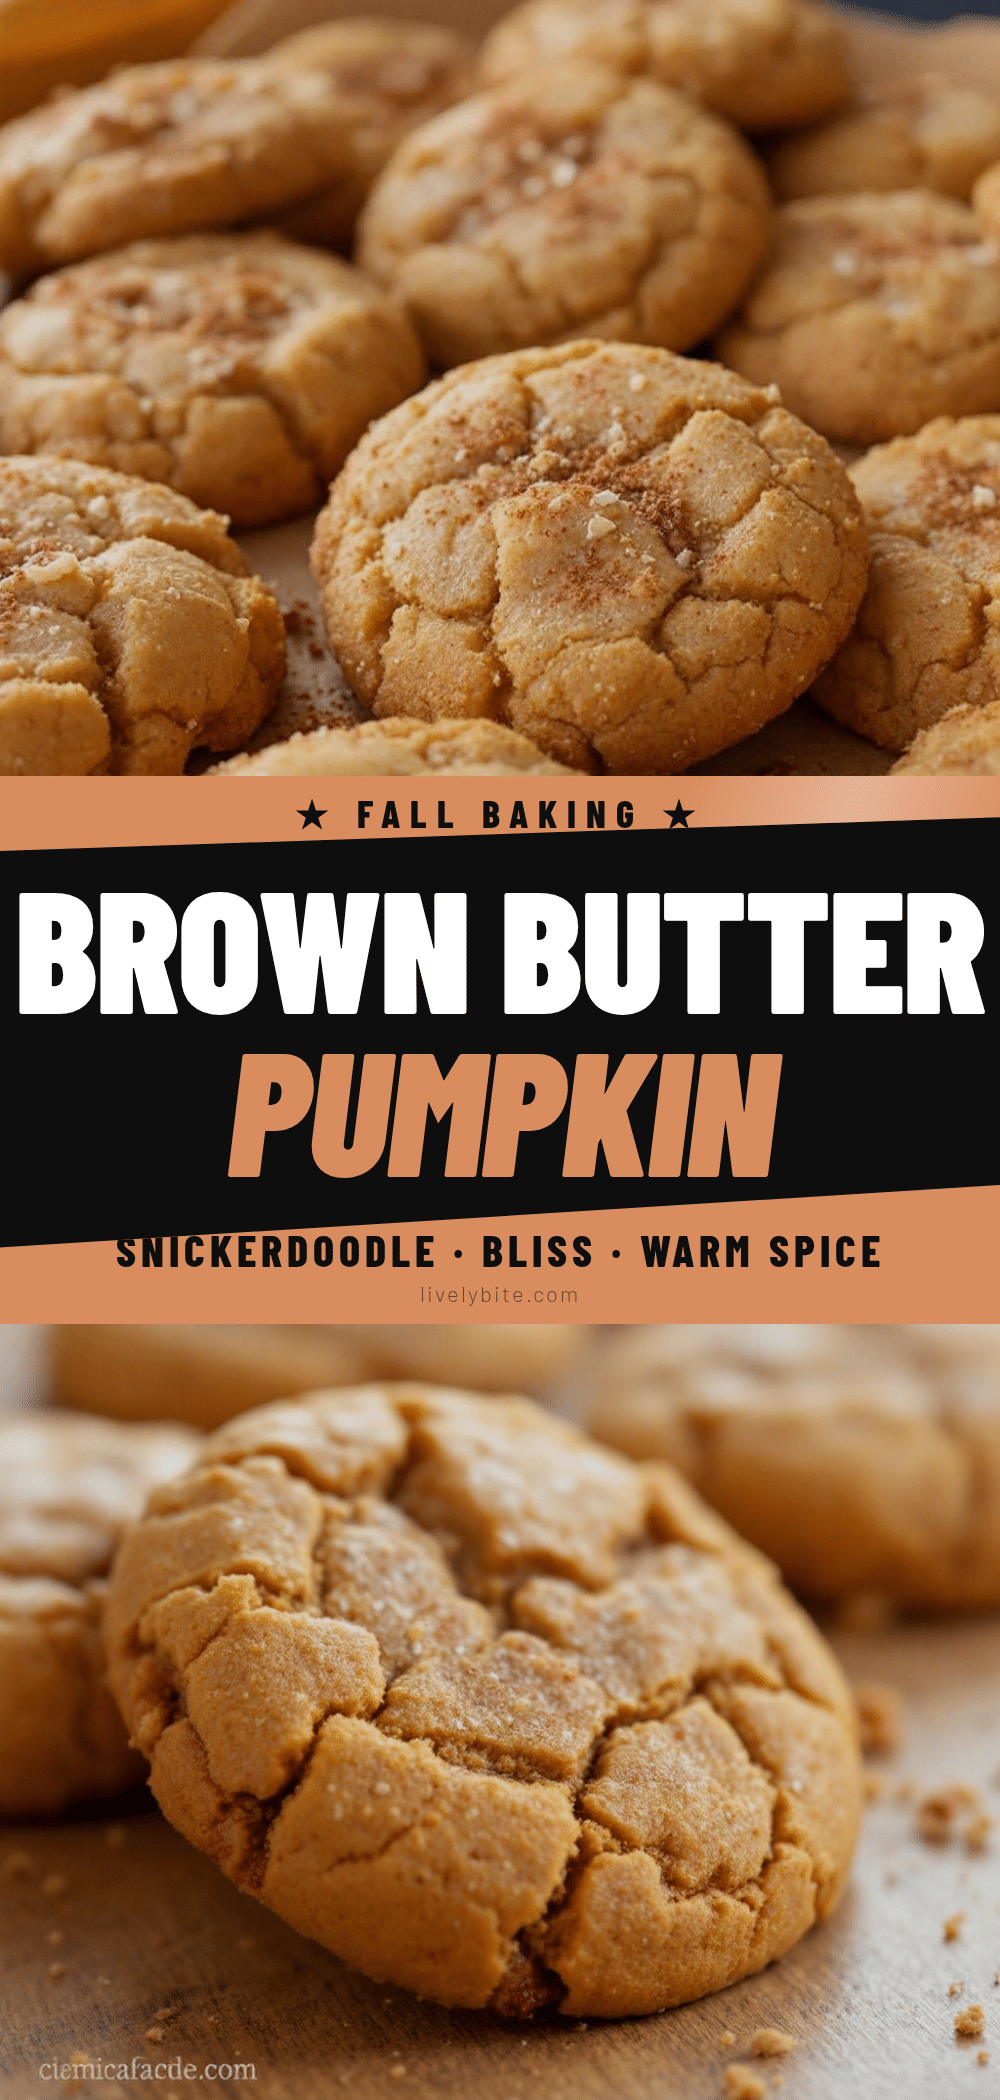
Best Brown Butter Pumpkin Snickerdoodle Cookies
These Best Brown Butter Pumpkin Snickerdoodle Cookies have crispy, crackly edges with soft, tender centers, and a deep, nutty brown butter flavor that wraps around pumpkin and cinnamon like old friends. They’re the perfect fall cookie that makes people stop mid-conversation and ask, ‘What is that smell?’
- Prep Time: 30 minutes
- Cook Time: 12 minutes
- Total Time: 1 hour 2 minutes
- Yield: 24 servings 1x
- Category: Dessert
- Cuisine: American
Ingredients
- 1 cup (2 sticks) unsalted butter
- 2 ½ cups (315g) all-purpose flour
- 1 teaspoon baking soda
- ½ teaspoon cream of tartar
- 1 teaspoon ground cinnamon
- ½ teaspoon ground nutmeg
- ¼ teaspoon ground cloves
- ½ teaspoon salt
- 1 cup (200g) packed light brown sugar
- ¼ cup (50g) granulated sugar
- 1 large egg, room temperature
- 1 teaspoon vanilla extract
- ½ cup (120g) pumpkin puree
- ¼ cup (50g) granulated sugar (for coating)
- 1 tablespoon ground cinnamon (for coating)
Instructions
- Brown the butter: Place 1 cup unsalted butter in a light-colored skillet or saucepan over medium heat. Melt completely, then continue cooking, swirling occasionally, until butter foams, subsides, and turns golden with brown specks and a nutty aroma (about 5-7 minutes). Remove from heat immediately. Pour into a heatproof bowl and let cool for 15-20 minutes until warm but not hot.
- Preheat oven to 350°F (175°C). Line two baking sheets with parchment paper or silicone mats.
- Mix dry ingredients: In a medium bowl, whisk together 2 ½ cups all-purpose flour, 1 teaspoon baking soda, ½ teaspoon cream of tartar, 1 teaspoon cinnamon, ½ teaspoon nutmeg, ¼ teaspoon cloves, and ½ teaspoon salt. Set aside.
- Cream butter and sugars: In a large mixing bowl, combine cooled browned butter, 1 cup brown sugar, and ¼ cup granulated sugar. Beat with a hand mixer or stand mixer with paddle attachment on medium speed for 2-3 minutes until smooth and slightly lighter in color.
- Add wet ingredients: Beat in 1 large egg, 1 teaspoon vanilla extract, and ½ cup pumpkin puree until fully incorporated. Scrape down sides as needed. Mixture may look separated at first but will come together into a smooth, glossy batter.
- Fold in dry ingredients: Add flour mixture to wet ingredients in two additions, mixing on low speed or folding with a rubber spatula until just combined. Do not overmix. Dough will be soft and slightly sticky.
- Chill dough: Cover bowl with plastic wrap and refrigerate for at least 30 minutes, or up to 24 hours.
- Prepare cinnamon sugar coating: In a small bowl, mix ¼ cup granulated sugar and 1 tablespoon cinnamon together.
- Scoop and coat: Using a 1.5-tablespoon cookie scoop, portion out chilled dough. Roll each portion into a ball, then roll generously in cinnamon sugar mixture. Place on prepared baking sheets, spacing 2 inches apart.
- Bake: Bake one sheet at a time for 10-12 minutes. Cookies should look set around edges but still slightly soft and puffy in center.
- Cool: Let cookies rest on baking sheet for 5 minutes, then transfer to a wire cooling rack to cool completely.
Notes
Don’t rush the brown butter – use medium heat and watch carefully. Chill the dough for at least 30 minutes to prevent flat cookies. Use room temperature egg for better incorporation. Bake one sheet at a time for even results. Cookies taste even better the next day as flavors meld.
Nutrition
- Serving Size: 1 cookie
- Calories: 165
- Sugar: 12
- Sodium: 95
- Fat: 9
- Saturated Fat: 5
- Carbohydrates: 21
- Fiber: 1
- Protein: 2
Keywords: brown butter, pumpkin, snickerdoodle, cookies, fall baking, pumpkin cookies, snickerdoodle cookies, brown butter cookies


