I had been looking for a Halloween dessert that actually tasted as good as it looked. For a while, I just accepted that holiday treats meant sacrificing flavor for decoration—dry cookies with too much royal icing, or cupcakes that were more about the sprinkles than the cake. It was getting old. Every October, I’d scroll through pages of “spooky” desserts that were all gimmick and no substance, and I’d close my laptop feeling like I was asking for too much. I just wanted a brownie. A really good, dark, fudgy brownie that also happened to look like it belonged at a Halloween party. Not a compromise. Not a project that required fondant.
So I started messing around with black cocoa powder—the stuff that gives Oreos their color. The first batch was a disaster. Too dry. The second was better but the frosting tasted like candy corn in a bad way. Then I figured out the orange frosting needed to be tangy, not sweet. And the brownie needed to be the kind that crackles on top but stays gooey inside. When I finally pulled that pan out of the oven and saw the deep, almost-black squares against the bright orange swirl, I just stood there holding the spatula. It was exactly what I’d been looking for. A brownie that didn’t need to apologize for being festive.
These black cocoa Halloween brownies with orange frosting are the ones I make every year now. They’re the ones people ask for by name. And honestly? They’re the reason I stopped looking.
Why You’ll Love This Recipe
Let’s be real—most Halloween desserts are a letdown. You take a bite of something that looks amazing and it tastes like cardboard with food coloring. These brownies are the opposite. They’re the kind of treat that makes people close their eyes and go quiet for a second. Here’s why they work:
- Deep, dark flavor – Black cocoa powder gives these brownies a rich, almost Oreo-like taste that regular cocoa just can’t match. It’s not bitter, it’s complex.
- That perfect texture – Crackly top, fudgy center, and edges that are just slightly chewy. No cakey brownies here.
- Bright, tangy frosting – The orange frosting isn’t cloyingly sweet. It uses cream cheese and fresh orange zest to cut through the dark chocolate, so every bite feels balanced.
- No special skills needed – If you can melt butter and stir, you can make these. There’s no stand mixer required for the brownie batter, and the frosting comes together in minutes.
- Perfect for Halloween parties – They look spooky and elegant at the same time. The black and orange combo is classic without being cheesy.
- Kid-approved and adult-approved – I’ve brought these to parties where kids grabbed two and adults pretended they were only having one. Everyone loves them.
I’ve tested this recipe about seven times to get it right. The first few batches were too dry or the frosting was too runny. But this version? This is the one I’d serve to anyone, anywhere, any time of year. The black cocoa does all the heavy lifting.
What Ingredients You Will Need
This recipe uses simple, mostly pantry-friendly ingredients to create something that feels way more complicated than it actually is. The star of the show is black cocoa powder, but everything else is pretty standard stuff you probably already have on hand.
For the Brownies
- Unsalted butter (1 cup / 226g) – Melted and slightly cooled. I use unsalted so I can control the salt level. Kerrygold is my go-to for flavor, but any good brand works.
- Granulated sugar (1 ¾ cups / 350g) – This gives the brownies that crackly top. Don’t reduce it or the texture will change.
- Large eggs (3, room temperature) – Room temperature eggs mix in more evenly and give a better rise. If you forgot to take them out, put them in a bowl of warm water for 5 minutes.
- Vanilla extract (2 teaspoons) – Pure vanilla, not imitation. It rounds out the flavor of the black cocoa.
- All-purpose flour (1 cup / 125g) – Spoon and level it. Scooping straight from the bag packs in too much flour and makes dry brownies.
- Black cocoa powder (¾ cup / 75g) – This is the key ingredient. It’s different from regular Dutch-process cocoa. It’s darker, less acidic, and has that signature Oreo taste. I use Guittard or King Arthur Flour brand.
- Salt (½ teaspoon) – Don’t skip it. Salt makes the chocolate taste more chocolaty.
- Baking powder (¼ teaspoon) – Just enough to give them a little lift without making them cakey.
For the Orange Frosting
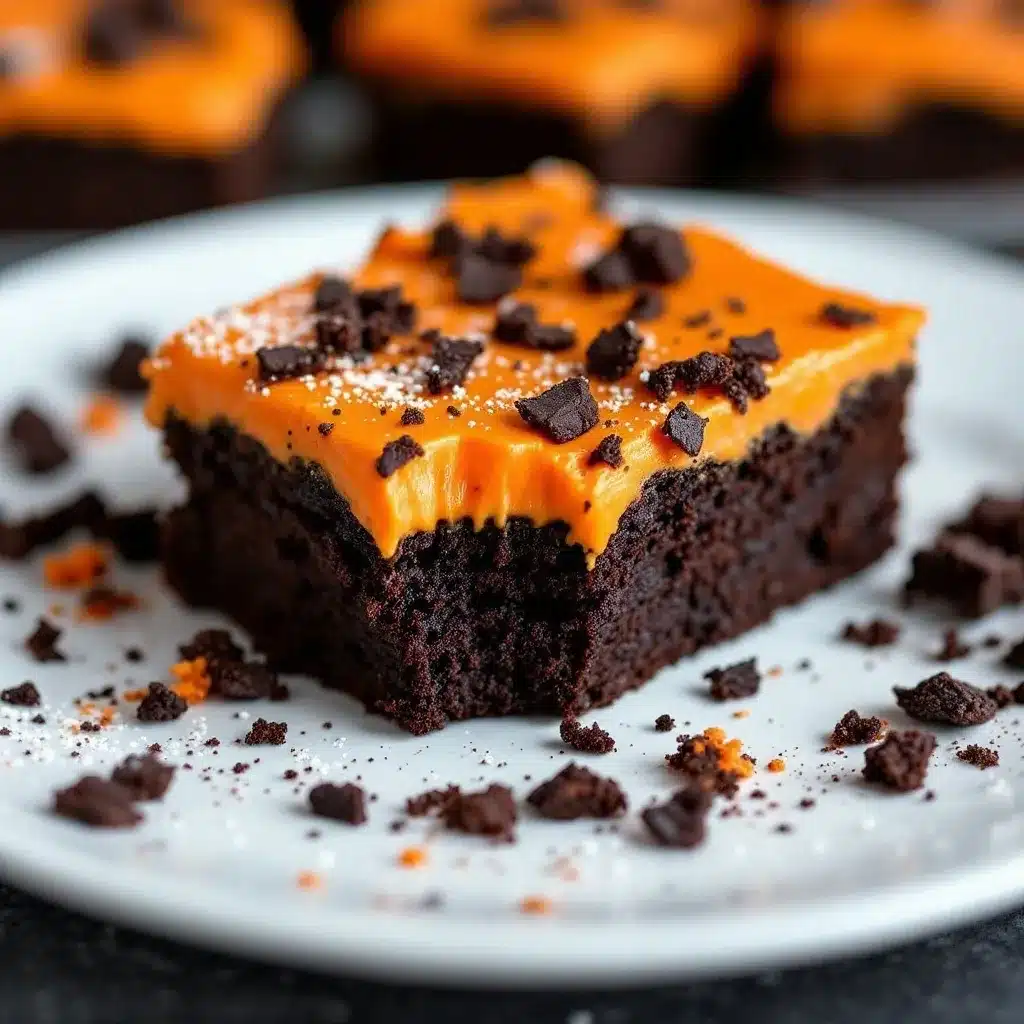
- Cream cheese (4 oz / 113g, softened) – Full-fat brick cream cheese, not the spreadable kind in a tub. It needs to be soft or the frosting will be lumpy.
- Unsalted butter (¼ cup / 57g, softened) – Same temperature as the cream cheese so they blend smoothly.
- Powdered sugar (1 ½ cups / 180g) – Sifted if it’s clumpy. Nobody wants lumpy frosting.
- Fresh orange zest (1 tablespoon from about 1 large orange) – This is non-negotiable. Bottled zest doesn’t have the same punch.
- Fresh orange juice (1 tablespoon) – Use the same orange you zested. It adds brightness without making the frosting runny.
- Orange gel food coloring (a few drops) – Gel is better than liquid because it doesn’t thin out the frosting. Americolor brand works great.
- Salt (a tiny pinch) – Balances the sweetness.
If you’re looking for a dairy-free option, you can use vegan butter and dairy-free cream cheese. I’ve tried it with Miyoko’s brand and it worked, though the frosting was slightly softer. For a gluten-free version, swap the all-purpose flour with a good 1:1 gluten-free baking blend. I like King Arthur Flour’s Measure for Measure for this.
Equipment Needed
You don’t need a ton of fancy equipment for these brownies, which is part of why I make them so often. Here’s what you’ll need:
- 9×13-inch baking pan – Metal pans give better browning than glass. If you only have glass, reduce the oven temperature by 25°F and expect a slightly longer bake time.
- Parchment paper – Line the pan with it, leaving overhang on two sides. This makes lifting the brownies out a dream. No scraping.
- Large mixing bowls – One for the brownie batter, one for the frosting. I use glass or stainless steel.
- Whisk – For the dry ingredients and for mixing the batter. A wooden spoon also works.
- Spatula – A rubber spatula for scraping every last bit of batter. I’m partial to the GIR brand spatulas—they’re one piece and don’t get gunk in the handle.
- Hand mixer or stand mixer – For the frosting. You can do it by hand with a whisk, but your arm will get tired. I use my KitchenAid hand mixer.
- Cooling rack – The brownies need to cool completely before frosting. A wire rack speeds this up.
- Offset spatula – For spreading the frosting evenly. A butter knife works in a pinch, but the offset spatula gives that smooth finish.
If you don’t have a 9×13 pan, you can use two 8×8 pans and reduce the bake time by about 5 minutes. Just keep an eye on them.
Preparation Method
These black cocoa Halloween brownies come together in about 45 minutes, plus cooling time. The actual hands-on work is maybe 15 minutes. Here’s how to do it:
- Preheat your oven to 350°F (175°C). Line your 9×13-inch baking pan with parchment paper, leaving about 2 inches of overhang on the long sides. This creates handles for lifting the brownies out later. Lightly grease the parchment with a little butter or nonstick spray.
- Melt the butter. In a large microwave-safe bowl, melt the 1 cup of butter in 30-second bursts, stirring in between. You want it melted but not hot. If it’s too hot, let it sit for a minute. You don’t want to cook the eggs when you add them.
- Add the sugar. Whisk the granulated sugar into the melted butter until it’s combined. It’ll look grainy and kind of separated. That’s normal. Let it sit for about 2 minutes—this helps dissolve some of the sugar and creates that crackly top.
- Add the eggs and vanilla. Crack the 3 eggs into the butter-sugar mixture, one at a time, whisking well after each. The batter should look smooth and glossy. Stir in the 2 teaspoons of vanilla extract. Take a second to smell it—that’s the smell of good brownies in the making.
- Mix the dry ingredients. In a separate bowl, whisk together the flour, black cocoa powder, salt, and baking powder. Make sure there are no lumps. Black cocoa can be clumpy, so I sometimes sift it if it looks particularly stubborn.
- Combine wet and dry. Add the dry ingredients to the wet mixture. Fold it together with a spatula or wooden spoon until you don’t see any more streaks of flour. Don’t overmix. About 20 strokes is usually enough. The batter will be thick and look very dark—almost black.
- Bake. Pour the batter into the prepared pan and spread it evenly. Bake for 22-26 minutes. Start checking at 22 minutes. A toothpick inserted into the center should come out with a few moist crumbs, not wet batter. If it comes out clean, they’re overbaked. The edges should look set and the top should be crackly and shiny.
- Cool completely. Let the brownies cool in the pan on a wire rack for about 10 minutes, then use the parchment handles to lift them out. Transfer to the wire rack to cool completely. This takes about 1 hour. Don’t rush this step. Warm brownies will melt the frosting into a puddle.
- Make the frosting. While the brownies cool, make the orange frosting. In a medium bowl, beat the softened cream cheese and butter together with a hand mixer until smooth and creamy, about 2 minutes. Add the powdered sugar, orange zest, orange juice, a tiny pinch of salt, and a few drops of orange gel food coloring. Beat on low speed until combined, then increase to medium and beat for another minute until fluffy. Taste it. Add more zest if you want a stronger orange flavor, or a drop more coloring if you want it brighter.
- Frost and decorate. Once the brownies are completely cool, spread the orange frosting evenly over the top using an offset spatula. I like to leave a slightly rustic edge so you can see the black brownie peeking through. Add Halloween sprinkles, candy eyeballs, or a dusting of black cocoa powder if you’re feeling fancy.
- Slice and serve. For clean cuts, use a sharp knife and wipe it clean between each slice. I cut mine into 24 squares, but you can go bigger or smaller depending on your crowd.
A note on timing: The brownies need about an hour to cool before frosting, so plan accordingly. I often make the brownies the day before, let them cool, wrap them tightly, and frost them the next day. They actually taste better the next day—the flavors meld together overnight.
Cooking Tips & Techniques
I’ve made these black cocoa Halloween brownies enough times to know where things can go wrong. Here are the things I wish someone had told me:
Don’t overbake. This is the number one mistake. Black cocoa makes it harder to tell when brownies are done because the batter is already so dark. You can’t rely on color. Use the toothpick test and pull them out when there are still a few moist crumbs. Overbaked brownies are dry and crumbly, and nobody wants that.
Room temperature ingredients matter. I know it’s annoying to wait for eggs and cream cheese to warm up, but it really does make a difference. Cold eggs seize the butter and make the batter lumpy. Cold cream cheese gives you lumpy frosting. Set everything out 30 minutes before you start.
Black cocoa is different. If you’ve never used it before, know that it’s less acidic than regular cocoa and has a milder flavor. Some people describe it as “chocolate lite” or “Oreo-like.” It doesn’t have the same punch as Dutch-process cocoa, so don’t expect a super intense chocolate flavor. What it lacks in intensity, it makes up for in color and that nostalgic cookies-and-cream vibe.
Zest before you juice. Always zest your orange before you squeeze it. Trying to zest a squishy, juiced orange is a nightmare. I learned this the hard way.
Let the brownies cool completely. I know I’ve said this already, but I’m saying it again because I’ve ruined a batch by being impatient. Warm brownies + cold frosting = a melted, sad mess. If you’re in a hurry, you can put the brownies in the fridge for 30 minutes to speed up cooling.
Use gel food coloring. Liquid food coloring will thin out your frosting and make it runny. Gel coloring gives you vibrant color without changing the consistency. A little goes a long way—start with two drops and add more if needed.
One time I forgot to add the sugar to the brownie batter. I realized it halfway through baking. Don’t be like me. Double-check your ingredients before you start.
Variations & Adaptations
One of the best things about this recipe is how easy it is to change up. Here are some ways I’ve adapted it over the years:
Spooky swirl brownies. Instead of frosting the top, dollop spoonfuls of the orange frosting onto the batter before baking and swirl it in with a knife. It creates a marbled effect that looks like a jack-o-lantern exploded. Bake as directed. The swirl won’t be as visible as you’d think because the brownie batter is so dark, but the flavor is still there.
Peppermint Halloween brownies. Swap the orange zest and juice for peppermint extract (about ½ teaspoon) and tint the frosting green or leave it white. Top with crushed candy canes or peppermint candies. This is great for a winter-themed Halloween party or just a change of pace.
Vegan version. Replace the butter with vegan butter (I like Earth Balance), use flax eggs (3 tablespoons ground flaxseed mixed with 9 tablespoons water, let sit for 5 minutes), and use dairy-free cream cheese for the frosting. The texture is slightly less fudgy but still really good. My sister is vegan and she devoured an entire pan of these.
Gluten-free option. Substitute the all-purpose flour with a 1:1 gluten-free baking blend. I’ve tested this with King Arthur Flour’s Measure for Measure and Bob’s Red Mill 1:1, and both worked well. The brownies are a tiny bit more delicate, so let them cool completely before cutting.
Extra dark. If you want an even more intense chocolate flavor, replace ¼ cup of the black cocoa with Dutch-process cocoa. The color will be slightly less black, but the flavor will be deeper. I did this for a party where everyone claimed to be a chocolate snob, and they couldn’t stop eating them.
I once made a batch with lavender extract instead of orange for a friend’s gothic-themed birthday party. The purple frosting against the black brownies looked incredible. It tasted like a fancy French pastry. So if you’re feeling adventurous, experiment with other extracts—raspberry, almond, or even rose water would work beautifully.
Serving & Storage Suggestions
These brownies are best served at room temperature. The frosting softens slightly and the brownie gets that perfect fudgy texture. If you’ve refrigerated them, let them sit out for about 20 minutes before serving.
For presentation, I like to cut them into squares and arrange them on a black or white platter. The contrast between the dark brownie and the bright orange frosting is striking. Add a few candy eyeballs or Halloween sprinkles on top for a festive touch. If you’re feeling extra, dust the plate with a little black cocoa powder using a small sieve.
These brownies pair beautifully with a cold glass of milk, a hot cup of coffee, or even a scoop of vanilla ice cream. For an adult twist, serve them with a glass of dark rum or a stout beer—the richness of the brownie stands up well to bold flavors. If you’re looking for a non-alcoholic option, try serving them alongside a refreshing cucumber mint green tea cooler for a surprising flavor contrast.
Storage: Store the frosted brownies in an airtight container in the refrigerator for up to 5 days. Place a layer of parchment paper between stacked brownies to keep the frosting from smudging. They actually taste better on day two or three, as the flavors continue to develop.
Freezing: You can freeze the unfrosted brownies for up to 3 months. Wrap them tightly in plastic wrap, then foil. When you’re ready to serve, thaw them in the fridge overnight, bring to room temperature, and then frost. I’ve also frozen frosted brownies with good results—just freeze them on a baking sheet until the frosting is firm, then wrap individually. Thaw in the fridge overnight.
Reheating: If you like warm brownies, pop an unfrosted square in the microwave for 10-15 seconds. The chocolate gets melty and the edges get slightly crisp. Don’t microwave frosted brownies unless you want a puddle of orange soup.
The flavors actually deepen after a day or two. The black cocoa becomes more pronounced and the orange zest mellows out into something more subtle. I often make these a day ahead for parties specifically for this reason.
Nutritional Information & Benefits
Let’s be honest—these are a treat, not a health food. But here’s what you’re looking at per brownie (based on 24 servings):
- Calories: Approximately 210 per brownie
- Fat: 12g (7g saturated)
- Carbohydrates: 26g (18g sugar)
- Protein: 3g
- Fiber: 1g
- Sodium: 95mg
Black cocoa powder actually contains antioxidants called flavonoids, which are known to support heart health and reduce inflammation. It also has less acidity than regular cocoa, making it easier on sensitive stomachs. The cream cheese in the frosting adds a small amount of protein and calcium, while the orange zest provides a tiny hit of vitamin C. So there are some redeeming qualities, even if we’re not pretending these are a salad.
If you’re watching your sugar intake, you can reduce the granulated sugar to 1 ½ cups, but be aware that this will affect the texture. The brownies will be less crackly on top and slightly more dense. For a lower-fat option, replace half the butter with unsweetened applesauce. The texture will be more cake-like, but the flavor is still good.
These brownies contain gluten, dairy, and eggs. They are not suitable for those with celiac disease or dairy allergies unless you use the substitutions mentioned in the variations section. Always check your ingredients for potential cross-contamination if you’re serving someone with severe allergies.
Conclusion
These black cocoa Halloween brownies with orange frosting are the dessert I look forward to making every October. They’re not complicated, they don’t require fancy equipment, and they always, always disappear. The combination of dark, fudgy brownie and bright, tangy frosting is just right—festive without being gimmicky, indulgent without being overwhelming.
I love that this recipe is forgiving enough for a beginner but impressive enough for a party. I love that it uses real ingredients and real technique, not shortcuts that sacrifice flavor. And I really love that people take one bite and say, “Wait, what’s in these?” That moment never gets old.
If you make these, I’d love to hear about it. Leave a comment below and tell me how they turned out, or tag me in your photos if you share them online. Did you add sprinkles? Skip the frosting? Make them for a party where nobody knew they were homemade? I want to know. And if you’re looking for other easy, crowd-pleasing desserts, check out this creamy vegan chocolate avocado pudding that takes five minutes to make—it’s another one of my favorites.
Happy Halloween, and happy baking. You’ve got this.
Frequently Asked Questions
Can I use regular cocoa powder instead of black cocoa?
You can, but the color and flavor will be different. Regular cocoa powder will give you a standard brown color instead of the deep black, and the flavor will be more acidic and intense. If you’re substituting, use Dutch-process cocoa for a closer match. The brownies won’t look as dramatic, but they’ll still taste great.
Why did my brownies turn out dry?
Most likely they were overbaked. Black cocoa makes it harder to judge doneness by color, so rely on the toothpick test. Pull them out when the toothpick comes out with a few moist crumbs. Also, make sure you measured your flour correctly by spooning it into the measuring cup and leveling it off. Scooping directly from the bag packs in too much flour.
Can I make these brownies ahead of time?
Absolutely. You can make the brownies up to 2 days ahead, let them cool completely, and store them tightly wrapped at room temperature. Frost them the day you plan to serve. You can also freeze the unfrosted brownies for up to 3 months. The flavors actually improve after a day or two.
How do I get clean cuts when slicing the brownies?
Use a sharp knife and wipe it clean with a damp paper towel between each cut. For the cleanest slices, refrigerate the frosted brownies for about 20 minutes before cutting. This firms up the frosting and makes it less likely to smudge. Cut in one smooth motion—don’t saw back and forth.
Can I make this recipe dairy-free?
Yes. Replace the butter with a good vegan butter (I recommend Earth Balance or Miyoko’s), use dairy-free cream cheese for the frosting (Kite Hill or Violife work well), and make sure your chocolate and cocoa powder are dairy-free. The texture will be slightly different—the brownies might be a bit more delicate—but the flavor is still excellent.
Pin This Recipe!
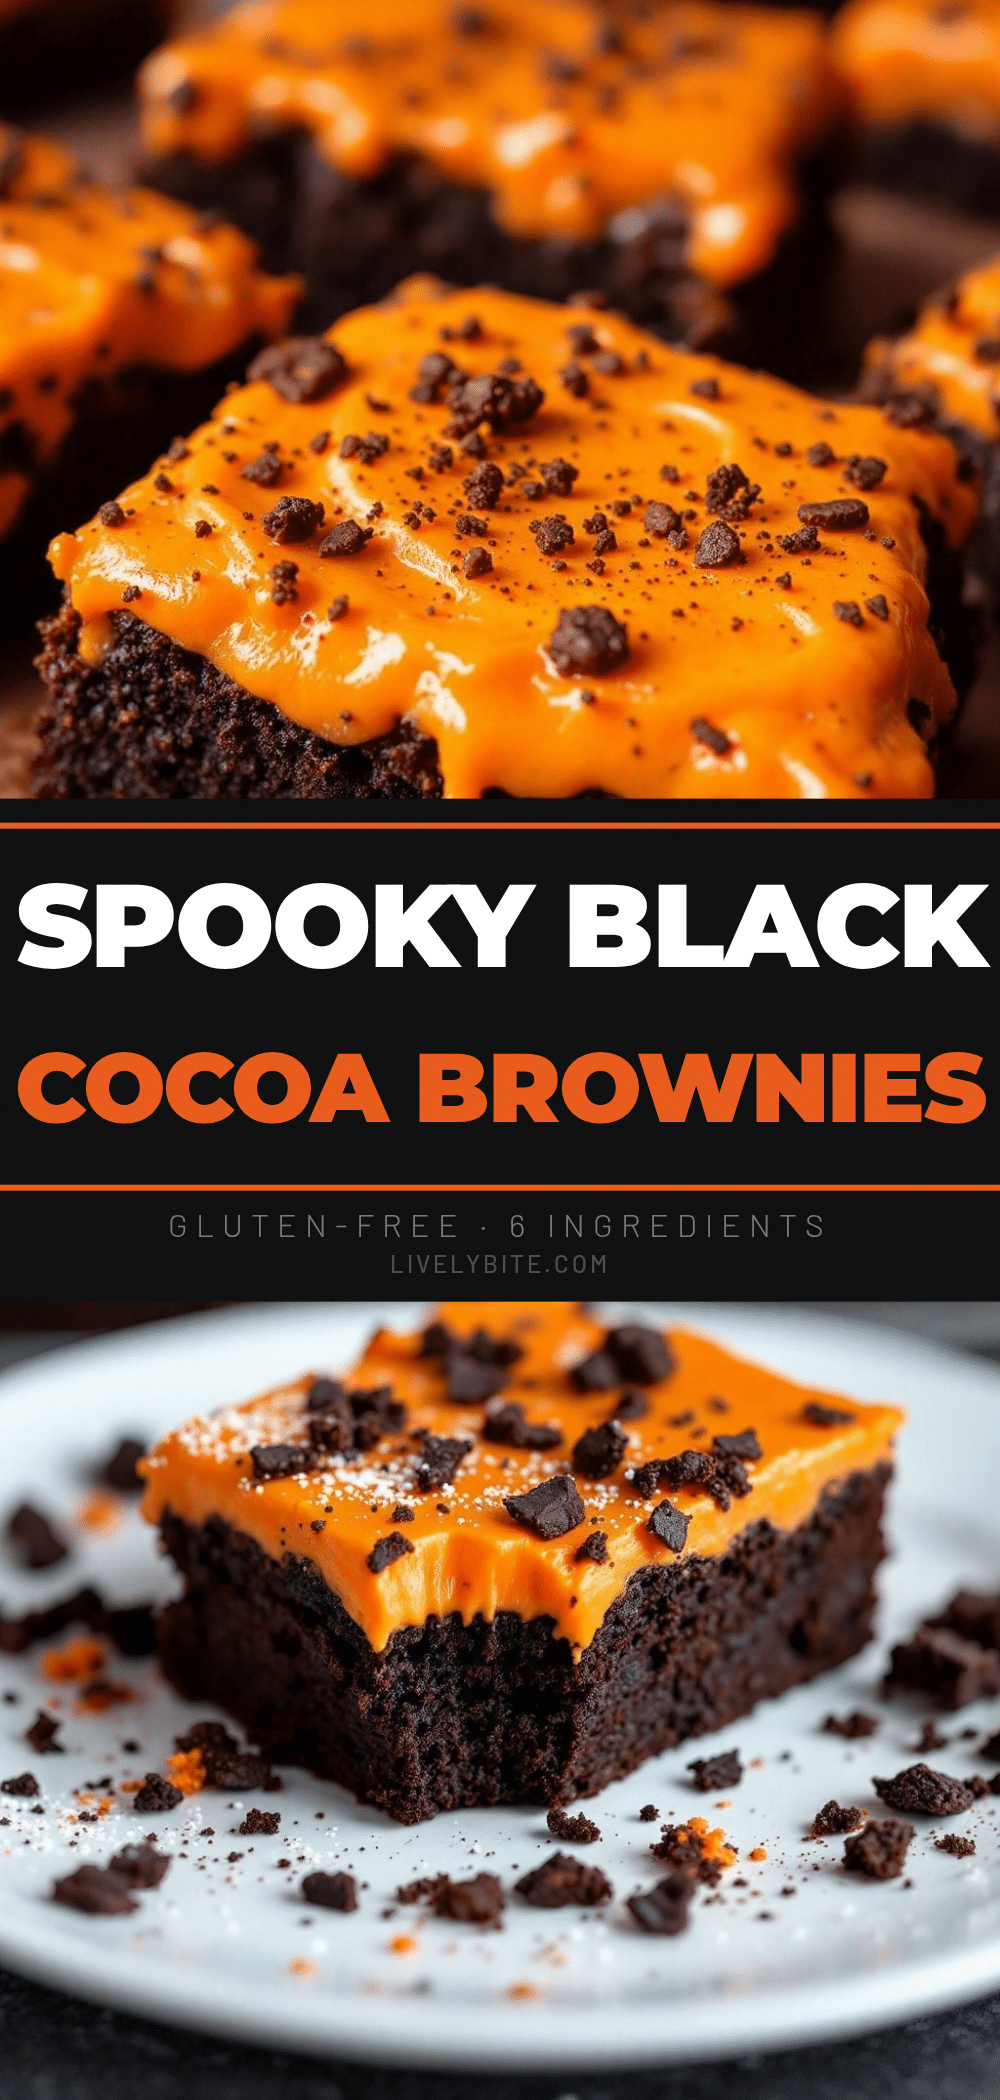
Best Black Cocoa Halloween Brownies With Orange Frosting
Deep, dark black cocoa brownies with a crackly top and fudgy center, topped with a bright, tangy orange cream cheese frosting. The perfect Halloween dessert that tastes as good as it looks.
- Prep Time: 15 minutes
- Cook Time: 25 minutes
- Total Time: 1 hour 40 minutes (including cooling)
- Yield: 24 servings 1x
- Category: Dessert
- Cuisine: American
Ingredients
- 1 cup (226g) unsalted butter, melted and slightly cooled
- 1 ¾ cups (350g) granulated sugar
- 3 large eggs, room temperature
- 2 teaspoons vanilla extract
- 1 cup (125g) all-purpose flour, spooned and leveled
- ¾ cup (75g) black cocoa powder
- ½ teaspoon salt
- ¼ teaspoon baking powder
- 4 oz (113g) cream cheese, softened
- ¼ cup (57g) unsalted butter, softened
- 1 ½ cups (180g) powdered sugar, sifted if clumpy
- 1 tablespoon fresh orange zest (from about 1 large orange)
- 1 tablespoon fresh orange juice
- A few drops orange gel food coloring
- A tiny pinch of salt
Instructions
- Preheat your oven to 350°F (175°C). Line a 9×13-inch baking pan with parchment paper, leaving about 2 inches of overhang on the long sides. Lightly grease the parchment with butter or nonstick spray.
- In a large microwave-safe bowl, melt the 1 cup of butter in 30-second bursts, stirring in between. Let it cool slightly if too hot.
- Whisk the granulated sugar into the melted butter until combined. Let it sit for about 2 minutes.
- Add the eggs one at a time, whisking well after each. Stir in the vanilla extract.
- In a separate bowl, whisk together the flour, black cocoa powder, salt, and baking powder until no lumps remain.
- Add the dry ingredients to the wet mixture. Fold with a spatula or wooden spoon until just combined (about 20 strokes). The batter will be thick and very dark.
- Pour the batter into the prepared pan and spread evenly. Bake for 22-26 minutes, until a toothpick inserted in the center comes out with a few moist crumbs. Cool in the pan on a wire rack for 10 minutes, then lift out and cool completely (about 1 hour).
- For the frosting: In a medium bowl, beat the softened cream cheese and butter with a hand mixer until smooth and creamy, about 2 minutes. Add the powdered sugar, orange zest, orange juice, a tiny pinch of salt, and a few drops of orange gel food coloring. Beat on low until combined, then on medium for 1 minute until fluffy.
- Once brownies are completely cool, spread the frosting evenly over the top using an offset spatula. Add Halloween sprinkles, candy eyeballs, or a dusting of black cocoa powder if desired.
- Slice into 24 squares using a sharp knife, wiping clean between cuts. Serve at room temperature.
Notes
Don’t overbake; use toothpick test. Room temperature ingredients matter. Black cocoa is less acidic and gives an Oreo-like flavor. Always zest orange before juicing. Let brownies cool completely before frosting. Use gel food coloring for vibrant color without thinning frosting.
Nutrition
- Serving Size: 1 brownie
- Calories: 210
- Sugar: 18
- Sodium: 95
- Fat: 12
- Saturated Fat: 7
- Carbohydrates: 26
- Fiber: 1
- Protein: 3
Keywords: Halloween brownies, black cocoa brownies, orange frosting, spooky dessert, fudgy brownies, cream cheese frosting


