Sunday evening, the kitchen counter dusted with oat flour, and the only thing I want is a batch of these pumpkin baked oatmeal cups cooling on the rack. The house smells like cinnamon and something warmer than the October air seeping through the window crack. I have my measuring cups out, the can of pumpkin puree already open, and I’m not rushing. That’s the thing about meal prep—it doesn’t have to feel like a chore. Sometimes it feels like the quietest part of the week.
I stumbled onto this recipe a few falls ago, not out of inspiration but out of necessity. I had a half-used can of pumpkin staring at me from the fridge and a bag of oats that was about to go stale. I threw things together, crossed my fingers, and pulled out something that actually worked. They were moist, not too sweet, and held together better than I expected. I ate one standing at the counter, and that was it. These healthy pumpkin baked oatmeal cups became my go-to for busy mornings when I need something I can grab and go without thinking.
What I love most is how forgiving they are. You don’t need to be precise, you don’t need fancy equipment, and they freeze beautifully. They are the kind of recipe that makes you feel like you have your life together, even if the rest of the week is chaos. And honestly, that’s a pretty good feeling for a Tuesday morning.
Why You’ll Love This Recipe
Let me tell you why these pumpkin baked oatmeal cups have earned a permanent spot in my weekly rotation. I’ve tested this recipe more times than I can count, tweaking the moisture level, the spice balance, and the bake time until it felt just right. What came out of those trials is a recipe that works every single time—and I’m not exaggerating.
- Quick & Easy: From start to finish, these come together in about 30 minutes. That includes prep and bake time. Perfect for Sunday meal prep or a last-minute weekday breakfast.
- Simple Ingredients: You probably have everything in your pantry right now. Oats, pumpkin puree, eggs, maple syrup, and a few spices. No weird health food store finds required.
- Perfect for Busy Mornings: Grab one on your way out the door, pop it in the microwave for 15 seconds, and you’re set. No bowls, no spoons, no mess.
- Crowd-Pleaser: I’ve served these to kids, picky eaters, and breakfast skeptics. They disappear fast. The texture is soft but sturdy, and the flavor is pure autumn comfort.
- Unbelievably Delicious: They taste like a pumpkin muffin but without the guilt. No refined sugar, no butter, no flour. Just wholesome ingredients that somehow taste indulgent.
What sets this recipe apart is the texture. I experimented with different ratios of oats to liquid until I found the sweet spot—moist but not soggy, tender but not crumbly. These cups hold their shape beautifully, which is crucial when you’re meal prepping for the week. Plus, they’re naturally sweetened with maple syrup, so you get that deep, caramel-like sweetness without the crash.
These are the kind of breakfast cups that make you look forward to Monday morning. They’re comfort food that actually fuels your body, and that’s a win in my book.
What Ingredients You Will Need
This recipe uses simple, wholesome ingredients that work together to create a breakfast that’s both satisfying and nourishing. No complicated steps, no obscure items—just real food that tastes good.
- Rolled oats, 2 cups (use certified gluten-free if needed) — These form the base of the cups. I prefer rolled oats over quick oats because they hold their texture better and give the cups a nice chew. Old-fashioned oats work best here.
- Pumpkin puree, 1 cup (not pumpkin pie filling) — Make sure you grab 100% pure pumpkin puree. The canned stuff is fine, just check the label. I like Libby’s for consistent texture, but any brand works.
- Eggs, 2 large, room temperature — They help bind everything together. If you’re out of eggs, you can use flax eggs (1 tablespoon ground flaxseed + 3 tablespoons water per egg), but the texture will be slightly denser.
- Maple syrup, 1/3 cup (use pure maple syrup for best flavor) — This is your sweetener. The flavor is warm and rich, and it pairs beautifully with pumpkin and cinnamon. You can substitute honey or agave if needed.
- Unsweetened almond milk, 1/2 cup (or any milk you have) — Adds moisture without extra fat. I’ve used oat milk, cow’s milk, and even coconut milk (the carton kind) with great results.
- Coconut oil, 2 tablespoons, melted — Keeps the cups tender and adds a subtle richness. You can substitute melted butter or avocado oil if you prefer.
- Vanilla extract, 1 teaspoon — Enhances the sweetness and rounds out the flavors. Don’t skip it—it makes a difference.
- Pumpkin pie spice, 2 teaspoons — You can use store-bought or make your own with cinnamon, nutmeg, ginger, and cloves. I make my own because I like controlling the spice level.
- Cinnamon, 1 teaspoon — Extra warmth and depth. I’m a cinnamon lover, so I always add a bit more than most recipes call for.
- Baking powder, 1 teaspoon — Helps the cups rise slightly and gives them a lighter texture.
- Salt, 1/4 teaspoon — Balances the sweetness and brings out the flavors.
- Optional mix-ins: 1/3 cup dark chocolate chips, 1/4 cup chopped pecans or walnuts, 1/4 cup dried cranberries — These add texture and flavor. I usually add chocolate chips because, well, chocolate.
For the best results, use room temperature eggs and milk. Cold ingredients can make the coconut oil seize up, which affects the texture. Also, if you’re using a nut or seed butter as a substitute, make sure it’s well-stirred and at room temperature.
Equipment Needed
You don’t need a lot of fancy gear for this recipe, which is part of why I love it. Here’s what you’ll need:
- Muffin tin (12-cup standard size) — This is non-negotiable. You can use a mini muffin tin for bite-sized cups, but adjust the baking time accordingly (about 12-15 minutes).
- Muffin liners — I prefer parchment paper liners because they’re non-stick and easy to peel off. Silicone liners work well too, but I find the paper ones give a cleaner edge.
- Large mixing bowl — For combining the dry ingredients.
- Medium mixing bowl — For whisking the wet ingredients.
- Whisk — A good whisk makes blending the wet ingredients effortless.
- Spatula — For folding everything together without overmixing.
- Measuring cups and spoons — Accurate measurements matter here, especially for the oats and pumpkin puree.
- Ice cream scoop or large spoon — For portioning the batter evenly into the muffin cups. An ice cream scoop gives you perfectly uniform cups.
- Cooling rack — Letting the cups cool completely before storing prevents them from getting soggy.
If you don’t have a muffin tin, you can bake this mixture in an 8×8-inch baking dish for about 25-30 minutes. Cut it into squares after cooling. It’s not as portable, but it tastes just as good.
Preparation Method
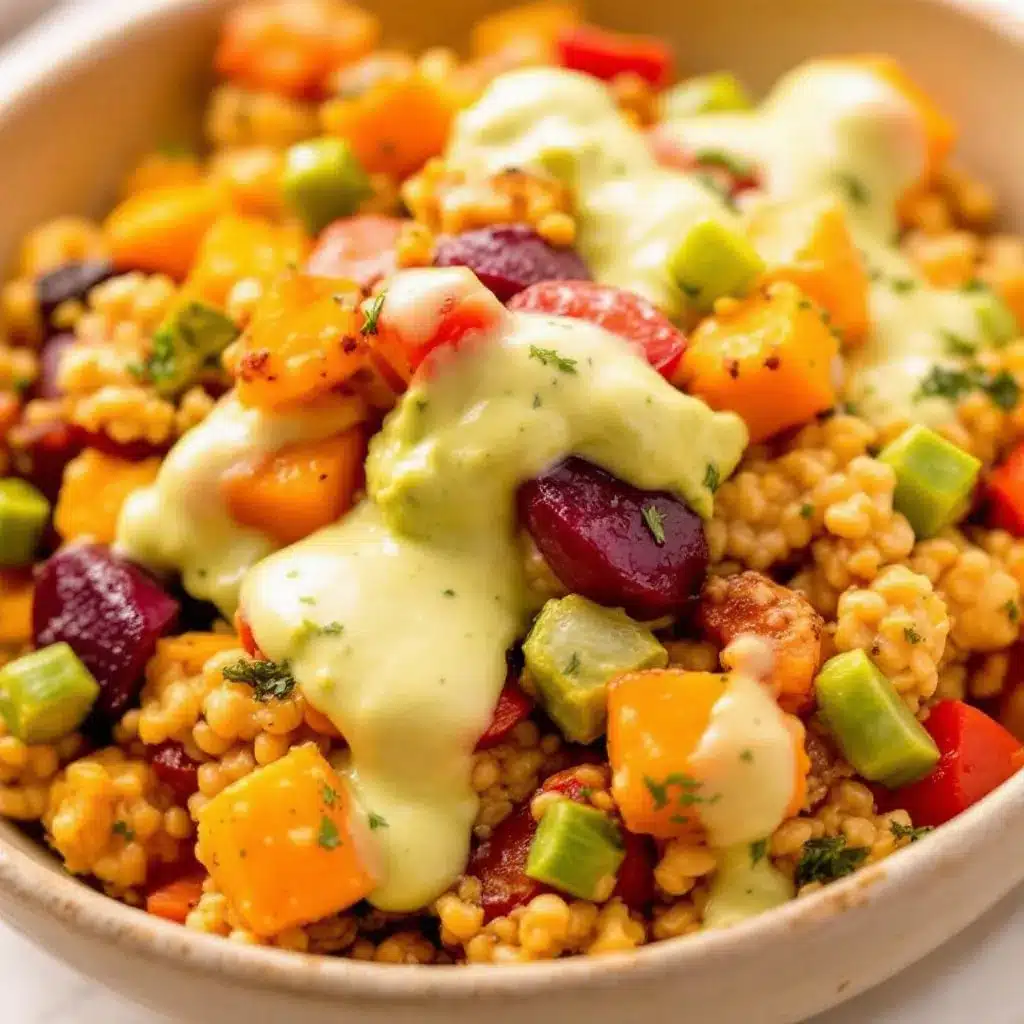
Let’s walk through this step by step. I’ve made these so many times that I could do it in my sleep, but I’ll share all the little details that make them turn out perfectly every time.
- Preheat your oven to 350°F (175°C). Line a 12-cup muffin tin with paper liners or lightly grease the cups with coconut oil. I prefer liners because they make cleanup easier and the cups come out perfectly every time.
- In a large mixing bowl, combine the dry ingredients: 2 cups rolled oats, 2 teaspoons pumpkin pie spice, 1 teaspoon cinnamon, 1 teaspoon baking powder, and 1/4 teaspoon salt. Whisk them together until everything is evenly distributed. This step ensures you don’t get a pocket of baking powder in one cup and none in another.
- In a medium mixing bowl, whisk the wet ingredients: 1 cup pumpkin puree, 2 large eggs, 1/3 cup maple syrup, 1/2 cup unsweetened almond milk, 2 tablespoons melted coconut oil, and 1 teaspoon vanilla extract. Whisk until the mixture is smooth and well-combined. The pumpkin should be fully incorporated with no streaks.
- Pour the wet mixture into the dry ingredients. Use a spatula to fold everything together gently. Stir just until the oats are fully coated and no dry spots remain. Overmixing can make the cups dense, so be gentle. The batter will look quite wet—that’s normal.
- If using mix-ins, fold them in now. I usually add 1/3 cup dark chocolate chips at this stage. Pecans, walnuts, or dried cranberries are also great choices. Fold them in with just a few strokes to distribute evenly.
- Let the batter rest for 5 minutes. This is a step I learned by accident. Letting the oats sit in the liquid for a few minutes allows them to absorb some moisture, which results in a softer, more cohesive cup. Don’t skip this—it makes a difference.
- Divide the batter evenly among the 12 muffin cups. I use an ice cream scoop for this, which gives me perfectly uniform portions. Fill each cup almost to the top—the batter won’t rise much, so you want a generous amount in each cup.
- Bake for 20-25 minutes. The cups are done when the edges are golden brown and the tops are set to the touch. A toothpick inserted into the center should come out clean or with just a few moist crumbs. Start checking at 20 minutes—ovens vary, and you don’t want to overbake them.
- Remove from the oven and let the cups cool in the pan for 5 minutes. This allows them to set further and makes them easier to handle. Then transfer them to a wire rack to cool completely. Resist the urge to eat one immediately—they’re fragile when hot and taste better after they’ve settled.
Pro tip: If you want extra crispy edges, you can brush the tops with a little melted coconut oil before baking. It gives them a slightly golden, almost caramelized finish that’s absolutely delicious.
Cooking Tips & Techniques
Over the years, I’ve learned a few things that make these pumpkin baked oatmeal cups even better. Here are my best tips:
Don’t overmix the batter. I know I said this already, but it’s worth repeating. Stir just until the oats are coated. Overmixing develops the starches in the oats and makes the cups dense and gummy. You want them tender, not tough.
Use room temperature ingredients. Cold eggs and milk can cause the melted coconut oil to solidify into small lumps, which creates uneven texture. Let everything sit on the counter for 15-20 minutes before you start. It’s a small step that makes a big difference.
Let the batter rest. I mentioned this in the method, but it’s one of those things I learned the hard way. The first few times I made these, I baked them immediately, and they came out a bit dry and crumbly. Letting the oats soak for 5 minutes allows them to absorb liquid and plump up, resulting in moist, tender cups.
Check for doneness with your finger, not just a toothpick. The tops should spring back when lightly pressed. If they feel soft or leave an indent, give them another 2-3 minutes. Every oven runs differently, and visual cues are more reliable than a timer.
Cool completely before storing. I made this mistake once and ended up with soggy cups. Trapping steam in a container creates condensation, which turns the tops into a wet mess. Let them cool on a wire rack for at least 30 minutes before transferring to an airtight container.
Double the batch. These freeze beautifully, so I always make a double batch when I have the time. They’re just as good thawed as they are fresh, and having a stash in the freezer means breakfast is always sorted.
Toast your oats for extra flavor. If you have an extra 5 minutes, spread the oats on a baking sheet and toast them at 350°F for 5-7 minutes before mixing. It adds a nutty depth that takes these cups to another level.
Variations & Adaptations
One of the best things about this recipe is how adaptable it is. Here are some variations I’ve tried and loved:
Gluten-Free Version: Use certified gluten-free rolled oats. That’s it. The recipe is naturally gluten-free as long as your oats are certified. I’ve tested this with Bob’s Red Mill gluten-free oats, and they work perfectly.
Vegan Version: Replace the eggs with flax eggs (2 tablespoons ground flaxseed + 6 tablespoons water, let sit for 5 minutes). Use maple syrup as the sweetener and a plant-based milk. The texture will be slightly denser, but the flavor is still spot-on. I’ve made this version for vegan friends, and they always ask for the recipe.
Nut-Free Version: Use oat milk or regular cow’s milk instead of almond milk. Skip the pecan or walnut mix-ins. The recipe is naturally nut-free if you choose the right milk and toppings.
Lower-Carb Version: Substitute half the oats with almond flour or coconut flour. Keep in mind that this will change the texture significantly—the cups will be denser and less chewy. I’ve tried this, and while it’s not the same, it’s still pretty good if you’re watching your carbs.
Pumpkin Chocolate Chip Version: Add 1/3 cup dark chocolate chips to the batter. This is my personal favorite. The combination of pumpkin and chocolate is underrated, and the slight bitterness of dark chocolate balances the sweetness of the maple syrup beautifully.
Apple Pumpkin Version: Fold in 1/2 cup finely diced apple (I use Honeycrisp or Fuji) along with an extra 1/4 teaspoon cinnamon. The apple adds little bursts of sweetness and a slightly different texture. This variation is perfect for late fall when apples are at their peak.
Protein-Packed Version: Add 2 scoops of unflavored or vanilla protein powder. You’ll need to increase the milk by 2-3 tablespoons to compensate for the extra dry ingredients. I’ve used collagen powder and plant-based protein with good results. The cups become more filling, which is great for post-workout breakfasts.
Serving & Storage Suggestions
These pumpkin baked oatmeal cups are incredibly versatile when it comes to serving. Here’s how I like to enjoy them:
Warm or at room temperature. I prefer them warm, so I pop one in the microwave for 15-20 seconds. The chocolate chips get melty, and the spices smell amazing. They’re also delicious straight from the fridge on a hot day.
With a dollop of Greek yogurt. The tangy yogurt contrasts beautifully with the sweet, spiced oatmeal. Add a drizzle of maple syrup if you want extra sweetness.
Alongside a hard-boiled egg or a smoothie. These cups are satisfying on their own, but pairing them with protein makes for a more balanced breakfast. I often grab one with a refreshing cucumber mint green tea cooler for a light but energizing start to my day.
Storage: Store the cooled cups in an airtight container in the refrigerator for up to 5 days. Place a paper towel at the bottom of the container to absorb any excess moisture. Change the paper towel every couple of days to keep the cups fresh.
Freezing: These freeze exceptionally well. Arrange the cooled cups in a single layer on a baking sheet and freeze for 1-2 hours, or until solid. Transfer them to a freezer-safe bag or container. They’ll keep for up to 3 months. To thaw, leave one in the refrigerator overnight or microwave for 30-40 seconds from frozen.
Reheating: The best way to reheat is in the microwave for 15-20 seconds. If you’re reheating multiple cups, you can pop them in a 350°F oven for 5-7 minutes. They’ll come out tasting almost as good as fresh.
Make-ahead tip: You can prepare the dry oat mixture and the wet pumpkin mixture separately up to 2 days in advance. Store them in the refrigerator and combine just before baking. This makes weekday morning prep even faster.
If you’re looking for a savory option to balance out your meal prep, try these easy Mediterranean stuffed mini peppers with feta for a quick lunch or snack.
Nutritional Information & Benefits
These pumpkin baked oatmeal cups are as nutritious as they are delicious. Here’s a rough breakdown per cup (based on 12 servings, without mix-ins):
- Calories: 145
- Protein: 4g
- Carbohydrates: 24g
- Fiber: 3g
- Sugar: 8g (naturally occurring from maple syrup and pumpkin)
- Fat: 4g
- Iron: 6% DV
- Vitamin A: 80% DV (from the pumpkin)
Pumpkin is a nutritional powerhouse. It’s loaded with vitamin A, which supports eye health and immune function. It’s also rich in antioxidants like beta-carotene, which help fight inflammation. The oats provide soluble fiber, which is great for heart health and keeping you full until lunch. Maple syrup offers trace minerals like zinc and manganese, though it’s still sugar, so moderation is key.
These cups are naturally dairy-free and can easily be made vegan or gluten-free. They’re also low in added sugar compared to most breakfast pastries, making them a smart choice for anyone watching their sugar intake. If you’re looking for a balanced breakfast that doesn’t spike your blood sugar, these are a solid option.
For a complete meal prep breakfast, pair one of these cups with a serving of creamy vegan chocolate avocado pudding for a sweet-but-healthy start that keeps you energized all morning.
Conclusion
These healthy pumpkin baked oatmeal cups have become a staple in my kitchen for good reason. They’re easy to make, incredibly forgiving, and they solve the “what’s for breakfast” problem for an entire week. The flavor is pure autumn comfort, and the texture is just right—tender, moist, and satisfying without being heavy.
What I love most is how customizable they are. You can make them your own with different mix-ins, adjust the sweetness, or adapt them to fit dietary needs. They’re the kind of recipe that grows with you, and that’s rare in a breakfast dish.
I’d love to hear how yours turn out. Did you add chocolate chips? Pecans? Did you try a vegan version? Drop a comment below and let me know. And if you’re looking for more meal prep inspiration, check out these easy slow cooker honey garlic chicken meal prep bowls for a savory option that pairs perfectly with these oatmeal cups.
Happy baking, and enjoy every warm, spiced bite.
Frequently Asked Questions
Can I use quick oats instead of rolled oats?
Yes, you can, but the texture will be softer and less chewy. Rolled oats give the cups a better structure and a more satisfying bite. If you only have quick oats, reduce the milk by 2 tablespoons to compensate for the finer texture.
How do I make these pumpkin baked oatmeal cups vegan?
Replace the eggs with flax eggs (2 tablespoons ground flaxseed + 6 tablespoons water, let sit for 5 minutes). Use a plant-based milk like almond or oat milk, and make sure your chocolate chips are vegan-friendly. The texture will be slightly denser, but the flavor is still excellent.
Can I freeze these oatmeal cups?
Absolutely. Freeze them in a single layer on a baking sheet, then transfer to a freezer-safe bag. They’ll keep for up to 3 months. To reheat, microwave from frozen for 30-40 seconds or thaw in the refrigerator overnight.
Why did my oatmeal cups turn out dry?
This usually happens from overbaking or using too much oat-to-liquid ratio. Check your oven temperature with an oven thermometer—many run hot. Also, make sure you’re measuring the pumpkin puree accurately. Packed too tightly, it can throw off the moisture balance.
Can I add protein powder to this recipe?
Yes, you can add 2 scoops of unflavored or vanilla protein powder. Increase the milk by 2-3 tablespoons to keep the batter moist. Keep in mind that protein powder can make the cups denser, so don’t overmix the batter. I’ve had the best results with collagen or pea protein.
Pin This Recipe!
Healthy Pumpkin Baked Oatmeal Cups: Easy Meal Prep
These healthy pumpkin baked oatmeal cups are perfect for busy mornings. Made with simple, wholesome ingredients like oats, pumpkin puree, and maple syrup, they’re naturally sweetened, gluten-free adaptable, and freeze beautifully for easy meal prep.
- Prep Time: 10 minutes
- Cook Time: 20-25 minutes
- Total Time: 30-35 minutes
- Yield: 12 servings 1x
- Category: Breakfast
- Cuisine: American
Ingredients
- 2 cups rolled oats (use certified gluten-free if needed)
- 1 cup pumpkin puree (not pumpkin pie filling)
- 2 large eggs, room temperature
- 1/3 cup pure maple syrup
- 1/2 cup unsweetened almond milk (or any milk)
- 2 tablespoons coconut oil, melted
- 1 teaspoon vanilla extract
- 2 teaspoons pumpkin pie spice
- 1 teaspoon cinnamon
- 1 teaspoon baking powder
- 1/4 teaspoon salt
- Optional mix-ins: 1/3 cup dark chocolate chips, 1/4 cup chopped pecans or walnuts, 1/4 cup dried cranberries
Instructions
- Preheat your oven to 350°F (175°C). Line a 12-cup muffin tin with paper liners or lightly grease the cups with coconut oil.
- In a large mixing bowl, combine the dry ingredients: 2 cups rolled oats, 2 teaspoons pumpkin pie spice, 1 teaspoon cinnamon, 1 teaspoon baking powder, and 1/4 teaspoon salt. Whisk together until evenly distributed.
- In a medium mixing bowl, whisk the wet ingredients: 1 cup pumpkin puree, 2 large eggs, 1/3 cup maple syrup, 1/2 cup unsweetened almond milk, 2 tablespoons melted coconut oil, and 1 teaspoon vanilla extract. Whisk until smooth and well-combined.
- Pour the wet mixture into the dry ingredients. Use a spatula to fold together gently until oats are fully coated and no dry spots remain. Do not overmix.
- If using mix-ins, fold them in now (e.g., 1/3 cup dark chocolate chips).
- Let the batter rest for 5 minutes to allow oats to absorb moisture.
- Divide the batter evenly among the 12 muffin cups, filling each almost to the top.
- Bake for 20-25 minutes, until edges are golden brown and tops are set. A toothpick inserted into the center should come out clean or with a few moist crumbs.
- Remove from oven and let cool in the pan for 5 minutes, then transfer to a wire rack to cool completely.
Notes
Let the batter rest for 5 minutes before baking for softer, more cohesive cups. Use room temperature ingredients to prevent coconut oil from solidifying. Cool completely before storing to avoid sogginess. For extra crispy edges, brush tops with melted coconut oil before baking. Toast oats for 5-7 minutes at 350°F for a nuttier flavor.
Nutrition
- Serving Size: 1 cup
- Calories: 145
- Sugar: 8
- Sodium: 95
- Fat: 4
- Saturated Fat: 2
- Carbohydrates: 24
- Fiber: 3
- Protein: 4
Keywords: pumpkin baked oatmeal cups, healthy breakfast, meal prep, gluten-free breakfast, vegan oatmeal cups, pumpkin oatmeal cups


