I did not trust pumpkin bars. Not really. Every version I’d tried before was either too dense, too wet, or just plain boring — like the baker had given up halfway through and decided a dusting of powdered sugar would fix everything. It never did.
Then my neighbor showed up at our annual fall block party with a tray of these. She didn’t even announce them. They just sat there, unassuming, with this weird brown frosting that looked like someone had caramelized butter and gone a little too far. I almost skipped them entirely.
One bite and I actually stopped mid-conversation. That frosting — it was nutty, almost toffee-like, and somehow made the pumpkin taste deeper, warmer, more like actual pumpkin and less like spiced mush. The bar itself was firm but tender, not soggy in the slightest. I asked for the recipe before I’d even finished chewing. (Embarrassing, yes. Worth it.)
She laughed and said it was her grandmother’s, but she’d added the brown butter twist after a happy accident in the kitchen. That accident changed everything. I’ve made these pumpkin bars with brown butter frosting at least a dozen times since that night, and they’ve never failed me. Not once.
These are the bars that make people close their eyes on the first bite. They’re the ones that disappear first at bake sales and get texted about afterward. And honestly? I think they might change your mind about pumpkin bars too.
Why You’ll Love This Recipe
I have tested this recipe more times than I care to count — tweaking the flour ratio, adjusting the brown butter timing, even trying different pumpkin purée brands — all so you don’t have to. Here is why this version stands apart from every other pumpkin bar recipe out there:
- Quick & Easy : From start to finish, these come together in under 45 minutes. The bars bake in about 20 minutes, and you can whip up the frosting while they cool. Perfect for those moments when you need a dessert fast.
- Simple Ingredients : You likely already have everything in your pantry. Canned pumpkin, flour, sugar, eggs, butter, and spices. No trips to specialty stores required.
- Perfect for Fall Gatherings : Whether it is a potluck, Thanksgiving dessert table, or a cozy Sunday with coffee, these bars fit right in. They travel well, too — I’ve brought them to tailgates and office parties without a single crumb lost.
- Crowd-Pleaser : Kids love the sweetness, adults love the sophisticated brown butter finish. I have watched people who “don’t like pumpkin” go back for seconds.
- Unbelievably Delicious : The texture is what gets me every time. Firm enough to hold its shape, tender enough to melt slightly on your tongue. And that frosting — it is seriously the star of the show.
What makes this recipe different is the technique. Most pumpkin bars rely on cream cheese frosting, which is fine but predictable. Brown butter frosting adds a nutty, caramelized depth that actually complements the pumpkin instead of just covering it up. I also use a specific blending method that prevents the dreaded gummy texture. This isn’t just another pumpkin bar recipe — it is the one I’d serve to anyone who thinks they’ve had enough pumpkin desserts for one season.
These bars are the kind that make you forget you were saving room for pie. They are comfort food reimagined — faster, more interesting, but with the same soul-soothing satisfaction that only a good fall dessert can deliver.
What Ingredients You Will Need
This recipe uses simple, honest ingredients to create something genuinely special. Most of these are pantry staples, but I have a few notes on choosing the right ones for the best results.
For the Pumpkin Bars
- Canned pumpkin purée (1 can, 15 oz / 425g) — not pumpkin pie filling. I prefer Libby’s for its consistent texture and deep color. Make sure to blot excess moisture with a paper towel if it looks watery.
- All-purpose flour (2 cups / 250g) — spoon and level it. Scooping directly from the bag packs in too much flour and makes the bars dry.
- Granulated sugar (1 cup / 200g) — standard white sugar works perfectly here. Do not substitute brown sugar; it changes the moisture balance.
- Light brown sugar (1/2 cup / 100g, packed) — adds a subtle molasses note that plays beautifully with the pumpkin and spices.
- Large eggs (2, room temperature) — room temperature eggs incorporate more evenly into the batter. Set them out 20 minutes before you start.
- Vegetable oil (1/2 cup / 120ml) — keeps the bars incredibly moist. Canola or avocado oil works too, but avoid olive oil (too strong a flavor).
- Vanilla extract (2 teaspoons) — pure vanilla, not imitation, for the best flavor.
- Baking powder (1 teaspoon) — helps the bars rise just enough without becoming cakey.
- Baking soda (1/2 teaspoon) — balances the acidity of the pumpkin.
- Salt (1/2 teaspoon) — enhances every other flavor. Do not skip it.
- Ground cinnamon (2 teaspoons) — the backbone of the spice blend.
- Ground ginger (1 teaspoon) — adds warmth without heat.
- Ground nutmeg (1/2 teaspoon) — freshly grated if you have it, but pre-ground is fine.
- Ground cloves (1/4 teaspoon) — a little goes a long way. Too much and it overpowers everything.
For the Brown Butter Frosting
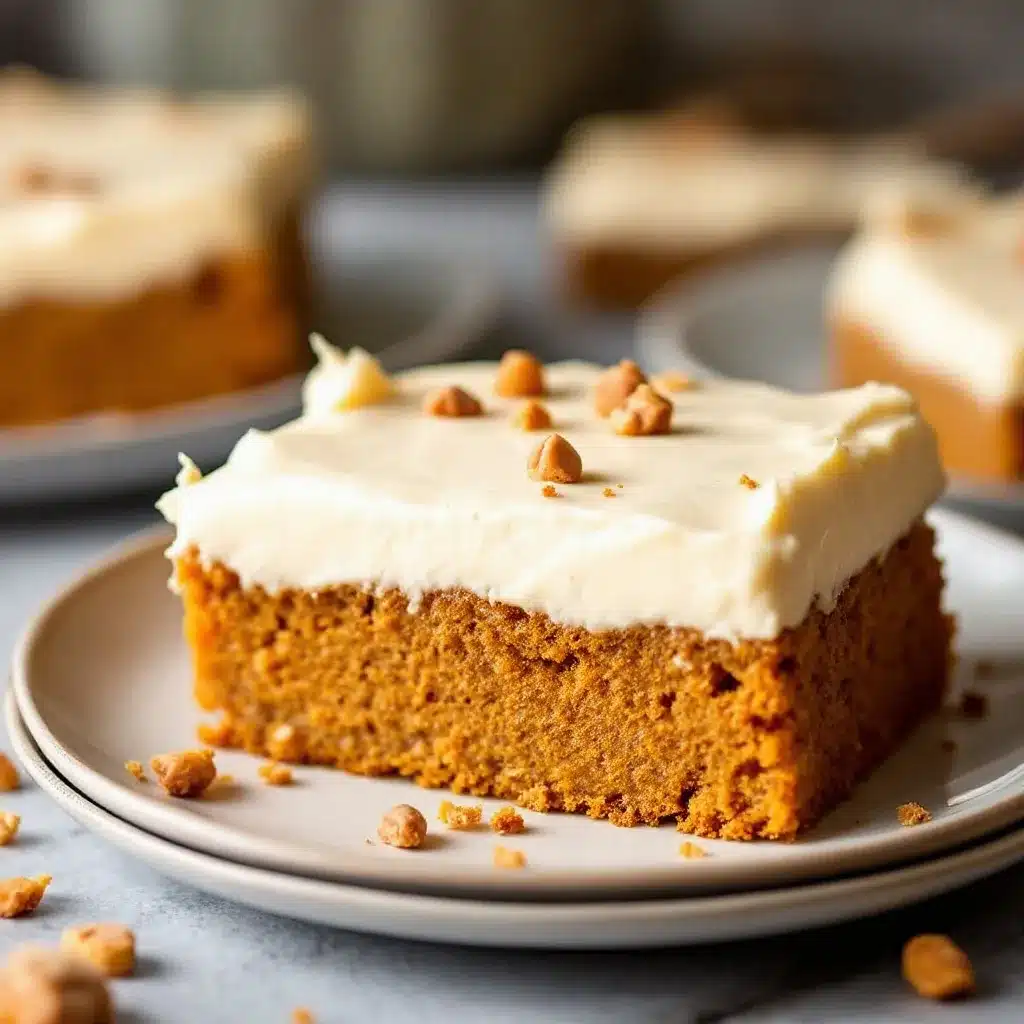
- Unsalted butter (1/2 cup / 1 stick / 113g) — this is the star. Use good-quality butter like Kerrygold or Plugrà for the richest brown butter flavor.
- Powdered sugar (2 cups / 240g) — sift it to avoid lumps. Trust me on this one.
- Vanilla extract (1 teaspoon) — pure vanilla again.
- Milk (2-3 tablespoons) — whole milk works best, but 2% is fine. Start with 2 tablespoons and add more if needed for spreadable consistency.
- Salt (a pinch) — a tiny flake of sea salt on top after frosting is optional but incredible.
Equipment Needed
You do not need a fancy kitchen to make these bars. Here is what you will need:
- 9×13-inch baking pan — standard size. A glass or metal pan works; just note that glass may require an extra minute or two of baking time.
- Mixing bowls — two medium bowls (one for dry ingredients, one for wet).
- Whisk — for combining dry ingredients evenly.
- Electric hand mixer or stand mixer — for the frosting. You can whisk it by hand, but your arm will thank you for using a mixer.
- Small saucepan — for browning the butter. Light-colored pans help you see the color change more easily.
- Rubber spatula — for scraping every last bit of batter into the pan.
- Parchment paper — line the pan for easy removal. I learned this the hard way after a stuck-bar disaster.
- Cooling rack — allows air to circulate so the bars cool evenly. A wire rack is ideal, but a flat surface works in a pinch.
- Offset spatula — for spreading the frosting smoothly. Not essential, but it makes the job much easier.
If you do not have an offset spatula, a butter knife works perfectly fine. I used one for years before upgrading. And if you do not have parchment paper, grease the pan thoroughly with butter or non-stick spray — just be extra careful when cutting the first piece.
Preparation Method
Let me walk you through this step by step. I have included every little detail I wish someone had told me the first time I made these.
Step 1: Preheat and Prep
Preheat your oven to 350°F (175°C). Line your 9×13-inch baking pan with parchment paper, leaving a little overhang on two opposite sides. This creates handles for lifting the bars out later. Lightly grease the parchment with non-stick spray or a thin smear of butter.
Step 2: Mix the Dry Ingredients
In a medium bowl, whisk together 2 cups all-purpose flour, 1 teaspoon baking powder, 1/2 teaspoon baking soda, 1/2 teaspoon salt, 2 teaspoons cinnamon, 1 teaspoon ginger, 1/2 teaspoon nutmeg, and 1/4 teaspoon cloves. Whisk thoroughly — about 15 seconds — to distribute the spices evenly. Set this bowl aside.
Step 3: Mix the Wet Ingredients
In a larger bowl, combine 1 cup granulated sugar and 1/2 cup packed light brown sugar. Add 1/2 cup vegetable oil and 2 room-temperature eggs. Whisk until smooth and slightly thickened, about 30 seconds. Stir in 2 teaspoons vanilla extract. Add the entire can of pumpkin purée (15 oz) and whisk until fully incorporated. The mixture should look glossy and uniform, with no streaks of pumpkin remaining.
Step 4: Combine Wet and Dry
Pour the dry ingredients into the wet ingredients. Use a rubber spatula to fold them together gently. Do not overmix — stop as soon as you no longer see streaks of flour. Overmixing develops gluten and makes the bars tough. A few tiny lumps are perfectly fine. The batter will be thick but scoopable.
Step 5: Bake
Spread the batter evenly into your prepared pan. Use the spatula to smooth the top. Bake for 20-25 minutes, until a toothpick inserted in the center comes out clean or with just a few moist crumbs. The edges should be lightly golden and pulling away from the pan slightly. My oven runs hot, so I check at 20 minutes. Let the bars cool in the pan on a wire rack for 10 minutes, then lift them out using the parchment handles and transfer to the rack to cool completely. Do not frost while warm — the frosting will slide right off.
Step 6: Make the Brown Butter Frosting
While the bars cool, make the frosting. Place 1/2 cup unsalted butter in a small saucepan over medium heat. Melt it completely, then continue cooking, swirling the pan occasionally. The butter will foam, then bubble, then turn golden. Watch closely — it can go from perfect to burnt in seconds. When the butter turns a deep amber color and smells nutty (like toasted hazelnuts), remove it from the heat immediately. Pour it into a heatproof bowl, including all the browned bits at the bottom. Those bits are pure flavor. Let it cool for 10-15 minutes, until it is warm but not hot.
Step 7: Finish the Frosting
Add 2 cups sifted powdered sugar, 1 teaspoon vanilla extract, a pinch of salt, and 2 tablespoons milk to the browned butter. Beat with an electric mixer on low speed until combined, then increase to medium-high and beat for 2 minutes until light and fluffy. If the frosting is too thick, add another tablespoon of milk. If it is too thin, add a little more powdered sugar. Spread it over the completely cooled bars using an offset spatula. For that bakery look, add a tiny pinch of flaky sea salt on top.
Cooking Tips & Techniques
I have made mistakes so you do not have to. Here are the lessons I learned the hard way:
Blot your pumpkin. Canned pumpkin can be surprisingly watery. If your purée looks loose or has liquid pooling on top, blot it gently with a paper towel before adding it to the batter. This single step prevents soggy bars. I forgot once and ended up with bars that were more pudding than cake.
Do not rush the brown butter. This is the most important part of the entire recipe. Brown butter goes through stages: melted, foamy, clear, golden, then amber. The moment it smells nutty and looks like dark honey, pull it off the heat. If you see black specks, you have gone too far. Start over — burnt butter tastes bitter and ruins the frosting.
Cool completely before frosting. I know it is tempting to rush this step, especially when your kitchen smells incredible. But warm bars + frosting = a melty mess. Wait until the bars are completely cool to the touch. If you are in a hurry, pop them in the fridge for 15 minutes.
Use a light-colored pan for browning butter. Dark pans make it nearly impossible to see the color change. I use a stainless steel saucepan and it makes all the difference.
Room temperature eggs matter. Cold eggs seize up the oil and sugar mixture, making it harder to incorporate evenly. I set my eggs in a bowl of warm water for 5 minutes if I forget to take them out ahead of time.
Cut clean slices. Use a sharp knife and wipe it clean between cuts. This gives you those beautiful, bakery-style squares without smearing the frosting everywhere.
Variations & Adaptations
One of the best things about this recipe is how adaptable it is. Here are some variations I have tried and loved:
Gluten-Free Version
Substitute the all-purpose flour with a 1:1 gluten-free baking flour blend (I like Bob’s Red Mill). Add 1/4 teaspoon xanthan gum if your blend does not already include it. The texture will be slightly more tender, but the flavor remains exactly the same.
Dairy-Free Frosting
Use vegan butter for the brown butter frosting. Miyoko’s or Country Crock Plant Butter work well. The browning process takes a little longer with vegan butter, and the flavor is slightly less nutty, but it is still delicious. Use oat milk or almond milk instead of dairy milk.
Spice It Up
Add 1/4 teaspoon cardamom or allspice to the dry ingredients for a more complex spice profile. I tried this last Thanksgiving and it was a hit. You can also swap the cinnamon for pumpkin pie spice if you prefer a pre-mixed blend.
Add-Ins
Fold in 1/2 cup chopped pecans or walnuts before baking for extra crunch. Or sprinkle them on top of the frosting while it is still soft. Chocolate chips also work surprisingly well — use dark chocolate for a sophisticated twist.
Frosting Alternatives
If you are short on time or patience, a simple cream cheese frosting works beautifully here. Beat 4 oz softened cream cheese with 1/4 cup softened butter, 2 cups powdered sugar, and 1 teaspoon vanilla. It lacks the nutty depth of brown butter, but it is still wonderful.
Serving & Storage Suggestions
These bars are best served at room temperature or slightly chilled. I actually prefer them chilled — the frosting firms up and the flavors seem more concentrated. Let them sit out for about 10 minutes after coming out of the fridge for the best texture.
For presentation, cut them into 24 squares (6 rows by 4 rows) for a standard 9×13 pan. Arrange them on a platter and add a light dusting of cinnamon or a few fresh cranberries for color. They look beautiful on a dessert table alongside other fall treats like slow cooker honey garlic chicken for a sweet-savory balance.
Storage: Store leftover bars in an airtight container in the refrigerator for up to 5 days. The frosting stays perfectly creamy, and the bars actually improve after a day — the flavors meld together beautifully.
Freezing: These freeze exceptionally well. Freeze unfrosted bars in a single layer on a baking sheet, then wrap tightly in plastic wrap and foil. They keep for up to 3 months. Thaw overnight in the refrigerator, then frost before serving. Frosted bars can also be frozen, but place parchment paper between layers to prevent sticking.
Reheating: If you prefer warm bars, microwave individual portions for 10-15 seconds. The frosting will soften slightly but remain intact. Do not microwave the whole pan — the frosting will slide off.
Nutritional Information & Benefits
Here is the estimated nutritional breakdown per bar (based on 24 servings):
| Nutrient | Amount Per Bar |
|---|---|
| Calories | 185 |
| Total Fat | 9g |
| Saturated Fat | 4g |
| Cholesterol | 30mg |
| Sodium | 95mg |
| Total Carbohydrates | 26g |
| Dietary Fiber | 1g |
| Sugars | 18g |
| Protein | 2g |
Pumpkin is packed with vitamin A, fiber, and antioxidants. It supports eye health and immune function — which is nice, but honestly, I eat these bars because they taste incredible. The brown butter adds a small amount of healthy fats, and the spices (cinnamon, ginger, nutmeg) have anti-inflammatory properties. Consider this dessert with benefits rather than health food.
For those with dietary concerns: this recipe contains gluten, dairy, and eggs. See the variations section for gluten-free and dairy-free adaptations.
Frequently Asked Questions
Can I use fresh pumpkin instead of canned?
You can, but fresh pumpkin purée has a much higher water content. You will need to strain it through cheesecloth for several hours to remove excess moisture. Even then, the texture may be slightly different. Canned pumpkin is actually more consistent and reliable for baking — I use it every time.
Why did my brown butter turn bitter?
You likely cooked it too long. Brown butter goes from perfect to burnt very quickly. Once you see amber color and smell a nutty aroma, remove it from the heat immediately. If you see black specks or smell anything acrid, start over. It is worth the extra few minutes.
Can I make these bars ahead of time?
Absolutely. Bake the bars up to two days in advance and store them unfrosted in an airtight container at room temperature. Make the frosting and frost them the day you plan to serve. Or freeze the unfrosted bars for up to three months.
Why are my bars dense and gummy?
Two possible culprits: overmixing the batter or too much moisture in the pumpkin. Mix only until the flour disappears, and blot your pumpkin purée if it looks watery. Also, make sure your baking powder and baking soda are fresh — expired leaveners won’t help the bars rise properly.
Can I double this recipe?
Yes, but use two separate 9×13 pans rather than one larger pan. Doubling the batter in a single pan will result in uneven baking. If you are feeding a crowd, this recipe doubles beautifully for a half-sheet pan (18×13 inches) — just increase the baking time by 5-8 minutes.
Conclusion
These pumpkin bars with brown butter frosting are the fall dessert you did not know you needed. They are simple enough for a weekday craving but impressive enough for a holiday table. The brown butter frosting is the kind of detail that makes people ask for the recipe — and when they do, you will be proud to share it.
I have made these bars for Thanksgiving, for random October afternoons, and for neighbors who needed a little sweetness in their week. Every single time, they disappear faster than I expect. There is something about that combination — tender spiced pumpkin, nutty caramelized butter, and a hint of salt — that feels like a warm hug on a chilly day.
Try them as written first, then make them your own. Add pecans, swap the spices, double the frosting (I won’t judge). And when you make them, come back and tell me how they turned out. I love hearing about your kitchen victories — and your happy accidents too.
Now go preheat that oven. Your new favorite fall dessert is waiting.
Pin This Recipe!
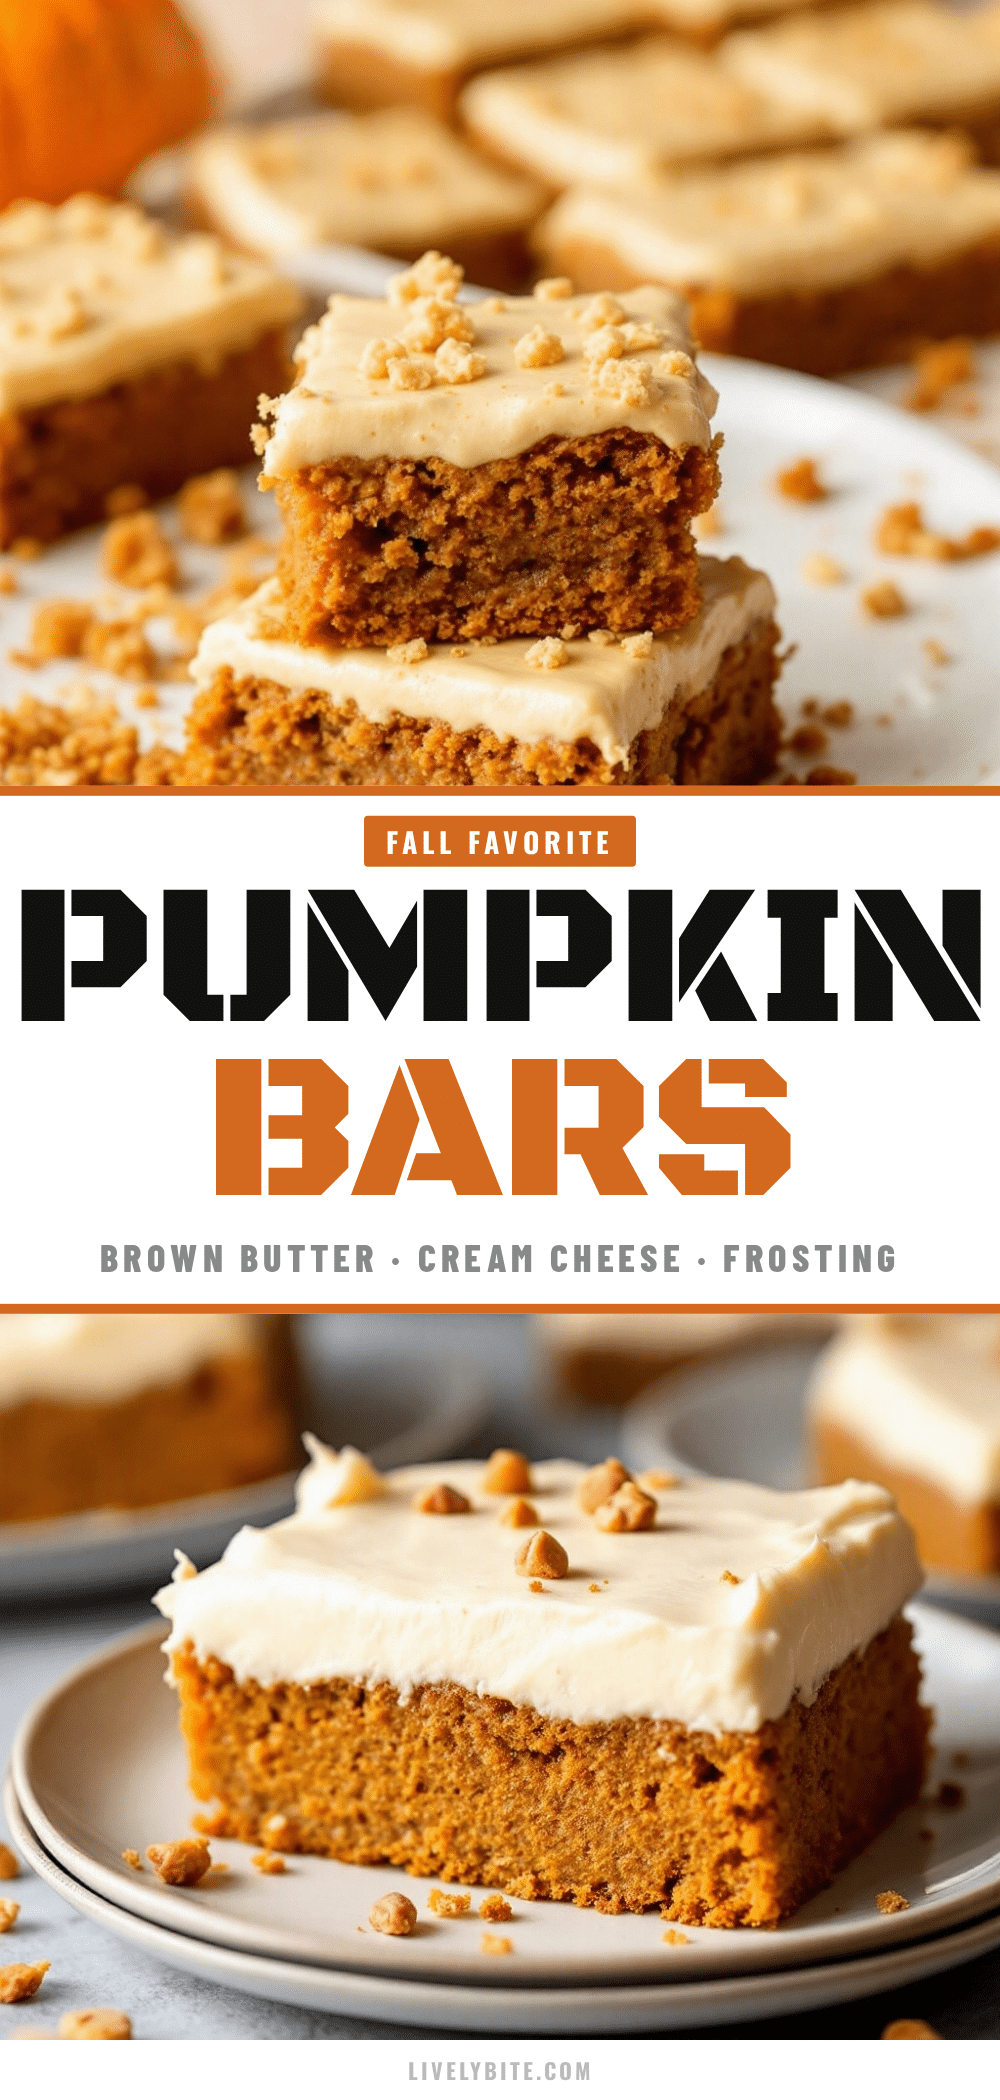
Best Easy Pumpkin Bars with Brown Butter Frosting
These pumpkin bars with brown butter frosting are tender, spiced, and topped with a nutty, caramelized frosting that makes them irresistible. Perfect for fall gatherings, they come together in under 45 minutes and are a crowd-pleaser every time.
- Prep Time: 15 minutes
- Cook Time: 20 minutes
- Total Time: 35 minutes
- Yield: 24 servings 1x
- Category: Dessert
- Cuisine: American
Ingredients
- 1 can (15 oz / 425g) canned pumpkin purée (not pumpkin pie filling)
- 2 cups (250g) all-purpose flour
- 1 cup (200g) granulated sugar
- 1/2 cup (100g) light brown sugar, packed
- 2 large eggs, room temperature
- 1/2 cup (120ml) vegetable oil
- 2 teaspoons vanilla extract
- 1 teaspoon baking powder
- 1/2 teaspoon baking soda
- 1/2 teaspoon salt
- 2 teaspoons ground cinnamon
- 1 teaspoon ground ginger
- 1/2 teaspoon ground nutmeg
- 1/4 teaspoon ground cloves
- 1/2 cup (1 stick / 113g) unsalted butter (for frosting)
- 2 cups (240g) powdered sugar, sifted
- 1 teaspoon vanilla extract (for frosting)
- 2–3 tablespoons milk (whole milk preferred)
- A pinch of salt (for frosting)
- Optional: flaky sea salt for garnish
Instructions
- Preheat oven to 350°F (175°C). Line a 9×13-inch baking pan with parchment paper, leaving overhang on two sides. Lightly grease the parchment.
- In a medium bowl, whisk together flour, baking powder, baking soda, salt, cinnamon, ginger, nutmeg, and cloves until evenly combined.
- In a large bowl, whisk together granulated sugar, brown sugar, vegetable oil, and eggs until smooth and slightly thickened, about 30 seconds. Stir in vanilla extract and pumpkin purée until glossy and uniform.
- Pour dry ingredients into wet ingredients. Fold gently with a rubber spatula until just combined (do not overmix; a few lumps are fine).
- Spread batter evenly into prepared pan. Bake for 20-25 minutes, until a toothpick inserted in the center comes out clean or with a few moist crumbs. Cool in pan on a wire rack for 10 minutes, then lift out using parchment handles and cool completely.
- While bars cool, make the brown butter frosting: Place butter in a small saucepan over medium heat. Melt completely, then continue cooking, swirling occasionally, until butter turns deep amber and smells nutty. Remove from heat immediately and pour into a heatproof bowl, including browned bits. Cool for 10-15 minutes until warm but not hot.
- Add sifted powdered sugar, vanilla extract, salt, and 2 tablespoons milk to the browned butter. Beat with an electric mixer on low until combined, then increase to medium-high and beat for 2 minutes until light and fluffy. Add more milk if too thick, or more powdered sugar if too thin.
- Spread frosting over completely cooled bars using an offset spatula. Optionally, sprinkle with flaky sea salt. Cut into 24 squares and serve.
Notes
Blot pumpkin purée if watery to prevent soggy bars. Do not rush the brown butter; watch closely to avoid burning. Cool bars completely before frosting. For gluten-free, use a 1:1 gluten-free flour blend with xanthan gum. For dairy-free, use vegan butter and oat or almond milk.
Nutrition
- Serving Size: 1 bar
- Calories: 185
- Sugar: 18
- Sodium: 95
- Fat: 9
- Saturated Fat: 4
- Carbohydrates: 26
- Fiber: 1
- Protein: 2
Keywords: pumpkin bars, brown butter frosting, fall dessert, easy pumpkin bars, pumpkin dessert, brown butter


