I ruined these cookies the first three times I made them. Not a little bit, either—I mean flat, greasy discs that spread into one sad, caramelized sheet. I was so mad because the pumpkin flavor was perfect, but the texture was a disaster. It took me a while to realize the problem wasn’t the recipe; it was how I was handling the moisture. Pumpkin has a lot of water in it, and if you don’t account for that, your cookies will turn into puddles. Once I figured out the trick—patting the pumpkin puree dry with paper towels—everything changed. These soft baked pumpkin snickerdoodle cookies with cinnamon sugar finally came out the way I wanted: thick, pillowy, and covered in that warm, crunchy coating. Now I make them every fall, and honestly, I prefer them over regular snickerdoodles. The pumpkin adds a subtle earthiness that balances the sweet cinnamon sugar perfectly. They’re not too heavy, not too light—they’re just right.
This recipe started as a fix for my own frustration, but it quickly became a staple in my kitchen. I love that I can whip up a batch in under thirty minutes, and they always disappear fast. If you’ve ever struggled with pumpkin cookies turning out too wet or flat, this method will change your mind. The key is all in the prep work, and I’ll walk you through every step. By the end of this post, you’ll have a batch of soft, bakery-style cookies that taste like fall in every bite.
Why You’ll Love This Recipe
There are a lot of pumpkin cookie recipes out there, but trust me—this one is different. I’ve tested it more times than I care to admit, and every single batch has turned out consistently soft and perfectly spiced. Here’s why you’ll love it:
- Quick & Easy: From start to finish, these cookies take about 25 minutes. No chilling required, which is a game-changer when you’re craving something sweet fast.
- Simple Ingredients: You probably already have most of these in your pantry. No weird extracts or hard-to-find spices—just basic baking staples.
- Perfect for Fall Gatherings: Whether it’s a Thanksgiving dessert table or a cozy weekend baking session, these cookies fit right in. They’re also great for cookie swaps because they travel well.
- Crowd-Pleaser: I’ve served these to kids, adults, and even picky relatives—they always get rave reviews. The pumpkin flavor is present but not overwhelming, and the cinnamon sugar coating is addictive.
- Unbelievably Delicious: The texture is what really sets these apart. They’re soft and tender on the inside with a slight chew on the edges, and that cinnamon sugar crust adds just the right amount of crunch.
What makes this recipe different from the rest is the technique. Instead of just dumping in the pumpkin puree, I pat it dry first to remove excess moisture. This simple step prevents the cookies from spreading and keeps them thick and fluffy. Plus, the spice blend is carefully balanced—not too much nutmeg, not too little cinnamon. It’s a version I’ve perfected over many failed batches, and I’m confident you’ll love it.
Honestly, these cookies are the kind that make you close your eyes after the first bite. They’re comfort food reimagined—healthier than a traditional snickerdoodle (thanks to the pumpkin), but with the same soul-soothing satisfaction. Perfect for impressing guests without stress, or turning a simple afternoon into something memorable.
What Ingredients You Will Need
This recipe uses simple, wholesome ingredients to deliver bold flavor and satisfying texture without the fuss. Most of these are pantry staples, so you probably won’t need to make a special trip to the store.
For the Cookies:
- All-purpose flour – 2 cups (240g) – Spoon and level it for accuracy. I prefer Gold Medal or King Arthur for consistent results.
- Baking soda – 1 teaspoon – Helps the cookies rise and stay soft.
- Baking powder – 1/2 teaspoon – Adds extra lift.
- Ground cinnamon – 2 teaspoons – The star spice here. Use fresh for the best flavor.
- Ground nutmeg – 1/2 teaspoon – Adds warmth without overpowering.
- Ground ginger – 1/4 teaspoon – Optional, but I love the subtle kick.
- Salt – 1/2 teaspoon – Balances the sweetness.
- Unsalted butter – 1/2 cup (113g), softened – Room temperature is key. Don’t microwave it.
- Granulated sugar – 1 cup (200g) – For sweetness and structure.
- Pumpkin puree – 1/2 cup (120g) – Not pumpkin pie filling. I recommend Libby’s brand for consistent texture.
- Large egg – 1, room temperature – Helps bind everything together.
- Vanilla extract – 1 teaspoon – Pure, not imitation, for the best flavor.
For the Cinnamon Sugar Coating:
- Granulated sugar – 1/4 cup (50g)
- Ground cinnamon – 1 tablespoon
Ingredient Tips: When choosing pumpkin puree, look for one that’s 100% pure pumpkin with no added spices or sugar. If you’re using a homemade puree, make sure it’s well-drained—extra water will ruin the texture. For the butter, let it sit on the counter for about 30 minutes before starting. You want it soft enough to press with your finger but not melted.
Substitutions: If you need a dairy-free option, use vegan butter sticks (like Earth Balance) in place of regular butter. The texture will be slightly different, but still delicious. For a gluten-free version, swap the all-purpose flour with a 1:1 gluten-free baking blend. I’ve tried Bob’s Red Mill and it works well. Just don’t overmix the dough.
Equipment Needed
You don’t need a lot of fancy tools for this recipe, which is one of the reasons I love it. Here’s what you’ll need:
- Mixing bowls – One large and one medium. I use glass or stainless steel.
- Electric hand mixer or stand mixer – A hand mixer works perfectly. If you don’t have one, you can cream the butter and sugar by hand with a wooden spoon—it just takes more elbow grease.
- Baking sheets – Two rimmed baking sheets. I prefer Nordic Ware for even heat distribution.
- Parchment paper or silicone baking mats – Essential for preventing sticking and even browning.
- Cookie scoop – A 1.5-tablespoon scoop makes uniform cookies. If you don’t have one, use two spoons.
- Cooling rack – Lets the cookies cool evenly without getting soggy bottoms.
- Paper towels – For patting the pumpkin puree dry. This is non-negotiable.
- Small bowl – For the cinnamon sugar coating.
If you’re on a budget, skip the cookie scoop and just use your hands—lightly greased palms work fine. Also, don’t worry if you don’t have a stand mixer; I’ve made these cookies with just a whisk and a spatula, and they turned out great. The key is to not overwork the dough, which is easier to do by hand anyway.
Preparation Method
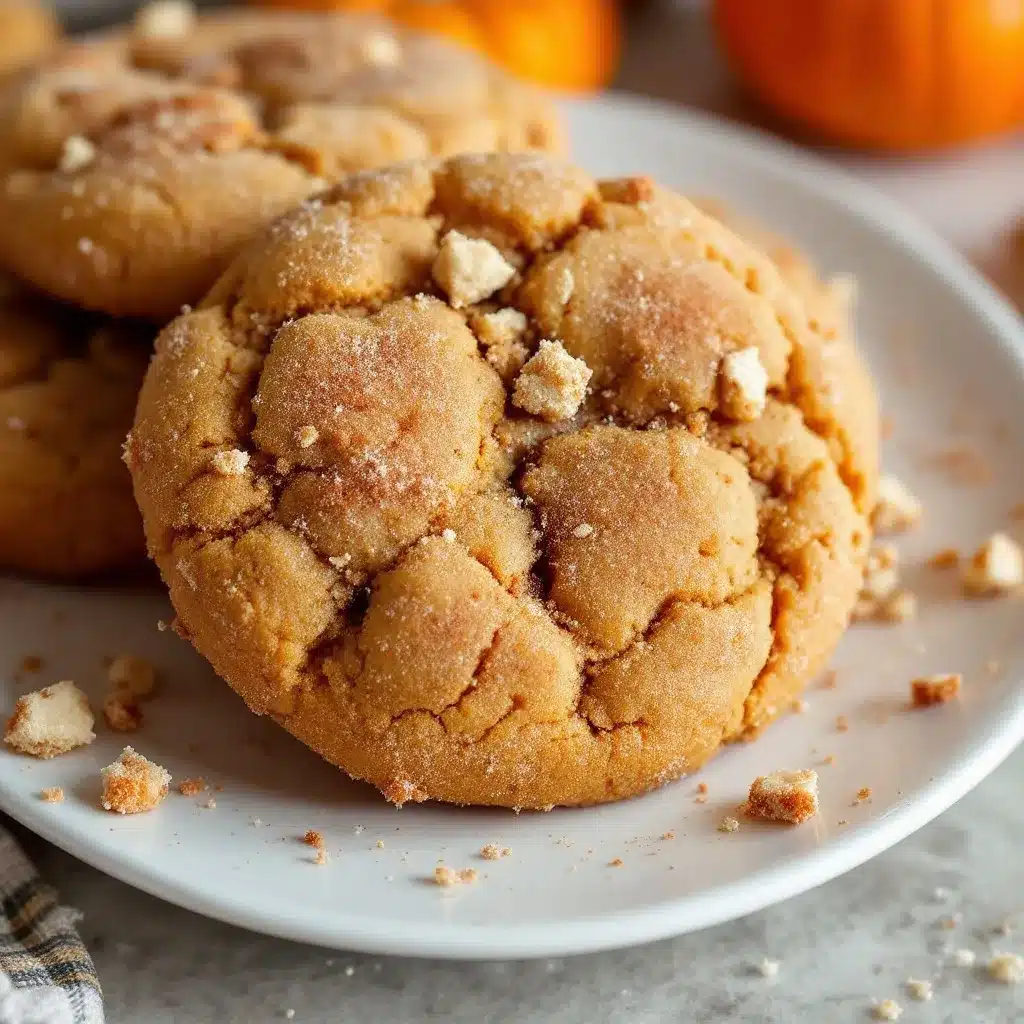
Let’s get baking! Follow these steps carefully, and you’ll have perfect cookies every time.
Step 1: Preheat and Prep
Preheat your oven to 350°F (175°C). Line two baking sheets with parchment paper or silicone mats. Set them aside.
Step 2: Pat the Pumpkin Dry
This is the most important step. Measure out 1/2 cup of pumpkin puree and place it on a plate lined with a few layers of paper towels. Spread it out slightly, then place another paper towel on top and press gently. Let it sit for 2-3 minutes. The paper towels will absorb excess moisture. You’ll see them darken as the water soaks in. This step prevents your cookies from spreading into flat discs.
Step 3: Mix Dry Ingredients
In a medium bowl, whisk together the flour, baking soda, baking powder, cinnamon, nutmeg, ginger, and salt. Set aside.
Step 4: Cream Butter and Sugar
In a large bowl, beat the softened butter and granulated sugar together with an electric mixer on medium speed until light and fluffy, about 2-3 minutes. Scrape down the sides of the bowl as needed. The mixture should look pale and slightly increased in volume.
Step 5: Add Wet Ingredients
Add the egg and vanilla extract to the butter mixture and beat until combined. Then add the patted-dry pumpkin puree and mix on low speed until just incorporated. Don’t overmix here—you want everything combined, but a few streaks are okay.
Step 6: Combine Wet and Dry
Gradually add the dry ingredients to the wet mixture, mixing on low speed after each addition. Stop as soon as the flour disappears. The dough will be soft and slightly sticky—that’s exactly what you want. If it feels too wet, don’t add more flour; the moisture will absorb as the dough rests.
Step 7: Make the Cinnamon Sugar Coating
In a small bowl, stir together the 1/4 cup granulated sugar and 1 tablespoon cinnamon. Set aside.
Step 8: Shape and Coat the Cookies
Using a cookie scoop or two spoons, portion out about 1.5 tablespoons of dough. Roll it into a ball between your palms (lightly greased hands help). Drop the ball into the cinnamon sugar mixture and roll it around until fully coated. Place it on the prepared baking sheet, spacing the cookies about 2 inches apart. Repeat with the remaining dough.
Step 9: Bake
Bake for 10-12 minutes, or until the edges are set and the tops look slightly cracked. The centers will still look soft and puffy—that’s fine. Don’t overbake, or they’ll lose their soft texture. Rotate the pans halfway through for even baking.
Step 10: Cool
Let the cookies cool on the baking sheet for 5 minutes. They’ll continue to set as they cool. Then transfer them to a wire rack to cool completely. The bottoms should be lightly golden, and the tops should be soft to the touch.
Pro Tip: If you want extra thick cookies, chill the shaped dough balls in the fridge for 15 minutes before baking. This firms up the butter and reduces spreading even more.
Cooking Tips & Techniques
I’ve learned a few things from my early failures, and I want to share them so you don’t make the same mistakes.
Don’t Skip the Pumpkin Drying Step: I know it seems like an extra hassle, but it makes all the difference. The first time I made these, I skipped it, and the cookies spread into thin, greasy pucks. The second time, I didn’t pat it dry enough, and they still spread a bit. Now I use three layers of paper towels and press firmly. It only takes two minutes, and the result is worth it.
Measure Flour Correctly: Spoon the flour into your measuring cup and level it off with a knife. Scooping directly from the bag packs the flour down, which leads to dry, dense cookies. I learned this the hard way when my cookies came out more like hockey pucks.
Room Temperature Ingredients Matter: Cold butter won’t cream properly, and cold eggs can seize the batter. Let your butter and egg sit on the counter for 30 minutes before starting. If you’re in a rush, place the egg in a bowl of warm water for 5 minutes.
Don’t Overmix the Dough: Once you add the flour, mix just until it disappears. Overmixing develops gluten, which makes cookies tough. I’m guilty of this myself—I’d keep mixing to get a perfectly smooth dough, but it always backfired.
Use a Cookie Scoop for Uniform Size: This ensures even baking. If some cookies are bigger than others, the smaller ones will burn while the larger ones are still raw. Trust me, I’ve been there.
Watch the Baking Time: Ovens vary, so start checking at 10 minutes. The cookies should look puffy and slightly cracked on top. If the edges are golden brown, they’re done. Let them cool on the sheet for 5 minutes before moving them—they’re fragile when hot.
Variations & Adaptations
One of the best things about this recipe is how versatile it is. Here are some variations I’ve tried and loved:
Vegan Version
Replace the butter with vegan butter sticks and the egg with a flax egg (1 tablespoon ground flaxseed mixed with 3 tablespoons water, let sit for 5 minutes). The cookies will be slightly less tender, but still delicious. I’ve made this for friends with dietary restrictions, and they couldn’t tell the difference.
Gluten-Free Option
Use a 1:1 gluten-free baking flour blend. I recommend Bob’s Red Mill or King Arthur. Add an extra tablespoon of flour if the dough feels too sticky. The texture will be a bit more crumbly, but the flavor is spot-on.
Spice It Up
Add 1/4 teaspoon of ground cloves or allspice for a warmer flavor profile. You can also increase the ginger to 1/2 teaspoon for a spicier kick. I sometimes add a pinch of cardamom for a unique twist.
Add Mix-Ins
Fold in 1/2 cup of white chocolate chips, chopped pecans, or dried cranberries after mixing the dough. The white chocolate version is especially good—the sweetness pairs perfectly with the pumpkin spice.
Make Them Gluten-Free and Dairy-Free
Combine the vegan and gluten-free substitutions above. I’ve tried this combo, and while the texture is a bit different, they’re still soft and flavorful. Just don’t overbake them.
Pumpkin Spice Latte Version
Add 1 tablespoon of instant espresso powder to the dry ingredients. It gives the cookies a subtle coffee flavor that complements the pumpkin beautifully. This is my personal favorite for fall mornings with a cup of coffee.
Serving & Storage Suggestions
These cookies are best served slightly warm, when the cinnamon sugar coating is still a little melty. But they’re also delicious at room temperature—the texture stays soft for days.
Serving Ideas: Pair them with a hot cup of chai tea, spiced cider, or a pumpkin latte. They’re also great crumbled over vanilla ice cream for a quick dessert. For a fun presentation, stack them on a wooden board with apple slices and a drizzle of caramel sauce.
Storage: Store the cookies in an airtight container at room temperature for up to 5 days. Place a slice of bread in the container to keep them extra soft—the bread absorbs excess moisture and releases it back to the cookies. Replace the bread every other day.
Freezing: You can freeze the baked cookies for up to 3 months. Wrap them individually in plastic wrap, then place them in a freezer bag. Thaw at room temperature for about 30 minutes before serving. To freeze the dough, shape it into balls, coat them in cinnamon sugar, and freeze on a baking sheet until solid. Transfer to a freezer bag and bake from frozen, adding 2-3 minutes to the baking time.
Reheating: Pop a cookie in the microwave for 10-15 seconds to bring back that fresh-from-the-oven softness. If you’re reheating multiple cookies, place them on a baking sheet in a 300°F oven for 5 minutes.
Flavor Development: Honestly, these cookies taste even better the next day. The spices meld together, and the texture becomes even softer. I often make them a day ahead for gatherings.
Nutritional Information & Benefits
While these cookies are definitely a treat, they do offer some nutritional perks thanks to the pumpkin. Here’s the estimated breakdown per cookie (based on 24 cookies):
- Calories: 120
- Fat: 5g
- Carbohydrates: 18g
- Fiber: 1g
- Sugar: 10g
- Protein: 2g
- Vitamin A: 35% of the Daily Value (from pumpkin)
Health Benefits: Pumpkin is packed with beta-carotene, which your body converts to vitamin A. It’s great for eye health and immune function. The cinnamon in the coating has anti-inflammatory properties and can help regulate blood sugar levels. Plus, using pumpkin puree adds moisture without extra fat, so these cookies are lighter than traditional butter-heavy recipes.
Dietary Considerations: This recipe is vegetarian and can be made vegan and gluten-free with simple substitutions. It contains dairy (butter) and gluten (flour), so adjust accordingly for allergies. The cookies are relatively low in sugar compared to many dessert recipes, but they’re still sweet enough to satisfy a craving.
Personal Note: I love that I can enjoy these cookies without feeling overly guilty. The pumpkin adds a nutritional boost that makes them feel a little more wholesome—even if I’m eating three in one sitting.
Frequently Asked Questions
Can I use pumpkin pie filling instead of pumpkin puree?
No, please don’t. Pumpkin pie filling has added sugar and spices, which will throw off the balance of the recipe. Stick with 100% pure pumpkin puree for the best results.
Why did my cookies spread too much?
This usually happens for two reasons: the pumpkin wasn’t patted dry enough, or the butter was too soft. Make sure to dry the pumpkin thoroughly and use softened (not melted) butter. Chilling the dough for 15 minutes before baking also helps.
Can I make these cookies without an electric mixer?
Absolutely. You can cream the butter and sugar by hand with a wooden spoon. It takes a bit more effort, but it works. Just make sure the butter is very soft before you start.
How do I know when the cookies are done baking?
Look for set edges and slightly cracked tops. The centers will still look soft and puffy. If you insert a toothpick, it should come out with a few moist crumbs—not wet batter. Don’t overbake, or they’ll lose their soft texture.
Can I double this recipe?
Yes, it doubles easily. Just make sure you have enough baking sheets and space in your oven. You may need to bake in batches. The dough can also be refrigerated for up to 2 days if you want to bake fresh cookies later.
Conclusion
These soft baked pumpkin snickerdoodle cookies with cinnamon sugar are everything I want in a fall dessert—warm, comforting, and incredibly easy to make. They’re the kind of cookies that disappear before they even cool down, and they always make me feel like a baking pro, even on days when I’m rushing.
I hope you give them a try and make them your own. Maybe add some white chocolate chips, or a pinch of extra cinnamon—whatever feels right. The beauty of this recipe is that it’s forgiving once you get the moisture right. And if you have any questions or variations you’ve tried, I’d love to hear about them in the comments below.
If you enjoyed this recipe, you might also like my easy lemon herb salmon sheet pan dinner for a savory fall meal, or the creamy vegan chocolate avocado pudding for another quick dessert option. Happy baking, and don’t forget to share your cookie photos—I love seeing them!
Pin This Recipe!
Soft Baked Pumpkin Snickerdoodle Cookies with Cinnamon Sugar

Thick, pillowy pumpkin snickerdoodle cookies coated in cinnamon sugar. The secret to perfect texture is patting the pumpkin puree dry to remove excess moisture.
- Prep Time: 15 minutes
- Cook Time: 12 minutes
- Total Time: 27 minutes
- Yield: 24 cookies 1x
- Category: Dessert
- Cuisine: American
Ingredients
- 2 cups (240g) all-purpose flour
- 1 teaspoon baking soda
- 1/2 teaspoon baking powder
- 2 teaspoons ground cinnamon
- 1/2 teaspoon ground nutmeg
- 1/4 teaspoon ground ginger
- 1/2 teaspoon salt
- 1/2 cup (113g) unsalted butter, softened
- 1 cup (200g) granulated sugar
- 1/2 cup (120g) pumpkin puree (not pumpkin pie filling)
- 1 large egg, room temperature
- 1 teaspoon vanilla extract
- 1/4 cup (50g) granulated sugar (for coating)
- 1 tablespoon ground cinnamon (for coating)
Instructions
- Preheat oven to 350°F (175°C). Line two baking sheets with parchment paper or silicone mats.
- Pat the pumpkin puree dry: Place 1/2 cup pumpkin puree on a plate lined with paper towels. Spread slightly, cover with another paper towel, and press gently. Let sit 2-3 minutes to absorb excess moisture.
- In a medium bowl, whisk together flour, baking soda, baking powder, cinnamon, nutmeg, ginger, and salt.
- In a large bowl, beat softened butter and 1 cup granulated sugar with an electric mixer on medium speed until light and fluffy, about 2-3 minutes.
- Add egg and vanilla extract; beat until combined. Add patted-dry pumpkin puree and mix on low until just incorporated.
- Gradually add dry ingredients to wet mixture, mixing on low until just combined. Dough will be soft and slightly sticky.
- In a small bowl, stir together 1/4 cup granulated sugar and 1 tablespoon cinnamon for coating.
- Using a cookie scoop or spoons, portion 1.5 tablespoons of dough. Roll into a ball, then coat in cinnamon sugar mixture. Place on prepared baking sheets, spacing 2 inches apart.
- Bake for 10-12 minutes, until edges are set and tops look slightly cracked. Rotate pans halfway through.
- Let cookies cool on baking sheet for 5 minutes, then transfer to a wire rack to cool completely.
Notes
Patting the pumpkin puree dry is crucial to prevent spreading. For extra thick cookies, chill shaped dough balls in the fridge for 15 minutes before baking. Store in an airtight container at room temperature for up to 5 days; place a slice of bread in the container to keep them soft.
Nutrition
- Serving Size: 1 cookie
- Calories: 120
- Sugar: 10
- Sodium: 95
- Fat: 5
- Saturated Fat: 3
- Carbohydrates: 18
- Fiber: 1
- Protein: 2
Keywords: pumpkin snickerdoodle, soft baked cookies, fall cookies, cinnamon sugar cookies, pumpkin cookies


