Day four, and the jar was bubbling. Not just a few timid bubbles either — it looked alive, like something was brewing in there that actually had a plan. I texted my sister a video, and she replied, “Is that supposed to do that?” Honestly, I wasn’t totally sure. But the smell was right — tangy, a little fruity, nothing like the science experiment I was half-expecting. That was the moment I knew this easy homemade sourdough starter from scratch was actually going to work.
I had tried before, a couple years back, and gave up around day three when nothing happened and I convinced myself I’d killed it. Turns out, starters are more resilient than we give them credit for. This time, I just let it do its thing. No stress, no hovering. And somehow, that hands-off approach was exactly what made this easy homemade sourdough starter from scratch finally click.
There’s something quietly satisfying about watching flour and water turn into a living thing. It feels less like cooking and more like you’re just… present for it. And when you finally bake that first loaf? You’ll understand why people get obsessed.
Why You’ll Love This Recipe
This easy homemade sourdough starter from scratch isn’t complicated. That’s the whole point. You don’t need fancy equipment or a decade of baking experience. You just need patience and a little daily attention.
- Simple Ingredients : Just flour and water. That’s it. No yeast packets, no sugar, no weird additives.
- No Special Equipment : A jar, a spoon, and a kitchen scale (or measuring cups) are all you need.
- Budget-Friendly : You’re literally spending pennies on flour to create something that can last for years.
- Completely Customizable : Use all-purpose, whole wheat, or rye flour — each gives your starter a slightly different personality.
- Incredibly Rewarding : There’s nothing quite like baking bread from a starter you grew yourself. It’s a genuine achievement.
What makes this easy homemade sourdough starter from scratch different from other methods is the schedule. Instead of complicated feeding ratios and rigid timetables, this one works around your life. Miss a feeding by an hour? It’s fine. Starter looking sluggish? Give it a warmer spot. I’ve learned that sourdough is more about reading the signs than following a strict clock. And honestly, that flexibility is what kept me from giving up this time.
This isn’t just about bread. It’s about slowing down, connecting with a process that’s been around for thousands of years, and creating something from almost nothing. The first time you see those bubbles, you’ll get it.
What Ingredients You Will Need
This easy homemade sourdough starter from scratch uses exactly two ingredients. Seriously. No secret list. Here’s what you’ll need and why each one matters.
- All-Purpose Flour : This is your workhorse. Unbleached all-purpose flour works beautifully because it has enough protein to support fermentation without being too heavy. I prefer King Arthur or Gold Medal for consistent results. Bleached flour can work, but it ferments more slowly, so stick with unbleached if you can.
- Whole Wheat Flour (optional but recommended) : Whole wheat flour is packed with nutrients and natural yeasts, which gives your starter a faster, more vigorous start. I use a 50/50 mix of all-purpose and whole wheat for the first few days, then switch to all-purpose once the starter is established. Rye flour is another excellent option — it ferments like crazy.
- Filtered Water : Tap water can contain chlorine, which inhibits yeast growth. Filtered or bottled water at room temperature is ideal. If you must use tap water, let it sit out for an hour to let the chlorine dissipate. Cold water slows fermentation, so always use lukewarm or room temperature water (around 70-75°F).
That’s literally it. No sugar, no commercial yeast, no special additives. The natural yeasts and bacteria present in the flour and your environment do all the work. If you want to experiment later, you can try different flour blends, but for this easy homemade sourdough starter from scratch, keeping it simple is the secret.
One thing I learned the hard way: don’t use self-rising flour. It contains baking powder and salt, which will mess with the fermentation process. Stick with plain flour. And if you’re measuring by volume instead of weight, fluff your flour before scooping to avoid packing it down. A kitchen scale is a game-changer here, but not mandatory.
Equipment Needed
You don’t need a fancy sourdough kit for this easy homemade sourdough starter from scratch. Here’s what actually matters:
- Glass Jar or Container : A 16-ounce or 32-ounce wide-mouth mason jar is perfect. Glass lets you see the bubbles and activity clearly. Avoid metal containers, as they can react with the acidic starter. Plastic works in a pinch, but glass is best.
- Kitchen Scale : This isn’t required, but it makes feeding so much easier and more consistent. A simple digital scale costs around $15 and eliminates guesswork. If you’re using measuring cups, be precise — scoop and level.
- Wooden or Silicone Spoon : Metal spoons can react with the starter over time. A chopstick also works great for stirring. I use a small silicone spatula because it scrapes the sides clean.
- Rubber Band or Marker : Mark the height of your starter after feeding so you can easily see how much it rises. A rubber band around the jar works perfectly.
- Clean Cloth or Coffee Filter : Cover the jar loosely to keep out dust and bugs while allowing airflow. A paper towel secured with a rubber band also works. Don’t seal the lid tight — the starter needs to breathe.
That’s it. No proofing baskets, no lame, no Dutch oven. Those come later when you bake. For now, just the basics. I keep my jar on the kitchen counter where I can see it, which also serves as a reminder to feed it.
Preparation Method
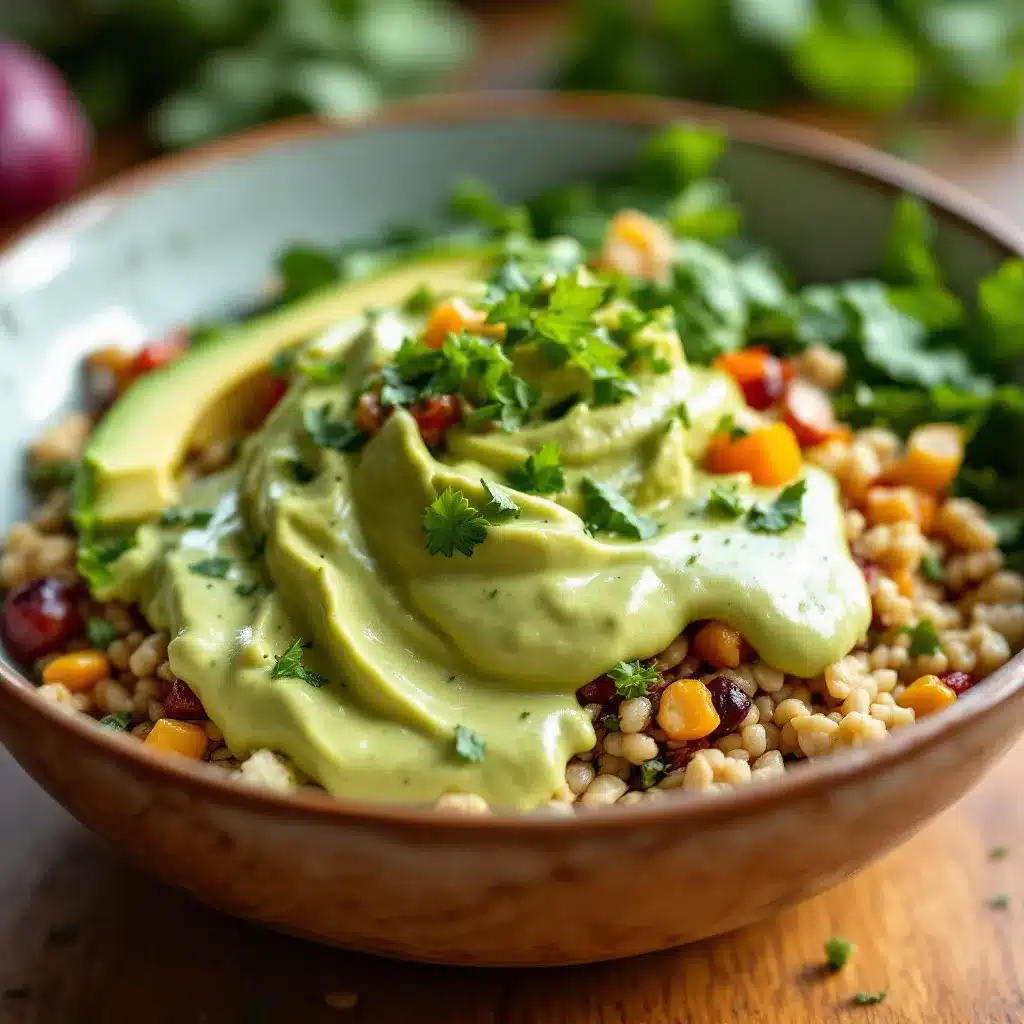
Here’s how to make this easy homemade sourdough starter from scratch in five days. Each feeding takes about two minutes of active time. The rest is just waiting.
Day 1: The Beginning
Combine 60 grams (about 1/2 cup) of whole wheat flour and 60 grams (about 1/4 cup) of room temperature filtered water in your jar. Stir until no dry bits remain. The mixture should be thick and pasty, like pancake batter. Scrape down the sides, cover loosely with a cloth, and place it in a warm spot (70-75°F is ideal). Leave it alone for 24 hours.
Day 2: Patience
You might see a few tiny bubbles or none at all. That’s normal. Discard half the starter (about 60 grams) and feed it with 60 grams of all-purpose flour and 60 grams of water. Stir well, cover, and wait another 24 hours. Don’t worry if it smells a little funky — that’s the good bacteria waking up.
Day 3: Action
By now, you should see noticeable bubbles and maybe some liquid on top (called hooch — it’s a sign of hunger). The smell will shift from funky to more fruity or yeasty. Discard half, feed with 60 grams all-purpose flour and 60 grams water, stir, cover, and wait 24 hours. If your starter has doubled in size, you’re ahead of schedule.
Day 4: Consistency
This is where things get exciting. Your starter should be bubbly, active, and smell pleasantly sour. It might double in size within 12 hours. Discard half, feed with 60 grams all-purpose flour and 60 grams water, and this time, check it every 8-12 hours. When it peaks (rises to its highest point and starts to dome slightly), that’s your window for feeding again.
Day 5: Ready to Bake
Your starter should be doubling within 4-8 hours after feeding. It should be full of bubbles, smell tangy and pleasant, and pass the float test (a spoonful dropped in water should float). Discard half, feed one last time, and wait 4-6 hours. You now have an active, healthy easy homemade sourdough starter from scratch ready for baking.
If it’s not quite there by day five, don’t panic. Keep feeding daily. Some starters take 7-10 days depending on temperature and flour. The key is consistency, not speed.
Cooking Tips & Techniques
After making this easy homemade sourdough starter from scratch a few times, I’ve picked up some tricks that make the process smoother. Here’s what I wish I knew from the start.
- Temperature matters more than you think : A warm spot (70-75°F) speeds up fermentation dramatically. If your kitchen is cold, place the jar on top of the fridge, near a warm oven, or in a turned-off microwave with the door cracked. In summer, my starter doubles in 4 hours. In winter, it can take 12.
- Don’t skip the discard : I know it feels wasteful, but discarding is essential. It removes built-up acid and gives the yeast fresh food. Without it, your starter becomes sluggish and overly sour. Save your discard for pancakes, crackers, or discard sourdough recipes.
- Look for signs, not the clock : Every starter is different. Instead of following a strict schedule, watch for visual cues. Bubbles, a domed top, and a pleasant yeasty smell mean it’s happy. A flat, liquidy starter with a sharp acetone smell means it’s hungry.
- Use a scale for consistency : I resisted this for years, but weighing flour and water makes feeding so much more reliable. A 1:1:1 ratio (starter:flour:water) by weight is standard. If you use cups, you’ll get slight variations that can slow things down.
- Name your starter : It sounds silly, but giving it a name makes you more invested. Mine is named “Bubbles.” My friend named hers “Yeastus.” It makes the daily feeding feel less like a chore and more like checking in on a pet.
One mistake I made early on was overfeeding. I thought more food would make it grow faster, but it actually diluted the yeast population and slowed everything down. Stick with equal parts by weight and you’ll be fine.
Variations & Adaptations
This easy homemade sourdough starter from scratch is forgiving enough to adapt to different flours, schedules, and environments. Here are some variations I’ve tried and loved.
- Rye Flour Starter : Rye flour ferments faster than any other flour I’ve tried. Use 100% rye for the first few days, then transition to all-purpose. Your starter will be incredibly active and have a deeper, more complex flavor. It’s my favorite variation.
- Gluten-Free Starter : Use brown rice flour or a gluten-free flour blend. The process is the same, but the starter will be thinner and less bubbly. It still works for gluten-free sourdough bread, though the rise will be more modest. Expect a longer timeline — up to 10-14 days.
- Whole Wheat Starter : Whole wheat gives a nuttier, more robust flavor. It also tends to be more vigorous because whole wheat has more nutrients for the yeast. I use this when I want a heartier loaf. Just note that whole wheat starters need more frequent feedings — every 12 hours once established.
- Slow Cold Fermentation : If you’re not in a rush, you can slow things down by keeping your starter in the fridge and feeding it once a week. This develops a tangier flavor profile. Just bring it back to room temperature and feed it a few times before baking.
I once tried a spelt flour starter, and while it was delicious, it was also very delicate and needed careful handling. If you’re new to sourdough, stick with all-purpose or whole wheat first, then experiment once you’re comfortable.
Serving & Storage Suggestions
Once your easy homemade sourdough starter from scratch is active and bubbly, you have options for how to keep it happy.
For Regular Baking (Baking 1-2 times per week) : Keep your starter on the counter at room temperature. Feed it once a day with equal parts flour and water by weight. If you bake daily, you can feed it twice a day. This keeps it perpetually ready for baking.
For Occasional Baking (Baking once a week or less) : Store your starter in the refrigerator. Feed it once a week to keep it alive. Before baking, take it out, feed it, and let it sit at room temperature for 8-12 hours until active. Then use what you need and return the rest to the fridge.
For Long-Term Storage : You can dehydrate your starter by spreading it thin on parchment paper and letting it dry completely. Crumble it into a jar and store in a cool, dark place. It will last for months. To revive it, mix a tablespoon of dried starter with flour and water and feed daily until active.
When storing in the fridge, use a jar with a loose lid to allow gas to escape. The starter will develop a layer of dark liquid on top — that’s hooch, and it’s perfectly normal. Either stir it back in for a tangier flavor or pour it off for a milder taste.
Your starter will develop more complexity over time. A month-old starter is good, but a year-old starter is incredible. The flavor deepens and becomes more nuanced. If you’re looking for a quick and satisfying baking project to use your new starter, try this easy slow cooker honey garlic chicken for a savory meal that pairs beautifully with crusty sourdough bread.
Nutritional Information & Benefits
This easy homemade sourdough starter from scratch isn’t something you eat directly, but it transforms the bread you bake with it in meaningful ways.
Estimated Nutritional Profile (per tablespoon of active starter) :
- Calories: 15-20
- Carbohydrates: 3-4g
- Protein: 0.5g
- Fat: 0g
- Fiber: 0.2g
Health Benefits : Sourdough fermentation breaks down phytic acid, a compound in grains that can block mineral absorption. This means your body can better absorb the iron, zinc, and magnesium in the bread. The lactic acid bacteria in sourdough also act as a natural preservative, keeping bread fresher longer without additives.
Dietary Considerations : This starter is naturally vegan and contains no added sugars or preservatives. It is not gluten-free unless you use gluten-free flour. The fermentation process does break down some gluten proteins, which can make sourdough bread easier to digest for some people with mild sensitivities, but it is not safe for celiac disease.
If you’re looking for a lighter, no-bake option to balance out all that bread, this creamy vegan chocolate avocado pudding is a fantastic way to use up ripe avocados and satisfy a sweet tooth without turning on the oven.
Conclusion
Making this easy homemade sourdough starter from scratch is one of those kitchen projects that feels almost magical. You start with flour and water, and a few days later, you have a living, bubbling culture capable of producing incredible bread. It’s patient, forgiving, and deeply rewarding.
Don’t stress about perfection. Your starter doesn’t need to look like someone else’s. It just needs to be alive and active. Every starter has its own personality — some are more vigorous, some are more sour, some take their sweet time. That’s part of the charm.
I’d love to hear how your starter turns out. Drop a comment below and let me know what you named yours, what flour you used, or how your first loaf came out. And if you’re looking for more ways to use your kitchen skills, this easy Mediterranean stuffed mini peppers make a fantastic appetizer to serve alongside your homemade bread. Happy baking, friend. You’ve got this.
Frequently Asked Questions
Why isn’t my starter bubbling after 3 days?
This is completely normal, especially in cooler kitchens. Temperature is the biggest factor. If your kitchen is below 70°F, fermentation slows way down. Try moving your jar to a warmer spot — on top of the fridge, near a warm appliance, or even in an oven with the light on (but turned off). Also, make sure you’re using unbleached flour and room temperature water. Some starters just take longer. Give it a full week before worrying.
Can I use bleached all-purpose flour?
Yes, but it’s not ideal. Bleached flour has been treated with chemicals that can slow down fermentation. Your starter will still develop, but it might take longer and be less vigorous. Unbleached all-purpose flour is a better choice. Whole wheat or rye flour will give you the fastest, most reliable results for your easy homemade sourdough starter from scratch.
What should I do with the discard?
Don’t throw it away! Sourdough discard is perfect for pancakes, waffles, crackers, biscuits, and even pizza dough. It adds a mild tangy flavor and helps with texture. You can collect discard in a separate container in the fridge for up to a week and use it in discard recipes. There are entire cookbooks dedicated to using sourdough discard.
How do I know when my starter is ready to bake with?
Your starter is ready when it doubles in size within 4-8 hours after feeding, is full of bubbles (both large and small), has a pleasant yeasty or tangy smell, and passes the float test. To do the float test, drop a spoonful of starter into a glass of room temperature water. If it floats, it’s full of gas and ready to bake. If it sinks, give it another feeding and wait.
Can I keep my starter in the fridge forever?
Pretty much, yes. A healthy starter can live in the fridge for weeks without feeding, though it will go dormant. Feed it once a week if possible, but I’ve gone three weeks without feeding mine and revived it with a couple of room temperature feedings. If you see mold (fuzzy spots in pink, green, or black), that’s a sign of contamination and you should start over. Otherwise, a layer of dark liquid (hooch) is normal and not a problem.
Pin This Recipe!
Easy Homemade Sourdough Starter: Best 5-Day Recipe

Learn how to make an easy homemade sourdough starter from scratch in just 5 days with simple ingredients and no special equipment. This forgiving, hands-off approach yields a bubbly, active starter perfect for baking delicious sourdough bread.
- Prep Time: 5 minutes per feeding
- Cook Time: 0 minutes
- Total Time: 5 days
- Yield: 1 active sourdough starter (about 1 cup) 1x
- Category: Starter
- Cuisine: American
Ingredients
- 60 grams (about 1/2 cup) whole wheat flour (optional but recommended for first few days)
- 60 grams (about 1/4 cup) all-purpose flour (unbleached preferred)
- 60 grams (about 1/4 cup) filtered water (room temperature, around 70-75°F)
Instructions
- Day 1: Combine 60 grams whole wheat flour and 60 grams filtered water in a glass jar. Stir until no dry bits remain. Scrape down sides, cover loosely with a cloth, and place in a warm spot (70-75°F). Leave for 24 hours.
- Day 2: Discard half the starter (about 60 grams). Feed with 60 grams all-purpose flour and 60 grams water. Stir, cover, and wait 24 hours.
- Day 3: Discard half, feed with 60 grams all-purpose flour and 60 grams water. Stir, cover, and wait 24 hours. Look for bubbles and a fruity/yeasty smell.
- Day 4: Discard half, feed with 60 grams all-purpose flour and 60 grams water. Check every 8-12 hours. When starter peaks (rises and domes), feed again.
- Day 5: Starter should double in 4-8 hours after feeding. Discard half, feed one last time, and wait 4-6 hours. It should pass the float test (a spoonful floats in water). Ready to bake.
Notes
Temperature matters: keep starter at 70-75°F for best results. Don’t skip discarding; it removes built-up acid. Use a scale for consistent 1:1:1 ratio by weight. If starter isn’t ready by day 5, continue daily feedings up to 7-10 days. Name your starter to stay invested!
Nutrition
- Serving Size: 1 tablespoon
- Calories: 1520
- Carbohydrates: 34
- Fiber: 0.2
- Protein: 0.5
Keywords: sourdough starter, easy sourdough starter, homemade sourdough starter, 5-day sourdough starter, sourdough from scratch


